Cabomba Yellowing & Melting: Aquarium Causes, Checks & Fixes
Quick answer
Yellow or translucent Cabomba whorls in a freshwater tank usually mean acclimation melt after purchase, insufficient submerged PAR, nutrient-poor water, buried stem rot, or copper medications-not houseplant watering or soil moisture. First step: trim melting tissue, check stem firmness and planting depth, then verify light at stem height before dosing fertilizer.
Cabomba Yellowing & Melting: Aquarium Causes, Checks & Fixes
This guide covers yellow leaves on Cabomba. See also the general Yellow Leaves guide, watering, and light pages for this plant.
Cabomba Yellowing & Melting: Aquarium Causes, Checks & Fixes
Quick answer
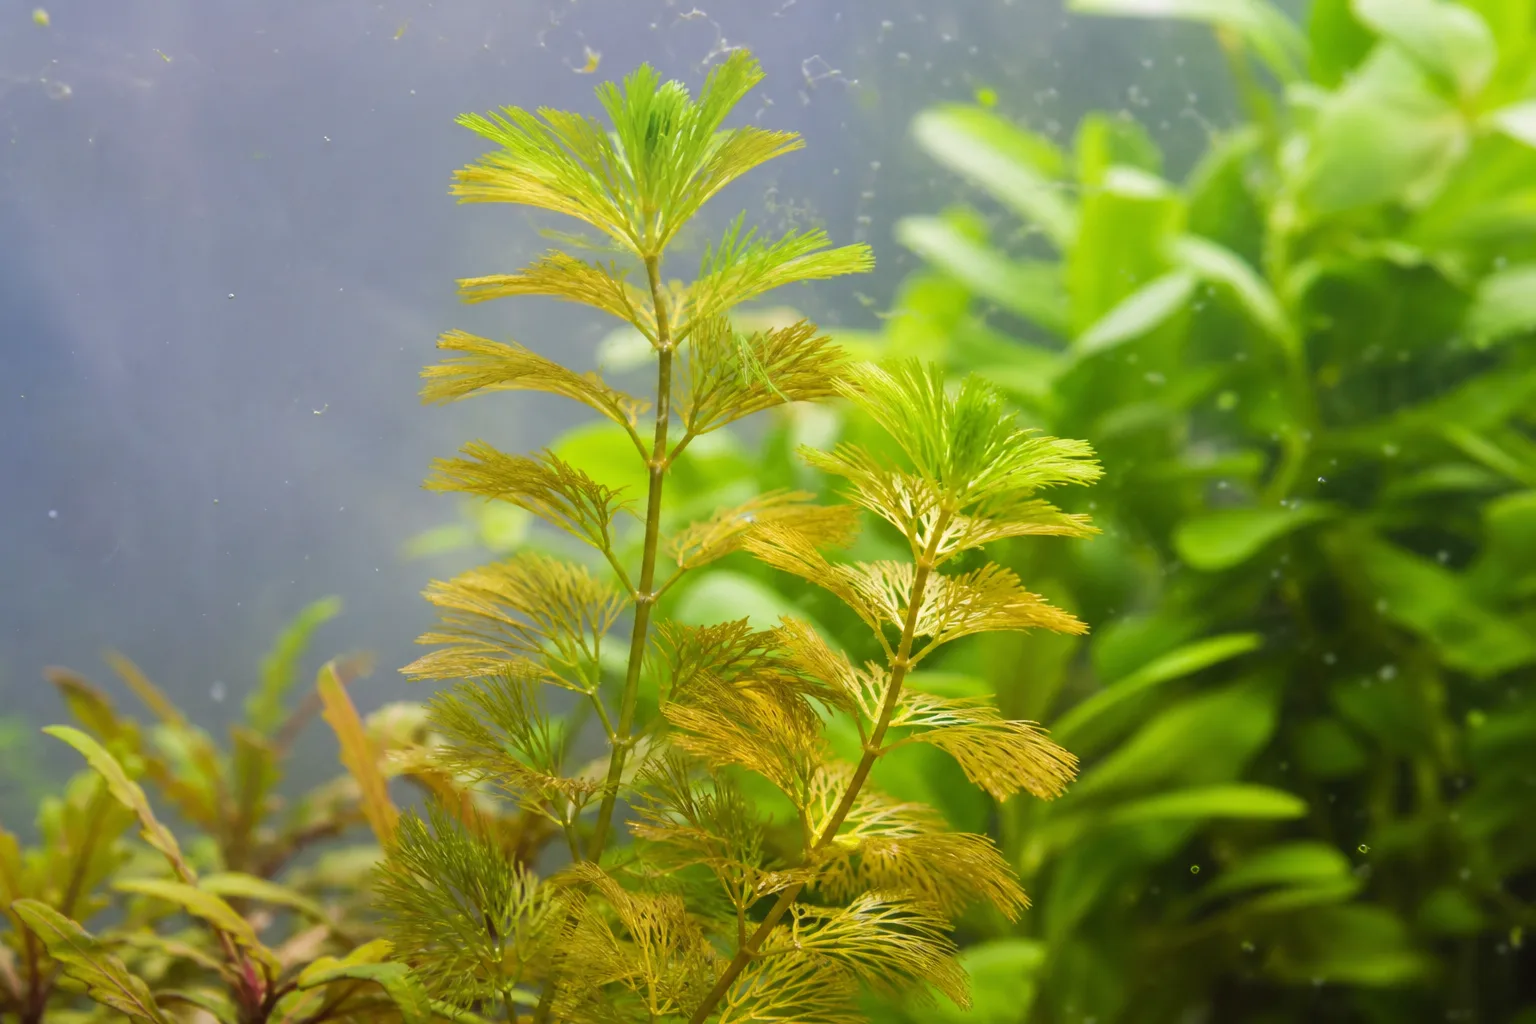
Yellow, pale, or glassy leaves on Cabomba (Cabomba caroliniana or C. furcata) in a freshwater aquarium are almost always stress signals underwater-acclimation melt, weak submerged light, stale or nutrient-poor water, buried stem decay, or copper exposure-not classic houseplant chlorosis from potting soil. Cabomba caroliniana is a fully submerged stem plant with fan-shaped leaves in opposite whorls that sheds fine needles into the filter when conditions slip.
First step: trim all translucent or mushy whorls back to firm green stem, remove that debris from the tank, and check whether the buried base is firm and planted at the correct 1–2 inch depth before changing fertilizer or moving the plant to a brighter room. Recovery is judged by new submerged whorls at the tips within one to three weeks-not by old yellow tissue turning green again.
For full species care, see the Cabomba overview. For PAR targets, see Cabomba light requirements. For iron and nitrate patterns, see Cabomba fertilizer guide. For trim-and-replant recovery, see Cabomba propagation.
What yellowing and melting look like on Cabomba
Cabomba yellowing takes several distinct underwater forms. Matching the pattern speeds diagnosis:
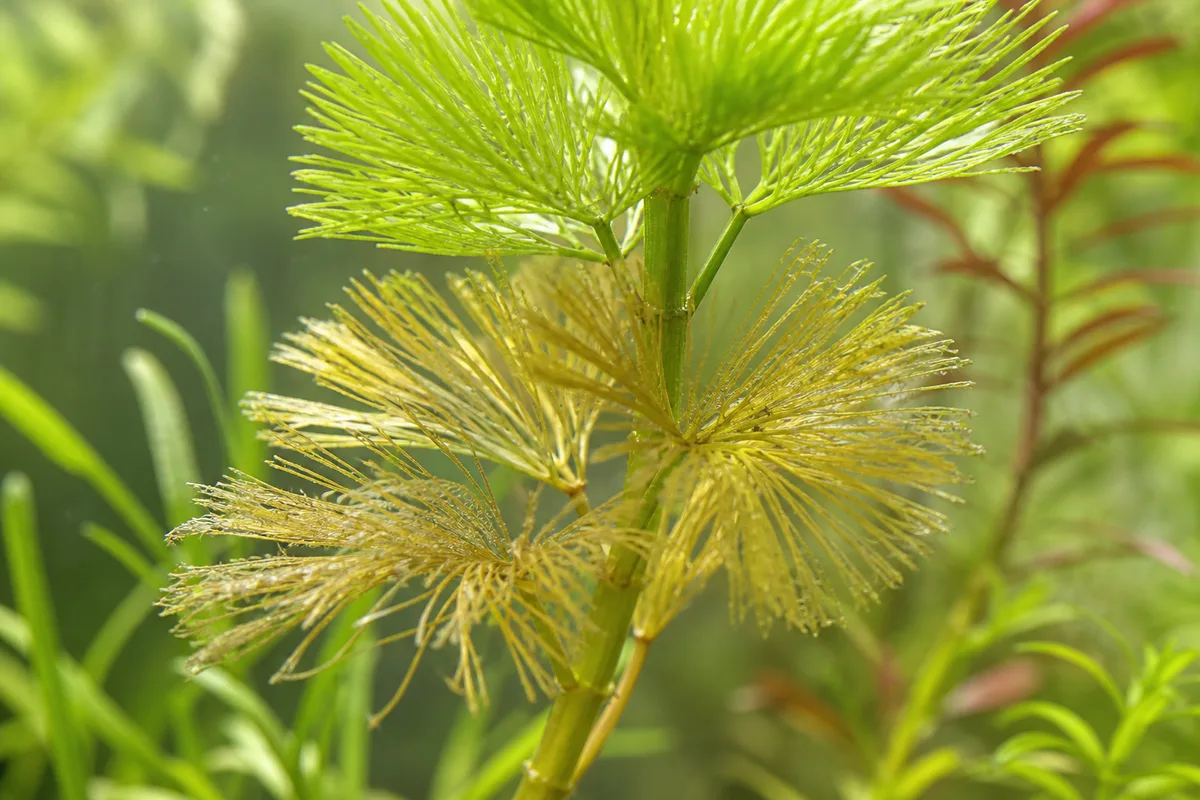
Glassy yellow-brown transparent whorl melting on submerged Cabomba - trim mushy tissue and judge recovery by firm new green tips, not old yellow needles re-greening.
- Whole-whorl transparency - leaves turn glassy yellow-brown and detach at a touch; fine needles cloud the water and clog filter sponges
- Bottom-up shedding - lower whorls yellow and drop while tips stay green briefly; bare stem segments appear at the substrate
- Tip chlorosis - newest whorls emerge pale yellow or white with green veins while older leaves remain green (iron or light stress)
- Uniform pale green - entire stand loses the bright lime color and looks olive or washed out without immediate mush
- Rapid collapse after treatment - whorls wilt within 24–72 hours of copper-based ich medication or algicide use
- Post-purchase melt - lush bunch from the store sheds within five to ten days while the stem itself stays firm
Early melt can look like one pale whorl at the gravel line. Advanced failure shows more than half the stem translucent with only a short green crown left. Do not confuse sporadic lower-leaf drop from self-shading (firm bare base, healthy feathery tips) with rot (mushy, sour-smelling tissue at buried nodes)-the fixes differ.
Why Cabomba turns yellow or sheds in aquariums
Five causes cover most tanks. Each ties to Cabomba’s submerged stem biology-not to soil moisture or rosette aging.
Acclimation melt after purchase or rescape
Commercial Cabomba is often grown emersed above water on farms, then submerged in your tank. Emersed leaves are structurally different; the plant sheds them and grows new submerged foliage. This is normal if the stem stays firm and green tips appear within seven to fourteen days. Yellowing in the first one to two weeks after planting usually traces here-not to a missing houseplant fertilizer.
Insufficient submerged PAR (light starvation)
Cabomba cannot use room light through tank glass the way a windowsill plant might. When photosynthetically active radiation at stem height falls too low, the plant abandons shaded lower whorls, stretches internodes, and thins toward the surface. Lower leaves yellow first; tips may look okay briefly. This is stem-plant light allocation-not harmless “old leaf aging” like on a rosette houseplant. See not enough light on Cabomba for PAR confirmation steps.
Nutrient deficiency in the water column
Cabomba absorbs nitrogen, iron, and other nutrients directly from the water. In lightly stocked or shrimp-only tanks, nitrogen deficiency often yellows oldest bottom whorls first with translucent tips. Iron deficiency shows on newest tip whorls as pale yellow leaves with darker veins. Heavy dosing without matching light and CO₂ feeds algae on feathery surfaces instead of fixing chlorosis-confirm light before stacking fertilizers.
Buried stem rot and debris buildup
Planting too deep, burying lower leaves, or leaving decaying tissue in the substrate triggers anaerobic rot at nodes. The base turns mushy and translucent; yellowing climbs the stem. Cabomba’s soft tissue rots faster than thicker stems when buried incorrectly-roots emerge from buried nodes on submerged stems, but decaying buried leaves reverse that process quickly. See stem-base rot on Cabomba for the trim-float-replant protocol.
Copper medications and poor water clarity
Cabomba is sensitive to copper in many fish medications. Copper exposure can yellow and kill fine leaves within days. Dirty water coats feathery whorls with detritus, blocks light to lower leaves, and accelerates decay even when your LED is technically adequate.
Green Cabomba vs. red Cabomba: different failure modes
Treat green and red fanwort as separate difficulty tiers-not color variants of the same easy stem.
Green Cabomba (C. caroliniana) tolerates moderate to high submerged PAR (roughly 30–80 µmol m⁻² s⁻¹ at stem height) and can grow without CO₂ injection when light and water clarity are good. Yellowing here often traces to acclimation melt, chronic under-lighting, or nitrate drift in low-tech tanks. Recovery within two to three weeks is realistic after trimming and correcting PAR.
Red Cabomba (C. furcata) demands high PAR (often 80–100+ µmol m⁻² s⁻¹ at stem height), soft acidic water, iron-rich fertilization, and usually pressurized CO₂ for long-term red color. Without those inputs, it yellows, greens out, and melts within weeks-not months. If red Cabomba fails repeatedly while green stems in the same tank look fine, the problem is species demand, not a mystery disease.
Cabomba yellowing cause matrix
| Pattern | Most likely cause | Key check | First direction |
|---|---|---|---|
| Whole-plant glassy melt days 5–14 after purchase | Acclimation melt | Stem firm; tips pushing new whorls | Trim melt; stable water; wait |
| Bare base, long internodes, green tuft on top | Low PAR / self-shading | PAR at stem height; canopy density | Increase LED; top and replant |
| Old bottom whorls yellow, tips stay green | Nitrogen deficiency | Stocking level; nitrate test | Comprehensive liquid fertilizer |
| New tip whorls pale yellow, green veins | Iron deficiency or borderline light | Light adequate? | Iron supplement; verify PAR |
| Mushy base, sour smell, translucent lower stem | Buried stem rot | Planting depth; buried leaves | Trim, float, replant shallow |
| Rapid wilt 24–72 h after fish treatment | Copper or chemical damage | Medication label | Stop copper; remove dead tissue |
| Fine needles in filter; water clouds | Decay cascade from any above | Debris after trim? | Remove shed leaves; clean sponge |
How to confirm the cause
Work through these checks in order before stacking treatments:
- Stem firmness - Pinch the stem at the substrate line. Firm green tissue means salvage is likely. Mushy, translucent, or sour-smelling base means rot-trim above it.
- Planting depth - Confirm only 1–2 inches (2.5–5 cm) of bare stem is buried with the first whorl above gravel. Buried leaves are a common rot trigger.
- Purchase timeline - Stems planted within the last fourteen days may melt from emersed transition even in a good tank. Persistent bare-base elongation after three weeks points to light, not acclimation alone.
- PAR at stem height - Measure or estimate photosynthetically active radiation where lower leaves attach, not at the water surface. Green Cabomba typically needs at least 30–40 µmol m⁻² s⁻¹ there to hold lower whorls.
- Yellow position - Bottom whorls first suggests nitrogen deficiency or light starvation at depth. Tip chlorosis suggests iron or insufficient PAR for new growth.
- Water clarity and filter load - Check pre-filter sponges for Cabomba needles. Turbid water or clogged mechanical filtration accelerates melt.
- Recent changes - Note tank moves, lighting jumps, large unmatched water changes, or ich medications in the last week. Copper sensitivity is a common overlooked cause.
If tips stay compact and green while only the base is bare, prioritize light and trimming over fertilizer. If new tips yellow while the base is firm, inspect nutrients and PAR together.
First fix for Cabomba
Remove all melting or translucent whorls back to firm green stem, pull shed needles from the tank, and verify planting depth before changing anything else.
Use sharp scissors. Cut away mushy tissue so it cannot decompose in the water column. If the base is rotted, trim the top 4–6 inches of healthy stem, strip lower leaves from the bottom 2–3 inches, and float the top near the light for three to seven days or replant immediately at standard shallow depth. Do not bury leaves hoping they will root deeper.
Hold off on heavy fertilizer during the first week of acclimation melt-dying tissue fuels algae. Do not increase photoperiod beyond ten hours to compensate for weak PAR. Do not check “soil moisture” or repot into potting mix; Cabomba lives fully submerged. Do not assume yellow leaves always need more light without confirming stem rot first.
Step-by-step recovery by confirmed cause
After acclimation melt
Trim transparent whorls daily as they appear. Run eight to ten hours of aquarium light on a timer. Keep temperature stable within 2–3°F of the transport bag when first introducing stems. Expect new submerged whorls at tips within seven to fourteen days if the stem stays firm.
After low PAR or self-shading
Increase aquarium LED intensity or lower the fixture toward the water. Top stems when lower sections go bare and replant healthy tops so light reaches the stand. Target at least 30–40 µmol m⁻² s⁻¹ at stem height for green Cabomba. Full detail is in the Cabomba light guide.
After nitrogen or iron deficiency
Dose a comprehensive liquid aquarium fertilizer weekly after water changes once new growth resumes-start at half label strength in low-tech tanks. Match product to stocking: trace-only formulas in heavily stocked tanks, macronutrient-inclusive formulas in shrimp-only setups. See the Cabomba fertilizer guide for iron vs. nitrogen symptom splits.
After buried stem rot
Follow the stem-base rot protocol: trim to firm tissue, float tops, replant at 1–2 inches with stripped nodes, and improve flow so detritus does not pack into whorls.
After copper exposure
Stop copper-containing medications if livestock allows. Remove dead plant tissue promptly. Some damage is irreversible on affected whorls; recovery requires new growth from firm stem nodes.
Recovery timeline
Melting may continue for one to three weeks after a major tank change or new purchase-that is normal if the stem stays firm and tips push new whorls. New green submerged leaves are the success signal, not old yellow needles re-greening.
| Milestone | Typical timing |
|---|---|
| Shedding slows after trim and stable water | 3–7 days |
| First new submerged whorls at tips | 7–14 days |
| Stand looks full again after top-and-replant cycle | 2–4 weeks |
| Red Cabomba color return (high-tech setup) | 3–6 weeks if PAR, CO₂, and iron align |
If melt climbs past the bottom two whorls per day after day seven in a stable tank, escalate to rot or chemical damage checks-not patience.
What not to do
Do not apply houseplant advice-potting soil checks, saucer drainage, humidity trays, or Cabomba repotting guide into fresh mix do not apply to submerged fanwort. Do not dose heavy fertilizer on a melting plant in one day. Do not extend photoperiod beyond ten hours instead of raising PAR. Do not leave melting leaves in the tank to “decompose naturally”-they foul filters and spike organics in small tanks and turtle tubs. Do not flush trimmings into ponds, streams, or storm drains; Cabomba fragments establish easily in wild waterways.
How to prevent yellowing and melt in your tank
Use a planted-aquarium LED with verified output for your tank depth before buying stems. Plant shallow with bare nodes buried, run eight to ten hours on a consistent timer, and trim tops every two to three weeks so light reaches lower whorls. Maintain weekly water changes in stocked tanks and clean pre-filter sponges when needles accumulate. Quarantine new bunches in stable water before a full rescape. Check medication labels for copper before treating a planted tank.
Dispose of unwanted trimmings by drying completely and discarding in household trash-never release live fragments outdoors. Confirm your state’s regulations before purchasing; C. caroliniana is restricted in multiple U.S. jurisdictions.
When to worry
Act urgently when melt spreads from base to tip within days, ammonia or nitrite rises after a large trim session, or the entire stand turns mushy after medication. Salvage only firm green tops. Mild lower-whorl yellowing with healthy tips is correctable over one to two weeks. Total crown collapse in a dim tank with stagnant debris needs cleanup and equipment upgrade-not another fertilizer bottle.
For overlapping symptoms, see leggy growth, slow growth, and brown tips on Cabomba.
When to use this page vs other Cabomba guides
- Cabomba watering guide - Use for routine moisture checks before assuming yellow leaves is the main issue.
- Cabomba problems hub - Browse all 16 common issues on this species.
- Overwatering on Cabomba - Different entry point when symptoms overlap with yellow leaves.
- Underwatering on Cabomba - Different entry point when symptoms overlap with yellow leaves.
- Not Enough Light on Cabomba - Different entry point when symptoms overlap with yellow leaves.