How to Propagate Cabomba: Stem Cuttings and Side Shoots
How to Propagate Cabomba: Stem Cuttings and Side Shoots
How to Propagate Cabomba: Stem Cuttings and Side Shoots
Cabomba looks like it should be impossible to keep. The stems are thin enough to snap between two fingers. The fan-shaped leaves dissolve into mush the moment water quality slips. Yet ask any experienced planted-tank hobbyist how they ended up with a full background of feathery green, and the answer is almost always the same: they trimmed a stem, replanted the top, and let the original base branch out. That is propagation. No seeds, no soil pots, no rooting trays on a windowsill - just scissors, substrate, and clean aquarium water.
This is an aquarium plant guide from start to finish. Cabomba (Cabomba caroliniana, commonly called fanwort or green Cabomba) reproduces in the wild and in your tank through vegetative fragmentation. A stem section with intact nodes can develop adventitious roots and become a new plant. In research published in Hydrobiologia, even single-node fragments of Cabomba caroliniana showed roughly 50% establishment success when planted in substrate, rising to near 100% for fragments with two or more nodes. The same study found free-floating fragments had only a 1–30% chance of colonizing without anchoring - which tells you exactly why replanting tops beats leaving trimmings to drift indefinitely.
What follows is a complete walkthrough of how to propagate Cabomba through stem cuttings and side shoots: when to trim, how long to cut, where to make the cut, how to anchor fragile stems, when floating works as a recovery step, and how the topping cycle turns one bunch into a dense background over a few months.
If symptoms persist, see the Yellow Leaves on Cabomba guide.
Why Cabomba Propagation Is Worth Learning - Even If the Plant Is Delicate
Cabomba has a reputation for being finicky, and that reputation is partly earned. It wants brighter light than anacharis, cleaner water than Java fern, and a substrate it can actually root into. But its propagation biology is remarkably forgiving once you respect those constraints. The plant’s stems are built to survive being broken - in nature, fragments detach, drift on currents, and establish new colonies. The U.S. Fish and Wildlife Service ecological risk summary notes that a fragment with at least one pair of leaves can regenerate into a full plant, which is why contaminated boats, dumped aquarium water, and careless disposal have spread Cabomba across continents.
For the home aquarist, that same regenerative power is an asset. Buy one bunch from a reputable aquarium store, separate the rubber-banded stems, plant them individually, and within a month you can be taking cuttings from your own stock. Aqua-Fish.net lists stem cuttings as the preferred propagation method for Cabomba caroliniana, and virtually every aquarium care reference converges on the same technique: trim healthy tops, strip lower leaves, bury nodes in fine substrate.
The payoff is more than saving money. Regular propagation through trimming is also essential maintenance. Cabomba grows toward the surface, shades everything below itself, and develops bare lower stems if left untrimmed - the “bald bottom” effect that makes background plantings look thin and scraggly. Topping and replanting is how you keep the display full, how you refresh struggling lower sections, and how you supply new stems when old ones go woody and leafless. Propagation and pruning are the same action in Cabomba care; learning one means you have learned both.
There are real limits. Cabomba is considered invasive in Australia, New Zealand, parts of Europe, and many U.S. states. It is a favorite snack for herbivorous fish and turtles. It melts when light is too low, when water is dirty, or when stems are crushed during planting. None of those caveats make propagation difficult - they just mean you propagate thoughtfully, in clean water, with gentle hands, and you never release trimmings into natural waterways.
How Cabomba Grows: Nodes, Opposite Leaves, and Side Shoots
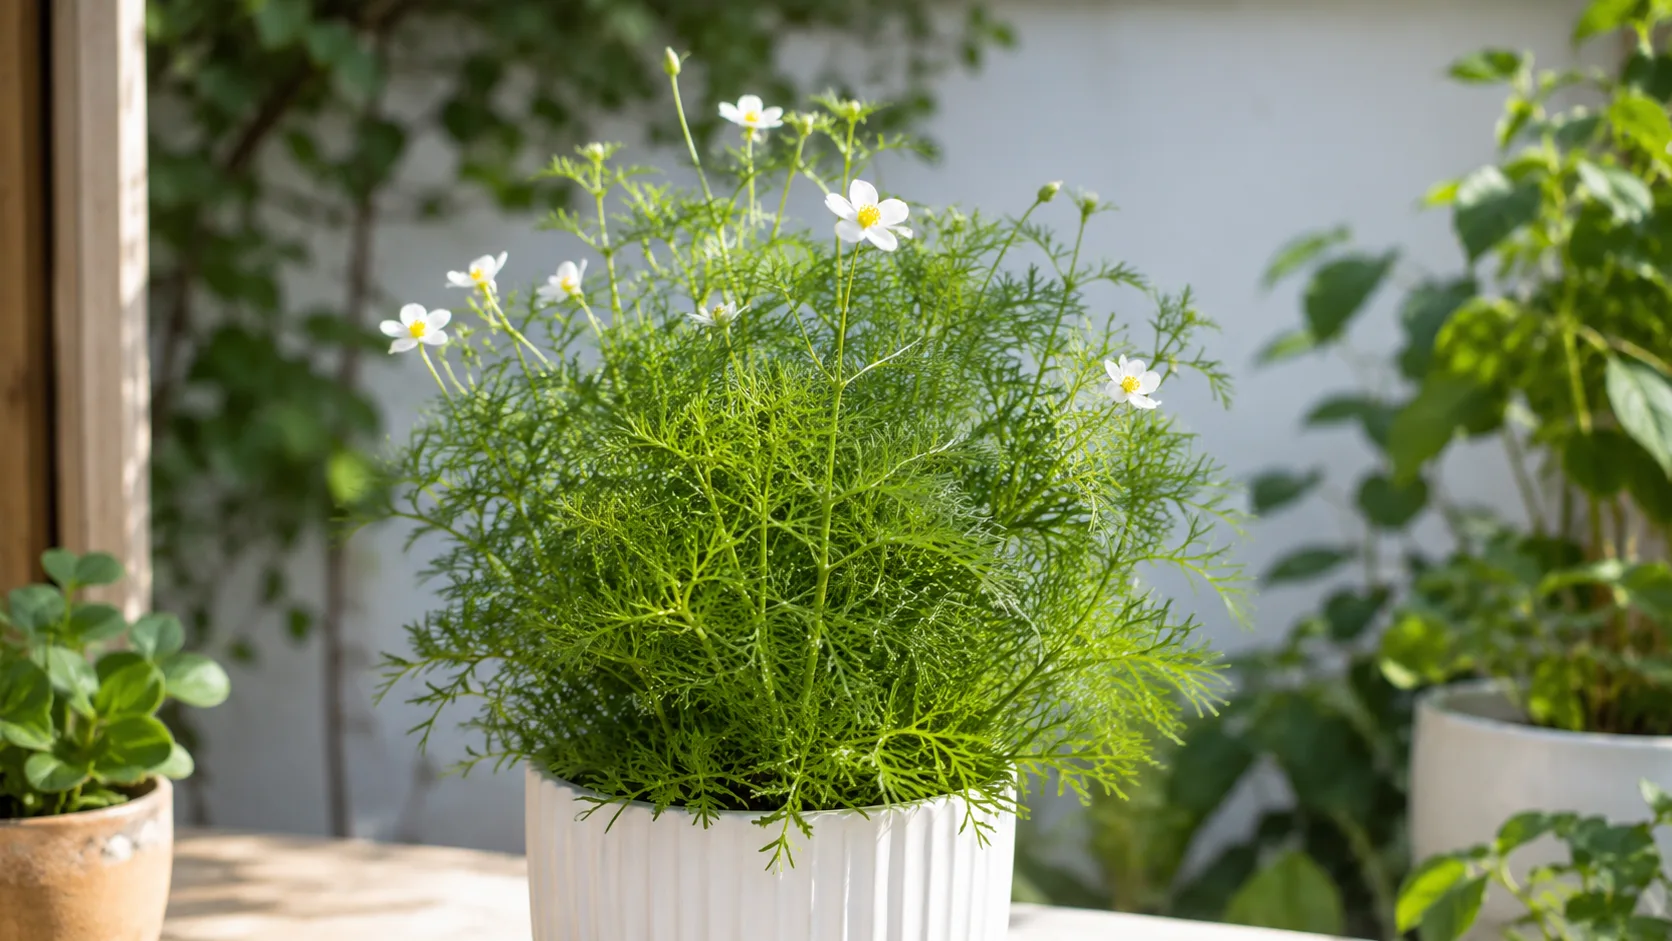
Propagation makes sense once you understand the stem anatomy. A healthy Cabomba stem is a repeating chain of nodes - the joints where leaves attach - separated by smooth internodes. Unlike anacharis, which carries leaves in whorls of four to six around the stem, Cabomba bears opposite pairs of finely divided, fan-shaped submerged leaves at each node. Those leaves are the plant’s primary photosynthetic surface, and the nodes beneath them are where adventitious roots and lateral shoots emerge when conditions are right.
The growing tip at the top of the stem is the apical meristem, the zone of active cell division that pushes the stem upward. That tip produces auxin, a growth hormone that suppresses side shoots on lower nodes. This is standard stem-plant biology, and it explains the single most useful propagation technique in the hobby: when you cut off the top, the hormonal suppression lifts, and the nodes just below the cut wake up and produce side shoots. Within a week or two of topping, a single Cabomba stem often becomes two or three.
Roots on Cabomba are white, fine, and fibrous. They develop from buried nodes, not from the cut end of the stem. Canton Aquatics recommends burying two to three nodes when planting, which gives multiple points for root emergence and improves anchoring on a plant whose stems float easily. Research on Cabomba fragment establishment confirms that larger fragments with more nodes establish more reliably than tiny scraps - apical (tip) fragments outperform basal fragments, and fragments with two or more nodes reach near-universal establishment in substrate.
The practical lesson: take cuttings from the vigorous top of the stem, make sure each cutting includes multiple nodes, strip the leaves from the portion you plan to bury, and plant deep enough that those nodes contact fine substrate. A 2-inch scrap with one node might survive; a 4–6 inch top cutting with three or four nodes almost always will.
The Stem-Cutting Method: A Step-by-Step Aquarium Walkthrough
For most hobbyists, Cabomba propagation means one thing: cut a section of stem, prepare it, and plant it in the aquarium substrate. The technique is simple in concept but demands more care than tougher stem plants because Cabomba stems bruise and snap easily.
Choosing a Healthy Parent Stem
Start with a stem that is bright green, has full fan-shaped leaves at each node, and shows active growth at the tip. Avoid stems that are pale, yellowing at the base, coated in algae, or already shedding lower leaves - those are stressed plants, and stressed cuttings fail at higher rates.
The parent stem should be long enough that you can take a 4–6 inch cutting from the top and still leave a healthy stub rooted in the substrate. The apical section - the top few inches - is always the most vigorous part of the plant because the growing tip is there. Cuttings from the middle of a long, leggy stem can work, but they establish more slowly and are more likely to shed leaves after planting.
If you just bought a bunch, remove the rubber band or lead weight at the base immediately. Bunched stems trap debris, restrict flow, and rot at the tie point. Separate each stem, inspect for shipping damage, and trim off any crushed or translucent sections before you propagate. Cabomba arrives stressed from transport more often than hardier plants; giving parent stems a few days to settle in clean water before taking cuttings improves success rates noticeably.
Making a Clean Cut Just Above a Node
Use sharp aquarium scissors or a razor blade. Dull tools crush Cabomba’s soft tissue, and crushed stems rot from the cut end within days.
When taking a cutting for replanting, snip the top 4–6 inches off a healthy stem. Make the cut on the parent stem just above a node - leaving roughly 5–10 mm of internode above the node on the rooted base. That clean cut point is where side shoots will emerge. When preparing the cutting itself, trim the base just below a node so the lowest node on the cutting is bare and ready for planting.
A 45-degree angle is sometimes recommended for terrestrial cuttings; for Cabomba it does not matter much because roots emerge from nodes along the buried section, not from the cut tip. What matters is a clean, single snip that does not fray the stem.
Cuttings shorter than about 4 inches often lack enough nodes to anchor and establish reliably. Cuttings longer than 8 inches become floppy, tangle in filter intakes, and break when you try to plant them. The range that hobby references from Aqua-Fish.net, Canton Aquatics, and Aquamarine Power consistently recommend is 4–6 inches with at least three to four leaf pairs.
Stripping Lower Leaf Whorls Before Planting
Once the cutting is free, remove the bottom two to three pairs of leaves - roughly the lower 2–3 inches of foliage. Pinch them off gently or snip with scissors. Any leaf buried in substrate will decompose, and on Cabomba that decomposition travels up the delicate stem fast.
The bare lower section is where roots will appear over the next one to two weeks. Exposing those nodes to substrate contact and water flow at the gravel line is what triggers adventitious root growth. If you are planting in a tank with fish that disturb the substrate, bury one extra node for security, but never bury living leaves to gain depth.
This step is where Cabomba propagation diverges most sharply from terrestrial “stick it in soil” advice. You are not rooting a houseplant cutting in potting mix on a windowsill. You are anchoring an aquatic stem so its nodes can send roots into saturated substrate while the leafy crown remains in open water with access to light and dissolved nutrients.
Anchoring Delicate Cuttings in Fine Substrate
Hold the cutting with plant tweezers or gentle fingers. Push the bare lower 2–3 inches into fine gravel, sand, or aqua soil - enough to cover two to three nodes. Coarse or sharp gravel crushes Cabomba stems and creates entry points for bacterial rot.
Space individual stems 1–2 inches apart. Tight bunches look full on day one but shade their own lower leaves within a week, accelerating the bald-bottom problem you are trying to avoid.
Cabomba cuttings float. That is normal. If a stem bobs back up before roots form, resist the urge to wrap metal plant weights around the stem - Canton Aquatics specifically warns that metal weights crush Cabomba’s soft tissue. Instead, use a small stone placed gently at the base, a ceramic plant ring loosely around the lower stem, or replant slightly deeper. Once white roots grip the substrate, the plant stays put on its own.
In a well-lit tank with stable parameters, new roots typically appear within 7–14 days. Fresh growth at the tip is the most reliable confirmation that the cutting has transitioned from surviving to actively growing.
Floating Fragments: When It Works and When It Does Not
Floating is a legitimate propagation and recovery technique for Cabomba, but it plays a different role than it does for column-feeding plants like anacharis.
When you float a Cabomba cutting, the stem drifts at or just below the surface, and adventitious roots may emerge from submerged nodes within several days. The plant can photosynthesize and even grow modestly in this state. Hobbyists often float cuttings for three to five days before planting as a “recovery” step after shipping stress or a melt episode. Pull the mushy base off, float the healthy green top, and let it regain turgor before replanting.
The limitation is long-term performance. Cabomba is primarily a root feeder in aquarium culture - it draws significant nutrition from substrate via its root system, especially when you want the dense, feathery growth that makes the plant worth keeping. Aqua-Fish.net and multiple hobby guides note that while Cabomba can survive temporarily while floating, it will not thrive indefinitely without substrate anchoring and root access. The Hydrobiologia establishment study reinforces this: free-floating fragments had dramatically lower colonization success (1–30%) compared to substrate-planted fragments.
Use floating as a short-term bridge, not a permanent growing method. Float to recover a melting cutting. Float to grow roots before planting in a difficult substrate. Float a few stems in a quarantine tub while you treat the main tank. Then plant them. For a structured background aquascape, submerged and rooted is where Cabomba belongs.
One advantage of floating during propagation: the stems sit closer to the light source and can access more atmospheric CO2 at the water surface, which sometimes speeds initial root emergence. Just do not confuse that early vigor with a reason to leave the plant floating forever.
Planting Depth, Spacing, and Substrate Choices for Cabomba Cuttings
Getting depth and substrate right is the difference between a cutting that roots in a week and one that melts in three days.
Planting depth: Bury the bottom 2–3 inches of the prepared cutting, covering two to three nodes. Shallower planting invites floating before roots form. Deeper planting buries leaves, reduces gas exchange at the stem base, and encourages rot - especially in low-flow areas of the tank.
Spacing: Plant stems 1–2 inches apart in staggered rows for a background wall. Cabomba needs water movement and light penetration to the lower stems. Packing stems like a supermarket bunch creates a green top and bare sticks below within two weeks.
Substrate type: Fine gravel, sand, or planted-tank aqua soil all work. Cabomba does not demand an expensive substrate, but it does demand one that holds stems without crushing them. Avoid large pebbles, sharp crushed coral, and heavy iron-rich substrates unless you are experienced with them - the stem contact point is fragile.
Water flow: Moderate flow helps. Stagnant pockets around newly planted cuttings accumulate debris and encourage biofilm on melting leaves. Position new cuttings away from direct filter blast, which can uproot them before roots set, but not in dead zones where detritus collects.
If your tank has a deep substrate bed (more than 3 inches), plant Cabomba in the upper portion rather than pushing stems to the bottom. The goal is node contact with oxygenated substrate, not maximum burial depth.
Root Tabs, Liquid Fertilizer, CO2, and Rooting Hormone
Rooting hormone: No. Aquatic stem plants root from nodes without auxin powders or gels. Rooting hormone products are formulated for terrestrial cuttings and are unnecessary for Cabomba. Save your money for light and fertilizer.
Root tabs: Useful. Because Cabomba feeds substantially through its roots, a root tab placed near newly planted cuttings provides phosphorus and micronutrients that accelerate establishment. This is especially helpful in inert gravel or sand without built-in nutrients. One tab per group of five to seven stems is a reasonable starting point in a typical home aquarium.
Liquid fertilizer: Also useful, particularly for nitrogen and potassium that support rapid leaf growth. Dose a comprehensive aquarium fertilizer weekly once the cutting shows new tip growth. Hold off on heavy dosing for the first few days after planting - the cutting is stressed and cannot use excess nutrients until it resumes active growth.
CO2 injection: Not required for propagation, but it meaningfully improves growth density and reduces melt risk in high-light setups. Aqua-Fish.net notes that CO2 is not mandatory but significantly improves Cabomba health. In a low-tech tank with moderate light, cuttings root and grow without injected CO2. In a high-light tank without CO2, Cabomba is more likely to struggle - and propagation success drops accordingly. Match your propagation expectations to your tank category.
Liquid carbon (glutaraldehyde products): Use with caution around Cabomba. While not as dramatically sensitive as anacharis, delicate stem plants in general fare poorly under aggressive glutaraldehyde dosing. If you use liquid carbon for algae control, dose conservatively and watch new cuttings closely for translucent melting.
Side Shoots and the Topping Cycle for Bushier Growth
Stem cuttings are how you make new plants. Side shoots are how you make those plants look full instead of like a row of lonely pencils.
What Happens to the Original Stem After You Top It
When you trim the top 4–6 inches off a rooted Cabomba stem just above a node, the apical meristem is removed from that stem. Auxin levels drop at the cut point, and the nodes below the cut - which were previously suppressed - activate. Within one to two weeks, you typically see one or two new lateral shoots emerging from nodes near the cut. Each side shoot behaves like a mini apical stem, producing its own fan leaves and growing upward.
This is the biological engine behind bushy Cabomba backgrounds. You are not waiting for magic; you are manipulating a hormone pathway that every stem plant uses. The more regularly you top, the more branching points you create, and the denser the planting becomes.
The lower portion of the original stem may still lose leaves over time - Cabomba naturally sheds foliage on shaded lower internodes. Topping helps because replanted cuttings fill the midground while side shoots replace lost lower growth on the parent. After several topping cycles, very old lower stems may go bare regardless; that is when you retire them and replace with fresh cuttings (covered in the next major section).
Replanting Tops vs Keeping Cuttings in a Grow-Out Tub
The tops you cut off during trimming are not waste. They are premium propagation material - more vigorous than mid-stem sections and already acclimated to your tank’s water. The standard practice is to replant them directly in the substrate near the parent stems, offset slightly so they do not compete for the same light pocket.
An alternative workflow that works well for turtle keepers and multi-tank hobbyists: maintain a grow-out tub - a separate container of clean dechlorinated water under bright light where cuttings root undisturbed. Turtle owners especially benefit from this because turtles graze Cabomba faster than it regrows in the display tank. A grow-out tub lets you stockpile rooted stems and replace eaten plants without buying new bunches every month.
For either approach, treat the tops exactly like any other cutting: strip lower leaves, bury nodes, anchor gently. Tops often establish faster than mid-stem cuttings because they still carry the most active meristem tissue.
The topping cycle in practice:
- Let stems grow until they approach the water surface or look leggy - typically every two to three weeks in a healthy tank.
- Cut the top 4–6 inches off each stem just above a node on the parent.
- Strip and replant the tops.
- Wait for side shoots on the parent stems and root growth on the new cuttings.
- Repeat.
Over three to four months, a starting bunch of six to eight stems can realistically become thirty to fifty without purchasing additional plants.
Growth Rate and Timeline After Propagation
Cabomba is a fast grower under the right conditions - but “right” means brighter and cleaner than many beginners expect.
In a well-lit aquarium with stable water quality, moderate fertilization, and temperatures in the 20–26 °C (68–79 °F) range, Cabomba commonly adds 2–4 inches of stem length per week during active growth. Aquamarine Power cites a similar weekly range and notes that growth slows when light is insufficient or nutrients are limiting. Root emergence on new cuttings typically begins within 7–14 days. Visible side shoots on topped parent stems appear within 7–14 days as well. A cutting that is actively growing at the tip within two weeks of planting is a success.
Low-Tech vs High-Tech Establishment Timelines
Low-tech tanks without CO2 injection and with moderate aquarium lighting should expect growth at the lower end of the range - roughly 1–2 inches per week once cuttings are established - and a higher melt risk during the first week after planting. Rooting may take the full two weeks. Success in low-tech setups depends heavily on not skipping steps: strip lower leaves completely, use fine substrate, provide at least moderate light (not ambient room light), and dose a basic liquid fertilizer weekly after the cutting resumes tip growth. Cabomba can propagate in low-tech tanks, but it is not the forgiving beginner plant that anacharis is in the same conditions.
High-tech tanks with CO2 injection, strong LED lighting (roughly 40+ PAR at the substrate), and regular fertilization push Cabomba growth toward the upper end of the 2–4 inch weekly range and produce noticeably denser, more compact leaf fans. Cuttings in these conditions often root within 7–10 days and branch within a week of topping. The trade-off is that high-light, high-nutrient systems demand more consistent maintenance - neglected CO2 or skipped fertilizer doses show up on Cabomba faster than on slower-growing plants. Match your propagation ambitions to the tank you actually maintain, not the tank you wish you had.
Temperature matters. Cabomba tolerates roughly 18–28 °C (64–82 °F), but growth stalls near the extremes. Cold water slows metabolism; sustained warmth above 28 °C stresses the plant. Seasonal slowing in unheated rooms is normal.
Be patient with the first few days after planting. Cuttings often pause visible growth while they redirect energy to root formation. That pause is not failure. Tip growth resuming is the signal you are waiting for.
Common Mistakes That Kill Cabomba Cuttings
Cabomba is less forgiving than hardy stem plants. Most propagation failures trace back to a short list of avoidable errors.
- Burying leaves in substrate. The number one melt trigger. Strip the bottom 2–3 inches of leaves before every planting. Rot from buried foliage travels up fragile Cabomba stems within days.
- Crushing stems with metal plant weights or coarse gravel. Cabomba stems are soft. Metal ties and sharp substrate edges cause bruising that becomes rot. Use fine substrate and gentle ceramic anchors instead.
- Planting in insufficient light. Cabomba is not a low-light plant. New cuttings in dim tanks may root but will gradually bleach, thin, and melt. Provide moderate to strong aquarium lighting for propagation success.
- Taking cuttings from stressed parent plants. Yellowing, algae-coated, or recently shipped stems produce weak cuttings. Let parent plants recover before propagating.
- Cutting too short. Fragments under 4 inches with only one node establish inconsistently. Follow the 4–6 inch guideline.
- Ignoring water quality. Ammonia, nitrite, or heavy organic loading kills delicate new growth. Propagate in cycled, clean water. Perform water changes if the tank is heavily stocked.
- Leaving cuttings floating indefinitely. Floating is a recovery step, not a long-term growing mode. Plant rooted floaters within a week or two.
- Dumping trimmings into ponds, drains, or natural water. Cabomba fragments establish aggressively in the wild. This is an ecological and often legal problem, not just a horticultural one.
If a cutting starts to melt, act quickly. Pull it out, trim the mushy section back to firm green tissue, and float the healthy remainder in clean water under light. Most partial melts are recoverable if the upper nodes and leaves are still intact.
When to Trim, Replant, and Retire Old Stems
Cabomba stems do not stay attractive forever. After multiple topping cycles, lower sections become woody, leafless, and sparse - even with good light. The standard rotation keeps display tanks looking fresh.
The maintenance cycle:
- Plant initial 4–6 inch cuttings.
- Let them grow 6–10 inches.
- Top each stem, replant the cuttings.
- Allow side shoots to develop on parent stems.
- Repeat every two to three weeks during active growth.
- After two to four rounds, evaluate lower stems. If the bottom half is bare and stiff, uproot it, discard responsibly, and replace with a fresh top cutting in the same spot.
This rotation is why experienced hobbyists say the tops grow better than the bottoms. The apical sections are younger, carry more meristematic vigor, and photosynthesize more efficiently. Continuously replanting tops while retiring bare lower stems keeps the background dense and green rather than tall and hollow.
If you propagate heavily, consider staggering trim sessions across different sections of the tank so you never remove more than one-third of the total Cabomba mass at once. Heavy simultaneous trimming stresses the tank’s nutrient balance and can trigger algae blooms as the system recalibrates.
Turtle Tanks, Ponds, and Responsible Disposal
Cabomba appears frequently in turtle setups because it provides cover, oxygenates water, and - according to The Tortoise Table - is verified safe for turtles when sourced cleanly. Propagation in turtle tanks adds one complication: turtles eat it. Fast.
The stem-cutting method still applies. Trim tops, replant, let side shoots fill in. But maintain a separate grow-out tub if your turtle outpaces regrowth. Use pesticide-free plants from aquarium suppliers, rinse them thoroughly, and quarantine in clean water before introducing to the turtle habitat. Avoid outdoor pond plants treated with herbicides or copper-based algaecides.
Outdoor pond propagation follows the same stem principles with faster growth rates due to natural light. It also carries higher invasive risk. Cabomba caroliniana is listed as a problematic invasive across Australia, New Zealand, parts of Asia and Europe, and numerous U.S. water bodies. The Cambridge University Press chapter on biological control of tropical weeds notes that Cabomba spreads almost entirely through vegetative fragmentation in most introduced regions - any fragment with a node can establish.
Responsible disposal is non-negotiable. Never dump aquarium or pond trimmings into streams, lakes, storm drains, or wild ponds. Never compost Cabomba in open piles that could wash into waterways. Bag trimmings, optionally freeze for 48 hours to kill viable tissue, and dispose in household waste. If you trade cuttings with other hobbyists, disclose the invasive status and remind recipients of proper disposal. Check local regulations before purchasing or transporting Cabomba - some jurisdictions restrict sale entirely.
Conclusion
Propagating Cabomba in an aquarium is stem work: trim healthy tops, strip lower leaves, bury nodes in fine substrate, and let the parent stems branch. No soil pots, no rooting hormone, and no special equipment beyond sharp scissors and patience. The plant’s feathery appearance suggests fragility, and the stems do demand gentle handling - but the underlying biology is built for fragmentation. Cuttings with multiple nodes establish reliably, topped stems produce side shoots within weeks, and a single purchased bunch can stock a background over a season of regular trimming.
The techniques that separate success from melt are specific to Cabomba overview: anchor without crushing, provide enough light, plant rather than float long-term, and retire bare lower stems by replanting vigorous tops. Float cuttings only as a recovery step. Fertilize through roots and water column once growth resumes. And treat every trimming as a propagation opportunity with an ecological responsibility attached - contain your Cabomba, dispose of fragments deliberately, and keep this adaptable plant out of natural waterways where it does not belong.
Master the topping-and-replant cycle, and Cabomba stops being a recurring purchase and becomes a renewable part of your aquarium - dense, feathery, and entirely under your control.
When to use this page vs other Cabomba guides
- Cabomba overview - Start here for whole-plant context before deep-diving this topic.
- Cabomba problems hub - Jump to symptom-specific fix guides when this care topic does not resolve the issue.