Best Substrate for Cabomba: Aquasoil, Sand, and Planting
Best Substrate for Cabomba: Aquasoil, Sand, and Planting Depth
Best Substrate for Cabomba: Aquasoil, Sand, and Planting Depth
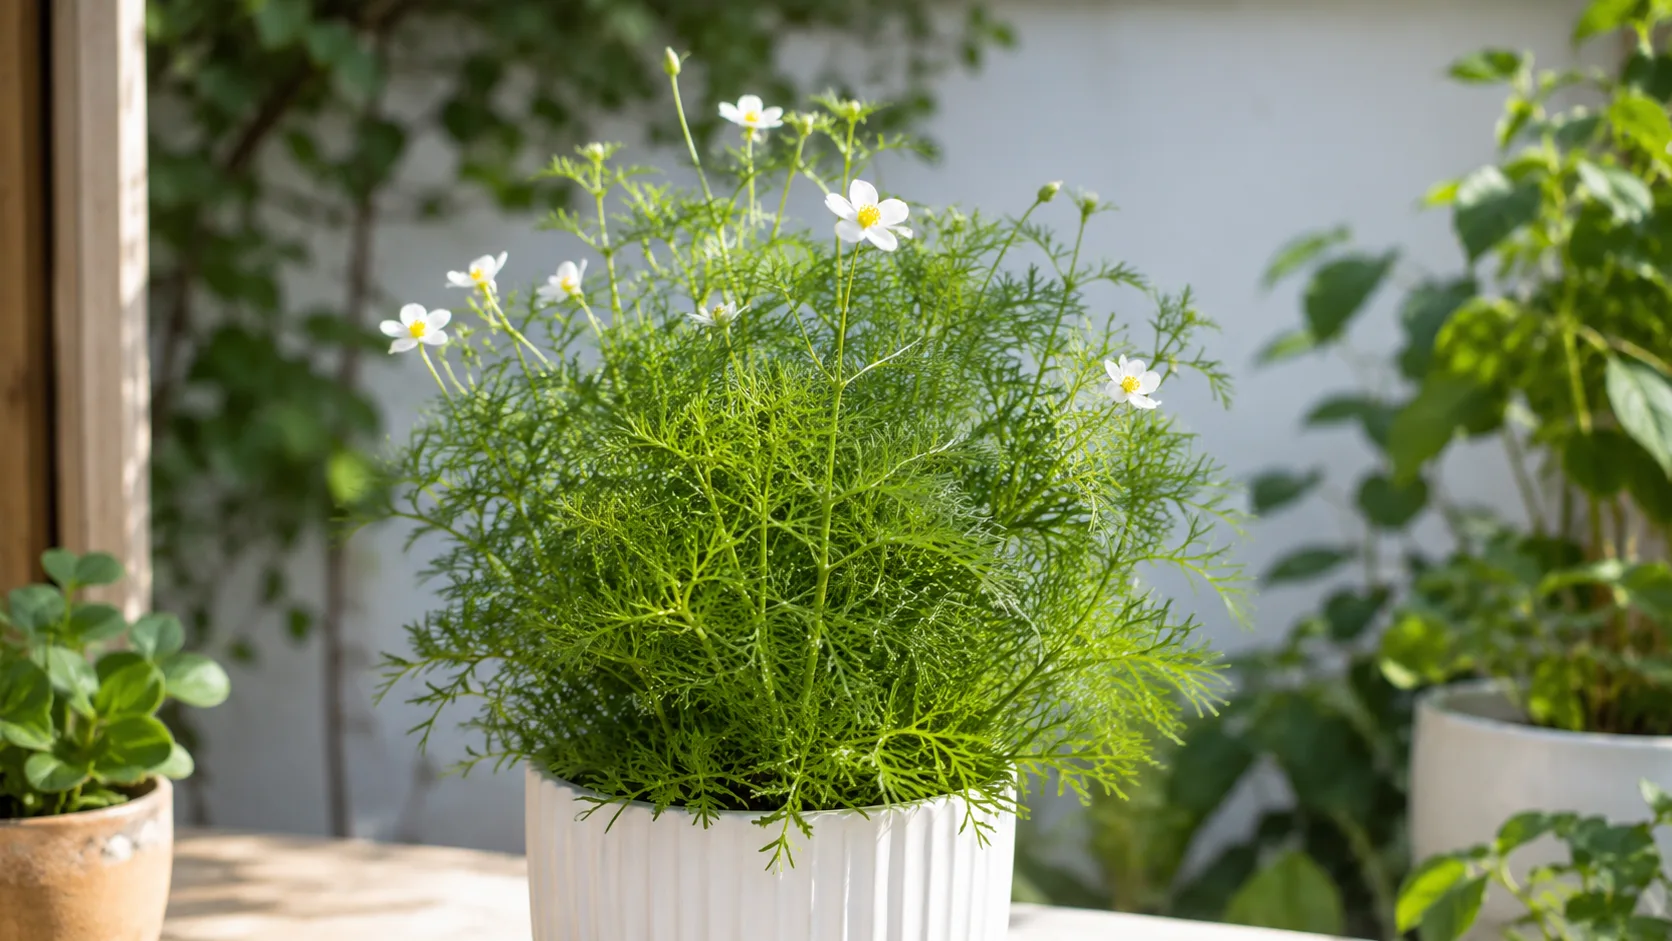
Cabomba - fanwort to botanists, “the plant that melts on contact” to frustrated hobbyists - is not picky about water chemistry the way red stem plants can be, but it is very picky about how you treat its stems at planting time. The substrate you choose and the depth you bury those stems determine whether Cabomba roots in place and grows bushy, or pops to the surface, melts at the base, and disappears within two weeks. This guide covers aquarium substrate only: active aquasoil, inert sand, fine gravel, substrate bed depth, and the stem planting depth that keeps delicate fanwort anchored without crushing it. If you arrived here looking for potting mix or garden soil, that is the wrong product category entirely - terrestrial soil will cloud your tank, rot underwater, and can introduce ammonia spikes that harm fish.
Why Cabomba substrate matters more than you think
Cabomba is a rooted stem plant, but calling it a “root feeder” oversimplifies how it actually works. The plant anchors through a fine, fragile root system at the stem base and along buried nodes, yet it draws most of its day-to-day nutrition from the water column through its leaves and exposed stem tissue. That dual strategy means substrate choice sits in an awkward middle ground: Cabomba can survive in plain sand if you dose the water well, but it grows noticeably better when the substrate provides supplementary nutrients and a texture gentle enough that the stems do not snap during planting.
Where substrate really earns its keep is mechanical. Cabomba stems are soft, buoyant, and easily damaged. A substrate that grips the base without crushing it, holds 2–3 buried nodes in place long enough for adventitious roots to form, and does not shift every time a cichlid digs nearby is worth more to Cabomba overview than a marginal nutrient boost. Get the texture and planting depth right, and even a modest setup produces a dense background wall. Get them wrong, and no amount of CO2 or lighting saves a stem that never rooted.
Green Cabomba vs red Cabomba: different substrate demands
Not all Cabomba sold in aquarium shops demands the same substrate investment. Green Cabomba (Cabomba caroliniana, sometimes labeled Cabomba aquatica) is the forgiving entry point. It tolerates inert sand or fine gravel with water-column fertilization, handles moderate light, and roots reliably when planted at the correct depth. Many North American hobbyists grow it in community tanks on nothing fancier than pool-filter sand and a weekly liquid fertilizer dose.
Red Cabomba (Cabomba furcata) and purple-toned varieties like Cabomba piauhyensis are a different conversation. These cultivars need stronger light, often benefit from injected CO2, and lean heavily on iron and trace nutrients to maintain color. An active, nutrient-rich aquasoil gives red Cabomba a meaningful advantage because the roots can supplement the heavy micronutrient demand that water-column dosing alone sometimes fails to satisfy consistently. Red Cabomba in plain sand without root tabs is a common setup that produces washed-out pink stems and chronic melt - not because sand is toxic, but because the combined nutrient and anchoring package is too thin for a demanding cultivar.
If you are starting with your first Cabomba, green C. caroliniana in fine sand or gravel is a reasonable test. If you are specifically chasing the red or purple fanwort look, budget for aquasoil or plan on root tabs under each cluster from day one.
What Cabomba actually pulls from the substrate
Cabomba roots are thin, white, and slow to develop compared with heavy root feeders like Amazon swords or Cryptocoryne. Once established, those roots absorb some nitrogen, phosphorus, iron, and potassium from the sediment - especially when the substrate is active and releasing nutrients over months. But the plant’s primary growth engine remains foliar: dissolved nutrients in the water column reach the feathery leaves faster than root uptake can supply them for top growth.
That biology explains a pattern every experienced planted-tank keeper recognizes: Cabomba can look healthy in aquasoil while a nearby stem in sand looks identical, as long as both tanks receive adequate liquid fertilization. The aquasoil advantage shows up in rooting speed, lower-stem stability, and color intensity in red varieties - not in a binary live-or-die difference for green Cabomba. Treat substrate as an anchor and a supplement, not the sole feeding source, and your fertilization strategy becomes much easier to calibrate.
Aquasoil vs sand vs gravel: choosing your Cabomba substrate
The three substrates hobbyists compare most often for Cabomba are active aquasoil, inert sand, and fine gravel. Each works in the right context. The wrong choice is usually a mismatch between substrate and Cabomba species, not an inherently bad product.
Active aquasoil (ADA Amazonia, Fluval Stratum): when it earns its price
Active aquasoils - ADA Amazonia, Fluval Stratum, Tropica Aquarium Soil, and similar baked-clay products - are the premium option for planted tanks. They buffer pH slightly acidic, release macronutrients and trace elements for 6–18 months depending on brand and bioload, and have a fine, cohesive texture that grips Cabomba stems without the sharp edges coarse gravel presents.
For red and purple Cabomba, aquasoil is the substrate most likely to produce dense, colorful growth without constant root-tab maintenance. The iron and micronutrient package in quality aquasoil supports the pigmentation that red fanwort is sold for. For green Cabomba, aquasoil is excellent but not strictly necessary - you are paying for nutrients the plant can mostly obtain from the water if you dose well.
Aquasoil does come with startup trade-offs. Most brands leach ammonia for the first few weeks, which means you should cycle the tank or use heavy water changes before adding sensitive fish. The substrate also compacts slightly over time and exhausts its nutrient reserve within one to three years, after which you either replenish with root tabs, add fresh soil during a rescape, or accept that the tank behaves like an inert substrate system.
If you are building a dedicated planted tank with carpeting species, stem plants, and injected CO2, aquasoil under Cabomba is a coherent choice. If Cabomba is the only plant in a simple community tank, aquasoil is premium spending you may not need.
Inert sand: the budget path that works with root tabs
Inert aquarium sand - pool-filter sand, play sand labeled aquarium-safe, or commercial black sand - is the most popular budget substrate in the hobby. It looks clean, works in almost every tank style, and grows green Cabomba reliably when you pair it with water-column fertilization and, ideally, a root tab near each planted cluster.
Sand’s weaknesses for Cabomba are mechanical, not chemical. Fine sand particles shift more easily than gravel, so freshly planted stems float up unless you plant deeply and use temporary anchors. Sand also compacts in beds deeper than 2–3 inches, which can create low-oxygen zones at the very bottom of the bed. Cabomba roots are shallow enough that compaction rarely kills the plant outright, but it can slow root development and contribute to lower-stem melt if the buried nodes sit in stagnant sediment.
The practical sand setup for Cabomba: a 2-inch sand bed, root tabs placed under background planting zones (replace every 2–3 months per manufacturer guidance), comprehensive liquid fertilizer dosed 2–3 times weekly, and stems planted at the full 2-inch depth with ceramic rings for the first two weeks. Green Cabomba thrives in this configuration. Red Cabomba may survive but often fails to match the color intensity it shows over aquasoil.
Fine gravel: the middle ground most tanks already have
Fine aquarium gravel in the 1–4 mm grain range is the middle path between sand and aquasoil. It is inert, inexpensive, grips Cabomba stems better than sand, and vacuums cleanly. Many community tanks already run fine gravel, which makes Cabomba an easy add - separate the bundled stems, strip the lower leaves, bury 2–3 nodes, and the plant usually stays put without weights.
Fine gravel does not provide nutrients on its own. Water-column dosing is essential, and root tabs help if you want faster rooting or if you are growing red Cabomba. The grain size matters: gravel labeled “fine” or “small” in the 2–4 mm bracket holds stems well. Gravel that runs 5 mm and above starts behaving like coarse substrate, with gaps too large for Cabomba’s delicate base to find purchase.
For hobbyists who want a single substrate type across the whole tank - foreground sand look without actually using sand, or a natural river-bed aesthetic - fine gravel is the most forgiving inert option for Cabomba.
Coarse gravel: the one to avoid
Coarse gravel, pebbles, crushed lava rock, and oversized decorative stone are poor matches for Cabomba. The stems are soft enough that pressing them into gaps between large grains can crease or snap the tissue. The root system is too fine to anchor in loose stone, so stems pop up within hours. And the bare nodes exposed between large grains dry out during water changes or tank maintenance, which invites melt.
If your tank already has coarse gravel and you do not plan to rescape, you have three realistic options: float Cabomba at the surface until it develops water-column roots, plant it in small plastic cups filled with fine gravel or aquasoil buried in the coarse bed, or use a dedicated background planting zone with a sand or soil insert. Trying to force Cabomba directly into coarse gravel is the single fastest way to confirm the reputation that fanwort is impossible to grow.
Grain size and texture: why fine substrates win for Cabomba
Cabomba stems are roughly the diameter of a thin pencil lead at the base - softer, actually, because the tissue is aquatic and flexible. Substrate grain size determines whether that base gets gripped, crushed, or left floating in open gaps.
Fine sand (0.4–1 mm) holds stems if you plant deeply but shifts under current and digging fish. Use it with anchors and accept that you may replant after maintenance.
Fine gravel (1–4 mm) is the sweet spot for stem grip, root oxygenation, and ease of vacuuming. This is the grain range most planted-tank guides recommend for delicate stem plants, and it matches what Cabomba vendors suggest when they specify “fine gravel or aquasoil.”
Medium gravel (5–8 mm) is marginal. Some stems stay down with weights; many do not. Root development is slow.
Coarse gravel (8 mm+) should be treated as incompatible unless you modify the planting zone.
Texture matters alongside size. Sharp-edged crushed quartz or lava rock can cut soft stem tissue during insertion. Rounded river gravel and polished aquarium gravel are safer. Active aquasoils have a clay-like cohesion that supports stems without sharp points - one reason they outperform inert gravel for initial establishment even when nutrients are not the limiting factor.
How deep your substrate bed needs to be
The substrate bed - the total depth of material in your tank - is separate from planting depth, which is how far each stem goes into that bed. Cabomba needs a bed deep enough to bury 2–3 nodes plus leave room for modest root extension below.
A minimum bed depth of 2 inches (5 cm) works for Cabomba in the background. Most planted tanks run 2–3 inches (5–8 cm) as a standard, and Cabomba fits comfortably in that range. Shallow beds under 1.5 inches do not give stems enough material to grip, especially in sand, and any burrowing fish will expose roots within days.
You do not need a deep sloped substrate unless your aquascape design calls for it. A flat, even 2–3 inch bed across the background planting zone is simpler to maintain and sufficient for fanwort. If you are combining Cabomba with carpeting plants that need shallow foreground beds, use a gentle slope or terrace so the background still reaches at least 2 inches where the Cabomba goes.
Deep sand beds above 4 inches carry compaction risk without benefit for a shallow-rooted stem plant. Keep sand beds for Cabomba in the 2–3 inch range unless you are running a dedicated deep-sand biotope for other reasons.
Stem planting depth: how far to bury Cabomba
Planting depth is the variable that separates thriving Cabomba from floating, melting stems. The standard target across aquarium publications and vendor care sheets: bury the bare lower portion of each stem 1 to 2 inches (2.5–5 cm) deep, covering 2–3 leaf nodes, while keeping the growing tip and upper foliage fully above the substrate surface.
Nodes are the points along the stem where leaves attach. Cabomba can produce adventitious roots from buried nodes, which is why covering 2–3 nodes matters more than simply getting “the roots” underground. A stem planted with only the very tip buried has nothing to grip with and no nodes positioned to generate anchor roots.
Less than 1 inch of burial and the buoyant stem usually reaches the surface overnight. More than 2 inches of burial and you risk covering healthy mid-stem nodes that need light and water flow - those buried leaves rot in the anaerobic lower layer, and rot travels upward through Cabomba’s soft tissue faster than through tougher stem plants like Ludwigia or Rotala.
A 45-degree planting angle is a technique some aquascapers use with stem plants: insert the tweezers at a shallow angle so the bare stem runs diagonally through the upper substrate layer, maximizing node contact without driving the stem straight down into compacted sand. This works well in fine gravel and aquasoil. In loose sand, straight vertical planting with a temporary anchor is usually more reliable.
Preparing Cabomba stems before they touch substrate
Store-bought Cabomba almost always arrives in a rubber-banded bundle, sometimes six to ten stems packed together. The first job is to cut the rubber band off in the tank or in a bucket of aquarium water - never plant with the band on. The band crushes stem tissue, traps decay against the base, and kills the lower section within days.
Separate each stem and inspect it. Trim any mushy, brown, or cracked sections with sharp scissors - dull scissors crush Cabomba stems. Then remove the leaves from the bottom 2–3 inches of each stem so you have a clean bare section to bury. Leaves buried in substrate decay without light, and the anaerobic rot spreads up the stem. This stripping step is non-optional for reliable planting.
If the stems look pale or limp from shipping, float them near the light for 2–3 days before planting. Cabomba often recovers from transit stress when it has direct surface-level light and can start developing water-column roots. Planting stressed stems immediately into substrate increases melt risk because the plant has no energy reserve to push anchor roots while recovering from shipping.
The correct planting technique step by step
Once stems are prepped, planting is straightforward if you work methodically:
Step 1 - Position the cluster. Cabomba belongs in the background or along the side walls where it can grow tall without blocking the view. Plan clusters of 5–7 stems rather than single stems; grouped planting looks fuller and the stems support each other against minor current.
Step 2 - Space stems 1–2 inches apart. Tighter spacing creates a dense wall faster but reduces water flow between stems and can shade lower leaves. Wider spacing looks sparse initially but reduces melt from overcrowding in low-light tanks.
Step 3 - Insert with tweezers. Grip the bare stem base with aquascaping tweezers, push it into the substrate to the 2-inch depth mark, and release slowly while wiggling the tweezers upward to let substrate collapse around the stem. Pulling tweezers out too fast creates a channel that lets the stem float up.
Step 4 - Do not bury the growing tip. The top few inches of leafy stem must remain above the substrate. If the bare section is too long after leaf stripping, trim the bottom end rather than burying extra length.
Step 5 - Add temporary anchors if needed. A small ceramic ring around the base, a gentle rock leaned against the cluster, or a plant weight placed below the substrate surface on the stem base holds the planting for 10–14 days while roots form. Remove anchors once the cluster resists a gentle upward tug.
Step 6 - Wait before rearranging. Cabomba roots slowly. Give each planting at least two weeks before moving stems or vacuuming aggressively around the base.
Anchoring Cabomba without crushing delicate stems
Floating after planting is Cabomba’s most common complaint, and the fix is almost always anchoring - not a different fertilizer or more light. The anchoring methods that work without damaging soft fanwort tissue:
Ceramic plant rings sit around the stem base on the substrate surface and weigh the stem down without pinching. They are the safest reusable anchor for Cabomba.
Small stones or pebbles placed gently against the base of a cluster hold multiple stems at once. Avoid pressing stone directly onto the stem; lean the stone against the base so substrate and stem slide underneath.
Plant weights made for aquarium use - lead strips or coated wire - work if you wrap them loosely around the bare lower stem and bury the weight in the substrate. Do not clamp metal tightly onto green stem tissue; fanwort crushes easily.
Avoid standard metal plant clips on the stem itself. The clips sold for stem plants are designed for tougher species. On Cabomba they leave crease marks that become melt points within days.
Suction-cup stem holders mounted on the back glass let you position Cabomba at the desired height without substrate anchoring at all. This is an underused option in tall tanks where the substrate bed is shallow.
If a stem floats repeatedly after two replanting attempts, float it at the surface for 2–3 weeks instead. Cabomba develops long dangling roots in open water, and those stems replant with much higher success rates than fresh-cut store stems.
Root tabs, liquid ferts, and what Cabomba actually needs
Substrate choice and fertilization strategy should be planned together. Cabomba is primarily a water-column feeder, so comprehensive liquid fertilizer is the baseline regardless of substrate. A balanced macro-and-micro formula dosed 2–3 times weekly covers nitrogen, phosphorus, potassium, and trace elements for green Cabomba in any substrate.
Root tabs become relevant when you run inert sand or gravel, or when you grow red Cabomba that needs consistent iron at the root zone. Place tabs under each background cluster, not under every individual stem, and follow replacement intervals on the product label - typically every 2–3 months for clay-based tabs. Overdosing root tabs in sand can create localized anaerobic pockets as the tab matrix breaks down, so one tab per 4–6 square inches of planting zone is a reasonable starting density.
Red Cabomba often needs supplemental iron beyond standard all-in-one fertilizers. Iron chelate dosed to product specifications or iron-rich root tabs under red clusters makes the difference between brick-red fanwort and pale pink stems that melt under moderate light.
Root tabs do not replace liquid dosing for Cabomba. They supplement it. Even in pure aquasoil, most high-tech planted tanks still run liquid fertilizers because stem plants consume nutrients faster than soil release alone can supply during peak growth.
Capping aquasoil with sand: risks for stem plants
A common planted-tank question is whether to cap active aquasoil with a sand cosmetic layer. For Cabomba specifically, a thick sand cap creates problems that outweigh the aesthetic benefit.
Aquasoil releases nutrients through water exchange at the substrate surface. A fine sand cap - especially 1 inch or deeper - slows that exchange significantly. Aquascaping experiments with dyed water penetration show fine sand caps can block nutrient replenishment from the water column into the soil below, exhausting the aquasoil’s usable nutrient reserve faster while preventing liquid fertilizers from reaching the soil effectively. Stem plants like Cabomba that bury nodes in the cap zone end up rooting in inert sand while the nutrients sit inaccessible below.
If you must cap aquasoil for design reasons, use a coarse cap material - small gravel or Eco-Complete-sized granules - that maintains gaps for water flow, and keep the cap thin. Better still, use aquasoil uncapped in the background planting zone where Cabomba lives, and restrict sand to foreground areas with no rooted stems. Mixed-substrate layouts are normal in professional aquascapes precisely because stem plants and cosmetic sand caps compete for the same real estate.
Floating first, planting later: a proven establishment method
Planting Cabomba directly into substrate on day one works when stems are healthy, light is adequate, and the substrate grips well. When it does not - stressed shipment, low light, sandy substrate, or repeated floating - the float-first method is more reliable than fighting the substrate.
Drop separated stems on the water surface or let them drift submerged near the light. Within 7–14 days, each stem develops fine white roots from nodes along the stem and at the base. Those stems, now metabolically active and rooted in open water, transplant into substrate with success rates dramatically higher than fresh-cut bundles.
After the floating period, strip lower leaves again, bury 2–3 nodes at the standard 1–2 inch depth, and skip anchors if the stems already have 1–2 inches of root tissue - the roots grip substrate on their own. This method is especially useful for red Cabomba in new tanks where aquasoil is still leaching ammonia and you want the plant established before the full bioload goes in.
Floating Cabomba is also a valid permanent growth style in breeding tanks, quarantine setups, and bare-bottom systems. The plant grows quickly as a floater, shades shy fish, and never deals with substrate anchoring at all. You trade the structured background-wall look for a surface-drift aesthetic - a fair swap in many functional tanks.
Common Cabomba substrate mistakes
Most Cabomba failures trace back to a short list of substrate and planting errors:
Using terrestrial potting soil or garden dirt. These products contain organic matter that decomposes underwater, cloud water, spike ammonia, and grow cyanobacteria. Aquarium aquasoil is baked, mineral-based, and designed for submerged use. Potting mix is not interchangeable.
Planting into coarse gravel without modification. Stems float, snap, or fail to root. Fix the substrate zone or float the plant instead.
Burying the growing tip or upper leaves. Buried apical tissue rots. Always leave the top leafy portion above the substrate line.
Leaving the rubber band on the bundle. The compressed section dies and spreads rot through the cluster.
Planting too shallow. Less than 1 inch of burial equals floating stems within 24 hours in most tanks.
Using tight metal clips on soft stems. Crease damage becomes melt within a week.
Ignoring species differences. Red Cabomba in plain sand without iron supplementation is a setup problem, not a “Cabomba is hard” problem.
Capping aquasoil with deep fine sand in the planting zone. Roots anchor in sterile cap material while nutrients sit locked below.
Vacuuming aggressively around new plantings. Disturbing the substrate before roots establish pulls stems free. Hold off on deep gravel vacuums near new Cabomba for two weeks.
Conclusion
The best substrate for Cabomba depends on which fanwort you are growing and what the rest of the tank already uses. Active aquasoil - ADA Amazonia, Fluval Stratum, or equivalent - is the strongest choice for red and purple Cabomba and for dedicated planted tanks where you want fast rooting and rich color. Inert sand grows green Cabomba well when you pair it with liquid fertilizer and root tabs under each cluster, plant stems at the full 2-inch depth, and use ceramic rings for the first two weeks. Fine gravel in the 1–4 mm range is the practical default for community tanks that already run inert substrate: it grips delicate stems, vacuums easily, and needs only water-column dosing for green varieties.
Regardless of substrate, the planting protocol is the same. Strip leaves from the bottom 2–3 inches, bury 2–3 nodes 1 to 2 inches deep, keep the growing tip above the surface, space stems 1–2 inches apart in clusters of five to seven, and give each planting two weeks before you move it or vacuum around it. Avoid coarse gravel, terrestrial potting soil, and tight metal clips on soft stems. If direct planting fails, float stems until they grow roots, then replant - that single adjustment resolves more “Cabomba won’t grow” reports than any substrate upgrade.
Cabomba is not a plant that rewards vague “stick it in the gravel” advice. It rewards a fine-textured substrate, precise node burial, and patience while anchor roots form. Get those three right and fanwort stops being the melting mystery and becomes what it should be: a fast, feathery background plant that fills in a tank within weeks.
When to use this page vs other Cabomba guides
- Cabomba overview - Start here for whole-plant context before deep-diving this topic.
- Cabomba problems hub - Jump to symptom-specific fix guides when this care topic does not resolve the issue.
- Root Rot on Cabomba - Escalate here when soil adjustments are not enough.
- Mold on Soil on Cabomba - Escalate here when soil adjustments are not enough.