Anacharis (Egeria densa) Propagation: Stem Cuttings
Anacharis (Egeria densa) Propagation: Stem Cuttings and Fast Growth
Anacharis (Egeria densa) Propagation: Stem Cuttings and Fast Growth
Most aquarium plants demand something. A CO2 system. A nutrient-rich substrate. Liquid fertilizer dosed on a precise schedule. Anacharis is the plant you reach for when you want a green, oxygenating, fish-friendly background that does not ask for any of that. Cut a piece, drop it in, and within a week you have a new plant. That ease is the entire reason anacharis has been a hobby staple for decades and the reason a single bunch from a pet store can quietly turn into a forest.
Propagation is also where the plant’s reputation for being “the easiest plant ever” either pays off or falls apart. Some hobbyists cut and replant, watch the stems go transparent and mushy, and assume anacharis is delicate. Others float the cuttings, watch them explode with roots, and wonder why the buried ones failed. Both outcomes come from the same plant behaving the way it is biologically wired to behave. Once you understand the double nodes, the water-column feeding, and the difference between a stem that wants to float and a stem that has been shoved too deep into gravel, propagation stops being a gamble and becomes routine. The leaf anatomy underpins much of this fragility: Egeria densa leaves are only two cell layers thick, which is why the plant is the textbook specimen for cytoplasmic-streaming demonstrations in introductory botany, and why mishandled stems shed leaves so readily.
This guide walks through how to propagate anacharis (Egeria densa) from stem cuttings, what growth rate to actually expect, whether you need substrate or rooting hormone, and how to avoid the most common melt-and-die mistakes.
Why Anacharis Is One of the Easiest Aquarium Plants to Multiply
Anacharis is a fully aquatic stem plant that reproduces almost entirely through vegetative fragmentation. There is no seed to germinate, no rhizome to divide, and no runner to coax. The plant is essentially a long, leafy stem, and almost every section of that stem is biologically capable of becoming a new plant. Cut a piece off, give it light and clean water, and it will grow. That is the whole trick. The reproductive pattern is the species’ main dispersal strategy: the Washington State Noxious Weed Control Board written findings note that Egeria densa has spread to at least 27 countries through the aquarium and water-garden trade, with vegetative fragmentation driving its establishment in new waters.
Tropica’s plant profile describes Egeria densa as a cosmopolitan beginner plant whose rapid growth “helps create a balance in the aquarium from the start,” with stems reaching 40-100 cm at maturity. The Flowgrow Aquatic Plant Database classifies its growth as “very fast” and its propagation method as “fragmentation, cuttings.” Multiple aquarium hobby references - Canton Aquatics, AquariumCareBasics, Splashy Fish, and Aqua-Fish.net - all converge on the same conclusion: cut healthy stems into 4-6 inch sections, strip the bottom leaves, and either plant them or float them.
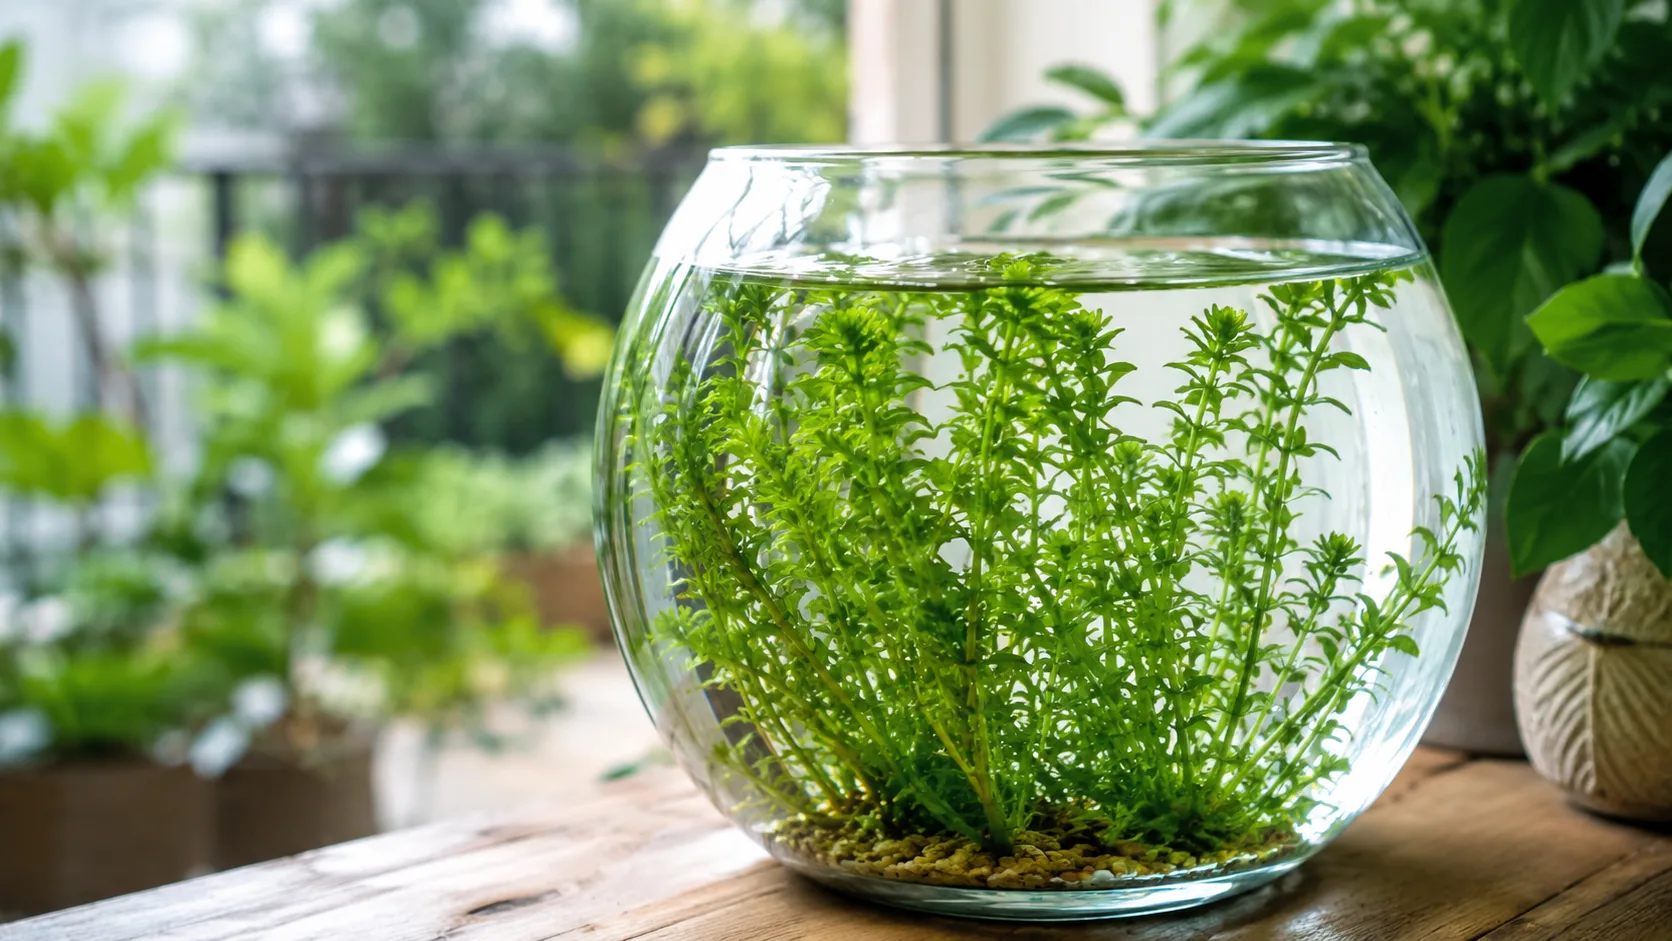
What makes this easy in practice is that anacharis does not need a fully cycled tank, high light, or even substrate to root. It is a column feeder, meaning it absorbs the bulk of its nutrients directly from the water through its leaves and stems. Its thin white roots are mostly anchors. Drop a cutting into a glass of dechlorinated water on a windowsill and it will grow roots within days. Put one in a fully stocked tropical community tank and it will be a self-sustaining background plant within a month.
There are limits, of course. Anacharis is a cool-water plant, struggles in tanks above 28 °C (82 °F), and is sensitive to liquid carbon products like glutaraldehyde. It also becomes a serious invasive species if released outdoors in the wrong region. None of those caveats change the fact that, for a reader who wants to multiply an existing plant, this is about as close to “free plants” as the freshwater hobby gets.
How Anacharis Actually Grows: Nodes, Whorls, and Double Nodes
Understanding propagation starts with understanding the stem. A healthy anacharis stem is a chain of repeating segments. Each segment consists of a node - the small joint where leaves emerge - and an internode - the smooth section of stem between two nodes. Leaves grow in whorls of four to six (occasionally up to eight) at each node, giving the plant its bottlebrush appearance.
Most nodes can produce leaves and, under the right conditions, a small number of adventitious roots. But not all nodes are equal. Brazilian waterweed has specialized regions called double nodes - two nodes separated by a shortened internode, spaced roughly every 6 to 12 whorls along a mature stem. The Montana Field Guide on Egeria densa confirms that only fragments containing at least one double node reliably develop into new plants and that adventitious roots and lateral branches grow primarily from these specialized nodes.
The practical takeaway is that not every 2-inch scrap of stem will root. A 4-6 inch cutting almost always contains a double node somewhere in its length, which is why the standard propagation length is what it is. If you cut very short fragments (under ~3 inches) or cut between the wrong nodes, the cutting can survive for a while, look fine, and then slowly decline because it has no meristematic tissue capable of producing true roots and new shoots.
Side shoots develop from the same nodes. Once a cutting establishes itself, you will see small lateral branches form at the whorls, especially near the top of the stem. This is the basis of the bushy look most aquascapers want, and it is also the basis of the cut-and-replant cycle that turns a single bunch into dozens of plants over a few months.
The Stem-Cutting Method: A Step-by-Step Walkthrough
For most hobbyists, propagation means cutting a piece off a healthy parent plant and replanting it. The technique is forgiving, but doing it well is the difference between a stem that roots in a week and a stem that melts.
Choosing a Healthy Parent Stem
Start with a stem that is bright green, has dense leaf whorls, and shows visible new growth at the tip. Avoid stems that are pale, yellowing at the base, or covered in algae - those signal a stressed parent plant, and stressed cuttings tend to fail.
Length is the next filter. The parent stem should be at least 8-10 inches long so you can take a 4-6 inch cutting from the top while leaving a healthy stub behind in the substrate. The top of a stem is always the most vigorous section because that is where the apical meristem (the actively growing tip) is producing new cells. Cuttings taken from the middle or base of a long stem can work, but they root more slowly and are more likely to shed their lower leaves in protest.
If the parent plant is one you just bought, remove the rubber band at the base, separate the stems, and inspect each one for cracked or crushed sections from shipping. Trim off any damaged portion. The Tropica profile specifically recommends removing the anchor and splitting the bunch into individual plants before planting, exactly because bunched stems trap gas and rot.
Making a Clean Cut Below a Node
Use a sharp pair of aquarium scissors, a razor blade, or plant-specific pruners. Make a clean, straight cut just below a node - the joint where leaves meet stem. A clean cut minimizes cell damage and reduces the risk of the stem rotting back from a ragged edge. Avoid crushing the stem with dull scissors; crushed tissue at the cut end is one of the most common reasons anacharis cuttings “melt” from the bottom up.
A 45-degree angle cut is sometimes recommended for terrestrial cuttings, but it does not matter for anacharis. The plant roots from nodes along the stem, not from the cut end, so a straight cut just below a node is the standard. The cut end will eventually seal on its own.
Cuttings shorter than 4 inches often struggle to establish, while cuttings longer than 8 inches can be floppy, hard to plant, and prone to breaking when handled. The sweet spot that almost every aquarium guide converges on is 4-6 inches, with each cutting containing at least 3-4 leaf whorls.
Stripping the Lower Leaves Before Planting
Once the cutting is off, strip the leaves from the bottom 1-2 inches of the stem. Pinch them off with your fingers or snip them with scissors. This step is non-negotiable. Any leaf buried in substrate or trapped under a plant weight will decompose, and the rot can travel up the stem and kill the whole cutting.
Tropica’s profile specifies removing leaves from the lowest 5 cm (about 2 inches) of the stem for exactly this reason. Multiple hobby references echo the same range. The bare lower section is also where new white adventitious roots will emerge over the next several days, and exposing the stem there makes it easier for those roots to find substrate or water flow.
Burying the Cutting in the Substrate
Push the bare lower 1-2 inches of the cutting gently into the substrate. Fine gravel or sand works best. Coarse or sharp substrates can damage the tender stem and create entry points for rot. Plant each stem individually, with about 1-3 inches of space between stems so light can reach the lower leaves and water can circulate.
If the cutting wants to float back up - a common problem with newly planted anacharis - use a plant weight, a small piece of driftwood, or simply replant it a little deeper. Once roots form, the plant will anchor itself and stop bobbing to the surface.
Roots usually appear within 5-10 days under typical conditions. New leaf growth at the tip is the most reliable sign that the cutting has successfully transitioned from “surviving” to “growing.”
Floating Cuttings: The Lower-Effort Alternative
If burying stems feels fiddly, or if you are worried about melting, the simplest method is to do nothing at all. Just float the cuttings.
Floating anacharis often grows faster than planted anacharis, and the reason is straightforward: the plant is closer to the light source and has direct access to atmospheric CO2 dissolved at the water surface. AquariumCareBasics, Aqua-Marine Power, and Canton Aquatics all note that floating stems typically outpace planted stems in the same tank.
The technique is trivial. Strip the bottom leaves (you can skip this for purely floating stems, but it helps if you eventually want to plant them), drop the cutting on the water surface, and leave it alone. Within a few days you will see fine white roots emerging from the nodes along the submerged portion of the stem. Those roots do not need to find substrate; they will dangle freely in the water column, where the plant absorbs the bulk of its nutrients anyway.
This is also the preferred recovery method for stems that have started to melt after being planted. Pull the melting cutting out, trim off the mushy portion, and float the healthy top. Within a week or two it usually recovers fully, after which you can replant it if you want a structured background.
The trade-off is aesthetic. Floating anacharis tangles easily, shades anything below it, and looks messy in a carefully aquascaped tank. Many hobbyists use floating as a propagation and grow-out step, then plant the rooted cuttings once they are vigorous.
Planting Depth, Spacing, and Substrate Choices
Anacharis is famously unfussy about substrate because it does not feed from the substrate. Its roots are mostly anchors, not nutrient uptake organs. The plant pulls the majority of its carbon, nitrogen, phosphorus, and micronutrients from the water through its leaves and stems. This is why it grows perfectly well in a bare-bottom hospital tank or quarantine setup with no substrate at all.
That said, if you are planting, the conventions are:
- Planting depth: Bury the bottom 1-2 inches of the stem, or about 2-3 cm. Going deeper than that buries leaves, traps gas, and encourages rot. Going shallower invites the stem to float up before roots can form.
- Spacing: Space stems 1-3 inches apart. Tightly packed bunches shade their own lower leaves, which then yellow and shed, leaving bare woody stems at the base. Looser spacing keeps the lower leaves photosynthesizing and produces a fuller-looking plant over time.
- Substrate type: Fine gravel, sand, or inert aquasoil all work. Coarse or sharp gravel can damage the stem. Nutrient-rich substrates are not required but do not hurt. Anacharis will perform identically in plain pool filter sand as it will in a $40 bag of premium aquasoil, because the plant is not reading the substrate.
If the substrate is unusually deep (more than 3 inches), be cautious. Burying anacharis in deep substrate can suffocate the lower nodes, especially in low-flow tanks where gas exchange is poor.
Rooting Hormone, Fertilizer, and CO2: What’s Necessary and What Isn’t
One of the most common questions new hobbyists ask is whether anacharis propagation requires rooting hormone. The short answer is no. Aquatic stem plants root readily from their nodes without any hormone treatment. Rooting hormone products (typically IBA or NAA-based powders and gels) are formulated for terrestrial cuttings and are unnecessary for fully aquatic plants like anacharis, hornwort, or cabomba.
Fertilizer is similarly optional but useful. Anacharis is a heavy nitrate and phosphate consumer, which is one of the reasons it is so effective at competing with algae. In a lightly stocked tank, the plant can run out of available nitrogen and stall. A comprehensive liquid fertilizer dosed once or twice a week is enough to keep growth vigorous. Macro fertilizers (nitrogen, phosphorus, potassium) are usually more relevant than micros (iron, trace elements) for anacharis, because the plant is a fast biomass builder.
CO2 is the one input that genuinely transforms growth. Anacharis does not require CO2 injection, and it grows well without it. But adding CO2 takes growth from “fast” to “very fast.” Under moderate to high light with CO2, anacharis can grow several inches per week and develop noticeably thicker stems. Without CO2, expect roughly half that pace. If you are running a high-tech planted tank, anacharis is one of the few stem plants that will reward CO2 injection noticeably. If you are running a low-tech tank, skip the CO2 and the plant will still be one of the fastest growers you own.
A word of caution: avoid liquid carbon products that contain glutaraldehyde (API CO2 Booster, Seachem Excel, and similar). These products are widely used to control algae and provide a carbon source for plants, but anacharis is unusually sensitive to glutaraldehyde. Many hobbyists report that anacharis planted shortly after a glutaraldehyde dose melts dramatically. If you use these products, dose them sparingly or keep them away from anacharis entirely.
Growth Rate Expectations: How Fast Is “Fast” for Anacharis?
The honest answer is that “fast” depends on your tank. Anacharis growth rate numbers from credible sources range from roughly 0.5 inches per day in ideal outdoor conditions to 2-4 inches per week in home aquariums. Let’s break that down.
Low-Tech Tanks Without CO2
In a typical low-tech community tank - moderate light, no CO2 injection, basic liquid fertilizer, water in the 22-25 °C range - anacharis typically grows 1-3 inches per week. The Aquatics.org BMP chapter on Egeria cites 0.5 inches per day as a typical outdoor growth rate, which translates to roughly 3-4 inches per week in warm seasons. In a dimmer, cooler, unfertilized setup, growth may slow to 1 inch per week or less.
What “growth” means here is elongation of the leading tip plus the development of side shoots. A stem that arrived at 6 inches can realistically reach 12-18 inches within a month in a healthy low-tech tank.
High-Tech Tanks With CO2 and Strong Light
Add CO2 injection, strong lighting (50+ PAR at the substrate), and a comprehensive fertilization routine, and anacharis growth can exceed 4 inches per week. Some hobbyists report 6-inch weekly growth spurts in peak conditions. Stems become noticeably thicker, leaf whorls tighter, and side shoot development more frequent.
These numbers are useful for planning, not for chasing. Most hobbyists do not need anacharis to grow at its absolute maximum; they need it to grow steadily and look healthy. The right growth rate for you is the one that keeps the plant filling in without constant trimming.
A seasonal note: anacharis is a cool-water plant. Growth slows significantly above 28 °C (82 °F) and below 10 °C (50 °F). In an unheated indoor tank in winter, it may stall entirely and resume growth in spring. In a heated tropical tank at 26-28 °C, it grows year-round but slightly slower than in spring and fall.
Side Shoots, Branching, and How Trimming Encourages Bushier Growth
A single anacharis stem naturally wants to grow tall and produce one or two side shoots near the top. If left alone, it eventually reaches the surface, sprawls, and shades everything below. That is not a failure - it is the plant being a stem plant.
The way to get a thick, bushy background is to interrupt that pattern with regular trimming. Cut the top 4-6 inches off the stem just above a node, replant the cutting, and the original stem will produce one or more new side shoots from the nodes below the cut. Repeat this cycle every few weeks, and what started as a single stem becomes a cluster of four, then eight, then a wall of green.
This is the same principle that drives bamboo, pothos, and most other stem-style plants. The apical meristem at the tip produces a hormone (auxin) that suppresses side shoots lower down. Remove the tip, and the lower nodes wake up and start branching. Anacharis responds to this trick reliably and quickly - usually within a week of being topped.
The cuttings you remove during trimming are not waste. They are your next round of new plants. A single healthy stem that gets trimmed every 3-4 weeks can realistically produce 4-6 new plantable cuttings per month. Over six months, a starting bunch of 8-10 stems can become 50-100 stems without buying a single new plant.
Common Mistakes and Troubleshooting New Cuttings
Anacharis is forgiving, but a few specific mistakes cause most propagation failures:
- Burying leaves in the substrate. This is the single most common cause of melting. Always strip the bottom 1-2 inches of leaves before planting. Any leaf buried under gravel or sand will rot, and that rot will travel up the stem.
- Planting the cutting upside down. Anacharis stems are not symmetrical - the growing tip is visibly different from the cut base. Planting a cutting upside down will not kill it immediately, but it will delay rooting and can cause the original tip to die back.
- Using liquid carbon near anacharis. Glutaraldehyde-based products cause dramatic melt in anacharis within days. If you use them, dose on the opposite side of the tank or skip them around anacharis.
- Overheating the tank. Anacharis struggles above 28 °C (82 °F) long-term. In tropical tanks kept at 30 °C or higher, the plant will slowly decline regardless of how it is propagated.
- Planting in deep substrate. Burying more than 2-3 inches of stem suffocates the lower nodes and invites rot. Keep planting depth shallow.
- Using algae-covered parent stems. If the parent plant is already struggling with algae, the cuttings will inherit that stress. Trim healthy green sections and discard anything with significant algae coverage.
- Expecting immediate growth. A newly planted cutting will often pause growth for several days while it transitions from “cutting” to “rooted plant.” Patience is part of the process.
If a cutting does start to melt, pull it out, trim off the mushy section, and float the healthy top. Most melt episodes are recoverable if the upper portion of the stem still has green leaves and intact nodes.
When to Trim, Replant, and Replace Old Stems
Anacharis does not live forever as a single stem. After several rounds of trimming and regrowth, the lower portions of a stem become woody, leafless, and unattractive. The standard practice is to retire old stems and replace them with fresh cuttings.
The typical cycle looks like this:
- Plant a bunch of 4-6 inch cuttings.
- Let them grow 6-8 inches of new length.
- Cut the top 4-6 inches off each stem.
- Replant the tops as new cuttings.
- Repeat every 3-4 weeks.
- After 2-3 rounds, the original lower stems will be bare at the base. Uproot them, discard, and replant fresh cuttings in their place.
This rotation keeps the display looking fresh and prevents the back wall of the tank from becoming a tangle of woody stems. It also keeps the plant’s growth rate high, because young stem tips grow faster than old, hardened lower sections.
Some hobbyists run a dedicated propagation tank - a bare-bottom, heavily lit, lightly stocked setup used purely as a grow-out space for new cuttings. This is a good approach if you want to mass-produce anacharis for multiple tanks, for trade with other hobbyists, or to keep a continuous supply ready for when the display tank needs a refresh.
Pond and Outdoor Propagation: A Quick Note
Anacharis is widely used in outdoor ponds, water gardens, and even tub water features. The same stem-cutting principles apply, with two extra considerations.
First, the growth rate outdoors is typically faster than indoors because of stronger light, more atmospheric CO2 exchange at the surface, and larger water volumes. A 4-6 inch cutting in a sunny pond in late spring can become a 24-inch stem within a month. Plan for aggressive trimming.
Second, anacharis is a federally listed noxious weed or restricted invasive species in several regions, including parts of the United States, Australia, and New Zealand. Releasing pond trimmings into natural waterways is illegal in many jurisdictions and ecologically harmful everywhere it is not native. Treat outdoor anacharis trimmings the way you would treat any other potentially invasive plant: bag them, send them to landfill, or compost them in a closed system that does not drain to natural water.
Responsible Disposal and Invasive-Plant Warnings
This is the part of anacharis care that most guides bury at the bottom, and it is the part that matters most if you keep the plant outdoors or live in a region where it is invasive.
Egeria densa is native to South America - primarily Brazil, Uruguay, and Argentina - but it has naturalized in freshwater systems across at least five continents. It forms dense submerged canopies that block light, raise surface water temperature, reduce dissolved oxygen, and crowd out native vegetation. State and federal agencies in the U.S. (including the Washington State Noxious Weed Control Board, which lists it as a Class B noxious weed on the state quarantine list), New Zealand’s biosecurity authorities, and Australian state agencies all list it as an invasive species of concern.
For indoor hobbyists, this is not a daily concern. Cuttings that go into the trash stay in the trash. But the moment anacharis moves outdoors - into a pond, a barrel, or a water feature that overflows into a storm drain - the disposal question becomes serious. Never compost anacharis in an open system. Never dump pond trimmings into a stream, lake, or storm drain. Bag the trimmings, freeze them for 48 hours to kill any viable fragments, and dispose of them in household waste.
Some states and countries restrict the sale or transport of anacharis. Check your local regulations before purchasing the plant, sharing cuttings with other hobbyists, or moving plants between water bodies.
Conclusion
Anacharis propagation is one of those rare aquarium tasks where the simplest technique is also the correct one. Cut a healthy 4-6 inch section, strip the bottom leaves, plant it or float it, and wait. No rooting hormone, no special substrate, and no CO2 system is required to get a new plant established. Light, clean water, and stable temperature do almost all of the work.
The biology is what makes the technique reliable. Anacharis reproduces through fragmentation, and its stems contain specialized double nodes every 6-12 whorls that are capable of producing both roots and side shoots. As long as your cutting contains at least one of those double nodes - and any 4-6 inch section from a healthy parent almost always does - you have a new plant in the making.
Once you understand the float-first option, the planting depth limits, the temperature ceiling, and the glutaraldehyde sensitivity, propagation becomes almost mechanical. Trim, replant, repeat. Within a few months, a single bunch can become a wall of green that supplies oxygen, absorbs nitrate, shelters fry, and never needs to be bought twice. The only real responsibility is to keep that growth contained: trim regularly, dispose of cuttings thoughtfully, and never release anacharis into natural waterways where it does not belong.
When to use this page vs other Anacharis / Elodea guides
- Anacharis / Elodea overview - Start here for whole-plant context before deep-diving this topic.
- Anacharis / Elodea problems hub - Jump to symptom-specific fix guides when this care topic does not resolve the issue.
- Transplant Shock on Anacharis / Elodea - Escalate here when propagation adjustments are not enough.
- Stem Rot on Anacharis / Elodea - Escalate here when propagation adjustments are not enough.