ZZ Plant Soil Mix: Perlite, Drainage & Rhizome Rot
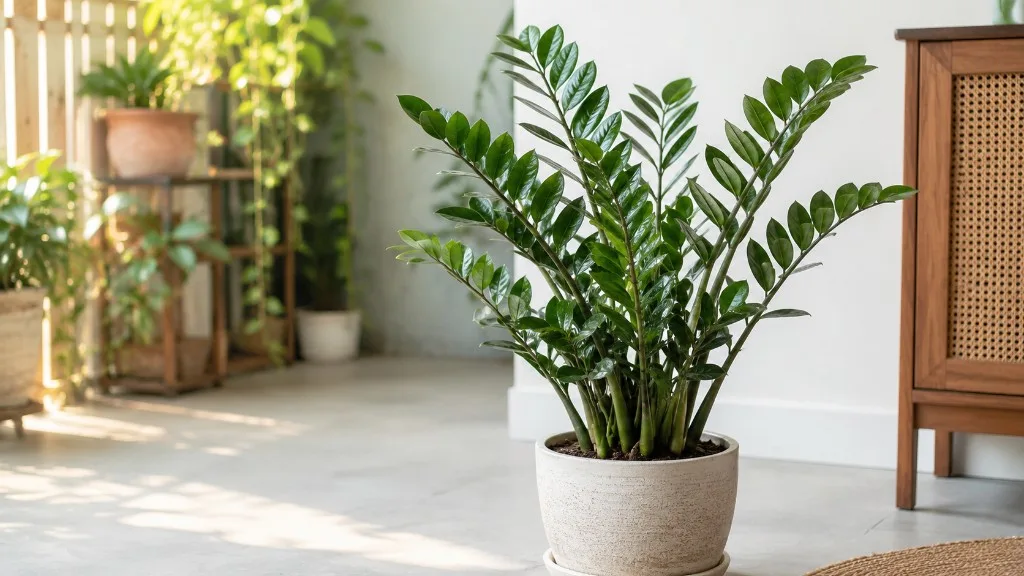
ZZ Plant Soil Mix: Perlite, Drainage & Rhizome Rot Prevention
ZZ Plant Soil Mix: Perlite, Drainage & Rhizome Rot Prevention
A ZZ plant that looks bulletproof on the surface can collapse from the bottom up when the soil stays wet too long. Zamioculcas zamiifolia stores water in thick underground rhizomes, tolerates drought for weeks, and asks almost nothing from you-except a root zone that drains quickly and breathes. The soil is not a background detail. It is the difference between a plant that survives office fluorescent light for years and one that yellows, softens, and dies after a few generous waterings in the wrong mix.
This guide covers what ZZ plants need from soil, why heavy moisture-retentive potting mix is the most common killer, how to build a perlite-rich blend that protects rhizomes, which pre-made bags work without amendment, and how to test whether your current setup is actually draining the way you think it is.
What ZZ plants actually need from soil
The best ZZ plant soil mix does three jobs in order: it drains excess water within minutes, it holds enough structure to stay airy between waterings, and it supplies a modest nutrient base without staying soggy. ZZ plants are slow growers with low fertilizer demand, so drainage and oxygen matter far more than rich organic matter. If water moves through the pot freely and the top few inches dry completely before you water again, the plant usually handles everything else you throw at it-low light, irregular care, dry winter air.
Fast drainage means that after a thorough watering, excess water exits through the drainage hole rather than pooling around the rhizomes. A useful home benchmark: pour a cup of water through two cups of dry mix in a strainer or nursery pot. Well-amended ZZ mix should pass most of that water through in under 15 to 30 seconds. If water sits on the surface or drips slowly for a minute or more, the mix is too fine or too peat-heavy for long-term rhizome health.
Stable aeration means the mix resists compaction. ZZ roots and rhizomes need oxygen between waterings. A substrate that collapses into a dense, peat-heavy mat after six months of watering loses the air pockets that keep rhizome tissue healthy. That is why perlite, pumice, bark chunks, and coarse sand appear in every serious ZZ soil recipe-they maintain pore space even when the organic fraction breaks down.
A modest nutrient base is enough. ZZ plants evolved in lean, fast-draining soils and do not need compost-heavy mixes. Too much organic matter holds moisture longer than the rhizomes can tolerate and pushes soft, leggy growth that is more vulnerable to rot after a watering mistake.
The African savanna context behind the mix
ZZ plants are native to open woodland and grassland regions of eastern Africa, from Kenya south to South Africa, where seasonal rainfall is followed by extended dry periods. Clemson University’s Home & Garden Information Center notes that wild plants grow in arid savanna conditions with bulbous rhizomes that store water and survive drought. The substrate in that habitat is not deep, spongy peat. It is sandy, rocky, and fast-draining, with organic matter concentrated near the surface and plenty of air in the root zone.
Replicating that logic indoors does not mean planting your ZZ in pure sand. It means choosing a mix where mineral and chunky components make up a large share of the volume, water moves through quickly, and the rhizomes spend most of their time in aerated-not saturated-conditions. Standard indoor potting soil, engineered for moisture-loving tropicals like pothos and peace lilies, pushes the environment in the opposite direction.
Rhizomes, water storage, and why drainage is non-negotiable
The potato-like rhizomes beneath a ZZ plant are water tanks. They carry the plant through weeks without irrigation, which is why ZZ plants are marketed as nearly indestructible. That same adaptation makes them vulnerable in wet soil: rhizome tissue that stores water internally does not tolerate external saturation. When the surrounding mix stays damp for days, oxygen around the rhizome drops, cell walls weaken, and opportunistic pathogens invade.
Rhizomes also sit close to the soil surface and send up leaf stalks directly from those storage organs. Unlike plants with a deep central taproot, a ZZ plant’s most critical tissue is physically near the zone that stays wet longest in a poorly drained pot-the lower third of the container and the interface where fine potting mix packs against the rhizome skin. A well-draining, perlite-amended mix keeps that boundary dry and ventilated. Heavy moisture-retentive soil keeps it damp, which is the direct path to rhizome rot.
Why heavy moisture-retentive soil fails ZZ plants
Standard all-purpose potting soil is the wrong default for ZZ plants if you use it unamended. Most bagged indoor mixes are built around sphagnum peat moss, composted forest products, and fine organic particles that act like sponges. They hold water for days, which is exactly what a fern or calathea wants and exactly what a drought-adapted rhizome plant cannot survive long term.
The failure pattern is predictable. A new ZZ plant arrives in a decent nursery mix and looks fine for months. As the plant is watered on a typical houseplant schedule-whenever the top inch feels slightly dry, or on a fixed weekly calendar-the peat-based mix in the root zone never fully dries. The rhizomes sit in persistently moist conditions. Leaves may stay green for a while because the plant is drawing on internal water reserves even as the underground tissue deteriorates. Then stems yellow, feel soft at the base, or collapse without obvious pest damage. By then, the soil has usually been too wet for far longer than the visible symptoms suggest.
Moisture-control and water-retaining potting blends are worse still. They are formulated with polymers and extra coir to keep tropical plants from drying out in hot greenhouses. For a ZZ plant, they extend wet time around the rhizomes and increase rot risk. Anything labeled for African violets, tropical foliage, or “moisture control” should not go into a ZZ pot without heavy amendment-or better, not at all.
What rhizome rot looks like before the leaves tell you
Rhizome rot is not always dramatic at first. Catching it early means inspecting the soil system, not only the glossy leaves.
Early signals: The mix smells sour, musty, or swampy near the surface. A chopstick pushed into the lower half of the pot comes out with dark, clinging wet soil rather than crumbly, earthy material. New growth slows even though light has not changed. Individual leaflets yellow one stem at a time while the rest of the plant looks normal.
Advanced signals: Stems feel soft or hollow at the soil line. Rhizomes exposed during ZZ Plant repotting guide are brown, mushy, or slimy instead of firm and pale tan or white. The plant collapses suddenly after a single heavy watering because the storage tissue can no longer support the shoots.
Rot in ZZ plants is usually a water + substrate problem, not a mystery disease. Soil-borne oomycetes such as Pythium and Phytophthora, along with fungi like Rhizoctonia, exist at low levels in most potting mixes. They become lethal when the mix stays wet long enough for populations to explode. Prevention is structural: fast drainage, full dry-back between waterings, and a pot sized to the root mass.
The core components of a good ZZ plant soil mix
Every reliable ZZ mix combines a small organic base, a large share of mineral aerators, and-ideally-chunky material that keeps air around the rhizomes themselves. Think in roles, not brand names.
Organic base (30–50% by volume): Standard indoor potting soil, coco coir–based mix, or a pre-made cactus blend. This supplies structure and a little nutrient content. Keep it to half or less of the total volume; the ZZ does not need more.
Mineral aerators (30–50%): Perlite, pumice, or coarse horticultural sand. These lighten the mix, accelerate drainage, and resist compaction.
Chunky amendments (10–25%): Orchid bark, pine bark fines, or horticultural charcoal. These create large voids so fine, damp soil cannot pack against rhizome surfaces.
Perlite, pumice, and coarse sand
Perlite is the most accessible aerator for most home growers. The white volcanic-glass granules create air pockets, improve drainage, and are cheap and widely stocked. Perlite does float toward the surface over time and slowly crushes into finer particles after a few years, which is one reason to refresh old mix on a two- to three-year cycle.
Pumice is heavier, more porous, and more durable than perlite. It stays in place when you water, holds a little moisture inside its pores without feeling wet on the surface, and maintains structure longer. It costs more and is harder to find in small garden centers, but it is an excellent upgrade for growers in humid homes where perlite-floating mixes dry slowly.
Coarse sand-horticultural sand or washed builder’s sand with visible grain, not play sand or beach sand-adds weight and mimics the sandy savanna soils ZZ plants evolved in. Clemson HGIC includes sand in its recommended blend. Fine sand is dangerous here: it fills gaps between peat particles and can reduce drainage, turning the mix concrete-like when it dries.
Orchid bark, charcoal, and chunk for rhizome air gaps
Fine perlite alone does not always protect large rhizomes. Chunky orchid bark or pine bark fines (roughly quarter-inch pieces) create macro-pores-visible air gaps where no fine soil contacts the rhizome wall. That matters because rhizome rot often starts where a smooth, wet peat matrix presses against storage tissue for days after watering.
Horticultural charcoal is optional but useful in closed indoor pots. It absorbs impurities, reduces sour smells in aging mix, and adds non-compacting structure. A handful per quart of finished mix is enough; it is not a substitute for perlite.
Because ZZ plants are aroids (relatives of philodendrons and monsteras), chunky aroid-style mixes with bark, perlite, and a little coir also work well. The priority is the same: fast dry-down and rhizome-level aeration, not moisture retention.
Perlite vs pumice for ZZ plant mixes
Both perlite and pumice work. Neither is wrong. The choice depends on your budget, local availability, and how fast your home dries pots.
| Property | Perlite | Pumice |
|---|---|---|
| Weight | Very light; may float when watered | Heavier; stays distributed |
| Drainage | Excellent | Excellent |
| Internal moisture | Low surface retention | Holds some water in pores without feeling soggy |
| Cost | Low; widely available | Higher; specialty or online |
| Longevity | Breaks down over a few years | Stable for many years |
| Best for | Beginners, budget mixes, most indoor setups | Humid homes, long repot intervals, heavy-handed waterers |
If you water on instinct and your pots dry slowly in winter, pumice is worth the upgrade. If you want the simplest path and your home has average humidity, perlite at 25–50% of the total mix volume is the standard recommendation across extension and commercial care guides.
The proven DIY soil recipes that work
Three recipes cover most indoor situations. All assume a pot with a drainage hole and watering only after the mix has dried completely through the upper half of the pot.
| Recipe | Components | Best for |
|---|---|---|
| Clemson extension blend | 50% peat or coir-based potting soil, 25% perlite, 25% coarse sand | Balanced default; matches HGIC guidance |
| 50-50 shortcut | 50% standard potting soil, 50% perlite or pumice | Fast setup; strong drainage in average homes |
| Chunky rhizome-safe mix | 50% cactus/succulent mix, 30% perlite or pumice, 20% orchid bark or charcoal | Humid homes; prior rot issues; large rhizomes |
To blend any recipe, measure by volume ( scoops or nursery pots), not weight. Mix in a bucket until perlite and bark are evenly distributed and the finished texture feels loose and crumbly.
Clemson’s 50-25-25 blend and the 50-50 shortcut
Clemson University’s HGIC recommends a coarse, well-draining mix of 50% peat moss or coir-based potting soil, 25% perlite, and 25% sand for indoor ZZ plants. That ratio is a strong default: half the volume still provides organic structure and modest nutrients, while the combined perlite and sand fraction guarantees fast water movement and resistance to compaction.
The 50-50 shortcut-half standard indoor potting soil and half perlite or pumice-is widely recommended by experienced growers when you want maximum insurance against rot, especially if you tend to water before the pot fully dries. It drains faster than the Clemson blend and is forgiving in low-light offices where soil stays wet longer because the plant uses water slowly. Trade-off: you may need to water slightly more often in hot, bright conditions, though ZZ plants still prefer deep dry periods over frequent light watering.
Avoid using regular potting soil alone. If that is all you have on hand, amend it before potting: at minimum, add one part perlite for every one part potting soil. Unamended peat-heavy mix in a low-light room is the most common soil-related cause of ZZ plant failure.
Scaling a batch for one pot
For a single 6-inch nursery pot (about 1.5 to 2 quarts of mix):
Clemson blend:
- 3 cups coir- or peat-based potting soil
- 1.5 cups perlite
- 1.5 cups coarse sand
50-50 shortcut:
- 3 cups potting soil
- 3 cups perlite or pumice
Chunky rhizome-safe mix:
- 3 cups cactus or succulent potting mix
- 2 cups perlite or pumice
- 1 cup orchid bark or a blend of bark and charcoal
Mix thoroughly, fill the pot, seat the plant so rhizomes sit just below the surface (never buried deeply), and wait several days after repotting before watering to let disturbed tissue settle. Water until it runs from the drainage hole, empty the saucer, and do not water again until the mix is fully dry several inches down.
Pre-made mixes worth using straight from the bag
You do not have to mix from scratch. A commercial cactus or succulent potting mix is the most practical off-the-shelf option for ZZ plants. These blends already contain perlite, sand, or pumice and drain far faster than all-purpose indoor soil.
Works well with little or no amendment: Hoffman Organic Cactus and Succulent Soil, Espoma Organic Cactus Mix, and similar bags where perlite or sand appears prominently in the ingredient list. In average indoor conditions, these are often sufficient straight from the bag.
Amend before use in humid or low-light rooms: Miracle-Gro Cactus, Palm & Citrus and other big-box cactus mixes that lead with peat or forest products. Add 30–50% extra perlite or pumice by volume before potting a ZZ plant. The amendment buys faster dry-down where the plant cannot use water quickly.
Premium gritty mixes: Products like Bonsai Jack gritty mix drain extremely fast and virtually eliminate compaction. They suit growers who have lost ZZ plants to rot before or who keep plants in humid bathrooms and basements. Expect to water slightly more often in bright light, though ZZ plants still prefer long dry intervals.
Read the bag label the same way every time: drainage materials (perlite, pumice, sand, bark) should dominate the first half of the ingredient list. If sphagnum peat moss or composted forest products lead and perlite is a footnote, plan to amend.
Pot choice, pH, and the drainage-layer myth
Soil and pot work as one system. The best perlite mix cannot compensate for a container that traps water.
Use a drainage hole. Non-negotiable for long-term ZZ care. Cachepots and decorative outer pots are fine only if the inner pot drains freely and you empty standing water after every watering.
Size the pot to the rhizome mass. Choose a container only 1 to 2 inches wider than the root ball. Oversized pots hold excess wet mix around rhizomes that are not yet large enough to use that water, extending dry-down time and rot risk. ZZ plants tolerate being slightly root-bound and prefer upgrading slowly.
Terra cotta vs plastic. Unglazed terra cotta wicks moisture through the walls and helps mix dry faster-useful in humid homes. Plastic and glazed ceramic hold moisture longer; pair them with a grittier 50-50 or chunky mix.
pH: ZZ plants tolerate typical houseplant range, roughly 6.0 to 7.0. Most peat- and coir-based mixes land there naturally. Do not chase exotic pH products; focus on drainage first. If leaf tips brown and white crust builds on the soil surface, flush the pot with plain water at the sink or refresh the mix at repot rather than stacking fertilizer.
The drainage-layer myth deserves a direct callout here because it still shows up in older care guides. Putting gravel, pebbles, or pot shards at the bottom of a pot does not improve drainage. Washington State University Extension horticulturist Linda Chalker-Scott summarized the research clearly: a coarse layer beneath finer soil creates a perched water table where saturated mix sits directly above the gravel line-exactly where ZZ rhizomes often sit. Water does not “jump” into the gravel; it follows capillary rules and stops at the texture change.
Effective drainage comes from well-amended mix throughout the entire pot and a hole at the bottom, not from a decorative stone layer. Skip the gravel. Spend that effort on perlite.
When to refresh or repot your ZZ plant’s soil
ZZ plants are slow growers and do not need annual repotting. Plan to refresh soil every two to three years, or sooner when you see clear root-zone problems.
Repot when: roots circle the pot heavily, the mix has compacted and water runs down the sides without soaking in, the soil smells sour, drainage has slowed noticeably, or you are recovering from rhizome rot and need to remove damaged tissue. Spring and early summer are ideal because the plant has months of active growth ahead, but a rot emergency trumps the calendar.
Do not repot on day one after bringing a plant home unless the mix is visibly failing or waterlogged. Quarantine new plants, learn how fast the current pot dries in your room, and repot only when you have a soil-related reason. Unnecessary repotting stacks stress on top of adjustment stress.
When repotting, shake off old compacted mix gently, trim mushy rhizome sections with a clean knife, let cuts air-dry for a few hours if tissue was damaged, and plant into fresh dry mix. Resume watering only after the plant has settled and the new mix is fully dry.
Reading your mix: drainage and squeeze tests
Two quick tests tell you more than guessing from the bag label.
Pour test: Place two cups of dry mix in a nursery pot or colander. Pour one cup of water through it. Well-amended ZZ mix should pass most of the water in under 30 seconds. Slow dripping means add perlite, pumice, or bark before potting a valuable plant.
Squeeze test: Moisten a handful of mix and squeeze firmly. When you open your hand, the mix should crumble apart, not hold a tight ball. A persistent clump signals too much peat and too little aerator-exactly the texture that keeps rhizomes wet.
Dry-down check in the pot: After a full watering, note how many days until a finger inserted two to three inches deep feels completely dry. In typical indoor conditions, that interval is often one to three weeks depending on light, pot material, and season. If the lower half still feels cool and damp while you are watering again on a weekly schedule, the mix-or the pot size-is too moisture-retentive for a ZZ plant.
Common soil mistakes that invite rhizome rot
Using unamended potting soil. The single most common error. Fix with 25–50% perlite minimum.
Choosing moisture-control blends. They extend wet time around rhizomes. Avoid for ZZ plants.
Oversized decorative pots. Extra volume of wet mix around small rhizomes is a rot trap.
No drainage hole. Water pools in the bottom third regardless of mix quality.
Gravel at the bottom. Creates a perched water table; does not help.
Fine sand or play sand. Compacts and worsens drainage.
Burying rhizomes too deep. Keep rhizomes near the surface in airy mix; deep burial in wet peat invites decay at the crown.
Watering on a calendar instead of dry soil. Even perfect mix fails if you water while the root zone is still damp. ZZ plants want the pot fully dry through much of the profile before the next soak-often only one to two times per month indoors, per Clemson HGIC guidance.
Repotting into wet mix after rot surgery. Plant into fresh, dry mix and wait before watering so wounded tissue is not immediately re-saturated.
Adjusting the mix for your home conditions
The right recipe is the one that dries at a speed matched to your light and humidity.
Low light / office fluorescent: Use the 50-50 shortcut or the chunky rhizome-safe mix. Lower light means slower water use; grittier mix compensates.
Humid home or bathroom: Push pumice over perlite and add 20% bark chunk. Consider terra cotta pots.
Hot, bright window: Clemson 50-25-25 or bagged cactus mix may be enough; monitor dry-down because faster growth uses water quicker.
Heavy-handed waterer: Prioritize pumice and bark chunk over peat-rich bases. A moisture meter read in the lower third of the pot can confirm dry-back before you water-aim for dry, not “slightly moist.”
Plant recovering from rot: Repot into the chunkiest mix you can maintain, smallest appropriate pot, and water sparingly until new firm growth appears.
Conclusion
The best ZZ plant soil mix is not a secret formula. It is a well-draining potting mix with plenty of perlite or pumice, optional bark or charcoal for rhizome-level air gaps, and a hard no on heavy moisture-retentive peat used straight from the bag. Zamioculcas zamiifolia stores its own water in rhizomes; your job is to keep the surrounding soil airy, fast-drying, and oxygenated so those rhizomes never sit in persistent damp.
Use Clemson’s 50% potting soil, 25% perlite, 25% sand as a balanced default, or the 50-50 perlite shortcut when you want maximum rot insurance. Bagged cactus mix works for most growers if you amend peat-heavy brands in humid rooms. Pair any mix with a drainage hole, a right-sized pot, and watering only after the soil dries completely. Run the pour test and squeeze test before repotting, refresh degrading mix every two to three years, and skip the gravel layer entirely.
Get the substrate right and the ZZ plant earns its reputation: slow, glossy, and tolerant of the kind of neglect that would destroy a thirstier houseplant. Get it wrong-heavy soil, frequent watering, nowhere for water to exit-and rhizome rot finishes the plant from the bottom up while the leaves still look fine. Soil is the prevention. Choose accordingly.
When to use this page vs other ZZ Plant guides
- ZZ Plant overview - Start here for whole-plant context before deep-diving this topic.
- ZZ Plant problems hub - Jump to symptom-specific fix guides when this care topic does not resolve the issue.
- Wrong Soil Mix on ZZ Plant - Escalate here when soil adjustments are not enough.
- Poor Drainage on ZZ Plant - Escalate here when soil adjustments are not enough.
- Root Rot on ZZ Plant - Escalate here when soil adjustments are not enough.