ZZ Plant Propagation: Leaf Cuttings & Division
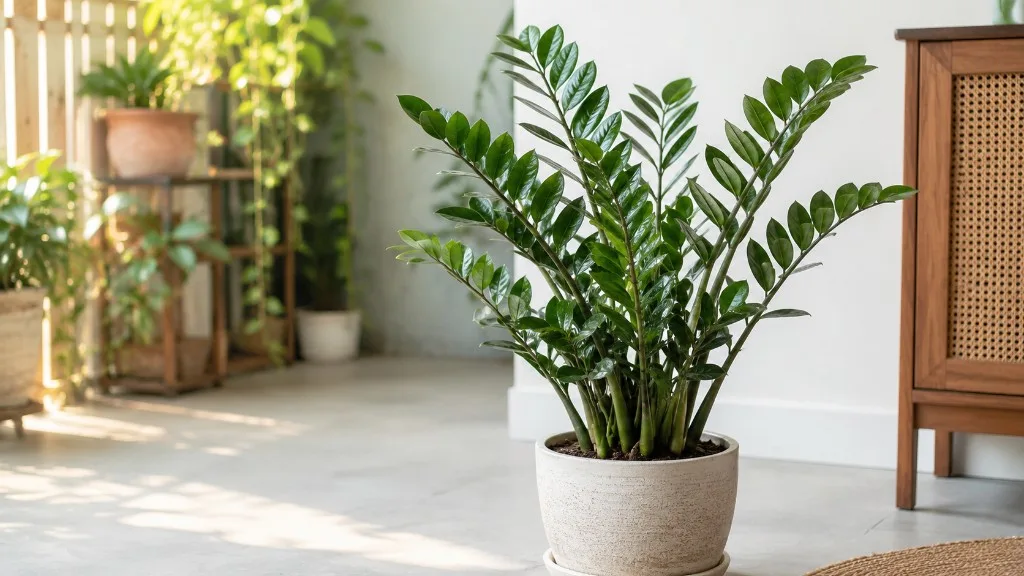
ZZ Plant Propagation: Leaf Cuttings & Division
ZZ Plant Propagation: Leaf Cuttings & Division
ZZ plant propagation is one of the most misunderstood projects in houseplant care because the plant looks indestructible in a pot but behaves like a slow-motion science experiment once you cut it apart. Zamioculcas zamiifolia - the ZZ plant, sometimes called aroid palm - stores water in thick underground rhizomes and can survive weeks of neglect on a desk. That same biology means new plants do not pop up in a fortnight. A leaflet may root in a month and still show no above-ground growth for half a year or longer. Understanding that rhythm before you start is the difference between a patient success and an abandoned jar of sour water on a windowsill.
The good news: propagation is straightforward. You do not need a greenhouse, misting cabinet, or rooting hormone to get results. You need clean material, a fast-draining setup, ZZ Plant light guide, warm stable temperatures, and the willingness to let the plant build a rhizome before demanding a shoot. This guide covers the three home methods - leaflet cuttings, stem cuttings, and rhizome division - with honest timelines, step-by-step technique, and troubleshooting for the failures that actually happen in real apartments.
Why ZZ Plant Propagation Demands Patience
ZZ plant is native to dry grassland and forest margins in Eastern Africa, where it survives seasonal drought by banking water in rhizomes and thick leaf petioles. The Missouri Botanical Garden describes it as a stemless evergreen that rises from rhizomes with pinnately compound leaves - botany shorthand for a plant that reboots from underground storage, not from a rush of top growth. When you propagate at home, you are asking a single leaflet or severed stem to recreate that storage system from scratch. That takes time.
Most social media propagation content is edited for speed. ZZ plant is the opposite. Ranking pages often list “four to eight weeks to root” without clarifying that roots are only the first chapter. The second chapter - rhizome enlargement - is invisible. The third chapter - a new petiole and leaflets - is what people photograph. Skipping the middle chapter is why so many growers throw out viable cuttings at month four, convinced nothing is happening.
The Rhizome-First Growth Cycle
A rhizome on ZZ plant is a tuber-like underground stem that functions like a battery: it holds moisture, starches, and the meristem tissue needed to push new shoots when conditions improve. Mature plants you buy at a nursery already have rhizomes sized to support multiple leaf stalks. A propagated leaflet starts with none.
The typical sequence on a leaflet cutting runs like this. First, the cut base calluses and forms initial roots or root-like anchors - small, often slow, sometimes visible only if you lift the cutting from water or brush soil away carefully. Second, the tissue at the base swells into a rhizome, a nub that may look like a tiny pale potato attached to the leaf. Third, and only after the rhizome has enough reserves, a new shoot emerges - a fresh petiole rising beside the original leaflet, which may still look unchanged above the soil line. Roots without rhizome enlargement are a partial win, not a finished plant. Rhizome without shoot is normal mid-process, not failure.
Stem cuttings - sections of the central stalk with several leaflets attached - follow the same biology but with more stored energy, so rhizome formation and shoot emergence generally happen sooner than on a lone leaflet. Rhizome division skips the entire build phase because you split an existing battery and replant it. That is why division feels instant while leaf cuttings test your calendar.
University of Florida IFAS Extension production guidance for commercial ZZ propagation notes that marketable plants from planted rhizomes still need eight to twelve months in ideal greenhouse conditions - 75–85°F (24–29°C), shaded light around 1,000–1,500 foot-candles, and consistently managed moisture. Home conditions are less controlled. Add months, not subtract them, when you are rooting on a kitchen counter in winter.
What Realistic Timelines Look Like at Home
Timelines vary with temperature, light, cultivar, and how wet the medium stays. These ranges reflect what experienced growers report in warm, bright homes - not worst-case winter shelves.
Leaflet cuttings: initial roots often appear in four to ten weeks; visible rhizome swelling commonly takes two to six months; the first new shoot frequently arrives between six and twelve months, and sometimes beyond a year. Documented home trials with bottom heat still landed near eight months from water start to first shoot.
Stem cuttings: roots often in three to eight weeks; rhizome formation in roughly one and a half to four months; first shoot often four to nine months, sometimes longer in cool rooms.
Rhizome division: you already have rhizomes at separation. New growth may pause one to three weeks while roots settle, then resume on a normal mature-plant schedule. This is the only method that delivers a credible plant within a season.
Raven ZZ (Zamioculcas zamiifolia ‘Raven’) and variegated forms are often slower and less predictable than standard green ZZ. Plan extra time and start more material if you are working with those cultivars.
Leaflet propagation also carries a lower per-piece success rate than division - many growers report roughly one viable plant per three to six leaflets started when conditions are merely good, not optimized. Starting a batch of six to ten leaflets is practical planning, not pessimism.
Choosing the Right Propagation Method
All three methods work. The right choice depends on what your parent plant offers, how fast you need results, and how much countertop real estate you will devote to jars and seed trays for the better part of a year.
Rhizome division wins when you have a mature multi-stem plant and want a guaranteed second pot now. Stem cuttings balance speed and output when you can spare a stalk segment without ruining the parent’s shape. Leaflet cuttings maximize multiplication from minimal parent damage - one arching stem can yield a dozen leaflets - but they are the slowest and least certain per piece.
Leaflet Cuttings for Maximum Multiplication
Leaflet cuttings use individual glossy leaflets - the paired ovals along each petiole - removed with their base intact where they attach to the rachis. Each leaflet carries enough living tissue to form its own rhizome. Unlike many houseplants where a leaf without a node is a dead end, ZZ leaflets can restart because the regenerative tissue sits at the leaflet base.
This method shines when you have a small plant you do not want to chop, when a few leaflets dropped during ZZ Plant repotting guide, or when you want many starters from one stem without dividing the root ball. The trade-off is time and attrition. You are running a portfolio strategy: start many, expect some to rot or stall, keep the winners.
Stem Cuttings for Faster Rhizome Formation
Stem cuttings use a section of the thick central stalk with two to six leaflets still attached. You lose more visual mass on the parent, but the cutting brings substantially more photosynthetic area and stored carbohydrates to the rooting party. Roots and rhizomes tend to form faster than on isolated leaflets, and the resulting starter looks more like a miniature plant sooner.
Take stem cuttings when the parent has multiple upright stalks and can spare one without looking scalped. Cut with sterilized shears, let the wound dry twelve to forty-eight hours, then root in soil or water using the same principles as leaflets. Stem cuttings are the sweet spot for growers who find leaflet timelines discouraging but do not yet have a rhizome mass worth dividing.
Rhizome Division for Instant Established Plants
Rhizome division separates the underground clusters that already feed existing shoots. Each division should include at least one healthy rhizome, attached roots, and one or more leaf stalks. NC State Extension lists division and leaf cutting as reliable propagation methods for ZZ plant. You are not waiting for a rhizome to appear - you are reallocating one that already exists.
Division pairs naturally with repotting, when you would disturb roots anyway. It also downsizes an overgrown specimen. Success rates exceed ninety percent when each section is healthy and potted in free-draining mix. The limitation is scale: you need a mature plant with multiple stems emerging from separate rhizome lumps. A single-stalk young ZZ is not a division candidate yet.
When to Propagate ZZ Plant
Timing is less about a magic calendar date than about metabolic momentum. ZZ plant propagates year-round indoors if warmth and light are stable, but active growth seasons compress timelines. Propagation during stress - fresh shipping, active root rot on ZZ Plant, pest outbreak, or the week after a harsh repot - stacks risk on already slow tissue.
Best Season and Temperature Window
Spring through early summer is the best window in most homes. Lengthening days and room temperatures in the 18–27°C (65–80°F) range support cell division at cut surfaces and rhizome enlargement underground. Horticulture specialists commonly recommend warm-season propagation for tropical houseplants for exactly this reason: the plant is already in forward gear.
If you propagate in winter, add time. Cooler soil slows everything. A leaflet that might root in six weeks in June may sit unchanged until March in a drafty room. Bottom heat helps: maintaining soil near 27°C (80°F) can shorten rooting phases by roughly one-third compared with fluctuating temperatures that dip below 21°C (70°F), which can double the wait for adequate rhizome development.
UF/IFAS Extension commercial guidance targets 75–85°F (24–29°C) for ZZ leaflet propagation in plug trays with 1,000 to 1,500 foot-candles of light. You do not need a greenhouse to approach that - a seedling heat mat under a small propagation tray, bright indirect light, and a stable room is enough to matter. Avoid baking cuttings above 32°C (90°F); excessive heat with wet medium can desiccate young tissue and invite rot.
Signs Your Parent Plant Is Ready
A healthy parent is the silent prerequisite. Before any cut, confirm firm upright stalks, even green leaflets without widespread yellowing, and no sour-smelling soil. Check for scale, mealybugs, and fungus gnats; pests transfer silently on cuttings. If the parent was overwatered recently, let the root zone recover before you remove tissue - stressed cells propagate poorly.
For division, readiness also means crowded rhizomes visible when you slide the plant partly out of the pot, or at least multiple stems emerging from the soil surface with two inches between them. For leaflets, any mature stalk with firm leaflets on the middle and lower sections supplies good material. Avoid the oldest, papery basal leaflets if greener mid-stem ones are available.
Wear gloves or wash hands after handling cut ZZ tissue. The plant contains calcium oxalate crystals; the ASPCA lists ZZ plant as toxic to pets if ingested, and sap can irritate skin on sensitive people. Propagation is not hazardous with basic hygiene, but it is worth respecting on a plant you will handle repeatedly over months.
How to Propagate ZZ Plant from Leaf Cuttings
Leaflet propagation is the method most home growers attempt first because it feels low-stakes: you are not sawing the plant in half, just plucking leaves. Low-stakes visually does not mean low-effort temporally. Set up the batch correctly once, then mostly leave it alone.
Gather sterilized pruning shears or a sharp knife, small pots or plug trays with drainage, clear jars if water-rooting, and a gritty propagation mix. Label batches with the start date - you will forget which month you planted them, and future you will need the record.
Taking Clean Leaflets From the Stem
Select healthy, fully expanded leaflets from the middle portion of a stalk. Grip the leaflet near its base and pull downward with a gentle twist until it separates, leaving the petiole base intact - the small knuckle where it joined the central rachis. You can also slice cleanly at that junction with sterilized scissors. The critical detail is including the base tissue; a torn leaflet missing its heel is weaker.
You do not need to debate exactly where along the petiole to cut for rhizome formation - ZZ regenerates from the leaflet base - but a clean wound heals faster than a ragged shred. After removal, lay leaflets on dry paper towel twelve to twenty-four hours so the base calluses. Skipping this step in humid homes increases rot in soil and slime in water.
Work in batches of six to ten leaflets if your goal is two or three finished plants. Single-leaflet experiments are fine for learning, but they are poor bets for filling a shelf.
Water Versus Soil for Leaf Propagation
Both media work. The choice is about visibility, maintenance, and your tolerance for transplant shock later.
Water propagation lets you watch rhizome formation - the most reassuring phase for impatient growers. Use a short jar or glass and suspend the leaflet so only the bottom few millimeters of the callused base touch water. The leaf body should stay in air. Place in bright indirect light. Change water every three to five days before it clouds or smells stale. Initial roots and early rhizome bumps may appear in four to eight weeks in warm conditions. When the rhizome is roughly one centimeter or larger and roots are several centimeters long, transfer to soil.
Soil propagation is lower-maintenance and avoids water-to-soil transition, but progress is invisible without disturbing the cutting. Use a gritty mix: roughly equal parts quality potting soil, perlite or pumice, and coarse sand or fine orchid bark. UF/IFAS Extension production mixes center on peat, perlite, and vermiculite or pine bark blends with pH 6.0–7.0 - home analogs should prioritize fast drainage over richness.
Fill a small pot or cell tray, moisten mix lightly so it holds together when squeezed but does not drip, insert the callused leaflet base three to five millimeters deep - shallow, not buried - and firm lightly. Bright indirect light, same as water. Water sparingly: let the surface dry before the next drink. A leaflet in wet idle soil for weeks is a leaflet headed for rot.
Water gives earlier feedback; soil gives fewer contamination failures. Many experienced growers start in water for the rhizome reveal, then pot up - a hybrid path with strong results if you transplant before roots become a tangled mass and if you keep the first soil weeks on the dry side of moist.
How to Divide ZZ Plant Rhizomes
Division is the method to use when you need a real plant this season, not a science project. Schedule it when you would repot anyway - root disturbance is already on the menu.
Water the parent two to three days before if the soil is bone dry and brittle; slightly hydrated rhizomes flex rather than snap. For easier separation, some growers prefer dryish soil at unpotting so rhizomes separate cleanly without mud cohesion - either approach works if you are gentle.
Slide the plant out by supporting all stalks in one hand and tipping the pot. Remove loose soil with your fingers until you see potato-like rhizomes connected to fleshy roots and upright petioles. Plan cuts so each section has at least one rhizome, healthy roots, and at least one leaf stalk. A rhizome with roots but no leaves can survive but recovers slowly; a leaf without rhizome is not a division - it is a cutting.
Separating Clusters During Repotting
Work on newspaper or a tarp. Tease rhizomes apart with fingers first; use a sterile knife only where natural joints resist gentle pressure. Slow separation preserves more roots than ripping. If two stalks share one massive rhizome, you can either keep them together as one division or cut through the rhizome with a clean blade, letting each half include stem and root tissue.
Pot each division into a container only slightly larger than its root mass, with the same very well-draining mix you use for mature ZZ plants. Set the rhizome one to two inches below the surface - deep enough to anchor, not so deep that moisture pools around the crown. Water once thoroughly to settle mix, then let the top inch dry before the next watering. Keep bright indirect light. Expect slight leaf droop for one to three weeks while roots readjust; firm leaflets returning to normal turgor signal success.
Do not fertilize for six to eight weeks after division. The plant is re-establishing root contact, not building new mass. Fertilizer on a stressed root system is wasted at best and harmful at worst.
Month-by-Month Rooting Timeline
Treat this as a field guide, not a contract. Your apartment will write its own schedule. Still, knowing what should be happening underground prevents premature discard.
Weeks 1–2: Callus completes on cut surfaces. Leaflets may look unchanged. No watering frenzy required. For soil leaflets, the mix should stay lightly moist, never soggy.
Weeks 3–6: First roots or anchoring bumps appear on warm batches - especially water-rooted leaflets on a heat mat. Above soil, nothing dramatic. Resist pulling leaflets daily; you break micro-roots that took weeks to form.
Weeks 7–12: Root systems lengthen. In water, you may see the first rhizome swelling at the leaflet base - a pale enlargement distinct from thin roots. In soil, the leaflet should still feel firm, not mushy. If it is yellowing but soft at the base, inspect for rot.
Months 4–6: Rhizome development continues. The original leaflet may still be the only visible green. This is the phase where most growers lose faith. If the base is firm and the medium is not wet-cold, persistence is correct.
Months 6–9: First new petiole may emerge - a thin shoot beside the propagated leaflet. Celebrate quietly and keep conditions boring. Some batches need the full nine to twelve months.
Months 9–12+: New leaflets unfurl on the baby shoot. You now have a structurally independent plant, still small. Gradually normalize watering toward mature ZZ rhythm. Upsize pot only when roots circle the container.
Division track: Weeks 1–3 settle-in, then normal slow ZZ growth resumes. No rhizome-wait phase.
If nothing happens for three months in a warm bright setup, check temperature and rot, not your worth as a gardener. If nothing happens for three months in a 55°F (13°C) basement, fix the environment before blaming the plant.
Aftercare for New ZZ Plant Starts
Newly propagated ZZ plants - whether from leaflet, stem, or division - are not mature office survivors yet. They have smaller rhizomes, narrower drought tolerance, and less fungal resistance. The first six months after visible new growth define long-term health.
Keep bright indirect light. ZZ tolerates low light on established plants; juveniles root and thicken faster with brighter filtered exposure. Avoid direct south-window sun on tiny starts.
Water when the top inch of mix is dry, then soak until drainage runs clear. Empty saucers. underwatering on ZZ Plant shrivels small rhizomes; overwatering on ZZ Plant rots them. The margin is narrower than on a three-year-old parent.
Hold fertilizer until the new shoot has hardened one full leaflet cycle - usually two to three months after shoot emergence. Then use a quarter-strength balanced liquid feed monthly during active growth only. ZZ is a low-nutrient plant; propagation batches do not need aggressive feeding.
Humidity at normal indoor 30–50% is fine. Do not enclose leaflets in sealed bags long term - stagnant humidity invites mold. Airflow matters.
When the starter fills its small pot - roots visible at drainage holes, rhizome bumping pot sides - move up one pot size, not three. Large wet voids around tiny rhizomes are a classic post-propagation killer.
Quarantine new propagations two weeks away from your main collection if the parent ever had pests. Mealybugs hide in petiole axils and ride cuttings cleanly.
Common Propagation Mistakes and How to Fix Them
Most ZZ propagation failures are environmental, not mystical. The plant is slow, but it is not arbitrary.
Rotting leaflet base in wet soil means too much moisture too soon, or no callus, or cold soil. Remove the leaflet, trim back to firm tissue if any remains, re-callus, restart in drier mix with less frequent water. Discard fully mushy pieces.
Sour cloudy water signals bacterial load. Replace with clean water, wipe the jar, trim any slime from the base, and move to fresh water. If the base is blackened, discard.
Shriveling leaflet with dry medium means underwatering during root formation or excessive heat without humidity. Slightly increase water frequency - still not soggy - and confirm the leaf is not under a heating vent.
Pulling cuttings to check roots breaks fragile new growth. Use translucent pots, water jars, or patience instead. One tug can erase three weeks of progress.
Starting one leaflet and expecting one plant ignores realistic attrition. Batch-start or accept lottery odds.
Propagating a sick parent exports weakness. Fix watering, pests, and rot on the donor first.
Giving up at month four before rhizome completion is the most common mistake of all. If tissue is firm and conditions are warm and bright, keep going.
Ignoring calcium oxalate leads to itchy hands for sensitive growers. Gloves or soap after handling are cheap insurance.
Conclusion
ZZ plant propagation rewards growers who respect the plant’s rhizome-first rhythm more than those who chase fast Instagram results. Leaflet cuttings multiply a single stem into many starters but may need six to twelve months before a new shoot appears; start six to ten leaflets and expect some losses. Stem cuttings compress that timeline modestly. Rhizome division during repotting delivers established plants now, provided the parent is mature enough to split.
Warmth near 24–27°C (75–80°F), bright indirect light, gritty well-drained mix, and spare watering carry every method. Water propagation offers a window into rhizome formation; soil keeps maintenance lower. Neither is magic - both are slow. If you choose material wisely, keep the medium barely moist rather than wet, and measure progress in months, ZZ plant becomes a reliable long game worth playing: more glossy upright plants for low-light rooms, shared with friends who will appreciate the honesty about how long your patience actually lasted.
When to use this page vs other ZZ Plant guides
- ZZ Plant overview - Start here for whole-plant context before deep-diving this topic.
- ZZ Plant problems hub - Jump to symptom-specific fix guides when this care topic does not resolve the issue.
- Stem Rot on ZZ Plant - Escalate here when propagation adjustments are not enough.