How to Prune Marble Queen Pothos: When, Where & What to Cut
How to Prune Marble Queen Pothos: When, Where & What to Cut
How to Prune Marble Queen Pothos: When, Where & What to Cut
First, remove only dead, damaged, or clearly rotting stems with clean sharp scissors - cut back into firm green tissue just above a healthy node. Marble Queen Pothos (Epipremnum aureum ‘Marble Queen’) stores energy in its vines like other pothos, but every cut is still a wound. A quick sanitation pass tells you what is actually alive before you shorten anything for shape or tackle variegation reversion.
Quick Answer
Prune Marble Queen Pothos for shape, density, and variegation control in late spring through early summer, when the plant is actively growing. Make cuts 5–10 mm (about ¼ inch) above a visible node - the slightly swollen point where a leaf attaches and aerial roots may form. Limit routine shaping to no more than one-third of total foliage per session. Remove fully reverted all-green stems back to the last node that still shows marbled stem tissue or variegated leaves. Emergency removal of mushy, pest-infested, or fully dead stems can happen any time. Pruning encourages branching at nodes but does not replace Marble Queen Pothos light guide - without enough light, Marble Queen reverts toward green and regrows leggy even after a hard trim.
What Pruning Does for Marble Queen Pothos
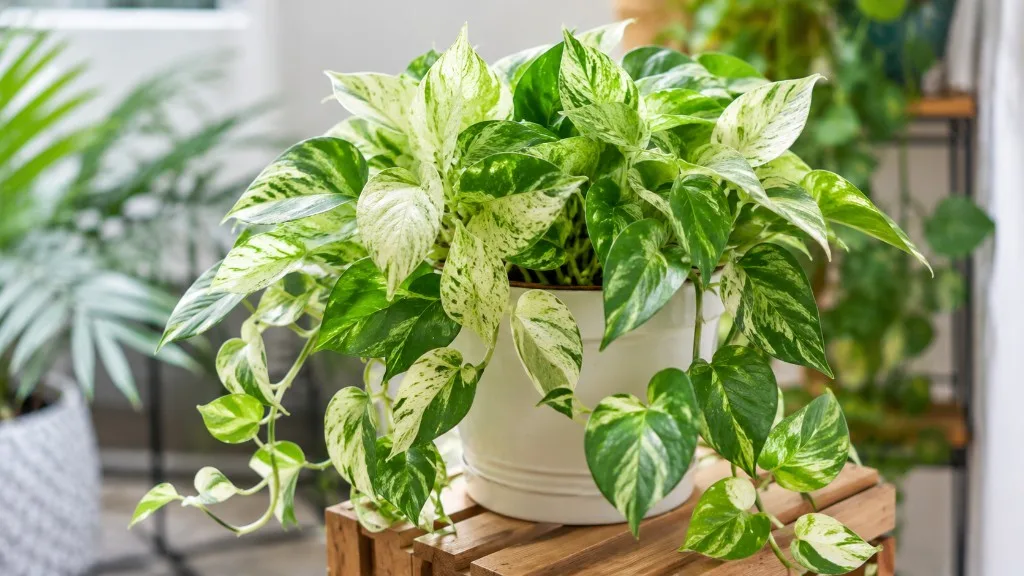
Marble Queen is a trailing cultivar of Epipremnum aureum with green leaves and stems marbled with white. It grows more slowly than Golden Pothos because less leaf tissue produces chlorophyll, so recovery after heavy cuts takes longer. Over time, leaves concentrate at vine tips and lower sections go bare - a pattern extension references describe for pothos generally when stems are left unpruned.
Pruning serves five practical jobs on Marble Queen Pothos overview:
- Redirects growth by breaking apical dominance at the cut, waking buds at nodes below
- Removes failing tissue before pests or rot spread along soft stems
- Shortens leggy runners that have shed lower leaves and left a sparse crown
- Stops variegation reversion by removing all-green stems before they dominate the plant
- Supplies propagation material - healthy node cuttings root readily in water or moist mix
Pruning does not restore white marbling on leaves that have already turned fully green, and it does not replace better light. Low light can cause loss of variegation on pothos cultivars. Trimming without brighter filtered light often produces another round of stretched, greener regrowth within weeks.
When to Prune Marble Queen Pothos
Best season for shaping cuts
Late spring through early summer is the ideal window for structural pruning in most indoor setups. Daylight is increasing, temperatures are stable, and new leaves are already opening. Penn State Extension recommends trimming pothos by shortening vining stems just above a node and notes that spring Marble Queen Pothos repotting guide is the natural time for heavier maintenance on established plants.
Early autumn can work as a second option if your plant still pushes steady new growth and indoor temperatures stay above roughly 18°C (65°F) with good light.
Avoid major reshaping in late autumn and winter unless you have no choice. Marble Queen already responds more slowly than solid-green pothos; when light drops and growth slows, hard cuts can leave bare stems unchanged for months. That idle period looks alarming but is often simple dormancy, not plant death.
Cuts that cannot wait
Some trimming should not wait for spring:
- Blackened, mushy, or rotting stems - cut back into firm green tissue above a healthy node; sterilize blades between cuts on diseased material
- Fully reverted all-green vines - remove them promptly so green cell lines do not outcompete variegated tissue on the same plant
- Stems with heavy active pest infestation - remove the worst sections once you have a treatment plan for the rest
- Fully brown, dry leaves - snap or snip at the petiole base any time; they no longer photosynthesize
Cosmetic shaping can wait for active growth. Health, sanitation, and reversion cuts happen immediately.
What to Check Before You Cut
Walk the whole plant in good light before touching shears:
- Nodes and internodes - locate swollen points where leaves attach; Marble Queen branches from nodes, not bare stem tissue
- Variegation pattern - compare marbled stems and cream-splashed leaves against solid-green reverted sections
- Leaf quality - yellow climbing a stem, brown mechanical damage, or pest residue on undersides
- Base density - compare bare crown versus lush trailing tips
- Root stress signals - persistent wilting with wet soil, sour smell, or recent cold draft damage
If the plant is wilted and the mix has stayed wet for days, fix watering and drainage first. Pruning a suffocating root system adds stress without solving the cause.
Wear gloves if you have sensitive skin. Like other Epipremnum species, Marble Queen contains calcium oxalate crystals and is toxic if chewed. Bag trimmings promptly and keep propagation jars away from pets.
The First Cut to Make
Start with the worst failing stem, not the longest healthy vine. Follow a blackened, pest-damaged, or fully reverted all-green section back toward the pot until you reach firm tissue and a node that still shows marbling on the stem or a variegated leaf below. Make one clean cut just above that node, wipe your blade with alcohol, and step back.
Only after dead, diseased, and reverted material is gone should you plan cosmetic shortening on leggy runners. Removing healthy length first is how growers accidentally take off too much in one session.
How to Prune Marble Queen Pothos Step by Step
- Sterilize bypass shears or sharp scissors with 70% isopropyl alcohol
- Remove failing and reverted stems back to the last variegated node
- Identify the longest leggy vine and trace it toward the soil line
- Choose a node one or two points above the bare section where you want new branching
- Cut 5–10 mm above the node at a slight angle so water does not pool on the face
- Pause and assess before shortening additional vines - you can always remove more later
- Collect vigorous variegated trimmings for propagation; discard yellowed, reverted, or rotting pieces
Work from the outside in on tangled multi-vine plants. On moss poles, gently untangle stems before cutting so you do not sever the wrong strand wrapped behind the support.
Where to cut on the stem
A node is the slightly swollen ring on the stem where a leaf meets the vine and aerial roots may emerge. Pothos produces new shoots from nodes, not from random internode tissue. Penn State Extension describes aerial roots developing at each node and recommends trimming vining stems just above a node to maintain a bushy habit.
- Shortening a rooted vine in the pot: cut above the node so the parent plant keeps the bud
- Making a propagation cutting: cut below the node on the piece you remove, leaving the node on the cutting with one or two leaves above it
Cutting too far above a node leaves a stub that often browns and dies back. Cutting below the node on the parent vine removes the bud you need for replacement growth.
Pruning reverted all-green growth
Marble Queen variegation is chimeric - the plant carries both green and white cell lines. When light is low, green tissue outcompetes white, and new leaves emerge solid green on otherwise healthy vines. Existing green leaves will not turn white again; you must remove the reverted section and encourage new growth from variegated nodes.
Trace an all-green runner backward until you find a node where the stem itself shows pale streaks or marbling, or where the last clearly variegated leaf attaches. Cut just above that point. If an entire vine has reverted with no marbled nodes left, remove it at the soil line rather than letting it dominate the pot.
Pair reversion pruning with brighter indirect light - east or west windows, or a few feet back from a bright south exposure - so new buds have enough energy to reopen white patterning. Reversion control is a pruning-plus-light job, not shears alone.
Trailing baskets vs moss-pole climbers
Trailing plants in hanging baskets: shorten the longest strands by up to one-third, spread across several vines rather than one dramatic chop. If the base is sparse, prioritize cuts on the longest bare runners to force shoots near the soil line.
Climbing plants on a moss pole: shorten vines that have outgrown the pole or wander sideways, cutting above nodes where you want lateral fill. Leave enough length to re-tie with soft ties - never crank stems tight against the pole. After pruning, guide the tip back up the moist pole so aerial roots can reattach. NC State Extension notes that given a support and adequate light, pothos can produce larger mature leaves - a goal some Marble Queen growers chase after shaping cuts.
Pinching vs hard pruning
Pinching - removing the soft growing tip above the newest leaf - gently reduces apical dominance with minimal stress. During active growth, pinching every few weeks on young plants builds density before legginess sets in.
Hard pruning removes substantial vine length or more than one-third of total foliage. Reserve it for severe legginess, tangled reclamation, or heavy reversion cleanup, and only during active season with steady aftercare.
Decision rule: if internodes are still short and leaves show good marbling, pinch. If you see feet of bare stem, solid-green reversion, or noticeably smaller leaves than six months ago, cut above selected variegated nodes.
How Much You Can Safely Remove
The practical ceiling is one-third of total foliage per session. Marble Queen has less photosynthetic tissue per leaf than Golden Pothos, so stripping too many leaves at once - especially outside active growth - forces a longer stall while the plant rebuilds reserves. Penn State Extension notes that when repotting large pothos in spring, growers may cut up to one-third of vining stem length as part of maintenance - a useful reference for the upper limit on a healthy plant.
If the specimen needs major renovation, plan two or three lighter sessions spaced three to four weeks apart during spring and summer. Dead, mushy, fully reverted, or fully brown tissue does not count toward the one-third cap and should be removed completely.
What Not to Cut
- Healthy variegated nodes you want for regrowth - never cut below the node on a vine you intend to keep
- The only remaining variegated leader on a very sparse plant without a backup node below - build density with pinches first
- Fresh new unfurling leaves at vine tips unless they are clearly damaged
- Aerial roots actively gripping a moist moss pole unless you are deliberately repositioning that section
Do not apply wound sealants on soft aroid stems. Open cuts heal better with airflow than trapped moisture under paste.
Pruning Yellow, Brown, or Damaged Growth
A single yellow lower leaf is often normal senescence - snip it at the petiole base. Worry when yellowing climbs a stem or pairs with soft tissue, since that pattern can signal root stress or disease.
Remove brown mechanical damage, sun scorch, or pest-injured sections back to firm green stem above a node. Never compost visibly diseased cuttings indoors; bag and discard them.
If legginess or reversion returns within weeks after your last trim, the driver is almost always insufficient light, not a need for more aggressive shears.
Using Pruning Cuttings for Propagation
Healthy variegated shaping trimmings are ideal propagation stock. Select sections with at least one node and one to two leaves showing marbling. Strip any leaf that would sit below water or bury the node in mix. Penn State Extension notes that pothos stem cuttings succeed best during the growing season from spring through summer and that vines root easily in water because aerial roots form at nodes.
Water: submerge the node in room-temperature water, refresh weekly, keep leaves above the line. Roots often appear in two to four weeks during warm bright conditions.
Moist aroid mix or sphagnum: nest the node in lightly moist medium with moderate humidity; avoid saturation.
Do not propagate from yellowed, pest-infested, fully reverted, or rotting stems removed for health reasons - those cuttings usually produce plain green plants or fail outright.
Aftercare and Recovery
Pruned Marble Queen needs steady conditions, not a care overhaul:
- Light: keep bright indirect light consistent; do not jump into harsh direct sun or a dark corner right after cutting
- Water: follow your normal dry-top test; heavily pruned plants transpire less until new leaves open, so the pot may dry more slowly
- Fertilizer: hold feeding two to three weeks after anything beyond a light pinch; resume diluted balanced fertilizer once new leaves emerge at cut nodes
- Moss poles: keep supports consistently moist during recovery so aerial roots stay active
Recovery timeline and success signs
Moderate cuts during active season often show new shoots in two to four weeks on a healthy plant - sometimes longer than Golden Pothos because Marble Queen grows more slowly. Correcting severe legginess or heavy reversion may take six to ten weeks and sometimes a second light trim as side branches establish. Winter cuts may show little outward change until spring regardless of care.
Success looks like: small green buds swelling at nodes below cuts, new leaves opening with cream marbling at normal size for your light level, and stable firm stems without spreading black tissue at wound sites. Soft wet blackening at a cut means remove farther back, sterilize tools, and improve airflow.
Mistakes to Avoid
- Cutting more than one-third of healthy foliage in one session, especially in winter
- Leaving reverted all-green vines in place hoping variegation returns on those leaves
- Stub cuts far above nodes or mid-internode cuts that kill the vine above with no replacement bud
- Pruning during active root rot on Marble Queen Pothos, severe drought, or right after repotting - stabilize care first
- Dirty shared tools between sick and healthy plants - extension guidance recommends disinfecting pruners with alcohol or dilute bleach after use on diseased material
- Expecting instant marbling on every new leaf after one trim - pattern depth depends on node genetics and light
- Leaving attractive cuttings where pets can chew them - Marble Queen is toxic to cats and dogs
When Not to Prune
Postpone cosmetic shaping when:
- No new leaves have opened for weeks and soil dries unusually slowly - treat as dormant
- The plant is wilted with chronically wet mix - address roots before cutting
- You just repotted or moved it into a much brighter window - let it settle one to two weeks
- Pests are unchecked and removing foliage would leave too little photosynthetic area - treat and reassess
Health cuts on rotting tissue and fully reverted green vines are the exception; those should not wait.
Conclusion
Marble Queen Pothos pruning comes down to timing, node placement, reversion control, and moderation. Shape the plant in late spring or early summer, cut just above healthy nodes with sterile sharp tools, and take no more than one-third of foliage per session. Remove all-green reverted stems back to marbled nodes, pinch soft tips for ongoing bushiness, and keep bright indirect light steady so new growth keeps its white pattern. Use vigorous variegated trimmings for propagation, pause fertilizer briefly, and expect a slightly slower recovery than solid-green pothos while new shoots establish.
The plant tells you when it needs help - stretched internodes, sparse crowns, reverted runners, and damaged tissue are clearer signals than any calendar. Respond with precise cuts rather than aggressive ones, and adjust light so regrowth stays compact and marbled whether the vine trails from a basket or climbs a moss pole.
When to use this page vs other Marble Queen Pothos guides
- Marble Queen Pothos overview - Start here for whole-plant context before deep-diving this topic.
- Marble Queen Pothos problems hub - Jump to symptom-specific fix guides when this care topic does not resolve the issue.
- Leggy Growth on Marble Queen Pothos - Escalate here when pruning adjustments are not enough.
- Slow Growth on Marble Queen Pothos - Escalate here when pruning adjustments are not enough.
- Brown Tips on Marble Queen Pothos - Escalate here when pruning adjustments are not enough.
Related Marble Queen Pothos guides
- Marble Queen Pothos overview
- Marble Queen Pothos watering
- Marble Queen Pothos light
- Marble Queen Pothos soil
- Marble Queen Pothos propagation
- Marble Queen Pothos fertilizer
- Leggy Growth on Marble Queen Pothos
- Slow Growth on Marble Queen Pothos
- Brown Tips on Marble Queen Pothos
- Marble Queen Pothos problems