How to Propagate Jasmine from Semi-Hardwood Cuttings
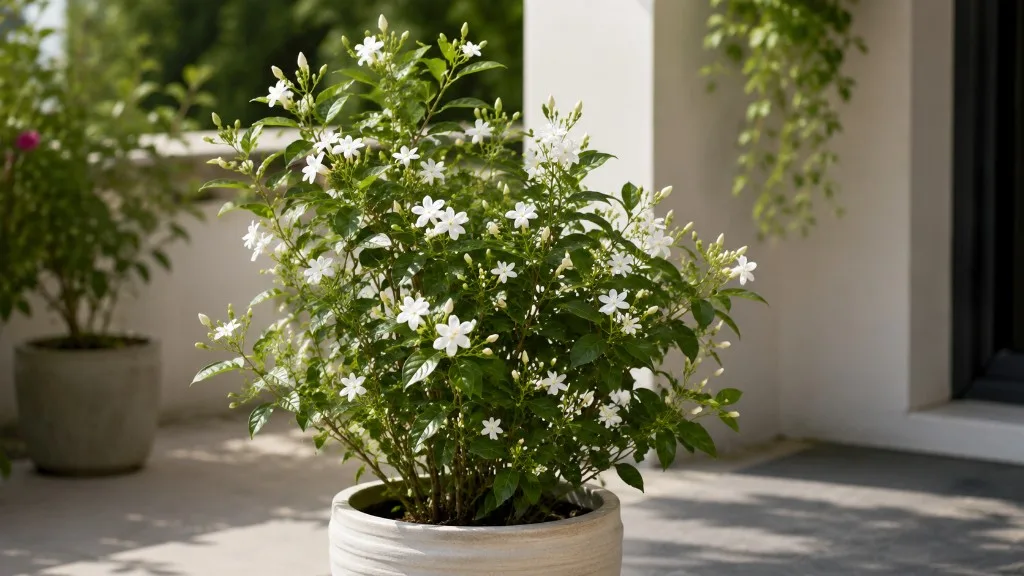
How to Propagate Jasmine from Semi-Hardwood Cuttings
How to Propagate Jasmine from Semi-Hardwood Cuttings
Jasmine propagation from semi-hardwood stem cuttings is the most reliable home method for Jasminum officinale - poet’s jasmine, common jasmine - and most other twining jasmine species grown for fragrance. The technique sits in a sweet spot between soft, green spring growth that wilts too fast and fully woody winter stems that root slowly or not at all. When you take a 10 to 15 cm section of current-season stem with a firm base, a soft tip, and at least one clean node, then give it warmth, Jasmine light guide, and steady humidity, adventitious roots usually form within four to eight weeks.
This guide walks through the full process: identifying semi-hardwood tissue on a climbing vine, choosing the right season, preparing cuttings with optional IBA rooting hormone, building a free-draining mix with a humidity cover, potting up without shock, and caring for young plants through their first eight weeks. You will also learn when simple layering beats cuttings, why water jars work for soft stems but struggle with semi-hardwood material, and how to recover from the failures that catch most first-time propagators.
Why Semi-Hardwood Cuttings Work Best for Jasmine
What semi-hardwood tissue looks like on a vine
Semi-hardwood cuttings - also called semi-ripe cuttings - come from the current season’s growth after the stem base has begun to lignify while the tip is still flexible and green. On a jasmine vine, pinch a stem between your fingers: the lower third feels firm and resists bending sharply, the upper third bends easily, and the bark at the base may show a slight colour shift from bright green toward tan without turning fully brown and woody. That is the tissue you want.
The Royal Horticultural Society describes semi-ripe material as having a hard base and soft tip, available from late summer through mid-autumn in temperate climates, though jasmine growers often succeed slightly earlier - late spring through early summer - when the plant is pushing strong post-winter growth. Before mid-summer, the same vine may offer softwood cuttings that root quickly but dehydrate fast without constant humidity. After mid-autumn, stems harden into hardwood that roots more slowly and suits different species such as winter jasmine (Jasminum nudiflorum).
Semi-hardwood strikes the balance jasmine needs. The stem has enough structural strength to resist rot for several weeks in moist mix, enough living cambium tissue at the nodes to initiate roots, and enough leaf surface at the tip to fuel the process through photosynthesis. Soft stems from the very top of a flush root fast but collapse if humidity drops for even a few hours. Fully woody sections from last year’s growth may sit in mix for months without rooting on species that prefer younger tissue.
Jasminum officinale versus other jasmine species
Jasminum officinale - poet’s jasmine - is a vigorous Oleaceae climber native from Turkey through the Trans-Caucasus to southern central China, widely naturalised across Asia and temperate gardens worldwide. NC State Extension lists semi-hardwood cuttings and layering as reliable propagation methods for common jasmine. It is the reference species for this guide because it is the most commonly grown fragrant climber sold simply as “jasmine.”
Other species root by cuttings too, but the details shift:
- Jasminum sambac (Arabian jasmine, mogra): semi-hardwood cuttings respond strongly to IBA rooting hormone; research at Indira Gandhi Krishi Vishwavidyalya found 1500 ppm IBA produced the highest survival (88.33%) and root counts in mist propagation. Home growers without a mist chamber still benefit from hormone powder on Jasmine overview.
- Jasminum polyanthum (pink jasmine): semi-hardwood cuttings taken after the spring flower flush root reliably in perlite mix with humidity cover.
- Jasminum nudiflorum (winter jasmine): prefers hardwood cuttings taken in November and inserted outdoors - a different calendar and technique from the semi-hardwood approach covered here.
Seed propagation is possible for some jasmines but unreliable for hybrids and many named cultivars. The Royal Horticultural Society recommends semi-ripe cuttings as the standard home method for woody climbers including jasmine - stem cuttings give you a genetic clone of the parent plant, the same flower form and fragrance, which matters when you are propagating a vine you already know performs well in your conditions.
One naming caution: plants sold as “jasmine” in commerce are not always Jasminum species. Star jasmine (Trachelospermum jasminoides) and Carolina jessamine (Gelsemium sempervirens) share the common name but belong to different genera with different toxicity profiles and propagation habits. Confirm the botanical tag reads Jasminum before applying this guide.
Best Timing to Take Jasmine Cuttings
Seasonal windows for temperate and tropical growers
Timing matters more than a calendar date on the wall. The right moment is when the parent plant is producing current-season stems that have begun to firm at the base while the plant is still in active growth - not dormant, not drought-stressed, and not mid-bloom on every shoot.
For temperate outdoor growers, the primary window runs from late spring through early summer (roughly May through July in the Northern Hemisphere), immediately after the first strong flush of new growth and ideally after the main spring bloom on J. officinale. A second window opens in late summer to early autumn (August through September) when semi-ripe wood is abundant. The RHS recommends taking semi-ripe cuttings in the morning to avoid midday wilting.
For tropical and subtropical growers - including much of India where jasmine is culturally and commercially important - jasmine often grows year-round with seasonal peaks. Take cuttings during active growth periods when nights stay above 15°C (59°F) and days are bright. Avoid the peak of monsoon saturation unless you can provide covered propagation with excellent airflow; constantly waterlogged mix is the fastest route to stem rot.
For indoor container jasmine, timing follows the plant’s growth rhythm in your home, not outdoor frost dates. If the vine is pushing 15 to 30 cm of new stem with firm lower internodes and you can provide warmth near 20°C (68°F) and bright indirect light, you can propagate whenever those conditions align - often spring through early autumn even indoors.
Avoid propagation during heat waves above 35°C (95°F) without shade and humidity control, during cold snaps below 10°C (50°F), or within two weeks of a major repot, shipment, or pest treatment. Stressed parent plants produce weak cuttings that fail at high rates regardless of technique.
Taking cuttings after flowering
Jasmine is bloom-driven in its care rhythm, and propagation fits that pattern. Stems actively carrying buds and open flowers divert energy toward reproduction. Cuttings taken from heavily flowering shoots root more slowly and often fail because the stem is transitioning hormonally toward seed set rather than vegetative growth.
The practical rule: take material from ** lateral shoots below the flowering zone** or wait until one to two weeks after the main flush fades on J. officinale, then select fresh semi-hardwood from the post-bloom growth surge. If the only available stems have flower buds, pinch the buds off before inserting the cutting - rooting may take longer, but it can still work.
For J. sambac, which can flower cyclically in warm conditions, choose non-flowering lateral stems on the lower half of the plant where tissue is slightly firmer. Research on jasmine cutting physiology consistently shows that non-flowering, semi-hardwood stems with two to four leaves outperform flowering tips in rooting percentage and root quality.
What You Need Before You Start
You do not need a greenhouse. A sharp pair of secateurs or snips, a clean cutting surface, small pots with drainage holes, and a clear plastic bag or humidity dome cover most home setups.
Gather these materials before you cut:
- Sharp bypass secateurs or scissors - crush cuts bruise cambium tissue and invite rot. Wipe blades with soap and water or 70% isopropyl alcohol if the parent plant has had pest issues.
- Small pots or a seed tray - 8 to 10 cm pots or a modular tray with individual cells. Drainage holes are non-negotiable.
- Rooting medium - a 50:50 blend of peat-free compost and perlite, or compost with 30% coarse perlite or horticultural sand. The mix must hold moisture without staying waterlogged.
- Rooting hormone (optional but recommended for jasmine) - powder or liquid IBA (Indole-3-butyric acid). Research on Jasminum sambac cuttings showed significantly improved rooting at 1000 to 1500 ppm IBA compared to untreated controls. Home powder formulations labelled for semi-hardwood cuttings typically fall in this range when used as directed.
- Clear plastic bag, humidity dome, or mini propagator - maintains ambient humidity around leaves while roots form. Vent daily if heavy condensation builds.
- Labels - jasmine cuttings look identical at the rooting stage. Note species and date.
- Heated propagator or heat mat (optional) - speeds rooting in autumn when ambient temperatures drop below 18°C (64°F). The RHS notes that cuttings taken in autumn root faster with bottom heat.
Choose a healthy parent plant with firm stems, clean leaf undersides, and no active spider mite, mealybug, or scale infestation. Weak, yellowing, or recently shipped plants produce cuttings that rot before they root. If the parent is recovering from root problems, wait until new growth is clearly vigorous before propagating.
How to Select and Prepare Semi-Hardwood Cuttings
Finding nodes and making the cut
Every successful jasmine cutting depends on including at least one node - the joint where a leaf attaches to the stem. Adventitious roots emerge from nodes, not from internodes (the bare stem between leaves) and not from leaves alone. Before you cut, trace the stem with your finger until you feel the slight ridge or swollen point where a leaf pair meets the vine.
Select a shoot that is more horizontal than vertical if possible. The RHS recommends shoots with short internodes - compact gaps between leaves - because they carry more stored energy per centimetre of stem. Avoid the wildest, most vertical water shoots unless nothing else is available.
Take cuttings 10 to 15 cm (4 to 6 inches) long. Make your bottom cut just below a leaf node, about 3 to 6 mm (⅛ to ¼ inch) beneath the node ridge. Use one clean slicing motion. Make the top cut just above a node or at a leaf joint so the remaining stub on the parent plant can sprout cleanly.
Take two to three more cuttings than you need. Not every cutting roots, and having backups prevents restarting the whole process if two fail.
Leaf stripping and rooting hormone
Remove the lowest one-third to one-half of leaves from each cutting. The buried or bottom portion of the stem should be bare - leaves that contact moist mix or sit in a humidity dome without light rot within days and spread fungal problems to the stem.
Leave two to three pairs of leaves at the top, sometimes four on vigorous J. officinale cuttings. If top leaves are very large, trim each leaflet by one-third to reduce water loss while roots form. Do not remove all foliage; the cutting needs photosynthesis to survive until roots take over water uptake.
Remove any flower buds, open flowers, or damaged leaf tissue before inserting the cutting. Buds drain energy and increase transpiration stress.
For rooting hormone, tap a small amount of IBA powder into a separate dish - never dip directly into the container to avoid contamination. Moisten the bottom 1 to 2 cm of the cut end, dip, and tap off excess. Too much hormone burns semi-hardwood tissue. Liquid IBA at 1000 to 1500 ppm for a 5 to 10 second dip matches research concentrations on J. sambac; follow product label rates if you use commercial formulations.
Untreated cuttings of J. officinale often root without hormone in warm, humid conditions. Hormone is most valuable on slower species (J. sambac), in cooler seasons, and when you need higher success rates from limited parent material.
Rooting Medium, Containers, and Humidity
Fill pots or trays with pre-moistened mix to the rim. Water the dry components together before filling so the blend is evenly damp - like a wrung-out sponge, not dripping wet. Insert a pencil or dibber to make planting holes so you do not scrape hormone off the cut end by forcing the stem into compacted mix.
The ideal medium is free-draining but moisture-retentive. Pure sand drains too fast for indoor propagators who cannot water twice daily. Pure compost stays wet too long and causes rot. A perlite-amended mix balances both demands. Vermiculite alone works under mist systems - horticultural research on multiple Jasminum species used vermiculite under mist - but home growers without mist benefit from the structure perlite provides.
Set planted cuttings in a warm, bright location out of direct sun. Direct sunlight through a plastic bag creates a greenhouse oven that cooks stems. Bright indirect light - an east-facing windowsill, a shaded bench, or 30 to 50 cm below a grow light - is ideal.
Cover with a clear plastic bag supported by stakes so plastic does not touch leaves, or use a propagator lid with ventilation slots. Aim for visible humidity - slight condensation on the bag - without water droplets constantly streaming down and soaking the mix surface. Vent for five to ten minutes daily to exchange stale air and prevent mould.
Bottom heat at 20 to 22°C (68 to 72°F) root zone temperature accelerates cell division at the cut surface. Ambient air temperature around 18 to 24°C (64 to 75°F) suits most jasmine species. Below 15°C (59°F), rooting slows dramatically; above 30°C (86°F) without ventilation, rot outpaces root formation.
Planting Jasmine Cuttings Step by Step
Follow this sequence for each prepared cutting:
- Fill the container with pre-moistened compost-perlite mix. Firm lightly; do not compact.
- Create a planting hole with a dibber, deep enough to bury one to two nodes below the surface - typically 3 to 4 cm (1 to 1½ inches).
- Insert the cutting so the lowest node sits at or just below soil level. Hold the stem upright and settle mix around it with gentle pressure. Do not pack tightly; roots need air pockets.
- Water lightly with a fine rose or spray to settle mix around the stem. The medium should be moist throughout, not flooded.
- Cover with humidity dome or bag as described above. Place in bright indirect light at approximately 20°C (68°F).
- Label with species and date so you can track rooting timeline accurately.
Space cuttings 5 to 8 cm apart in trays so leaves do not overlap. Overlapping foliage traps moisture against leaf surfaces and encourages botrytis. One cutting per small pot simplifies potting up later because you disturb roots less.
Some growers insert three cuttings around the edge of a 10 cm pot to produce a bushier first plant. This works for container jasmine intended to stay compact. Separate or grow on together once rooted, depending on your goal.
Water propagation - placing semi-hardwood jasmine cuttings in a water jar - is possible for softer material but less reliable than soil for semi-hardwood stems. Semi-hardwood tissue is prone to basal rot in stagnant water before roots emerge. If you experiment with water, change it every two days, keep only the bottom node submerged, and transfer to mix promptly once roots reach 2 to 3 cm. For highest success rates on semi-hardwood J. officinale, start in mix from the beginning.
Light, Temperature, and Moisture While Roots Form
During the rooting phase, your job is to maintain three stable variables: light, warmth, and evenly moist - not wet - mix.
Light: Bright indirect exposure for 10 to 14 hours daily. A cutting in deep shade may stay alive but will not root for weeks. A cutting in hot direct sun bleaches leaves and overheats the humidity dome. If using artificial light, hang a full-spectrum LED 30 to 45 cm above the cuttings and run 14 to 16 hours daily.
Temperature: Target 20°C (68°F) ambient where possible. Indian indoor growers near AC vents should avoid cold drafts that drop night temperatures below 15°C. Outdoor propagators in temperate zones should move trays indoors or into a cold frame before the first frost.
Moisture: Check mix every two to three days by touching the surface. It should feel lightly damp. Water sparingly with a spray bottle or fine can - a few tablespoons per small pot, not a full soak. Overwatering is the number one killer of jasmine cuttings. If the mix smells sour, the stem base turns black, or fungus gnats appear in large numbers, you are keeping the medium too wet.
Humidity: Leaves may wilt slightly on day one after cutting - normal. They should recover within 24 to 48 hours under the dome. Persistent collapse means the cutting cannot transpire fast enough to match water loss; increase humidity slightly or trim top leaves further. If leaves stay wet and develop grey mould spots, increase ventilation.
Do not fertilize during rooting. Cuttings have no functional root system to absorb nutrients. Soluble fertilizer in the mix can burn the cut surface and encourage algae on the medium surface.
How Long Jasmine Cuttings Take to Root
Most jasmine semi-hardwood cuttings root in four to eight weeks under warm, bright, humid conditions. The Royal Horticultural Society notes that semi-ripe cuttings taken in autumn root faster with bottom heat, and that Jasminum officinale responds well to the standard semi-ripe protocol.
Timeline breakdown by conditions:
- Warm (20 to 24°C) with bottom heat and hormone: first root initials often visible at 3 to 4 weeks; ready to pot up at 4 to 5 weeks.
- Room-temperature windowsill without heat: 5 to 8 weeks is typical.
- Cool autumn bench below 16°C: 8 to 12 weeks or failure; add heat or wait until spring.
Test for roots at four weeks with a very gentle tug - slight resistance suggests roots are forming. Do not yank; brittle new roots snap easily. A better sign is new leaf growth or a firm green stem that no longer wilts when you briefly vent the humidity cover.
Research on Jasminum species shows species variation in days to root: J. grandiflorum rooted in as few as 45 days in mist trials, while J. auriculatum took up to 70 days in comparable studies. Home growers working with J. officinale should plan on one month minimum before expecting pot-ready roots.
If a cutting stays green with no roots after ten weeks, it may eventually root - but the success rate drops sharply. Evaluate whether temperature, moisture, or tissue quality was off, and restart with fresh material rather than waiting indefinitely.
Potting Up and Hardening Off Rooted Jasmine
Once roots are 3 to 5 cm long or the cutting resists a gentle tug and shows new top growth, move it to a permanent small pot - usually 10 to 12 cm for the first solo container. A well-draining standard potting mix at pH 6.0 to 7.5 suits established jasmine; amend with 20 to 30% perlite if your base mix is heavy.
Water the rooted cutting well the day before potting up if the mix is dry. Turn the pot gently, support the root ball, and lift without pulling the stem. If multiple cuttings rooted in one tray, tease apart roots carefully or cut between cells with a clean knife.
Plant at the same depth the cutting sat in the propagation mix - burying the stem deeper than before can rot bark tissue that is not adapted to soil contact. Water thoroughly once after potting, then let the top 2 cm approach dry before watering again.
Hardening off the humidity cover happens over 7 to 10 days. On day one, remove the bag for one hour in bright indirect light. Increase open time daily until the plant stays out permanently. Sudden removal causes leaf drop on tender new roots still adjusting to lower humidity.
For outdoor planting of rooted J. officinale, harden off completely, then transplant to a sheltered spot with morning sun after the last frost. Climbing jasmines need a trellis, wire, or pergola from the start so you do not disturb roots later by adding support stakes.
Aftercare for New Jasmine Plants
Water, light, and feeding in weeks one through eight
Young jasmine plants - whether destined for a container with support or an outdoor wall - need boring, stable care more than aggressive pushing. The first two months after potting determine whether the root system expands fast enough to support flowering within the next season.
Water: Allow the top 2 to 3 cm of mix to approach dry before watering deeply until runoff exits drainage holes. Empty saucers so the pot never sits in standing water. Freshly potted cuttings have a small root volume relative to leaf area, so they dry more slowly than you expect - check with your finger rather than watering on a calendar. Soggy mix after potting is the fastest way to lose a rooted cutting that survived four weeks of propagation.
Light: Mature jasmine wants full sun to partial shade - roughly four to six hours of direct sun daily for strong bloom on J. officinale. Newly potted cuttings benefit from bright indirect light for the first 7 to 10 days after humidity hardening, then gradual introduction to stronger light over two weeks. Indian balcony growers should acclimate slowly to afternoon sun in hot climates; scorched leaves on a young plant set back growth more than slightly lower light for one month.
Feeding: Hold fertilizer until active new growth is clearly visible - usually three to four weeks after the first solo potting. Then apply a balanced liquid fertilizer at quarter to half the label rate every four to six weeks during the growing season. Overfeeding a root-limited young plant burns tender roots and produces soft, pest-prone foliage.
Support: Install a bamboo cane, trellis segment, or ring in the pot early so the vine can attach without root disturbance. J. officinale is a twining climber; guide stems gently clockwise or counterclockwise around support - jasmine twines in one direction per species habit, and forcing the wrong direction can crack stems.
Pruning: Once the plant reaches 20 to 30 cm of new growth, pinch the tip to encourage lateral branching. A single unbranched whip looks sparse in a container; pinched plants bush out and flower more generously in subsequent seasons.
Most rooted J. officinale cuttings reach a stable, self-sustaining size in 8 to 12 weeks after potting under good conditions. Flowering may occur in the same season if the cutting rooted in spring, or the following year if rooted in autumn - do not expect bloom immediately; energy goes to root and shoot establishment first.
Why Jasmine Propagation Fails and How to Fix It
Black or mushy stem base is the most common failure. Causes include over-wet mix, no drainage holes, a humidity dome that never vents, cuttings taken from fully flowering shoots, or tissue that was still softwood rather than semi-hardwood. Fix: restart with firmer stems, fresher mix, better drainage, daily venting, and lighter watering.
Cuttings green but no roots after eight weeks usually means insufficient warmth, too little light, or a missing node buried too shallowly. Confirm at least one node sits 3 to 4 cm deep in mix. Add bottom heat and move to a brighter indirect location.
Grey mould on leaves signals excessive humidity without airflow. Remove affected leaves, vent the cover twice daily, and space cuttings farther apart.
Wilting after potting can be normal for 3 to 7 days if roots were disturbed during transplant. Keep mix lightly moist, provide indirect light, and wait. If the stem shrivels and turns brown, the root ball dried out during handling - pot more quickly next time with pre-moistened mix.
Wrong species technique - applying semi-hardwood timing to J. nudiflorum or expecting softwood results from woody autumn stems - produces zero roots despite perfect humidity. Match cutting type to species and season.
Pest transfer from parent to cutting shows up as stippled leaves or cottony deposits two weeks in. Quarantine new propagations away from your main collection and treat pests before cutting, not after.
Prevention beats rescue: firm semi-hardwood tissue, clean tools, one node buried deep, bright indirect light at 20°C, and a humidity cover that vents daily solve most problems before they start. When in doubt, take more cuttings than you need and discard failures early rather than nursing rotting stems for months.
Conclusion
Jasmine propagation from semi-hardwood stem cuttings gives you a fragrant, flowering clone of a vine you already trust - without waiting for seed or gambling on nursery stock. The method comes down to reading the stem: firm at the base, soft at the tip, with at least one clean node 10 to 15 cm long. Take cuttings in late spring through early autumn when the parent is actively growing, dip optionally in IBA rooting hormone, plant in compost and perlite, cover for humidity, and keep the setup near 20°C in bright indirect light.
Roots typically form in four to eight weeks. Pot up gently, harden off the humidity cover, then give young plants steady moisture, gradual sun, and light feeding once new growth appears. When cuttings fail, the cause is almost always wet airless mix, weak tissue, or cold dim conditions - not some mysterious jasmine reluctance to root. Jasminum officinale is, by NC State Extension and Royal Horticultural Society guidance, straightforward to propagate from semi-ripe cuttings. Match the technique to the tissue, keep conditions stable, and one parent vine becomes many.
When to use this page vs other Jasmine guides
- Jasmine overview - Start here for whole-plant context before deep-diving this topic.
- Jasmine problems hub - Jump to symptom-specific fix guides when this care topic does not resolve the issue.
- Transplant Shock on Jasmine - Escalate here when propagation adjustments are not enough.
- Stem Rot on Jasmine - Escalate here when propagation adjustments are not enough.