How to Prune Dieffenbachia: When, Where & What to Cut
How to Prune Dieffenbachia: When, Where & What to Cut
How to Prune Dieffenbachia: When, Where & What to Cut
Quick answer
First, remove only dead, damaged, or diseased leaves with clean, sharp scissors. Follow each yellow or brown petiole to where it meets the cane and cut cleanly at the base. Do not start by topping a leggy stem or pinching the crown until urgent cleanup is done and you have identified healthy nodes below any planned cut line.
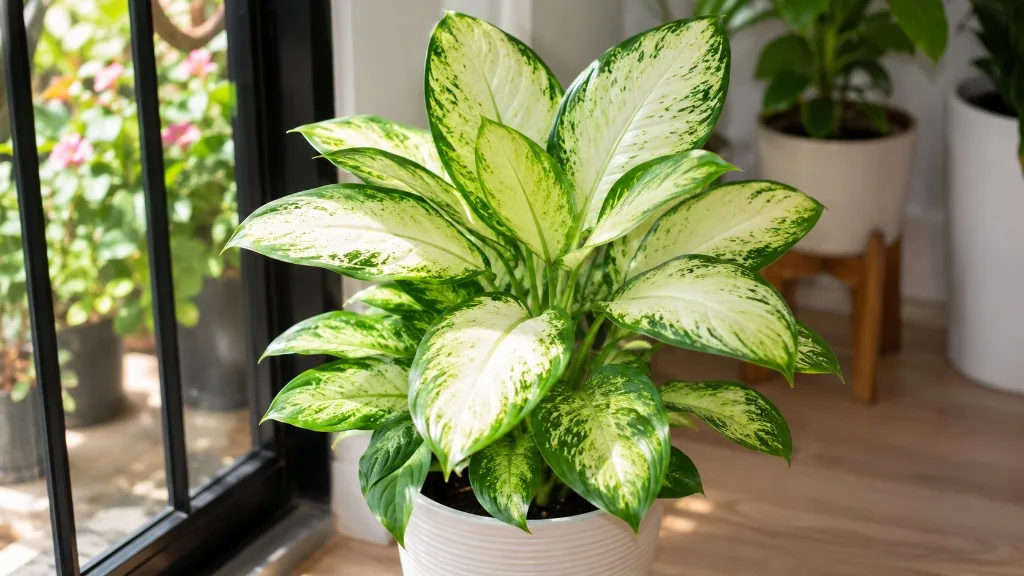
Dieffenbachia - commonly called dumb cane - grows as an upright, cane-forming plant in the Araceae family. Most indoor specimens eventually develop a long bare stem topped by a cluster of large variegated leaves. Pruning redirects that upward habit: cleanup removes failing tissue anytime, light pinching prevents early legginess, and hard topping breaks apical dominance so dormant buds at lower nodes can sprout.
What pruning does for Dieffenbachia
Pruning on Dieffenbachia is not about formal shaping. It solves three jobs that show up in almost every home:
Cosmetic cleanup removes yellow, brown, or pest-damaged leaves whenever you see them. Light shaping shortens individual stems just above a node during active growth to encourage lateral shoots without dramatically changing height. Rejuvenation topping cuts a tall, bare cane back hard - often leaving 6–12 inches of stem - to reset a plant that has lost its lower foliage.
Each job uses the same anatomical rule: new shoots emerge from nodes, the slightly swollen rings where leaves attached or buds wait dormant. Dieffenbachia does not sprout from smooth internode tissue between nodes. That single fact explains most pruning failures on Dieffenbachia overview.
Pruning also gives you a close view of spider mites, mealybugs, scale, and stem discoloration that are easy to miss from across the room. A clean cut heals faster than a torn petiole, and removing compromised tissue early limits spread.
Assess the cane before you cut
Before any structural cut, read the whole plant from soil line to crown:
- Stem firmness: A soft, water-soaked base or mushy cut zone suggests rot - address that before topping.
- Node health: Look for plump rings on the lower cane; dormant buds often appear as small bumps.
- Leaf pattern: Yellowing only on the lowest one or two leaves is often normal senescence. Rapid yellowing through multiple leaves signals watering, light, or root stress - fix that before hard pruning.
- Light exposure: A plant in chronic dim light will stretch again after topping unless you improve placement.
- Pest signs: Stippling, sticky residue, or cottony clusters in leaf axils mean cleanup and treatment come first.
Clemson HGIC notes that as Dieffenbachia matures, lower leaves naturally drop to reveal trunklike stems. That bare cane is normal aging, not always a crisis - but it tells you whether you need grooming only or a full rejuvenation cut.
When to prune Dieffenbachia
The best window for structural pruning and topping runs from late spring through early summer, when lengthening days and warmer room temperatures support fast callusing and bud break. During active growth, new shoots commonly appear within two to four weeks after a hard cut. NC State Extension lists stem cuttings as a standard propagation method, which confirms cane tissue responds well to clean cuts in the growing season.
Avoid heavy cane cutbacks in autumn and winter unless you have no choice. Shorter days and cooler rooms slow metabolism, so latent buds activate more slowly and wounds stay open longer. A cane topped in December may sit nearly dormant for two months before meaningful regrowth appears.
Year-round cleanup vs. seasonal topping
Remove dead, yellow, brown, or pest-damaged leaves whenever you see them. That tissue is not helping the plant and can harbor insects or fungal spores. Snip at the petiole base where the leaf stalk meets the cane.
Save cane topping, hard cutbacks, and major shaping for the active growth window. If your Dieffenbachia is severely leggy in November, you can wait until spring or provide supplemental grow lighting and stable warmth above 65°F (18°C) before making a hard cut. Emergency exceptions - a cane snapping under its own weight, active stem rot, or concentrated pest infestation in the upper canopy - justify immediate removal regardless of season, with slower regrowth accepted as the trade-off.
Wear gloves - sap safety matters
All Dieffenbachia parts contain calcium oxalate crystals called raphides that rupture when tissue is cut. Poison Control notes these needle-like crystals cause immediate pain, swelling, and irritation on skin and eyes, and severe oral symptoms if plant material is chewed. The common name “dumb cane” refers to temporary speech difficulty after mouth exposure.
Wear waterproof gardening gloves for every pruning task, even small leaf removals. Fabric gloves absorb sap and press it against skin. For large cane cuts, add safety glasses to block flicked droplets. Work on a stable surface, keep children and pets away, and avoid touching your face mid-task.
Dispose of trimmings in a sealed bag. The ASPCA lists Dieffenbachia as toxic to cats and dogs, so treat fallen leaves on the floor with the same caution as the live plant. If sap contacts skin, wash with soap and running water. For eye exposure, flush with lukewarm water for at least 15 minutes and seek medical attention. The Missouri Poison Center notes serious poisonings are uncommon because pain stops further chewing, but breathing difficulty requires emergency care.
The first cut to make
Start with dead, damaged, or diseased leaves only. Follow each affected petiole to the cane and cut cleanly at the base. Tearing leaves strips bark and opens a larger wound than necessary.
If mealybugs or spider mites have colonized lower leaf axils, remove those leaves immediately and isolate the plant if needed. Waiting until spring to remove active pest habitat turns a localized problem into a room-wide one.
Only after urgent cleanup should you decide whether the plant needs pinching (removing the terminal bud on a compact specimen), light stem shortening (one cane slightly long), or rejuvenation topping (bare cane, palm-tree silhouette). That order prevents you from removing healthy height before addressing tissue that is already failing.
Where to cut on the cane
Every structural cut targets a node - the ring where a leaf was attached or a lateral bud waits. The smooth section between nodes is the internode. Place the blade 5–10 mm (about ¼ inch) above a healthy, plump node at a slight angle so water does not pool on a flat surface.
Nodes, internodes, and why placement decides regrowth
Cuts placed too far above a node leave a dead stub of bare cane that browns slowly and invites decay. Cuts too low - into the internode below the bud - remove the tissue you need for sprouting. Dieffenbachia does not branch randomly along bare internodes.
Breaking apical dominance is the mechanism behind topping. The terminal bud at the crown produces hormones that suppress lower buds. Remove it and latent buds at nodes below the cut often activate, sometimes producing two or three shoots from a single node. That is how a single-stem plant becomes multi-cane and bushy.
Topping a leggy Dieffenbachia
When all foliage sits atop a long bare cane - the familiar “palm tree” look - topping is the definitive fix. Study the cane from base to crown and identify two or three healthy nodes on the portion you intend to keep. Clemson HGIC recommends cutting stems back to about 6 inches tall when rejuvenating overgrown specimens; the plant regrows below the cut.
Make one confident cut rather than nibbling the stem in multiple passes. Each extra wound is another sap exposure point and infection entry site. Angle the blade about 30–45 degrees. Do not apply wound sealants - Dieffenbachia heals best when the cut is clean and exposed to air.
How low to cut and how much is safe
For height, a 4–5 foot indoor specimen might be topped to leave 12–18 inches of stem with two or three nodes intact. A moderately leggy plant with some lower foliage may need only the top 12–24 inches removed. Dieffenbachia can survive very hard cutbacks, but the more foliage and stem you remove at once, the longer recovery takes.
The one-third rule applies to cumulative healthy foliage removal in one session: do not strip more than one-third of total leaf area unless you are deliberately rejuvenating and accept the recovery time. For severely overgrown plants, stage work across two sessions four to six weeks apart during active growth.
Select the highest healthy node in your chosen zone, position the blade 5–10 mm above it, and cut through in one motion. If uncertain between two nodes, choose the lower one - you can always remove more later. After cutting, blot excess sap with a paper towel. The cut surface should look clean and white to pale green, not brown or mushy.
Pinching and light shaping on younger plants
Young Dieffenbachia and moderately compact specimens benefit from pinching during the active season. Remove the terminal bud and the newest unfurled leaf at the crown - a cut just above the next node down. That early interruption encourages multiple stems and delays the bare-cane phase.
Light trimming shortens an individual stem that is slightly long but not yet worthy of full rejuvenation. Step back after each cut and assess the silhouette. Dieffenbachia does not take tight shearing like a hedge; aim for an open canopy with multiple growth points. Remove crossing stems that rub and create friction wounds.
Once new shoots appear after topping, you can pinch a shoot’s terminal bud after it has two or three leaves to encourage lateral branching at a smaller scale. Wait until the shoot is established - pinching a half-inch sprout removes too much photosynthetic tissue on a plant still recovering from a hard cut.
Tools and blade sterilization
Sharp bypass pruners or fine pruning shears handle cane tissue up to about ½ inch in diameter. Thicker mature canes may need a sharp knife or loppers - dull tools crush stems and slow healing. Household scissors work only on thin young stems.
Sterilize blades before you start and between plants with 70% isopropyl alcohol or a diluted bleach solution (one part bleach to nine parts water). Pathogens travel on tool surfaces, and Dieffenbachia’s succulent stems are vulnerable at fresh wounds. Keep a disposal bag nearby so you are not carrying toxic stems across the house.
Step-by-step pruning routine
For a typical rejuvenation session on a leggy Dieffenbachia:
- Inspect for pests, disease, and overall vigor. Resolve root rot on Dieffenbachia or severe drought stress before structural pruning.
- Gather bypass pruners, waterproof gloves, safety glasses for large cuts, alcohol, and a sealed disposal bag.
- Sterilize blades with 70% isopropyl alcohol.
- Remove dead and damaged leaves first, working from the bottom up.
- Mark cut height by identifying the lowest healthy nodes to keep. Confirm at least two viable nodes remain below your cut line.
- Top the cane with one angled cut 5–10 mm above the chosen node.
- Blot sap from the wound and tools.
- Place the plant in bright, indirect light with stable temperatures. Hold fertilizer for two to three weeks.
- Monitor weekly for new shoots, pests, and cut-end discoloration. Black, mushy tissue below the cut means rot and needs a recut to healthy tissue.
After pruning care and recovery timeline
Hold fertilizer for two to three weeks after a hard cut, then resume at half strength once new shoots have two or three leaves. Keep light steady and bright but indirect - relocate gradually over seven to ten days if the plant needs better placement. Water on your normal rhythm; avoid soggy soil at the cut zone or severe drought that slows bud break. Do not repot the same week as a hard prune unless the mix is clearly failing.
During active growth, expect one or more new shoots within two to four weeks. Full, bushy recovery often takes six to eight weeks. If nothing appears within four to six weeks in the growing season, check light first - insufficient brightness is the most common cause of stalled regrowth. Rot at the cut end shows as black, water-soaked tissue spreading downward; recut to firm white tissue above the next node if caught early.
Using pruned cane sections for propagation
The upper cane section removed during topping can often be rooted as a stem cutting if it has healthy nodes and leaves or buds. Trim the bottom just below a node, remove lower leaves that would sit below the soil line, and place the cutting in moist, well-draining medium or water until roots form. Clemson HGIC lists cane cuttings and stem tip cuttings as standard propagation methods done in spring or early summer.
Discard sections with pest damage, rot, or yellow foliage. The rooted cutting and topped base grow independently - a common way to turn one leggy plant into two compact specimens. Bag and discard unwanted stems away from pets and children.
Mistakes to avoid
Cutting in the wrong place is the most damaging error. Locate the node first, then place the blade just above it. A dead stub above a node or a cut into the internode without regard for the bud beneath it delays or prevents regrowth.
Removing too much at once on a stressed plant - winter pruning, recent Dieffenbachia repotting guide, root rot, or widespread yellowing - can stall growth for months or kill the cane. Fix underlying problems before hard cuts.
Other common errors: pruning with dirty or dull tools, skipping gloves on “small” cuts, leaving fallen toxic leaves accessible to pets, fertilizing immediately after a hard cut, and applying wound sealant that traps moisture. Pruning alone cannot fix chronic low light - improve placement when you reshape the cane.
When not to prune
Delay structural pruning when the plant shows active root rot (sour soil, soft base, widespread wilting), severe drought stress, or recent repotting shock. Resolve those first.
Skip hard cutbacks in late autumn and winter unless emergency conditions demand it. Do not prune heavily on a specimen that has already lost more than one-third of its foliage to unrelated stress in the past month.
If the plant is healthy but only slightly tall, try rotating the pot and improving light before topping. Sometimes a quarter turn every week and brighter indirect exposure reduce further stretching without a hard cut.
Conclusion
Dieffenbachia pruning comes down to respecting cane biology and protecting yourself from sap. Remove damaged leaves first, then decide whether you need pinching, light trimming, or rejuvenation topping. Every structural cut belongs 5–10 mm above a healthy node - never mid-internode, never on a stub.
Wear waterproof gloves, sterilize blades, save hard cutbacks for active growth, and give the plant two to four weeks to show new shoots before deciding a cut failed. Pruning cannot replace adequate light or sound watering, but on a healthy Dieffenbachia it is one of the fastest ways to turn a bare, top-heavy cane into a fuller, multi-stemmed plant worth keeping in the room.
When to use this page vs other Dieffenbachia guides
- Dieffenbachia overview - Start here for whole-plant context before deep-diving this topic.
- Dieffenbachia problems hub - Jump to symptom-specific fix guides when this care topic does not resolve the issue.
- Leggy Growth on Dieffenbachia - Escalate here when pruning adjustments are not enough.
- Slow Growth on Dieffenbachia - Escalate here when pruning adjustments are not enough.
- Brown Tips on Dieffenbachia - Escalate here when pruning adjustments are not enough.