Croton Pruning Guide: When, Where, and How Much to Cut
Croton Pruning Guide: When, Where, and How Much to Cut
Croton Pruning Guide: When, Where, and How Much to Cut
Quick answer - your first cut
First, remove only dead, broken, diseased, or clearly pest-infested stems with clean, sharp bypass shears - cut back to healthy tissue or to the main trunk, always just above a node when shortening living wood. Codiaeum variegatum is a woody tropical shrub that branches from swollen joints (nodes), not from bare internodes, and it reacts to stress by dropping leaves. Once obvious damage is gone, decide whether you need shaping or a leggy-stem reset - but save major cutback for early spring through early summer, when warmth and longer days support regrowth.
For routine work, limit removal to one-third of living foliage per session and cut 5–10 mm above a healthy node at a slight angle. Wear gloves: croton bleeds irritating milky latex when cut (RHS Growing Guide - Codiaeum). If stems are mostly bare sticks with leaves only at the top, spring hard cutback to low nodes can work - but fix insufficient light at the same time, or new growth will stretch again within months.
What pruning does for croton (and what it cannot fix)
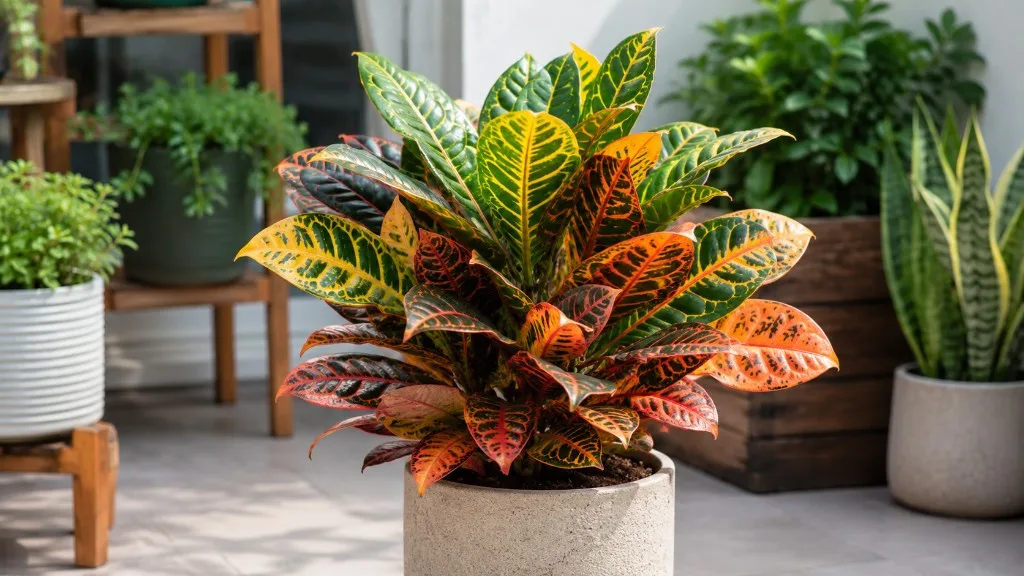
Indoor croton is grown for bold variegated foliage - thick, leathery leaves in orange, red, yellow, pink, and green patterns on woody stems that can reach several feet tall in bright conditions (NC State Extension - Garden Croton). Left in typical home light, stems elongate, lower leaves yellow and fall, and the plant becomes a colorful tuft on bare legs.
Pruning helps in four concrete ways. Size control keeps a fast-growing specimen manageable. Rejuvenation wakes dormant buds at nodes on bare stems, replacing sparse tops with fresh side shoots. Shape corrects leaning or lopsided canopies. Health inspection forces you to examine stem joints where mealybug, scale, and spider mites hide.
Pruning does not replace better light. Croton color and compact habit depend on bright conditions - extension guidance recommends at least two to three hours of direct sun for best coloration (Ask Extension - Leggy Croton). Cut back a leggy plant and return it to a dim corner, and you will prune the same stems again next year.
When to prune croton
Timing matters more on croton than on many houseplants because the species is sensitive to environmental change and may shed leaves after any major disruption (Wisconsin Horticulture - Croton).
Spring shaping and rejuvenation window
Schedule cosmetic shaping, pinching, and hard rejuvenation from late spring through early summer - roughly when indoor temperatures stay consistently above 60°F (15°C) and you see bud swell at stem tips. Wisconsin Extension recommends hard pruning in early spring before new growth begins to stimulate branching on leggy plants (Wisconsin Horticulture - Croton). The RHS similarly advises spring pruning above a leaf joint when plants become misshapen or straggly (RHS Growing Guide - Codiaeum).
During this window, metabolic activity is rising and the plant can push new shoots from nodes below your cuts within two to four weeks under good light. If you move croton outdoors for summer, prune just before or after gradual acclimation to brighter exposure - not during a sudden light shock.
Avoid major cuts from late fall through winter. Short days and cooler rooms slow growth; a hard winter prune often triggers prolonged leaf drop and bare sticks until spring warmth returns. Light tip pinches are acceptable in summer and early fall while the plant still pushes new leaves.
Cleanup cuts any time
Sanitation pruning - removing dead, blackened, broken, or pest-damaged stems - belongs on your calendar the day you notice the problem. Do not wait for “pruning season” while mealybug spreads or rot advances. Removing a single dry leaf or a cracked tip is also fine year-round because the biomass loss is minimal.
When to wait
Delay shaping if the plant recently repotted, moved locations, dropped many leaves from cold drafts, or shows active pest infestation. Stabilize care for two weeks - steady light, appropriate watering - before removing additional living tissue. Croton already punishes stacked stress events with leaf drop; pruning on top of Croton repotting guide the same weekend compounds the problem.
Inspect before you cut
In good light, walk around the plant and check:
- Stem condition - soft, blackened, or shriveled wood indicates rot or old damage
- Node locations - identify swollen joints where leaves attach or once attached; these are your cut targets
- Leaf undersides and stem axils - mealybug cotton, scale bumps, fine spider mite webbing
- Overall stress - recent mass leaf drop, wilting despite moist soil, or cold exposure
- Legginess pattern - bare lower stems with foliage only at tips usually signals insufficient light plus normal aging
If more than one-third of the plant looks compromised, address root health and light before aggressive shaping. Pruning cannot revive a root-rotted croton by removing top growth alone.
Tools, gloves, and sap safety
Use sharp bypass pruning shears or snips - dull blades crush woody croton stems and slow healing. Wipe blades with 70% isopropyl alcohol before starting and again after cutting into discolored tissue.
Croton belongs to Euphorbiaceae, the spurge family (NC State Extension - Garden Croton). Cut stems exude milky white latex sap that irritates skin and eyes (RHS Growing Guide - Codiaeum). Wear nitrile or gardening gloves. Keep a damp cloth handy to blot fresh cuts; some growers briefly cap cuts with paper towel to slow sap flow (Ask Extension - Leggy Croton). Wound sealants are unnecessary indoors.
The ASPCA lists Codiaeum variegatum as toxic to dogs and cats, causing oral irritation, vomiting, and diarrhea if ingested (ASPCA - Croton). Prune where pets cannot reach fallen leaves and wash hands after handling cut stems.
Where croton grows after a cut
New shoots emerge from nodes - the slightly swollen joints where leaf petioles meet the stem. Each node can carry a dormant bud that activates when the apical growing tip above it is removed. Growth does not reliably sprout from internode tissue between nodes, and long stubs left above a node die back brown without branching.
When you remove a stem tip, the plant redirects hormones toward buds below the cut. In bright, warm conditions, one or more buds elongate into new stems bearing variegated leaves. Recovery speed depends on season, light intensity, and root health - expect visible bud swell within one to two weeks and new leaves within two to four weeks during active growth.
Step-by-step: how to prune croton
Work methodically and pause between passes.
- Sterilize tools and put on gloves.
- Remove dead, diseased, and pest-infested stems first - cut to healthy wood or trunk base.
- Identify nodes on stems you plan to shorten.
- Shorten the tallest or most wayward stems to nodes that sit inside your target silhouette.
- Rotate the pot and view from multiple angles; stop when the outline looks balanced.
- Collect sap-dripping trimmings in a bag; wipe sap from surfaces.
- Hold light and temperature steady for two weeks - no repotting, no fertilizer push.
For routine shaping, remove no more than one-third of total living foliage in one session. Step back after every few cuts; croton tolerates a pause far better than a second aggressive pass the same day.
Cut placement above the node
Locate a healthy node with a visible bud scar or small bump. Position your blade 5–10 mm (about ¼ inch) above that node - not flush against it and not an inch higher. Too close damages the bud; too high leaves a stub that browns without producing side shoots.
Slice at a slight angle so moisture runs off the cut face. One clean motion beats multiple partial crushes. On fully leafed stems, cut just below the lowest leaf you intend to keep. On bare leggy stems, trace downward to the highest viable node - sometimes near the soil line - and cut there. Extension guidance confirms cutback above a node is correct and that plants can be cut back as much as required in early spring when light is adequate (Ask Extension - Leggy Croton).
How much you can safely remove
Routine shaping vs hard rejuvenation
For maintenance shaping on a reasonably healthy plant, stay within the one-third rule - remove no more than one-third of living foliage per session. Stagger additional work across two or three weeks if you need more reduction.
For severe legginess - mostly bare woody stems with leaves clustered at the top - spring hard rejuvenation is a different category. Cut individual stems to 4–12 inches above the soil line, always just above a node. Wisconsin Extension supports hard spring pruning to stimulate branching when plants get leggy (Wisconsin Horticulture - Croton). Multiple hard-cut stems often produce several fresh basal shoots each, creating a bushier plant than tip pinching alone.
Hard rejuvenation temporarily removes most visible foliage once, in spring, on a healthy rooted plant - not as a monthly habit. If the plant is already stressed, stage cuts across two sessions two to three weeks apart instead of stripping everything at once.
Fixing leggy croton stems
Moderate legginess - a few long whips but foliage remains mid-stem - shorten each stem to a node one-third to halfway down from the tip, or to the highest node below the bare zone. That removes the sparse top and forces lower branching without resetting the entire plant.
Severe legginess - bare sticks with a leaf tuft at the top - calls for spring hard cutback as described above. Expect the plant to look rough for weeks; judge success by bud break at nodes, not immediate lushness.
When legginess is really a light problem
Before hard-cutting the same croton a third time, verify light. Croton wants bright light with at least two to three hours of direct sun for best color and compact growth (Ask Extension - Leggy Croton). In too little light, internodes stretch and lower leaves drop faster. Move toward an east window, filtered south exposure, or supplemental grow light - acclimate gradually to avoid scorch - then prune to the height that fits the brighter location.
Pinching and light maintenance
Pinching - removing the soft growing tip and top one or two immature leaves with fingernails or snips - redirects growth to side buds during spring and summer. Pinch every few weeks on young plants you want dense and multi-branched; stop by early fall.
Light maintenance trims remove a single rogue stem, a yellow leaf, or an occasional flower spike without triggering major leaf drop. These micro-cuts are fine whenever the plant is in obvious active growth.
Healthy trimmings make useful stem cuttings - 4–6 inch sections with at least one node root in moist mix or water under warm, bright conditions. Wear gloves for sap. Spring aligns cutting propagation with shaping work.
Aftercare and recovery timeline
Keep light bright and consistent - do not move the plant to a darker room while it has fewer leaves to photosynthesize. Water when the top inch of mix dries; reduced foliage uses less water, so avoid overcompensating with heavy soaking. Pause fertilizer two to three weeks after moderate pruning and four weeks after hard cutback; resume half-strength feeding only when new shoots are clearly expanding.
Do not repot the same weekend as major pruning unless root failure makes it unavoidable - pick one stress event per month.
| Phase | Active spring/summer | What to expect |
|---|---|---|
| Immediate | Days 0–3 | Sap slows; possible minor leaf drop; keep conditions stable |
| Bud swell | Days 7–14 | Enlargement at nodes below cuts |
| First new leaves | Weeks 2–4 | Small shoots unfurl; color deepens as leaves mature |
| Canopy fill | Weeks 6–8 | Side branches lengthen; silhouette fills in |
| Winter cut | Nov–Feb | Timeline may double; minimal progress until spring |
Signs pruning worked - and warning signs
Success shows as swollen buds at nodes within one to three weeks, then firm new leaves with cultivar-appropriate color within two to four weeks. The silhouette looks more balanced from multiple angles. Cut faces dry clean; stub dieback is minimal.
Warning signs include black mushy cut ends (dull tools or diseased wood - trim back with sterile blades), long brown stubs above nodes (cut too high - remove stub to just above the node), mass leaf drop within days (wrong season, over-cutting, or pre-existing stress - hold steady care and wait), and no bud break after six weeks in spring with decent light (damaged nodes, compromised roots, or stems too woody without viable buds).
Common mistakes
- Major cuts outside the active growth window - winter hard pruning on a plant that cannot replace leaves quickly
- Cutting mid-internode or leaving long stubs - dieback without branching
- Pruning without improving light - guarantees repeat legginess
- Removing too much on an already stressed plant - compounds leaf drop
- Dull or unsterilized tools - crushed stems and disease spread
- Fertilizing immediately after hard cutback - pushes weak shoots before wounds heal
- Ignoring sap and pet safety - skin irritation and toxic risk to cats and dogs (ASPCA - Croton)
- Shearing like a hedge - random tip removal without node awareness produces uneven regrowth
Conclusion
Croton pruning succeeds when timing, cut placement, and light align with the plant’s growth rhythm. Remove dead and damaged wood first, then shape or rejuvenate in spring through early summer. Cut just above healthy nodes with sharp, sterilized tools and gloves for the milky sap. Stay within the one-third rule for routine work; use spring hard cutback on severely leggy specimens when bright light will support recovery. Fix insufficient light alongside any cutback, keep conditions stable afterward, and judge recovery by bud swell and fresh leaf color - not by how the plant looked the day before you cut.
When to use this page vs other Croton guides
- Croton overview - Start here for whole-plant context before deep-diving this topic.
- Croton problems hub - Jump to symptom-specific fix guides when this care topic does not resolve the issue.
- Leggy Growth on Croton - Escalate here when pruning adjustments are not enough.
- Slow Growth on Croton - Escalate here when pruning adjustments are not enough.
- Brown Tips on Croton - Escalate here when pruning adjustments are not enough.