Not Enough Light on Bird's Nest Fern: Causes, Checks & Fixes
Quick answer
Bird's nest fern in too little light keeps old fronds green while new ones stay small, pale, and slow. First step: move the pot 12–24 inches closer to your brightest safe window and judge the next unfolding frond-not the old leaves.
Not Enough Light on Bird's Nest Fern: Causes, Checks & Fixes
This guide covers not enough light on Bird's Nest Fern. See also the general Not Enough Light guide, watering, and light pages for this plant.
Not Enough Light on Bird's Nest Fern: Causes, Checks & Fixes
Quick answer
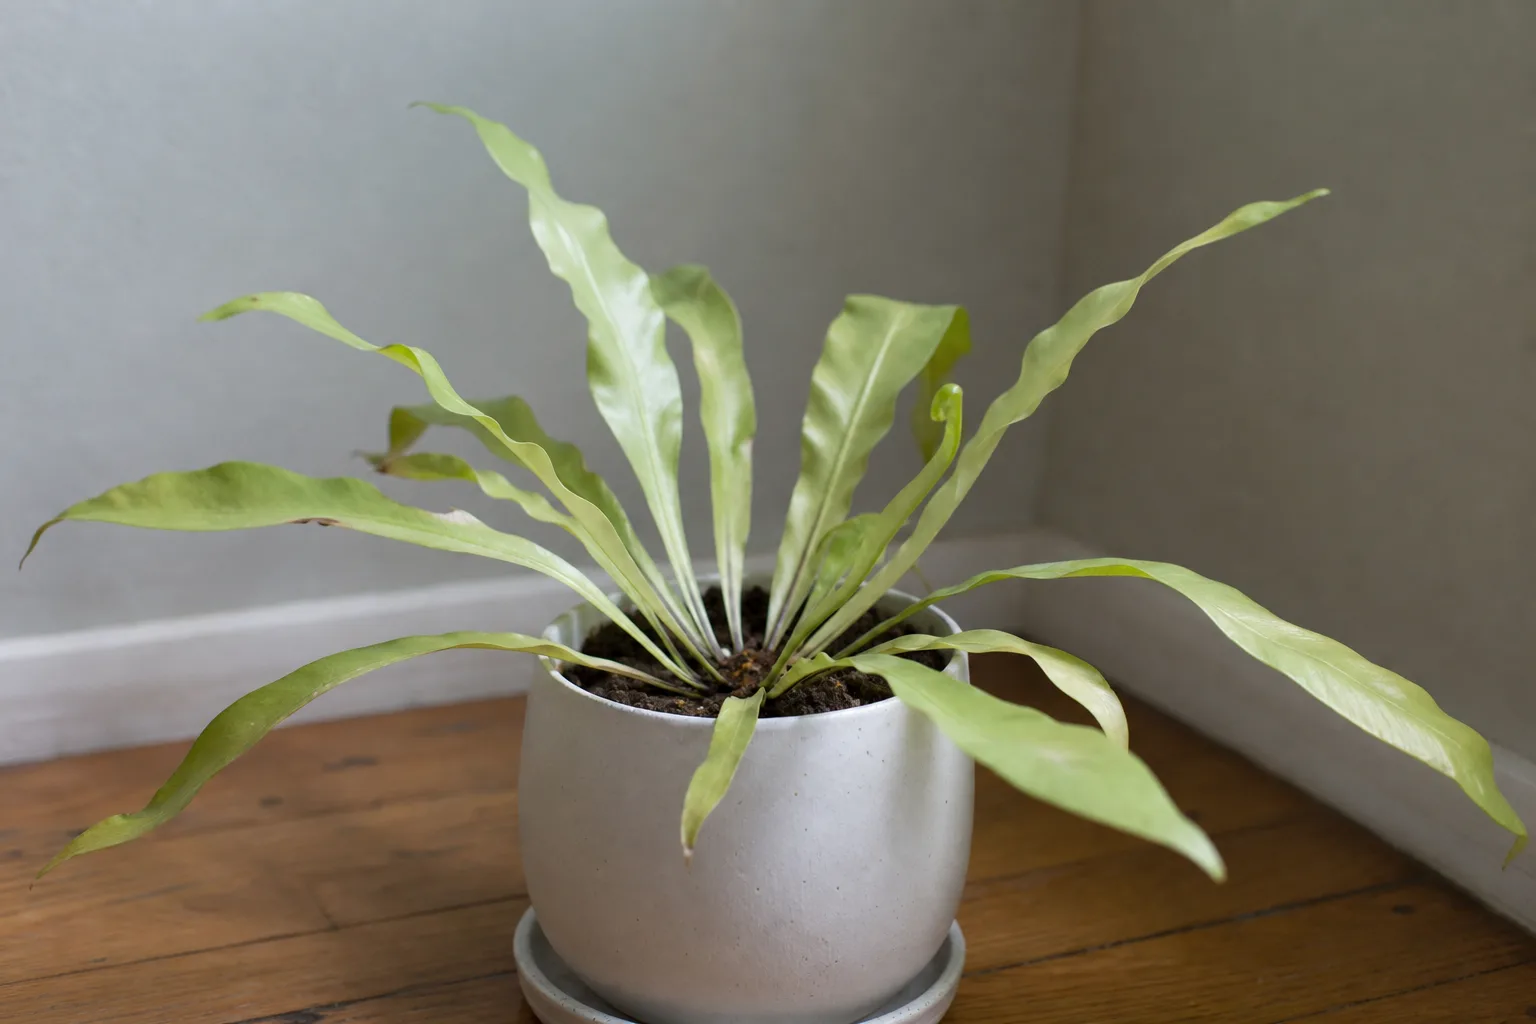
Not enough light on bird’s nest fern (Asplenium nidus) is one of the most common reasons a store-perfect fern turns into a pale, stalled rosette indoors. The plant can survive in a dim corner better than sun-loving succulents, but survival is not the same as healthy growth. Old fronds may stay green for months while the crown produces almost nothing new-or only small, washed-out leaves that take forever to unfurl.
First step: move the pot 12–24 inches closer to your brightest safe window today. Bird’s nest fern wants bright, filtered indirect light-the kind you get near an east window or a bright north exposure-not ambient room glow six feet from the glass. Do not repot, fertilize, or change your Bird’s Nest Fern watering guide until you have given the plant a fair trial in better light and watched the next unfolding frond.
What not enough light looks like on Bird’s Nest Fern
Low-light stress on this fern shows up first at the central rosette, where new fronds emerge. That matters because bird’s nest fern grows from the center outward; the oldest fronds sit around the rim and can look fine long after the plant has been starving for weeks.
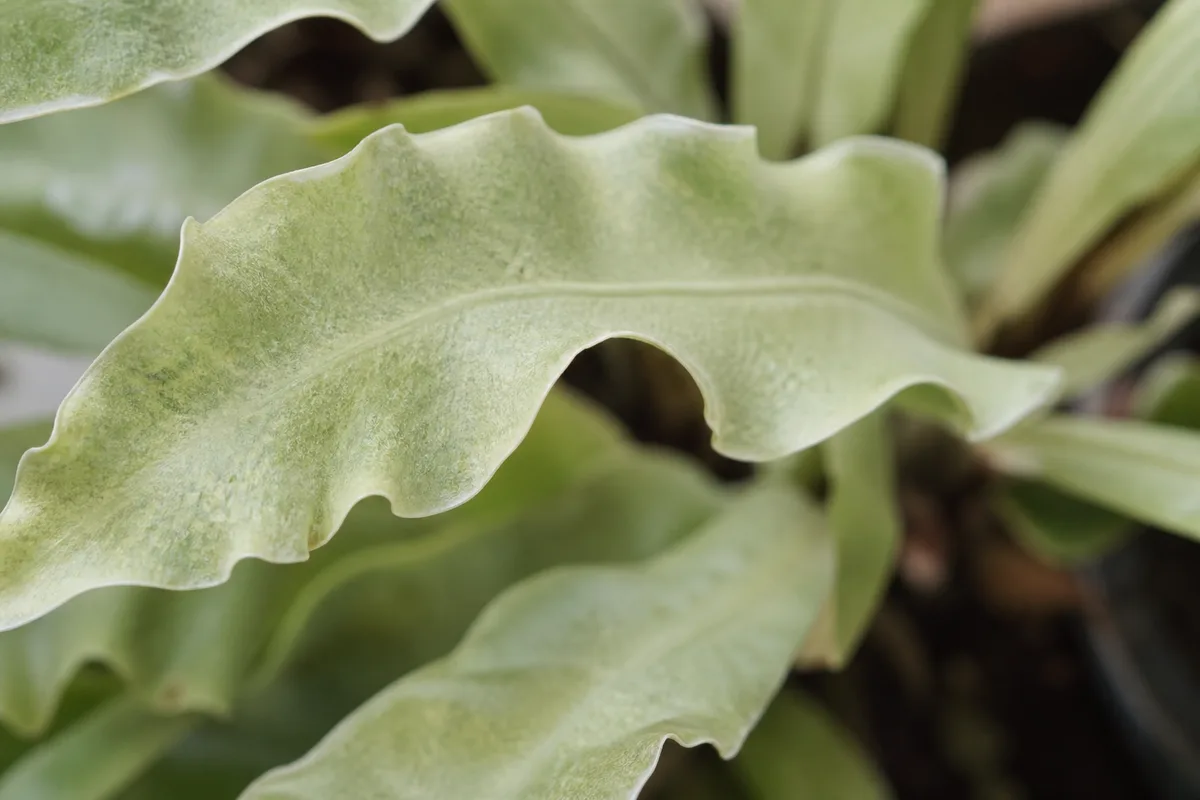
Not Enough Light symptoms on Bird’s Nest Fern - compare with healthy tissue on the same plant.
Typical patterns include:
- Small, pale, or dull new fronds that unfurl slowly compared with fronds the plant produced in brighter seasons
- Thin, soft, sometimes floppy frond texture instead of firm, glossy green tissue
- Strong lean toward the brightest direction, leaving the rosette lopsided-a common response when light reaches plants from one side
- Slow or stalled growth even when temperature and humidity are otherwise stable
- Flattened or less wavy frond edges on new growth in chronically dim spots
- Soil that stays wet for unusually long periods, sometimes followed by yellowing lower fronds
What you usually will not see with low light alone: bleached white patches, crispy brown scorch on sun-facing frond surfaces, or sudden collapse on a windowsill in direct afternoon sun. Those patterns point toward too much light or heat, not too little.
Bird’s nest fern does not flower indoors. Pale growth, stalled unfurling, or a “tired” rosette are never bloom problems on Bird’s Nest Fern overview-UF/IFAS lists the plant as having no flowers-so do not chase fertilizer to “force” something that will not happen on a foliage fern.
Why Bird’s Nest Fern gets not enough light
The label “low-light plant” causes more bird’s nest fern damage than almost any other care myth. Clemson University’s Home & Garden Information Center recommends placing the fern in a room with bright, indirect light, especially in east- or north-facing rooms. The species tolerates lower indoor light, but that tolerance has a ceiling.
In the wild, Asplenium nidus grows as an epiphyte on tree trunks in humid tropical rainforests across Oceania, Southeast Asia, and related regions. UF/IFAS notes that canopy shade is not darkness-it is filtered brightness strong enough to fuel steady photosynthesis without the harsh, magnified beams that hit leaves through unshaded south or west glass. Indoors, a hallway far from windows or a decorative shelf across the room often delivers far less usable light than the plant received in a greenhouse or garden center.
Human eyes adapt quickly to dim rooms. A corner that feels comfortable for reading may be too weak for a fern trying to push out broad new fronds. Distance matters enormously: light intensity decreases rapidly with distance from the source, so a pot on the floor six feet from a bright window receives a fraction of the light it would get one to three feet from the glass.
Common placement mistakes for bird’s nest fern include:
- Decor-first positioning on dark shelves, bookcases, or interior walls with no real window exposure
- Winter drift-the same east-window distance that worked in June may be too far in January when days are shorter and the sun angle is lower
- Blocked glass from heavy curtains, tinted panes, exterior trees, or furniture between the plant and the window
- Office or bathroom spots with a distant single window and long unlit hours overnight
- Misreading survival as success-old fronds stay green while the crown barely produces new tissue
Low light also changes how the rest of care feels. A fern photosynthesizing less uses less water. Soil that dried appropriately in brighter light can stay damp in a dim corner, setting up yellowing and root stress that is easy to blame on watering alone.
How to confirm the cause
Work through these checks before Bird’s Nest Fern repotting guide, feeding, or pruning:
- Newest frond quality - Compare the unfolding center frond to older outer fronds. Smaller, paler, slower new growth with greener mature leaves strongly suggests light is the limiter.
- Distance and direction - Note how many feet the pot sits from the glass and which way the window faces. East and bright north exposures are lower-risk starting points; deep interior placement is higher-risk.
- Hand-shadow test at frond height - Around midday, hold your hand between the window and the plant. Bird’s Nest Fern light guide gives a soft, fuzzy shadow. Almost no shadow means the spot is likely too dim. A sharp, dark-edged shadow means direct sun is hitting that point-too strong for unacclimated bird’s nest fern fronds.
- Soil dry-down speed - Stick a finger into the top inch of mix. If soil stays wet for many days while growth is slow, low light may be reducing water use. Fix light and watering together rather than only adding drainage.
- Seasonal context - Did symptoms start or worsen in late fall or winter? Shorter days often expose marginal placements that looked fine in summer.
- Lean and asymmetry - A rosette reaching hard toward one direction usually means usable light arrives from only one side.
If the pot is on a sunny south or west sill and fronds show bleaching or crispy brown patches on the window-facing side, you are likely dealing with excess light, not deficiency. Pull back or filter sun before moving the plant closer.
First fix for Bird’s Nest Fern
Move the pot 12–24 inches closer to your brightest safe window.
Choose a spot with bright, filtered indirect light-typically 1–4 feet from an east window, near a bright north window, or several feet back from a south or west window behind a sheer curtain. Make the move in one step if the plant is not currently scorched; if it has been in very deep shade for months, shift closer over 10–14 days in small increments instead.
After the move, do nothing else for two weeks except rotate the pot a quarter turn every few days and adjust watering only if the mix now dries faster. The next unfolding frond is your report card.
Step-by-step recovery
Once the plant is closer to usable light, support recovery in this order:
- Stabilize placement - Keep the fern in the improved spot for at least three to four weeks before judging failure. Avoid moving it again during that window.
- Rotate weekly - Turn the pot a quarter turn so the rosette does not keep leaning hard toward the glass.
- Match watering to new light use - Brighter appropriate light increases transpiration. If the top inch of soil dries sooner than before, water slightly earlier. If the pot is still damp deep down, wait-low light may still be limiting, or the old schedule is too heavy.
- Add a grow light if the room cannot improve - In genuinely dark interiors, use a full-spectrum LED fixture 12–24 inches above the fronds on a timer for about 10–12 hours per day. Raise the lamp or shorten runtime if new fronds look tight or bleached; lower it or add an hour if growth stays small and the plant leans toward the bulb.
- Hold fertilizer - Do not feed a stressed fern to “wake it up.” Resume half-strength monthly feeding only after a new frond opens firm and green and care has been stable for two weeks.
- Trim only dead tissue - Remove fully brown or mushy fronds at the base for hygiene. Keep partially pale fronds until replacements emerge unless they harbor pests.
If natural light cannot reach the plant at all-no window within practical distance-a grow light is not optional décor. It replaces the window the room lacks.
Recovery timeline
Low-light correction is slower than sun-scorch rescue because the damage is cumulative rather than sudden.
First reliable sign: a new frond that emerges firmer, greener, and closer to normal size than the previous one-often visible within three to four weeks after a meaningful light upgrade during warm months. Winter recovery can take longer because day length is shorter even after you fix placement.
Old fronds that developed pale or thin in dim light usually do not regain full color or size-judge recovery by new growth, not by old leaves. Judge success by crown output, not by trying to green up mature leaves.
Worsening signs during recovery: lower fronds yellow while soil stays wet, the central crown softens, or new fronds keep shrinking after a month in a clearly brighter spot. Those patterns suggest compounding root stress, pests, or a placement that is still too dim-re-check distance, drainage, and whether water is entering the central rosette.
Lookalike symptoms
- overwatering on Bird’s Nest Fern in dim light - Yellowing lower fronds, soggy mix, and sour smell with slow growth. Fix light first, then let the top inch dry before the next drink; do not assume more water will perk up a shaded fern.
- underwatering on Bird’s Nest Fern - Crisp pale edges, very light pot, and dry mix throughout with fronds that look drought-stressed rather than simply small. Deep edge-watering once, then resume a measured rhythm.
- Low humidity - Brown tips and margins with otherwise normal frond size in adequate light. Add humidity support near brighter windows where transpiration is higher.
- Too much direct sun - Bleached patches and crispy brown areas on sun-facing frond surfaces. Pull back or sheer-filter immediately; do not move closer to the window.
- Normal winter slowdown - Slightly slower unfurling in cool, short days with firm green new tissue. Supplement light or accept slower pace; do not double fertilizer.
- root rot on Bird’s Nest Fern from watering the crown - Black mushy center with wet soil. That is a watering and crown-care emergency, not solved by brightness alone.
What not to do
Do not blast the fern with direct south or west afternoon sun to fix pale growth. Bird’s nest fern fronds scorch quickly without gradual acclimation.
Do not fertilize heavily on a pale, stalled plant. Salts on a weak root system stress recovery.
Do not repot on day one unless the mix is clearly failing or the crown is rotting. Low light is a placement problem, not a pot-size problem.
Do not keep watering on the old calendar if soil now stays wet in a dim spot. Less photosynthesis means less water use.
Do not judge the fix by old fronds and conclude the move failed before a new frond has time to open.
How to prevent low-light stress next time
Place bird’s nest fern where bright, filtered indirect light is realistic most of the day, not only where the pot looks best in the room. For most homes that means an east window, a bright north exposure, or a filtered south or west window at safe distance.
Practical habits that keep the rosette full:
- Keep the pot 1–4 feet from window glass unless sheer filtering or season requires more distance
- Rotate the pot weekly during active growth
- Clean windows seasonally and trim indoor obstructions that block beams
- Supplement with grow lights in offices, hallways, and north rooms that darken in winter
- Acclimate gradually when moving from a dim shop shelf to a brighter window over 10–14 days
- Re-check placement every autumn when daylight shortens
Pair light with stable humidity. Bird’s nest fern in brighter light transpires more; dry heated air plus new brightness can brown margins if humidity drops below the 50–70% range the species prefers.
Conclusion
Bird’s nest fern low-light problems come down to one idea: the plant needs bright, filtered brightness like rainforest canopy light, not a dark corner and not harsh sunbeams. Move it closer to a safe window, read the next new frond honestly, and adjust watering to match how much light the plant actually receives. Get placement right and the rosette returns to slow, steady, glossy growth. Miss the light window and even careful watering will not keep the crown looking its best.
When to use this page vs other Bird’s Nest Fern guides
- Bird’s Nest Fern watering guide - Use for routine moisture checks before assuming not enough light is the main issue.
- Bird’s Nest Fern problems hub - Browse all 16 common issues on this species.
- Leggy Growth on Bird’s Nest Fern - Different entry point when symptoms overlap with not enough light.
- Slow Growth on Bird’s Nest Fern - Different entry point when symptoms overlap with not enough light.
- Yellow Leaves on Bird’s Nest Fern - Different entry point when symptoms overlap with not enough light.