Best Soil for Aparajita: Mix, Drainage, and Container Tips
Best Soil for Aparajita: Mix, Drainage, and Container Tips
Best Soil for Aparajita: Mix, Drainage, and Container Tips
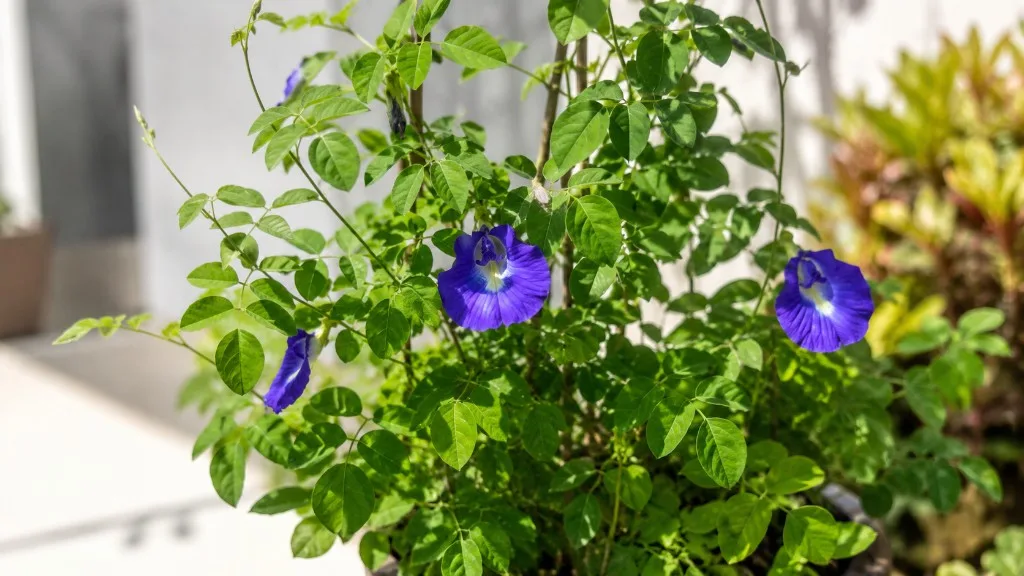
Aparajita is often sold as an easy flowering vine, and in many ways it is. Clitoria ternatea tolerates a wider range of soil types than fussy ornamentals, grows fast once established, and even improves soil fertility through nitrogen fixation. That tolerance creates a trap: growers assume any bagged mix will work, then wonder why the vine stays green but flowers poorly, or why lower leaves yellow after every heavy rain. The real issue is usually not “wrong ingredients” in the abstract. It is a root zone that drains too slowly, holds stale moisture, or compacts in a pot that is too large for the current root system.
Soil for aparajita is less about finding a magic recipe and more about building a predictable root environment - one that stays airy after watering, holds enough moisture for steady growth, and never traps the roots in standing water. This guide covers the best mix ratios, the pH range that supports nutrient uptake, how to choose containers that actually drain, and the practical checks that tell you whether your current setup is helping or quietly suffocating the roots.
Quick Answer: The Best Soil Mix for Aparajita
The best aparajita soil is a well-draining, moderately fertile mix with these traits:
- Structure: Light, friable, and open enough for roots to breathe after a full watering
- Drainage: Excess water exits within minutes; the lower root zone should not stay saturated for days
- Organic matter: Enough compost or vermicompost to support steady growth without turning the mix into sponge
- pH: Slightly acidic to neutral, roughly 6.0 to 7.5, with tolerance up to about 8.0 in many references
- Moisture behavior: The top 2–3 cm can dry between waterings while the root ball stays lightly moist, not wet
For balcony pots, a dependable starting recipe is 40% garden soil, 30% compost or vermicompost, 20% cocopeat, and 10% river sand or perlite by volume. That ratio gives you structure from mineral soil, fertility from compost, moisture buffering from cocopeat, and drainage insurance from sand or perlite. Adjust based on how your pot actually dries: if it stays heavy for four or five days after watering, increase sand or perlite and reduce cocopeat. If it dries out in a single hot afternoon, add a little more cocopeat or compost and check whether the pot is too small or sitting in relentless direct sun.
The Spruce describes butterfly pea as growing best in moist, well-drained soil with a pH of 6.0 to 8.0, and notes the plant is tolerant of soil type while still requiring good drainage. That combination - forgiving of composition, unforgiving of waterlogging - is the key mental model for every decision below.
What Aparajita Roots Need From Soil
Aparajita is a twining tropical legume. In the ground, it can spread roots widely, partner with soil bacteria to fix atmospheric nitrogen, and push through seasons of heat and brief dryness. In a container, the entire root system lives inside a small volume with no escape route. Every watering decision, every ingredient choice, and every pot dimension gets amplified. Good soil has to do four jobs at once: anchor the vine and its support, hold usable moisture, drain excess water quickly, and keep air pockets open around the roots.
Miss any one of those jobs and the plant may look fine for weeks while the root zone deteriorates. Leggy growth, reduced flowering, yellow lower leaves, and fungal spotting on foliage often trace back to soil that looked “fine” on the surface but stayed wet and oxygen-poor deeper in the pot. The goal is not the driest possible mix. Aparajita is not a cactus. It wants consistent access to moisture. The goal is moisture with oxygen - a mix that wets evenly, drains freely, and dries at a pace that matches your climate and Aparajita watering guide.
Drainage vs Moisture: The Real Balance
Drainage and moisture sound like opposites, but in container culture they are partners. A mix that drains well is not one that refuses to hold water. It is one where large and medium pores empty after irrigation and refill with air, while smaller pores retain a usable water reserve. When growers say aparajita needs “well-draining soil,” they mean the roots should never sit in stagnant saturation. They do not mean the plant should cycle between flood and desert every 48 hours.
You can test whether your mix strikes the right balance with a simple squeeze test on slightly damp material. Grab a handful, compress it lightly, and release. A good aparajita mix may hold a loose shape for a moment, then crumble apart when you touch it. If it forms a tight, sticky ball, it probably needs more sand, perlite, or coarse organic structure. If it falls apart instantly and feels dusty, it may dry too fast for a flowering vine in a exposed terrace pot. Watch the plant over two or three watering cycles and adjust the recipe rather than chasing a perfect bagged product label.
Why Legume Roots Change the Equation
As a Fabaceae legume, aparajita forms a symbiotic relationship with rhizobia bacteria that convert atmospheric nitrogen into forms the plant can use. NCAT’s cover-crop profile on butterfly pea notes it can fix substantial nitrogen - on the order of 280 pounds per acre in field settings - and responds well to inoculation with cowpea-group rhizobia. In garden beds, that nitrogen-fixing ability means aparajita often thrives in moderately fertile soil without heavy feeding. In pots, the same biology still operates, but the smaller soil volume means nutrients and moisture swing faster.
Legume status also explains an important limitation: aparajita will not tolerate flooding or waterlogging. PROSEA’s agronomic profile for Clitoria ternatea describes wide soil adaptation from pH 5.5 to 8.9, including heavy clay in subhumid tropics, but explicitly states the species will not tolerate waterlogging. Useful Tropical Plants echoes the same point: it succeeds on varied soils as long as they are well-drained, prefers fertile friable soil, and grows poorly on infertile sand unless fertilized. For home growers, the practical takeaway is simple. Aparajita can handle less-than-perfect mineral soil in the ground. In a pot, poor drainage is one of the fastest ways to kill the plant or shut down flowering.
That legume biology also shifts how you think about fertilizer. A young vine in fresh, compost-rich mix may need little supplemental nitrogen. An older plant in depleted soil, or one in very sandy mix, may need balanced feeding. Soil quality and feeding should be planned together, not treated as separate problems.
Soil pH and Nutrient Availability for Butterfly Pea
For Clitoria ternatea, aim for a root-zone pH between 6.0 and 7.5, with acceptable performance reported up to 8.0 in several horticultural and agronomic sources. The Spruce allows up to 8.0. PROSEA’s wider range of 5.5 to 8.9 reflects field performance across tropical soils, including alkaline clays, but home container growers get the most predictable results in the mildly acidic to neutral band.
pH matters because it controls nutrient availability. In overly acidic or overly alkaline mixes, phosphorus, iron, and other elements can become harder for roots to absorb even when they are present. For aparajita, the most common pH-related home problem is not extreme acidity. It is slowly rising alkalinity from hard tap water, calcium-rich garden soil, or repeated top-dressing with fresh compost and lime-heavy amendments without flushing salts. If leaves look pale or growth stalls despite good light and reasonable watering, pH is worth checking - but only after you rule out waterlogging, root damage, and obvious pest issues.
Most growers do not need laboratory testing to start. If you are using a balanced mix with compost, cocopeat, and mineral soil in the ratios below, you are usually inside a workable range. Test when you see persistent unexplained decline, when using highly alkaline local garden soil, or when reusing old mix that has developed white crust on the surface. A simple soil pH meter or a home vinegar/baking-soda reaction test can give you a rough direction; for serious correction decisions, a proper soil test is more reliable than a cheap probe stuck in loose potting mix.
Best DIY Aparajita Soil Mix Recipes
No single aparajita soil recipe is perfect for every terrace, balcony, and climate. The best mix is the one that dries at a healthy pace under your actual sun, wind, pot material, and watering habits. Use the recipes below as starting points, then adjust based on how the root ball behaves over several watering cycles.
Before mixing, break up compacted garden soil clumps, moisten dry cocopeat so it blends evenly, and measure by volume rather than weight. A standard 5-gallon bucket makes a practical “one part” measure for small batches. Mix on a tarp or in a wheelbarrow until the texture looks uniform. Avoid layering different materials directly in the pot; uneven distribution creates wet zones and dry zones in the same container.
Balcony and Container Mix (40/30/20/10)
This is the most useful all-purpose aparajita potting mix for Indian balconies and terrace containers:
- 40% garden soil or quality potting mix - structure and mineral content
- 30% compost or vermicompost - fertility and microbial activity
- 20% cocopeat - moisture buffering and lighter texture
- 10% river sand or perlite - drainage and aeration
This ratio mirrors what multiple Indian balcony guides recommend for aparajita and butterfly pea, and it behaves well in 10–14 inch (25–35 cm) pots with drainage holes. The garden soil component anchors the vine and slows drying slightly, which helps on hot terraces where lightweight peat-heavy mixes can go from wet to dry too fast. The cocopeat keeps the root zone from becoming hydrophobic in dry spells. The sand or perlite prevents the compost-rich blend from compacting into a dense mass after months of watering.
If your balcony pot stays wet too long during monsoon season, shift to 35% soil, 25% compost, 15% cocopeat, 25% sand or perlite. If you are in a dry, windy terrace where pots bake daily, try 35% soil, 35% compost, 25% cocopeat, 5% sand and monitor before adding more drainage material.
Garden Bed Mix for Climbing Vines
In-ground aparajita has more forgiveness because excess water can move sideways and downward through a larger soil volume. Still, the planting site should not be a low spot that collects runoff. For garden beds, trellises, and boundary fences, prepare soil to 30–40 cm depth by loosening the native earth and incorporating organic matter.
A practical bed prep formula:
- Loosen existing soil thoroughly and remove rocks, roots, and debris
- Mix in 20–30% well-rotted compost or aged cow dung by volume
- Add 10–15% coarse sand or fine gravel if your native soil is heavy clay
- Build a trellis or string support before planting so you do not compact the prepared zone later
Feedipedia and PROSEA note that butterfly pea is unusually well adapted to heavy clay soils in tropical field settings, often outperforming other herbaceous legumes on those sites. That does not mean you should plant into raw, unamended clay in a home garden and expect fast establishment. It means clay can work when loosened and enriched so roots can penetrate and water can move. On sandy or depleted sites, compost is not optional. The same sources report poor performance on infertile sand without fertilization.
Seedling and Propagation Mix
Seeds and young cuttings need a lighter, more aerated mix than established vines. A dense, wet root zone is especially risky for seedlings because a small root system cannot recover from rot the way a mature plant sometimes can.
For seed starting and rooting cuttings:
- 30% garden soil or fine potting mix
- 30% cocopeat
- 30% compost or vermicompost
- 10% perlite or sand
Keep seedling containers shallow but wide enough for root development, and water gently so you do not compact the surface. Once seedlings have several true leaves and a visible root network, transplant into the standard balcony mix rather than keeping them in the lighter propagation blend long term. The lighter mix dries faster and lacks the structure needed to support a fast-growing twining vine through a full season.
Key Soil Ingredients Explained
Understanding what each ingredient does helps you adjust intelligently instead of randomly adding “more compost” or “more sand” every time the plant looks unhappy. Aparajita soil is a system of particle sizes, organic matter, and pore spaces. Change one component and you change how water moves, how roots breathe, and how long nutrients remain available.
Garden Soil vs Potting Mix as a Base
Garden soil from a healthy outdoor bed provides mineral structure, native microbes, and weight that helps stabilize a climbing vine in wind-exposed terraces. The risk is variability. One garden’s soil may be rich loam; another may be heavy clay, salty, or full of weed seeds and pest eggs. If you use garden soil in containers, source it from a productive bed, sift out debris, and never use soil from waterlogged or chemically treated areas.
Bagged potting mix is more consistent and usually lighter, which can be an advantage in containers you move often. Many commercial mixes are peat- or coir-based with added perlite. They work for aparajita when amended with compost for fertility and sand or extra perlite if the bagged product feels too moisture-retentive. Pure potting mix without mineral soil or compost can dry unevenly and may lack the weight and structure a twining vine wants in an exposed balcony.
For most Indian home growers, a blend of both worlds - garden soil plus compost plus cocopeat plus drainage material - outperforms either pure garden soil or pure bagged mix alone.
Compost, Vermicompost, and Cocopeat
Compost and vermicompost supply slow-release nutrients, beneficial microbes, and improved soil structure. For aparajita, they are the primary fertility source in many home setups, especially where chemical feeding is light. Well-made compost should smell earthy, not sour or ammonia-sharp. If compost is wet, slimy, and anaerobic, it will harm roots instead of helping. Age immature compost before mixing, or use a smaller percentage until it finishes breaking down.
Cocopeat holds moisture without the heaviness of clay, re-wets more easily than old peat in many cases, and lightens the mix for container use. It is valuable on sunny terraces where pots dry quickly. The trade-off is water retention. Too much cocopeat in a humid, low-light, or oversized pot keeps the root zone wet too long. Cocopeat also varies in salt content depending on processing. Rinse low-quality cocopeat before use if it feels gritty with salts or if seedlings struggle in fresh mix.
A useful rule: compost feeds the plant and feeds soil life; cocopeat manages moisture. You need both, but neither should dominate the entire recipe.
Sand, Perlite, and Other Drainage Materials
River sand or coarse horticultural sand increases drainage and reduces compaction in compost-heavy mixes. Use clean, washed sand rather than fine builder’s sand that packs like cement. Sand is cheap, heavy, and effective on terraces where wind topples lightweight pots.
Perlite is lighter and excellent at creating air pockets, which makes it ideal for growers who need to reduce weight or who mix large batches of container soil. It does not add nutrients and can float to the surface over time with aggressive top watering, but it remains one of the most reliable aeration amendments.
Some growers ask about gravel or broken pottery at the pot bottom to improve drainage. In practice, that layer often creates a perched water table where fine soil meets coarse material, sometimes keeping the root zone wetter, not drier. Focus on a well-blended mix and a drainage hole instead. If water pools in a saucer or cachepot, empty it after watering rather than letting the pot sit in runoff.
Container Selection and Drainage Setup
Soil cannot compensate for a bad container. The best aparajita soil mix will still fail in a pot with no drainage hole, an outer decorative pot that traps runoff, or a volume far too large for the current root ball.
For balcony and terrace culture, start with a pot 10–14 inches (25–35 cm) in diameter for a young to mid-size vine, with depth at least equal to diameter so roots have room to develop before the plant becomes seriously pot-bound. Aparajita grows fast once established and wants support - a trellis, railing wires, or strings - but that vertical growth does not mean you should jump immediately to a huge container. Oversized pots hold wet mix around roots that cannot use the volume yet, which is a common reason flowering stalls while foliage looks acceptable.
Drainage holes are non-negotiable for long-term container culture. One clear hole is minimum; three to five holes across the base are better for plastic and ceramic pots. Terracotta breathes through its walls and can help soil dry more evenly in humid climates, but it still needs holes. Grow bags are a workable option for space-limited balconies because they drain well and store flat off-season, though they dry faster and may need more frequent watering in peak summer.
If you use a cachepot for aesthetics, water the inner pot at the sink or balcony tap, let it drain completely, and only then set it in the outer container. Never let the inner pot sit in a permanent pool of water. On railings, make sure drainage water will not drip on neighbors below during monsoon weeks; a saucer you empty is fine, a saucer that stays full is a root-rot invitation.
Match pot size to growth stage. Seedlings and newly rooted cuttings belong in smaller starter pots. Step up one size at a time as roots circle the inside wall. A mature, flowering vine that dries the entire root ball in two days during summer may be ready for the upper end of the size range - but only if the foliage and root mass justify it.
How to Test Aparajita Soil Drainage Before You Plant
Do not wait for yellow leaves to tell you drainage is wrong. Test the mix before you plant, and retest after monsoon season or whenever you refresh soil at Aparajita repotting guide.
The pot drainage test: Fill your empty pot with freshly mixed, slightly damp soil. Water slowly until water runs from the drainage holes. Healthy behavior: water exits within a few minutes, the surface wets evenly, and no persistent puddle remains after ten minutes. Problem signs: water runs down the inside wall and out the bottom while the center stays dry, or the pot feels heavy and soggy a day later without the top drying at all.
The finger and skewer check: After a full watering, insert a wooden skewer or your finger to knuckle depth near the root ball, not just at the surface. For aparajita, the top 2–3 cm should dry between waterings while the deeper root zone remains lightly moist. If the skewer comes out wet and cold five days after a single watering in moderate weather, the mix is too dense, the pot is too large, or both.
The smell test: Lift the pot or tip it slightly and sniff near the drainage hole. Fresh, healthy mix smells earthy. A sour, swampy, or rotten odor means anaerobic conditions are developing - often from overwatering on Aparajita, poor drainage, or decomposing organic matter in a sealed root zone. Correct the soil system before blaming pests or fertilizer deficiency.
The weight test: Learn how heavy the pot feels after a full drain cycle and how light it feels when the top few centimeters are dry. Many experienced growers water by weight more reliably than by calendar. This matters for aparajita because the line between “moist enough to flower” and “wet enough to rot” is narrower in containers than in open ground.
Run these checks once when you set up the plant, then again whenever you repot, change seasons, or move the pot to a very different light exposure. Soil behavior changes when a terrace goes from mild spring sun to brutal June afternoon heat.
Seasonal Soil Adjustments for Aparajita
Aparajita is a tropical vine that grows most actively in warm, bright conditions. Soil that works in March may behave differently in July monsoon humidity or December cool dormancy. Seasonal adjustment does not mean replacing the entire mix every month. It means tuning watering, aeration, and repot timing to how the root zone actually dries.
Summer and peak flowering season: Growth and water use are highest. The root ball should stay evenly moist without staying saturated. If pots dry in one day on a west-facing terrace, add a little cocopeat or shade the container sides - not the foliage - to slow evaporation. Water thoroughly when the top 2–3 cm dries, then drain fully. This is when flowering depends most on stable root moisture; drought stress shows up as bud drop and smaller blooms before it shows as obvious wilting.
Monsoon and high-humidity stretches: The enemy is not rain on leaves. It is a pot that never dries. Reduce cocopeat in mixes for plants that sit in covered balconies with little airflow. Space pots farther apart so air moves between them. Elevate pots on feet or bricks so drainage holes stay clear of pooled water on the floor. Pause repotting during sustained wet weather unless the current mix is clearly failing.
Winter and cool slowdown: Growth slows, water use drops, and the same soil can stay wet much longer. Water less often, but when you do water, still soak the root ball and drain - do not switch to shallow sips that wet only the surface. If lower leaves yellow from chronic wetness in a cool room, the fix is usually less water and better light, not more fertilizer. Avoid repotting a stressed winter plant unless roots are rotting or the mix smells sour.
Repotting window: The best time to refresh aparajita soil is at the start of active growth - often early spring on most Indian terraces - when the plant can recover quickly. Repot when roots circle the pot, water runs straight through without soaking the root ball, the mix has compacted, or drainage has slowed noticeably. Do not repot purely because of a few yellow leaves; diagnose first.
Troubleshooting Aparajita Soil Problems
Soil problems rarely announce themselves as “soil problems.” They show up as leaves, flowers, or growth habits that look like light or pest issues until you inspect the root zone.
Yellow lower leaves with wet mix: Classic overwatering or poor drainage. Check hole blockage, cachepot pooling, and whether the top dries but the bottom stays cold and wet. Fix drainage before trimming foliage.
Good foliage, few flowers, strong vine: Often too much nitrogen in fertile, compost-heavy mix, too little direct sun, or an oversized pot keeping roots comfortable but lazy. Soil fertility is only one variable; light matters enormously for aparajita flowering. Still, if you have been top-dressing compost monthly, ease back and ensure the mix drains sharply.
Wilting despite wet soil: Can indicate root rot on Aparajita from past waterlogging, compacted anaerobic mix, or damaged roots after repotting. Unpot, trim mushy roots with clean scissors, repot into fresh, airier mix in a appropriately sized pot, and place in bright indirect recovery light for a week.
Black spots on leaves with stagnant soil: Urvann’s aparajita care notes often link fungal spotting to waterlogging and poor drainage. Improve airflow, reduce watering frequency, ensure holes are clear, and refresh mix if it smells sour. Neem oil may help on foliage, but it does not fix a wet root zone.
Crusty white surface on soil: Usually salt or mineral buildup from water and fertilizer. Scrape the crust, flush the pot with clean water in several slow passes allowing full drainage between passes, and reduce fertilizer concentration. If crust returns quickly, consider lower-mineral water or a lighter feeding schedule.
Plant dries out too fast: Small pot, lightweight mix, terracotta in Aparajita light guide, or root-bound plant. Step up pot size modestly, add a little cocopeat or compost, and verify you are not watering so shallowly that only the top wets while the root ball stays dry.
When several symptoms appear at once, change one major variable at a time. Replacing soil, moving pots, increasing fertilizer, and pruning hard in the same week makes it impossible to know what helped.
Common Aparajita Soil Mistakes to Avoid
Most aparajita soil failures come from a short list of repeatable errors. Avoiding them is cheaper than rescuing a root-rotted vine mid-season.
Using pure cocopeat or pure compost in pots. Both ingredients are useful in blends. Neither should be the entire container volume. Alone, they hold too much moisture, lack stable structure, and can slump over time into a wet mass around the roots.
Adding a gravel layer at the bottom “for drainage.” This rarely fixes poor mix structure and can worsen the wet zone where fine soil meets coarse gravel. Blend drainage materials throughout the mix instead.
Choosing an oversized pot for a small plant. Big pots look generous. They behave like swamps for young root systems. Size up gradually as the vine proves it can use the volume.
Ignoring drainage holes or leaving saucers full. No soil recipe survives standing water at the base of the pot.
Reusing old, compacted mix without refreshing. After a year or more in a fast-growing vine pot, organic matter breaks down, pore spaces collapse, and watering behavior changes. Refresh soil at repotting even if the plant does not need a larger container.
Treating garden-bed advice as container advice. In-ground butterfly pea tolerates heavier soil because the environment is larger. Container culture needs a lighter hand with compost and a heavier hand with aeration.
Over-fertilizing nitrogen on healthy legume soil. Aparajita fixes nitrogen when rhizobia are present. Excess nitrogen can push foliage at the expense of flowers, especially when light is only moderate.
Repotting into wet mix on a wilted plant. If the plant is stressed, diagnose watering and drainage first. Emergency repotting into another wet, dense mix doubles the shock.
Conclusion
The best soil for aparajita is not a rare specialty blend. It is a well-drained, moderately fertile mix that keeps legume roots moist, oxygenated, and stable through your real watering rhythm - whether that is a sunny Indian terrace pot or a garden bed along a trellis. Start with a balanced recipe like 40% soil, 30% compost, 20% cocopeat, and 10% sand or perlite, pair it with a container that has real drainage and sensible size, and aim for a pH near 6.0 to 7.5. Test how the mix dries after watering, adjust for monsoon humidity or summer heat, and treat sour smells, persistent wetness, or crusty salt buildup as root-zone problems worth fixing immediately.
Aparajita rewards growers who pay attention to what happens below the soil line, not just the blue flowers above it. Get the root environment predictable, and the vine has the foundation it needs to climb, bloom, and recover from the stress that every container plant faces sooner or later.
When to use this page vs other Aparajita guides
- Aparajita overview - Start here for whole-plant context before deep-diving this topic.
- Aparajita problems hub - Jump to symptom-specific fix guides when this care topic does not resolve the issue.
- Root Rot on Aparajita - Escalate here when soil adjustments are not enough.
- Mold on Soil on Aparajita - Escalate here when soil adjustments are not enough.