Best Soil for Aglaonema: Mix, pH, and Drainage
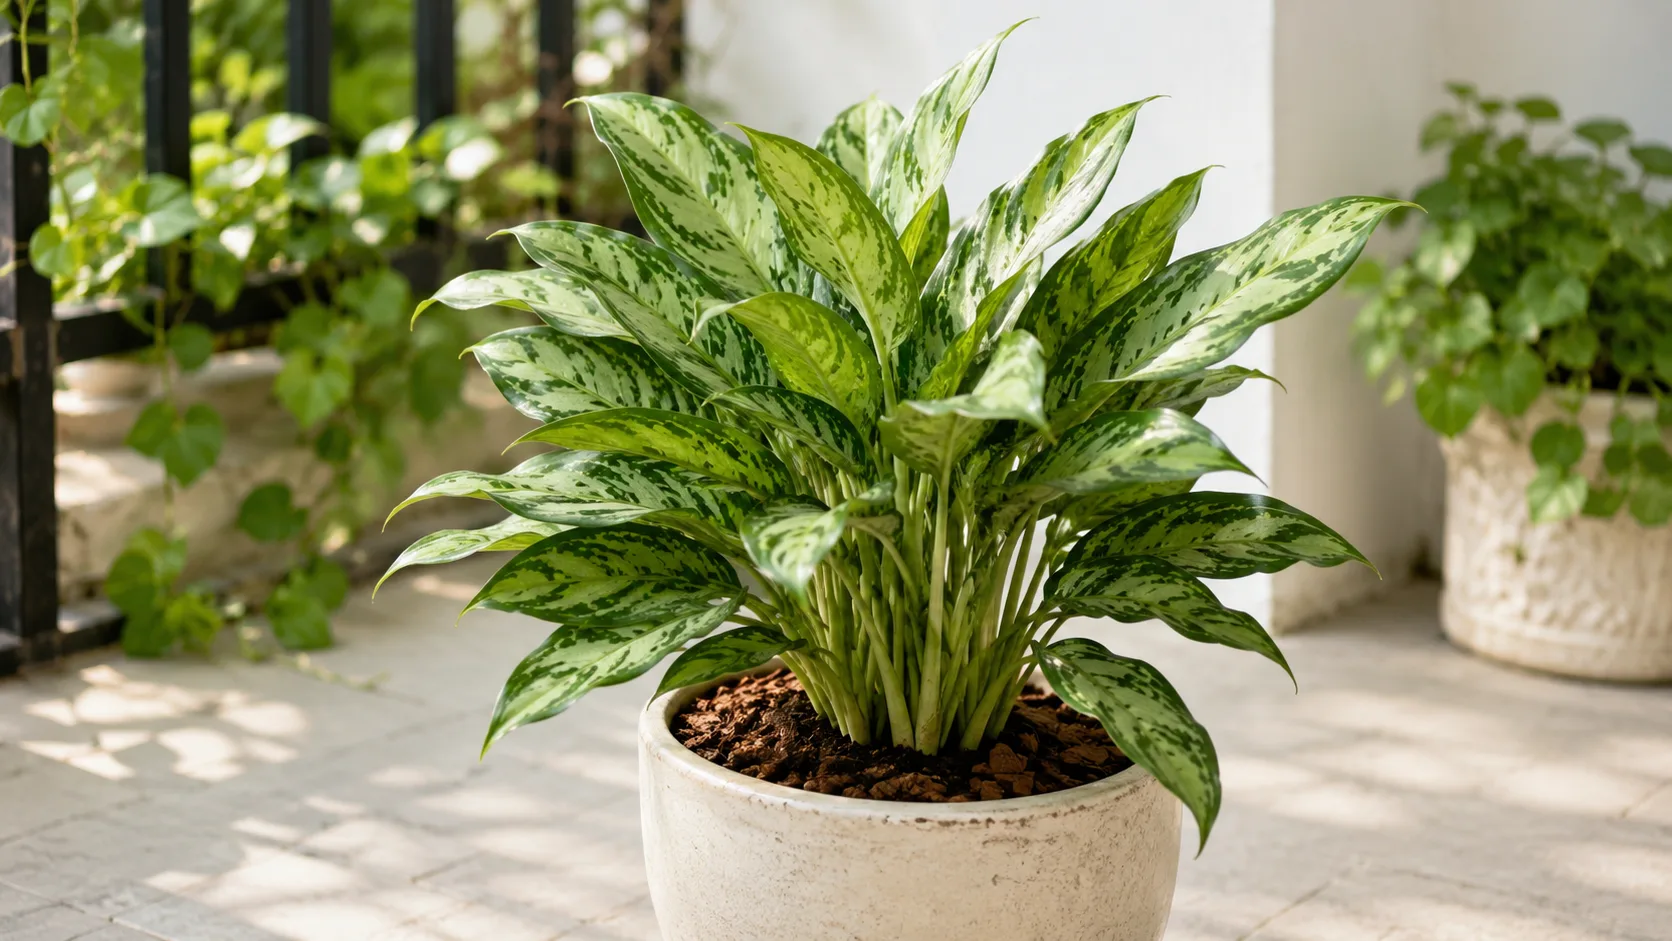
Best Soil for Aglaonema: Mix, pH, and Drainage
Best Soil for Aglaonema: Mix, pH, and Drainage
The best soil for Aglaonema is not the driest, chunkiest mix you can assemble. It is a light, stable potting medium that holds usable moisture while preserving air around the roots. That distinction matters because Chinese evergreens tolerate brief drying better than prolonged saturation, yet they are not desert plants and can struggle in a mix that becomes bone-dry within a day or two. A successful setup balances the plant, the ingredients, the pot, the room, and the way you water.
Aglaonema is a tropical foliage genus in the aroid family, Araceae, but the popular instruction to use “aroid mix” is too vague to be reliably useful. Some commercial aroid blends are mostly large bark and mineral particles, which may suit thick-rooted climbers in humid greenhouses but dry too quickly for a smaller Aglaonema in a warm home. Other indoor mixes are fine and peat-heavy, holding water for so long that the lower root zone loses oxygen. The practical goal is predictable behavior: water should spread through the root ball, excess should drain, and the medium should gradually approach the next watering point without remaining swampy or becoming hard and water-repellent.
Quick Answer: The Best Soil for Aglaonema
Use two parts quality indoor potting mix, one part fine-to-medium orchid bark, and one part perlite or pumice as a dependable starting recipe. Aim for a slightly acidic root zone, roughly pH 6.0 to 6.5, and always pair the mix with a container that has an open drainage hole. This blend retains enough water for steady growth but adds larger pores that continue holding air after irrigation. Adjust the ratio rather than treating it as a law: use a little more aeration material in cool, dim conditions and slightly more moisture-retentive base in hot, bright, fast-drying conditions.
That recommendation translates research targets into ingredients available to a home grower. University of Florida IFAS Extension describes successful commercial Aglaonema media made from sphagnum peat, pine bark, vermiculite, or perlite, with 50–75% total porosity, 10–20% air space, and pH 6.0–6.5. You do not need laboratory equipment to reproduce those exact specifications at home. You do need to preserve the same functional balance: a medium with moisture-holding particles, durable structure, and enough connected pore space for excess water to leave.
What Aglaonema Roots Need From a Potting Mix
Roots need water, oxygen, anchorage, and access to dissolved nutrients at the same time. A mix can appear to “drain” because water exits the bottom, yet still remain too wet internally if most particles are small and tightly packed. Conversely, a pot full of large bark may drain instantly but provide too little continuous moisture for fine new roots. Good Aglaonema soil therefore has a range of particle sizes: finer organic material stores water and nutrients, while coarser bark and mineral particles preserve channels for gas exchange.
This is why ordinary garden soil is a poor container ingredient even when it grows plants well outdoors. In the ground, soil connects to a huge volume, drains into deeper layers, and is worked by weather and organisms. Inside a pot, the same mineral soil can settle into a dense mass with limited air. University of Maryland Extension recommends lightweight container media made from ingredients such as peat, perlite, vermiculite, composted bark, compost, and coir because these mixes can hold water and nutrients while still draining.
The Balance Between Moisture and Air
“Well-draining” does not mean that a mix should hold almost no water. It means that gravity can remove excess water while smaller pores retain a usable reserve and larger pores refill with air. Aglaonema roots perform best when the medium moves through a cycle from evenly moistened to partly dry, rather than oscillating between stagnant saturation and severe drought. The exact speed of that cycle changes with leaf area, root density, light, temperature, humidity, airflow, pot size, and pot material.
Judge the cycle at root depth, not only by the surface color. The top centimeter may look dry while the bottom half remains wet, especially in a tall pot, a decorative cachepot, or a dense mix. A wooden skewer inserted low into the root ball, the weight of the pot, and the feel through a drainage hole provide better evidence than a fixed weekly schedule. If the lower zone is still cool and wet long after the top has dried, the answer is usually more time, better light, or a better-aerated setup, not another small drink.
The Useful pH Range for Aglaonema
For container-grown Aglaonema, pH 6.0–6.5 is a practical target based on the UF/IFAS production guidance. This mildly acidic range supports nutrient availability without requiring home growers to chase a perfect decimal. Most reputable indoor potting mixes are already adjusted into a useful range; Maryland Extension notes that commercial container media are commonly around pH 6.2. If your plant grows steadily and produces sound leaves, routine pH testing is unnecessary.
Test only when there is a reason, such as persistent nutrient-like discoloration despite appropriate feeding, unusually alkaline irrigation water, or repeated surface crusting. Cheap probe meters are often unreliable in loose potting media, so a calibrated meter or a reputable soil test is more meaningful. Remember that pH is only one part of the root environment: saturated roots, damaged roots, cold conditions, or excess fertilizer can all reduce nutrient uptake while imitating a pH problem. Correct the obvious physical problem before adding acidifiers, lime, or extra fertilizer.
Best DIY Aglaonema Soil Mix
A useful home recipe should be easy to reproduce and easy to alter. Start with 50% high-quality indoor potting mix, 25% fine-to-medium orchid bark, and 25% coarse perlite or pumice by volume. For a small batch, that is two scoops potting mix, one scoop bark, and one scoop mineral aeration material. Lightly moisten dusty ingredients before mixing, break apart compacted clumps, and distribute the particles evenly rather than layering them.
The final texture should feel springy and heterogeneous. When dampened and squeezed, it may hold a loose shape for a moment, but it should break apart readily when touched. Water poured onto it should soak across the surface rather than sit in a puddle or race down one dry gap. This recipe is a baseline for ordinary indoor conditions, not a guarantee; the plant’s drying pattern over the next several watering cycles tells you whether it needs refinement.
Choosing the Moisture-Retentive Base
The base is usually a peat- or coir-based indoor potting mix. Sphagnum peat moss holds substantial moisture and nutrients, is lightweight, and is naturally acidic, but old peat can shrink and become difficult to rewet after extreme drying. Do not confuse horticultural sphagnum peat with fine, heavily decomposed peat sold mainly as a garden amendment. Iowa State University Extension notes that finer “black peat” can retain too much water and provide too few air-filled pores for an ideal potting medium.
Coconut coir is a workable peat-free base with good water-holding capacity and relatively easy rewetting. Its performance varies by product: particle size, processing, and salt content all matter, so use material labeled for horticulture rather than an unknown craft or animal-bedding product. Coir is not automatically better-draining than peat; either ingredient can remain too wet when milled finely or packed tightly. Whichever base you choose, let bark and perlite or pumice provide the structural correction instead of expecting the base to do every job.
Adding Bark, Perlite, or Pumice for Structure
Fine-to-medium composted pine bark or orchid bark creates irregular spaces, slows compaction, and contributes modest moisture retention. Pieces around 6–12 millimeters are generally easier to integrate into a small houseplant pot than oversized orchid chunks. Fresh, extremely coarse bark can produce unstable gaps, while broken-down bark eventually becomes finer and holds more water. Bark is therefore useful structure, but its condition should be checked when an older mix starts shrinking or draining unevenly.
Perlite is lightweight, porous, neutral in pH, and widely available. It improves aeration without adding meaningful nutrition, though it can float toward the surface and creates irritating dust when handled dry. Pumice performs a similar structural role but is heavier, usually stays distributed more evenly, and can stabilize top-heavy pots; its disadvantages are price and regional availability. Penn State Extension’s Aglaonema overview of propagation media likewise characterizes perlite as providing drainage and aeration and bark as offering strong drainage and aeration, which explains why both work well in an Aglaonema blend.
Do not substitute a large quantity of fine sand for perlite or pumice. Coarse horticultural grit can add weight and some pore structure, but fine sand fills spaces between other particles and can make a mix denser. The same caution applies to crushing bark or perlite too aggressively. The useful property is not the ingredient name alone; it is the durable pore space created by the particle size and its relationship to the rest of the mix.
Optional Amendments and What They Actually Do
Vermiculite holds more water and nutrients than perlite, so it is better used sparingly when a blend dries too rapidly. It is not the first amendment to choose for a cold, low-light room or a chronic overwaterer because those setups already need faster gas exchange. A small amount of screened compost or worm castings can add nutrient-holding capacity, but rich organic additions also increase water retention and continue decomposing. Keep them modest, especially when the packaged base already contains compost or starter fertilizer.
Horticultural charcoal is optional, not a cure for bad drainage, root rot on Aglaonema, or overwatering on Aglaonema. A small amount of appropriately sized charcoal may add structure, but there is no need to buy it if bark and mineral aeration already produce the right texture. Avoid barbecue charcoal, ash, and briquettes, which may contain additives or alter chemistry unpredictably. Slow-release fertilizer is also not a structural amendment; check the bag first because many potting mixes arrive pre-fertilized, and unnecessary additions can raise soluble salts.
Choosing a Ready-Made Potting Mix
You can use a packaged indoor potting mix for Aglaonema, but evaluate texture rather than trusting plant graphics on the bag. Choose a product that is lightweight, contains recognizable structural ingredients, and does not resemble dense black garden compost. Mix a handful with water: it should moisten reasonably evenly, feel resilient rather than muddy, and separate after squeezing. If it remains in a heavy lump, amend it with bark and perlite or pumice before potting.
An aroid mix can work if it includes enough fine material to remain evenly moist around Aglaonema’s roots. If the bag is dominated by large coco chips, bark slabs, and mineral chunks, blend it with indoor potting mix rather than using it neat. Cactus or succulent soil is also not an automatic solution; some brands are simply fine peat with added sand, while others drain rapidly. A cactus blend that dries very fast can be softened with a moisture-retentive base, and a fine one may still need coarse aeration.
Avoid using seed-starting mix as a long-term medium for an established plant. Seed mixes are designed for germination and often lack the particle structure and durable nutrient reserve expected in a foliage-plant container. Likewise, never reuse sour, pest-infested, or root-rot-contaminated media to save a small amount of money. A healthy old mix can sometimes go into outdoor compost where appropriate, but it should not become the foundation of another valuable houseplant.
Adjusting the Mix to Your Growing Conditions
No soil recipe works independently of its environment. Water leaves a pot through plant uptake, evaporation, and drainage, so a large plant in bright warmth processes moisture much faster than a recently divided plant in a cool dim corner. Before changing the recipe, observe how long the root zone remains wet after a thorough watering and whether the plant is actively growing. Make one measured adjustment at a time so you can identify what actually improved the cycle.
A useful target is not a particular number of days. It is enough moisture stability that the plant does not repeatedly wilt, paired with enough air that the lower root ball does not remain saturated, smell stale, or support persistent fungus gnat activity. A pot that approaches watering readiness in four days can be healthy in one home, while another that takes ten days can also be healthy if the roots remain firm and the mix is airy. Problems arise when the timing conflicts with root health or makes correct watering impractical.
Low Light, Cool Rooms, and Slow Drying
Low light and cool air reduce water use, so the same bagged mix that performs well near a bright window may remain wet much longer across the room. Increase the bark and perlite or pumice fraction modestly, perhaps shifting from 50:25:25 to roughly 40% potting mix, 30% bark, and 30% mineral aeration. Keep the pot only slightly larger than the root mass, remove it from the cachepot for watering, and empty all collected runoff. These changes reduce the reservoir of unused wet medium without forcing the plant into an extremely dry blend.
Do not solve slow drying by giving tiny sips. Partial watering can leave some roots dry, concentrate fertilizer salts, and create misleading wet and dry pockets. Instead, wait until the plant genuinely needs water, irrigate the entire root ball, and let excess escape. If the mix still stays wet for an excessive period, improve the environment or repot into a more suitable structure. University of Minnesota Extension specifically advises that indoor plant pots drain well and not stand in water because poor drainage and overwatering can contribute to root rot and fungus gnats.
Aglaonema light guide, Warm Rooms, and Fast Drying
In a warm room with bright indirect light, active roots and a fuller canopy can empty a pot quickly. If a healthy plant wilts soon after thorough watering and the root ball is genuinely dry throughout, raise the moisture-retentive fraction rather than watering shallowly every day. A ratio near 60% potting mix, 20% bark, and 20% perlite or pumice may provide a more manageable reserve. A plastic or glazed pot can also reduce evaporation compared with unglazed terracotta.
Check for other explanations before changing soil. A severely root-bound plant has little medium left to store water, and old peat may repel water so that irrigation bypasses the center. Slowly rehydrate a hydrophobic but otherwise healthy root ball in stages, then let it drain fully; if bypassing recurs, replace the degraded mix. High heat, direct sun, and strong airflow can also drive water loss beyond what a soil adjustment should reasonably compensate for.
Pot Drainage Is Part of the Soil System
A well-formulated mix cannot protect roots if runoff has nowhere to go. Use a pot with at least one unobstructed drainage hole, and confirm that a flat surface or tight saucer is not sealing it. Water thoroughly over a sink or tray, allow drainage to finish, and discard the runoff before returning the nursery pot to a decorative cover. Missouri Botanical Garden recommends a well-drained, peaty mixture for Aglaonema, while Clemson Cooperative Extension advises keeping the medium moist but not overly wet; a functioning outlet is what makes those two requirements compatible.
Do not add a layer of stones, gravel, or pot shards as a substitute for a drainage hole. That layer reduces the volume available to roots and does not transform dense media into an airy mix. Keep the same medium through the root zone, cover a large hole with mesh only if particles escape, and focus on particle structure plus a clear exit. If you must use a decorative vessel without a hole, keep the plant in a removable nursery pot inside it rather than planting directly into the closed container.
Pot Size and Material Change Drying Speed
Move up only one modest pot size when Aglaonema repotting guide, commonly about 2–5 centimeters wider than the existing root ball depending on plant size. A dramatic jump surrounds the roots with a large volume of wet, unused medium and makes moisture readings harder to interpret. University of Georgia Extension similarly recommends containers with drainage holes that are only 1–2 inches larger for houseplant repotting. Aglaonema generally tolerates being somewhat snug, so there is little benefit in “giving it room to grow” several sizes in advance.
Pot material changes the recipe’s behavior. Unglazed terracotta allows evaporation through its walls and may help a careful grower in a humid or slow-drying space, but it can demand frequent watering in hot, dry rooms. Plastic and glazed ceramic retain moisture longer and are lighter or more decorative, but they leave less margin for an overly dense mix. Self-watering pots require a medium designed for capillary movement and enough established roots to use the reservoir; do not transfer a struggling, sparsely rooted plant into continuous moisture and assume the container will correct root damage.
How to Test an Aglaonema Soil Mix
Test a candidate mix before risking the plant. Fill a pot of the intended size, settle the damp medium with a few light taps, and water slowly across the surface. Water should penetrate without sitting for several minutes, then emerge from the drainage hole in a steady flow. Immediate runoff down the pot wall can indicate that the mix is hydrophobic or has pulled away from the sides, while prolonged ponding suggests particles are too fine, the mix is compacted, or the outlet is blocked.
Next, observe retention rather than judging drainage alone. Weigh the freshly drained pot in your hands, then check it daily under the intended growing conditions. Use a skewer or finger at depth where possible and note when the pot becomes substantially lighter while retaining a trace of cool moisture below. This simple calibration teaches you more than a generic “water every seven days” rule because it captures your pot, room, plant size, and exact batch of media.
After several cycles, look for even wetting and drying. Water that repeatedly channels through one side, a center that stays dry, or a bottom zone that remains sodden signals a structural problem. White crust on the surface or rim suggests mineral or fertilizer salt accumulation, especially when accompanied by damaged root tips. Flush a healthy, free-draining mix occasionally with plain suitable water, but replace a badly compacted or sour medium rather than trying to wash a physical problem away.
Repotting Aglaonema Into Fresh Soil
Repot when roots densely circle the container, the mix has decomposed and collapsed, water bypasses the root ball, drainage has slowed, or the pot remains wet despite appropriate care. A calendar can prompt inspection, but it should not force unnecessary disturbance. A slow-growing plant may remain comfortable for several years, while one in a poor nursery substrate may need attention much sooner. When there is no emergency, warm conditions and active growth improve the plant’s ability to replace disturbed roots.
Prepare the new mix and pot before removing the plant. Slide out the root ball, loosen only the outer congested roots, and remove degraded medium that falls away without aggressive tearing. Healthy roots are generally firm and pale to tan; rotten roots are soft, dark, hollow, or foul-smelling and should be cut away with clean tools. If substantial rot is present, use a smaller pot matched to the remaining roots rather than returning a diminished root system to an oversized wet reservoir.
Set the plant at its previous depth and keep the crown above the medium rather than burying stems deeply. Backfill without compressing the mix into a hard block; gentle tapping and one thorough watering will settle particles around the roots. Let all excess drain, then return the plant to stable warmth and indirect light. Do not stack stresses by repotting, fertilizing heavily, dividing, relocating into harsher light, and changing the watering method at the same time.
Troubleshooting Soil and Root Problems
When soil remains wet, investigate in a fixed order: confirm the drainage hole is open, empty the cachepot, assess light and temperature, compare pot size with the root mass, and inspect the medium’s texture. Yellowing lower leaves alone do not prove root rot, but yellowing combined with a wet heavy pot, soft stems, declining new growth, or a sour smell warrants a root inspection. Fungus gnats are another clue that the surface remains consistently damp, though their presence does not by itself diagnose rot. Fix the moisture system rather than relying only on sticky traps.
When water runs through instantly but the plant still wilts, determine whether the mix is too coarse, hydrophobic, or mostly displaced by roots. A hydrophobic peat ball often feels surprisingly light before watering and remains dry in the center afterward. Slow, repeated passes of water can rewet it temporarily, but persistent shrinkage means the medium has lost useful function. A very chunky blend may simply need more coir- or peat-based potting mix incorporated at the next repot.
Brown leaf tips are not a soil diagnosis on their own. They can reflect inconsistent moisture, concentrated fertilizer salts, water quality, low humidity, physical damage, or temperature stress. Inspect the full pattern and the roots before replacing soil, because repotting an otherwise healthy plant can create more stress than it solves. If a white crust is visible and drainage remains good, pause fertilizer and flush the pot thoroughly; if the medium is structurally collapsed, replace it.
Common Aglaonema Soil Mistakes
The most damaging mistake is treating an ingredient list as more important than actual drying behavior. Adding perlite does not guarantee aeration if it is a token amount in dense peat, and adding bark does not help if the pieces are layered at the bottom instead of distributed. Likewise, a premium branded mix can fail in an oversized pot or a dark cold location. Evaluate the complete system after watering and adjust based on evidence.
Another mistake is using an excessively chunky blend because Aglaonema belongs to the aroid family. Large particles can leave a small root system with uneven contact, rapid drying, and unstable anchorage. At the opposite extreme, straight compost, garden soil, or fine moisture-control mix can stay airless in ordinary indoor conditions. The middle ground is intentionally mixed: enough fine material for continuous moisture and enough durable coarse material for pore space.
Finally, avoid changing soil whenever a leaf looks imperfect. Old leaves naturally decline, recently moved plants acclimate, and watering or temperature errors may cause symptoms that fresh media cannot fix. Repot when there is credible evidence of a root-zone problem or inadequate space, then give the plant time to respond. Stable care after a well-judged correction is more useful than repeatedly modifying the mix.
Conclusion
The best soil for Aglaonema is a well-aerated, moisture-retentive potting medium, not a single branded bag or universal recipe. Begin with two parts indoor potting mix, one part fine-to-medium bark, and one part perlite or pumice, then judge how that blend performs in your actual room. Keep the root zone mildly acidic, ideally around pH 6.0–6.5, use a modestly sized pot with a clear drainage hole, and water the whole root ball only when its drying pattern shows that it is ready.
The decisive skill is observation. A healthy mix accepts water evenly, releases excess, retains a moderate reserve, and gradually becomes lighter without turning sour, muddy, or rock-hard. If it stays wet, adjust the environment, pot, or coarse fraction; if it dries too quickly, add moisture-holding base or use a less porous container. Build around those functions and Aglaonema roots receive what they actually need: moisture without stagnation, nutrients without excessive salts, and enough oxygen to support steady foliage growth.
When to use this page vs other Aglaonema guides
- Aglaonema overview - Start here for whole-plant context before deep-diving this topic.
- Aglaonema problems hub - Jump to symptom-specific fix guides when this care topic does not resolve the issue.
- Root Rot on Aglaonema - Escalate here when soil adjustments are not enough.
- Mold on Soil on Aglaonema - Escalate here when soil adjustments are not enough.