Aglaonema Repotting: A Complete Step-by-Step Guide
Aglaonema Repotting: A Complete Step-by-Step Guide
Aglaonema Repotting: A Complete Step-by-Step Guide
Aglaonema repotting is less about giving a plant “more room” and more about restoring a functional root environment. A healthy Chinese evergreen can remain in the same container for years when its roots still have oxygen, the potting mix drains predictably, and the plant is growing normally. Moving it simply because a calendar says two years have passed can damage roots and introduce a moisture problem that did not exist. The better approach is to inspect the plant, pot, roots, and substrate together, then repot only when the evidence supports it.
The Quick Answer: Repot for a Reason, Not a Date
Repot an Aglaonema when the roots have densely occupied the container, the old potting mix has collapsed or become difficult to rewet, or root disease requires immediate treatment. For a routine move, spring through early summer is usually the easiest recovery window because warmth and longer days support active root growth. Arkansas Cooperative Extension specifically recommends delaying nonurgent repotting until the longer days of spring, while general guidance from Penn State Extension advises moving a houseplant into a container only slightly larger than its current one.
Choose a pot with drainage holes, generally 1 to 2 inches wider in diameter than the old pot. Use a fresh, airy indoor mix that holds some moisture without remaining saturated, keep the crown at its original depth, and remove only dead or rotten root tissue. Water according to the actual moisture in the new mix rather than automatically soaking an already-wet root ball. Then place the plant in stable warmth and Aglaonema light guide, pause fertilizer, and allow time for root repair.
When an Aglaonema Really Needs Repotting
The strongest case for repotting comes from several signs pointing to the same root-zone limitation. One root at a drainage hole does not mean the container is full, because roots naturally explore openings where air and moisture meet. A better diagnosis combines what you see above the soil, how water behaves in the pot, and what the root ball looks like when gently slipped from the container. If the plant is otherwise healthy, you can perform that inspection without committing to a larger pot.
A routine repot is justified when roots form a dense network around the root ball, little loose mix remains, and water management has become difficult despite appropriate care. Repotting can also mean replacing exhausted soil while returning the plant to the same cleaned pot. Fresh mix and a larger container solve different problems, and automatically upsizing can surround a modest root system with more wet soil than it can use.
Root Evidence That Justifies a Larger Pot
Healthy Aglaonema roots are generally firm and pale cream, tan, or light brown, although potting media can stain them. A plant likely needs more space when firm roots circle densely around the bottom and sides, create a tight pot-shaped mass, lift the plant upward, or repeatedly block drainage holes. The container may bulge or crack, and the root ball may slide out as a nearly solid unit. Oklahoma State University Extension recommends checking pot-bound houseplants periodically and choosing a new pot only 1 to 2 inches larger when repotting is indicated.
Root density should be judged by function rather than appearance alone. Circling roots at the perimeter are not automatically an emergency if water still penetrates evenly, the mix dries at a manageable rate, and growth remains normal. Aglaonema tolerates a relatively snug container, and a mildly crowded plant is often easier to water safely than one placed in too much soil. Move up when congestion is interfering with hydration, drainage, stability, or continued growth, not merely because visible roots look untidy.
Soil and Water Behavior That Signal a Problem
Old potting media can fail before an Aglaonema becomes root-bound. Fine organic ingredients decompose and settle over time, reducing the air spaces roots need. The surface may stay wet while water bypasses dry pockets, or the mix may shrink from the pot wall and let irrigation race straight down the sides. A sour smell, persistent saturation, dense texture, or water that sits on the surface unusually long indicates that the root environment is no longer functioning well.
Rapid drying can also support a repotting decision, but only after checking the cause. A root-filled pot contains less moisture-holding mix, so it may need water much sooner than it once did. Yet faster drying can also result from hotter weather, brighter light, a porous terracotta pot, low humidity, or a heating vent. Compare the change with the plant’s root density and environment before concluding that the pot is too small.
Symptoms That Do Not Prove the Plant Is Root-Bound
Yellow leaves, drooping, brown tips, and stalled growth are nonspecific symptoms. overwatering on Aglaonema, underwatering on Aglaonema, cold drafts, insufficient light, sun scorch, pests, fertilizer salts, and natural aging can produce similar changes. University of Florida IFAS notes that Aglaonema has relatively low water requirements and warns that overwatering can trigger problems. Putting an overwatered plant into a larger pot without fixing drainage usually intensifies the original issue.
Check the simplest explanations first. Feel moisture below the surface, confirm that excess water can leave the container, inspect leaf undersides and stem joints for mealybugs or scale, and review any recent changes in location or temperature. NC State Extension describes Aglaonema as a warm-growing plant that performs in diffuse sun or good indirect light and benefits from reduced watering during winter. A cold, dim plant may pause growth because its demand for water and nutrients has fallen, not because it needs more root space.
The Best Time to Repot a Chinese Evergreen
For a healthy plant, the best repotting window is usually spring to early summer, when indoor temperatures are warm and increasing daylight supports active growth. Roots can colonize fresh mix more quickly in these conditions, shortening the period when unused substrate stays wet. Choose a week when you can monitor moisture and keep the plant away from temperature extremes. Avoid combining the move with other abrupt changes such as relocation into stronger sun.
Season matters less than urgency. If the mix smells rotten, stems are soft at the base, or roots are decaying, waiting until spring gives disease more time to advance. Emergency repotting should happen as soon as the problem is identified, even in winter. The recovery strategy then becomes more conservative: use a close-fitting pot, remove damaged tissue carefully, provide stable warmth, and water sparingly because low winter light slows moisture use.
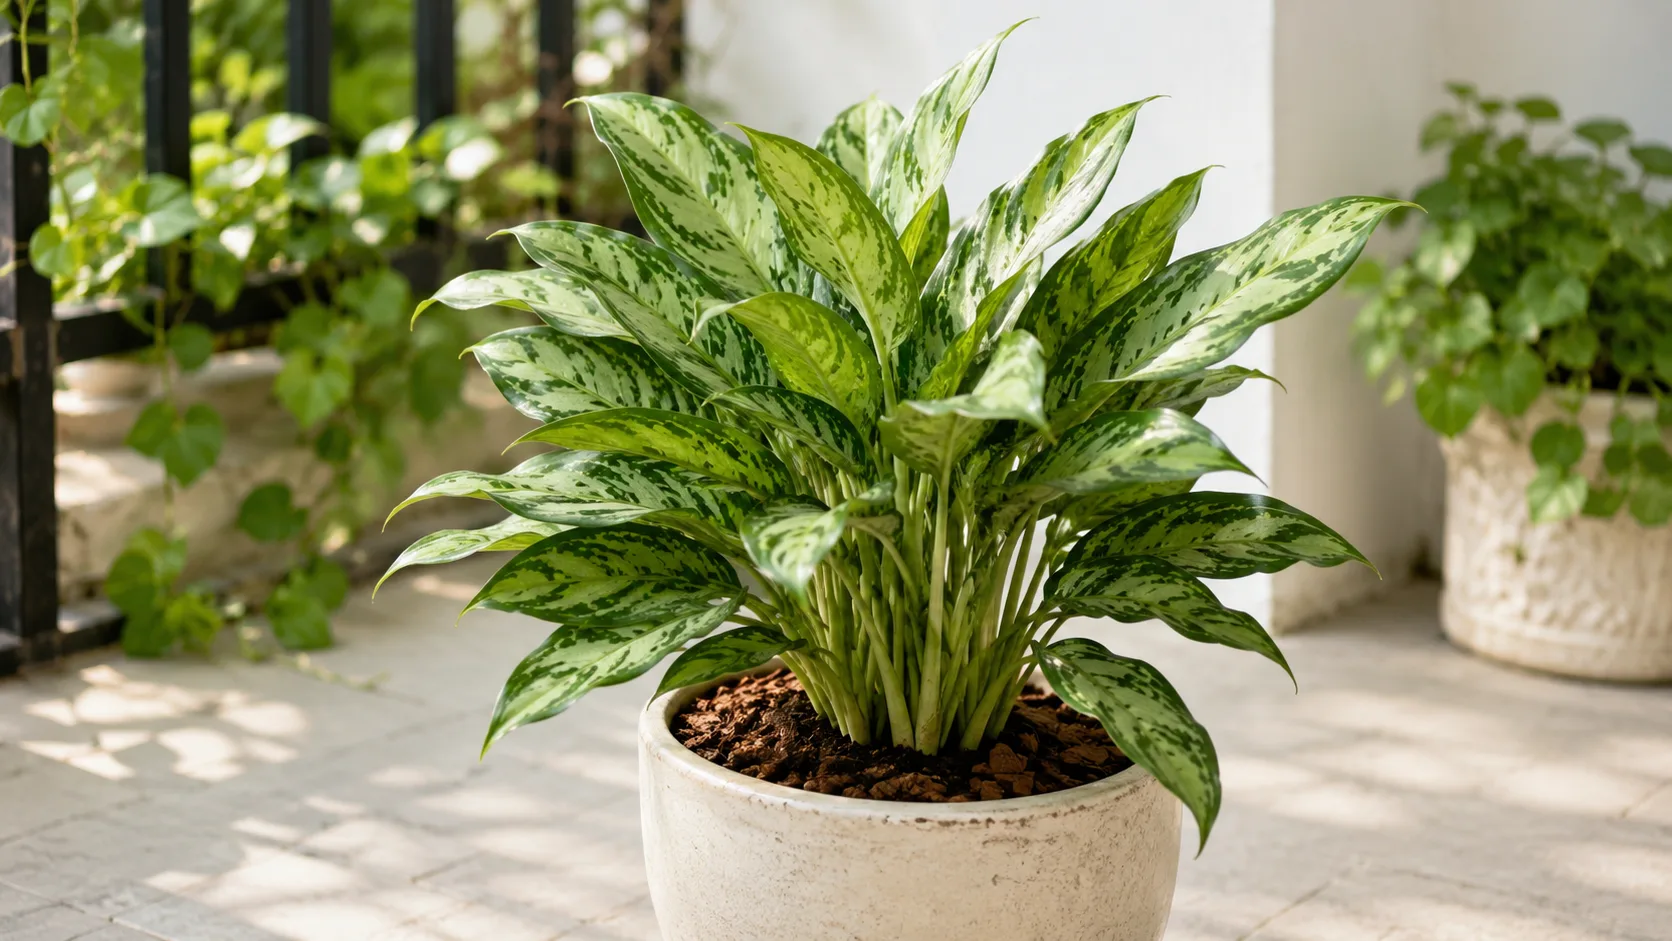
Choosing the Right Aglaonema Pot
The right pot balances root volume, drainage, stability, and your own watering behavior. Aglaonema does not need a deep reservoir of unused substrate. Its new container should hold the existing root ball with a modest margin for fresh mix, drain freely, and remain stable under the weight of the foliage. A decorative container is acceptable, but it should not trap runoff around a nursery pot.
Inspect the container before mixing soil. Drainage holes should release water promptly. A mesh screen can retain coarse mix, but do not add a thick layer of rocks: gravel does not replace drainage holes or make saturated potting mix drain correctly.
How Much Larger Should the New Pot Be?
For most routine Aglaonema repotting, select a pot approximately 1 to 2 inches wider than the current container. This is typically one nursery-pot size up. A severely congested, large specimen may justify the upper end of that range, while a small plant or a root system reduced by rot may need the same size or even a smaller pot. Measure roots, not leaves: a broad canopy does not necessarily mean a broad root mass.
Oversizing creates a predictable problem. The roots occupy only the center while a thick ring of fresh mix around them remains wet, particularly in low light or cool conditions. Because the plant cannot remove that water quickly, oxygen declines and opportunistic rot becomes more likely. A large pot does not make an Aglaonema grow faster by itself; healthy roots, adequate light, warmth, and balanced nutrition drive growth.
Drainage, Material, and Cachepot Trade-Offs
Plastic nursery pots retain moisture longer, weigh little, and make root inspection easy because their sides flex. They work well for growers who water only after checking the substrate. Unglazed terracotta loses moisture through its walls and can help in humid homes or with a heavy-handed watering style, but it may dry too quickly in hot, bright, or arid rooms. Glazed ceramic behaves more like plastic in moisture retention and adds useful weight, provided it has a functional drainage hole.
A cachepot is a decorative outer vessel that holds a draining inner pot. This arrangement gives you design flexibility and makes thorough watering practical because you can remove the nursery pot, irrigate it at a sink, let it drain, and return it. Never leave the inner pot standing in collected runoff. Empty the cachepot after watering and check it again later because additional water can continue draining from the mix.
Self-watering planters require more judgment. They can work with an airy substrate and an established root system, but moving a stressed or freshly root-pruned Aglaonema directly onto a continuously wet reservoir can keep the lower mix saturated. Establish the plant first and understand how the wick, substrate, and room conditions interact. Whatever material you choose, drainage and moisture monitoring matter more than the label on the pot.
The Best Potting Mix for Aglaonema Repotting
Aglaonema needs a mix that holds enough moisture for steady hydration while preserving air around the roots. UF/IFAS recommends a rich potting medium with 50–75% total porosity, 10–20% air space, and pH 6.0–6.5, while the plant’s sensitivity to overwatering makes structure equally important. A practical blend begins with a quality indoor potting mix and adds coarse components such as perlite and fine-to-medium orchid bark. The result should feel springy and crumbly, accept water evenly, and release excess promptly.
A useful starting recipe is two parts indoor potting mix, one part perlite or pumice, and one part orchid bark. This is not a universal formula. Add more coarse material if you grow in low light, use a large glazed pot, live in a humid climate, or tend to water frequently. Use a slightly more moisture-retentive blend if the plant is in strong indirect light, a small terracotta pot, or a hot, dry home where the mix otherwise dries in only a few days.
Coco coir or peat may provide the moisture-holding base, but either can behave poorly when used without enough structural amendment. Fine peat can compact and become difficult to rewet after severe drying; coir quality and salt content vary. Bark helps create durable air spaces, while perlite or pumice improves porosity. Avoid garden soil indoors because it is usually too dense for a container, may drain unpredictably, and can introduce pests or pathogens.
Pre-moisten the components until the mix is evenly damp but not dripping. Dry peat-based media can repel the first watering and encourage channels around the root ball. A squeezed handful should hold loosely, then break apart easily rather than forming a sticky lump.
What to Prepare Before You Remove the Plant
Gather the new pot, fresh mix, gloves, clean shears, a tray or work surface, and a blunt tool for loosening the container edge. If you may divide the plant, prepare additional appropriately sized pots before exposing the roots. Clean reused containers with soap and water, remove mineral deposits, and disinfect tools, especially if they have contacted diseased plants. Sharp, clean blades make deliberate cuts instead of crushing tissue.
Wear gloves and keep children and pets away from the work area. The ASPCA lists Chinese evergreen as toxic to dogs and cats because it contains insoluble calcium oxalates, which can cause oral irritation, swelling, drooling, vomiting, and difficulty swallowing when chewed. Sap may also irritate sensitive skin. Bag discarded leaves and roots, wipe the surface after repotting, and wash your hands even if gloves were used.
If the old mix is extremely dry and hard, water modestly a day in advance so roots are less brittle and the root ball releases. If it is saturated or root rot on Aglaonema is suspected, do not add more water. Avoid fertilizing immediately before the move because fresh commercial mix may already contain nutrients.
How to Repot Aglaonema Step by Step
Match root disturbance to the goal: move an intact healthy root ball, refresh failed media, or remove disease. Healthy roots do not need to be washed bare or aggressively untangled.
Use this sequence for a routine repot:
- Cover the drainage hole with mesh if the mix falls through easily.
- Add only enough damp mix to set the final planting height.
- Slide the Aglaonema from its old pot while supporting the base.
- Inspect the outside and bottom of the root ball.
- Loosen only tightly circling outer roots and remove loose, degraded media.
- Set the plant at the same depth it previously grew.
- Fill around the root ball in stages, lightly settling the mix.
- Water based on root health and current moisture, then drain completely.
Keep the stems and crowns centered unless the plant’s natural growth habit makes a slight offset more stable. Do not bury bare canes or crown tissue deeply to make the plant stand upright, because persistently wet stem tissue is vulnerable to decay. If support is necessary, use a temporary stake rather than compacting the substrate hard around the base.
Remove the Root Ball and Inspect the Roots
Tip the pot sideways, hold the plant near the soil line, and squeeze or tap the container. Do not pull hard on the leaves or individual stems. For a rigid pot, run a blunt knife or plant label around the inner edge; if roots have grown through drainage holes, tease them back or cut only what is necessary to release the plant. Breaking a cheap nursery pot is better than wrenching apart the crown.
Inspect roots by color, firmness, smell, and continuity. Healthy roots feel resilient and remain intact when handled gently. Dead or rotten roots are often dark, soft, hollow, slimy, or easily stripped from their inner core, and the media may smell sour. Color alone is not decisive because bark, peat, and mineral deposits stain roots. Texture and odor provide stronger evidence.
For a healthy but congested root ball, massage the lowest and outermost roots gently so some point into the new mix. Cut a few severe girdling roots only if they cannot be redirected. Do not rake the entire mass apart. For a soil refresh without upsizing, remove loose exhausted media around the perimeter, trim no healthy roots unless necessary, and replace the plant in its cleaned original pot.
Position, Backfill, and Set the Correct Depth
Place the root ball so the crown sits at the same level as before and the top remains below the rim enough to allow watering. Fill the side gap with damp mix, working it in with your fingers or a chopstick without stabbing roots. Tap the pot and water gently to settle particles naturally. Compressing the mix forcefully removes the air spaces you added perlite and bark to create.
Leave a modest watering space below the rim. The plant should feel stable but the surface should not be packed solid. If it wobbles, check whether the root ball is sitting on an uneven mound and reposition it. Do not solve wobble by burying the stems or adding a thick layer of substrate over the original root-ball surface.
For an intact, healthy root ball placed into merely damp mix, a thorough watering helps integrate old and new media; let all excess drain. If the root ball was saturated or roots were substantially cut, wait until the root zone approaches an appropriate level of dryness before watering fully.
Emergency Repotting for Root Rot
Root rot changes the procedure because preserving contaminated, oxygen-starved media is no longer useful. Remove the plant, discard the old mix, and rinse or gently tease enough material away to see the roots and lower stems. With disinfected shears, cut back soft, hollow, slimy, or foul-smelling roots until the remaining tissue is firm. Sterilize the blades between significant cuts and discard contaminated material away from other plants.
Do not assume every brown root is rotten or remove the whole system in pursuit of perfectly white tissue. Roots naturally vary in color, and excessive pruning can leave the foliage with too little capacity to absorb water. If most roots are lost, reduce the pot size to fit what remains and consider taking healthy stem sections as propagation insurance. A smaller root system in a large volume of moist mix is likely to decline again.
Fresh airy mix, a clean pot, and corrected watering conditions matter more than pouring household chemicals onto damaged tissue. Hydrogen peroxide is often recommended online as a universal root-rot cure, but concentration, contact time, and plant sensitivity vary, and it can injure living cells as well as microbes. Physical removal of diseased tissue and correction of saturation are the core interventions. Fungicide is not a substitute for drainage, and identifying a specific pathogen would require professional diagnosis.
After an emergency repot, maintain warmth and bright indirect light without direct sun. Do not fertilize damaged roots, and do not keep the mix continuously wet out of fear that the plant will dehydrate. Loss of roots can cause temporary wilt because water uptake is impaired, yet extra water cannot make nonfunctional roots absorb more. Monitor stem firmness and the progression of yellowing; continued softening suggests decay remains.
Dividing Aglaonema During Repotting
Mature Aglaonemas often contain several rooted shoots or clusters, making repotting a convenient time to divide them. Division is optional. A full clump creates the dense appearance many growers want, while separating it produces multiple plants but temporarily reduces each one’s visual impact. Divide only a healthy, well-rooted specimen that can tolerate additional disturbance.
Look for natural boundaries between crowns and trace which roots belong to each cluster. Gently pull sections apart where they separate readily; use a clean knife for a tightly connected rhizome or stem base. Every division should retain healthy roots and at least one viable growing point, preferably with several leaves. A leaf or crown without supporting roots may require propagation treatment rather than ordinary potting.
Place each division into a close-fitting pot. Do not put a small section into the large container intended for the original clump. Keep the planting depth unchanged, use the same airy mix, and provide stable warmth and indirect light. Because divided roots have been disturbed more than an intact root ball, careful moisture control and a fertilizer pause are especially important.
Aftercare: Water, Light, Fertilizer, and Humidity
Aftercare should reduce stress without creating stagnant conditions. Put the repotted Aglaonema in bright indirect light or the stable light level it previously tolerated, away from intense direct sun, cold windows, air-conditioning vents, and heaters. Light provides the energy for repair, but a sudden jump in exposure can scorch leaves while roots are adjusting. Warm, consistent conditions are more valuable than very high humidity paired with wet soil.
Check moisture below the surface rather than watering by weekday. Fresh mix may dry at a different rate from the old substrate, and a larger plastic pot will often stay moist longer. Water thoroughly when the upper layer has dried and the pot feels lighter, then let runoff escape. Do not keep adding small sips to a wet core, and never allow the pot to stand in a full saucer or cachepot.
Hold fertilizer until the plant has stabilized and the roots have resumed function, usually several weeks for a routine repot and longer after root rot or major division. Watch for firm new growth rather than relying only on elapsed time. If the fresh mix contains fertilizer, there is even less reason to feed immediately. When feeding resumes, use a conservative dilution appropriate for the product and plant’s active growth.
Common Repotting Mistakes and How to Troubleshoot Them
The most damaging mistake is using a pot much larger than the surviving root system. If the mix remains wet for a week or more, leaves yellow progressively, or the base softens, check moisture deep in the pot and improve warmth, light, and drainage. If decline continues, inspect the roots rather than waiting for the surface to dry while the center remains saturated. Repot into a smaller container if the root-to-soil ratio is clearly wrong.
Another common error is treating all post-repotting droop as thirst. A dry, lightweight pot and limp leaves may justify watering, but a heavy wet pot with drooping foliage points elsewhere: damaged roots, cold conditions, or oxygen deprivation. Adding water to saturated media worsens the mismatch. Use a wooden skewer, finger check, or pot weight to assess the lower root zone instead of judging only the top centimeter.
Planting too deeply can lead to stem or crown rot. If buried stems remain wet, remove excess mix until the original level is restored. If tissue has become soft, unpot the plant and inspect immediately. Likewise, a plant that rocks in loose mix should be repositioned or temporarily supported, not buried deeper. Root anchorage will improve as new growth enters the surrounding substrate.
Aggressive root washing and pruning can create avoidable shock during an otherwise routine move. If roots were heavily disturbed but remain healthy, focus on warmth, indirect light, and controlled moisture; fertilizer cannot accelerate repair. If only a few leaves yellow while the stem stays firm and no foul odor develops, monitor rather than repotting again. Repeated unpotting interrupts new root formation.
Conclusion
Successful Aglaonema repotting begins with diagnosis. Dense roots, failed potting media, severe salt buildup, instability, or disease are valid reasons to act; a date on the calendar or one visible root is not. When a move is needed, use a draining pot only modestly larger than the healthy root mass, an airy moisture-balanced mix, and the least root disturbance necessary for the problem you are solving.
The recovery period is equally important. Keep the plant warm, provide useful indirect light, adjust watering to the new pot and substrate, and delay fertilizer until roots are functioning again. If rot forced the repot, fit the container to the roots that remain and correct the conditions that caused saturation. These choices are less dramatic than oversized pots and elaborate treatments, but they give a Chinese evergreen what it actually needs: oxygen, stable moisture, and time to rebuild.
When to use this page vs other Aglaonema guides
- Aglaonema overview - Start here for whole-plant context before deep-diving this topic.
- Aglaonema problems hub - Jump to symptom-specific fix guides when this care topic does not resolve the issue.
- Root Rot on Aglaonema - Escalate here when repotting adjustments are not enough.