How to Make a DIY Pebble Tray for Indoor Plants
Build a DIY pebble tray for indoor plants with tray sizing, waterline rules, material choices, maintenance steps, and the failure modes to avoid.
What This DIY Guide Covers
This page is for readers who have already decided a pebble tray is worth trying and now want to build one correctly. It is not the evidence page and it is not the definition page. The job here is practical: choose the tray, choose the fill material, set the waterline, place the pot safely, and maintain the setup without creating a new moisture problem.
If you still want the concept first, use What is a pebble tray?. If you still want to know whether trays make enough difference to bother with, use Do pebble trays really increase humidity for houseplants?.
The Build Rule That Matters More Than Every Other Step
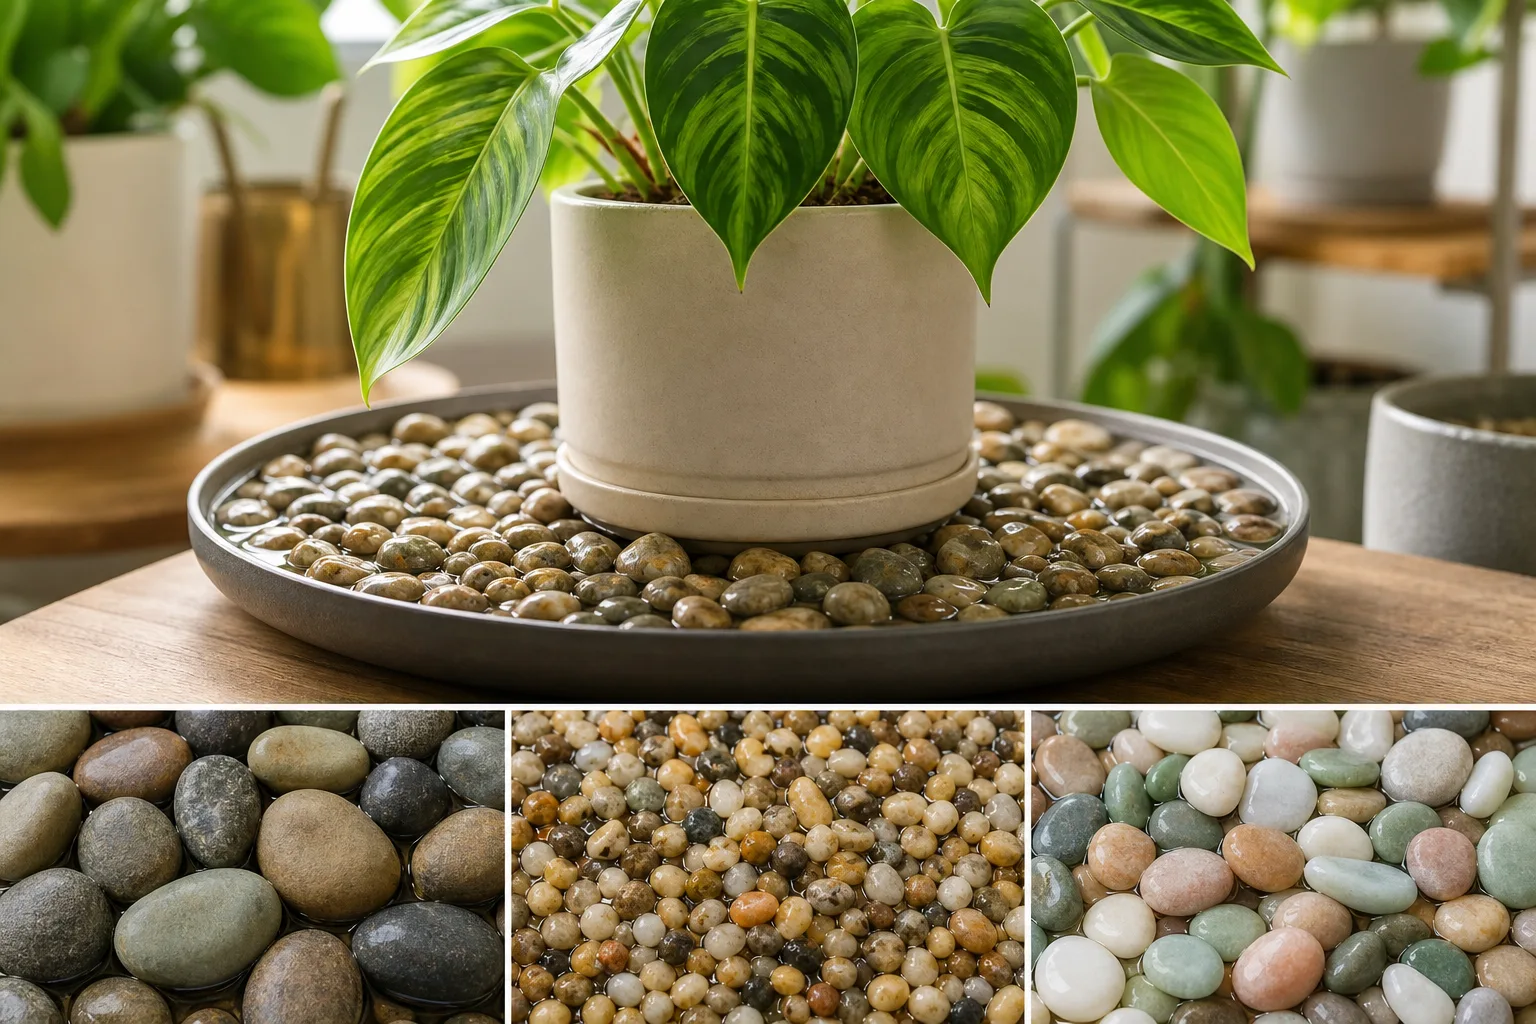
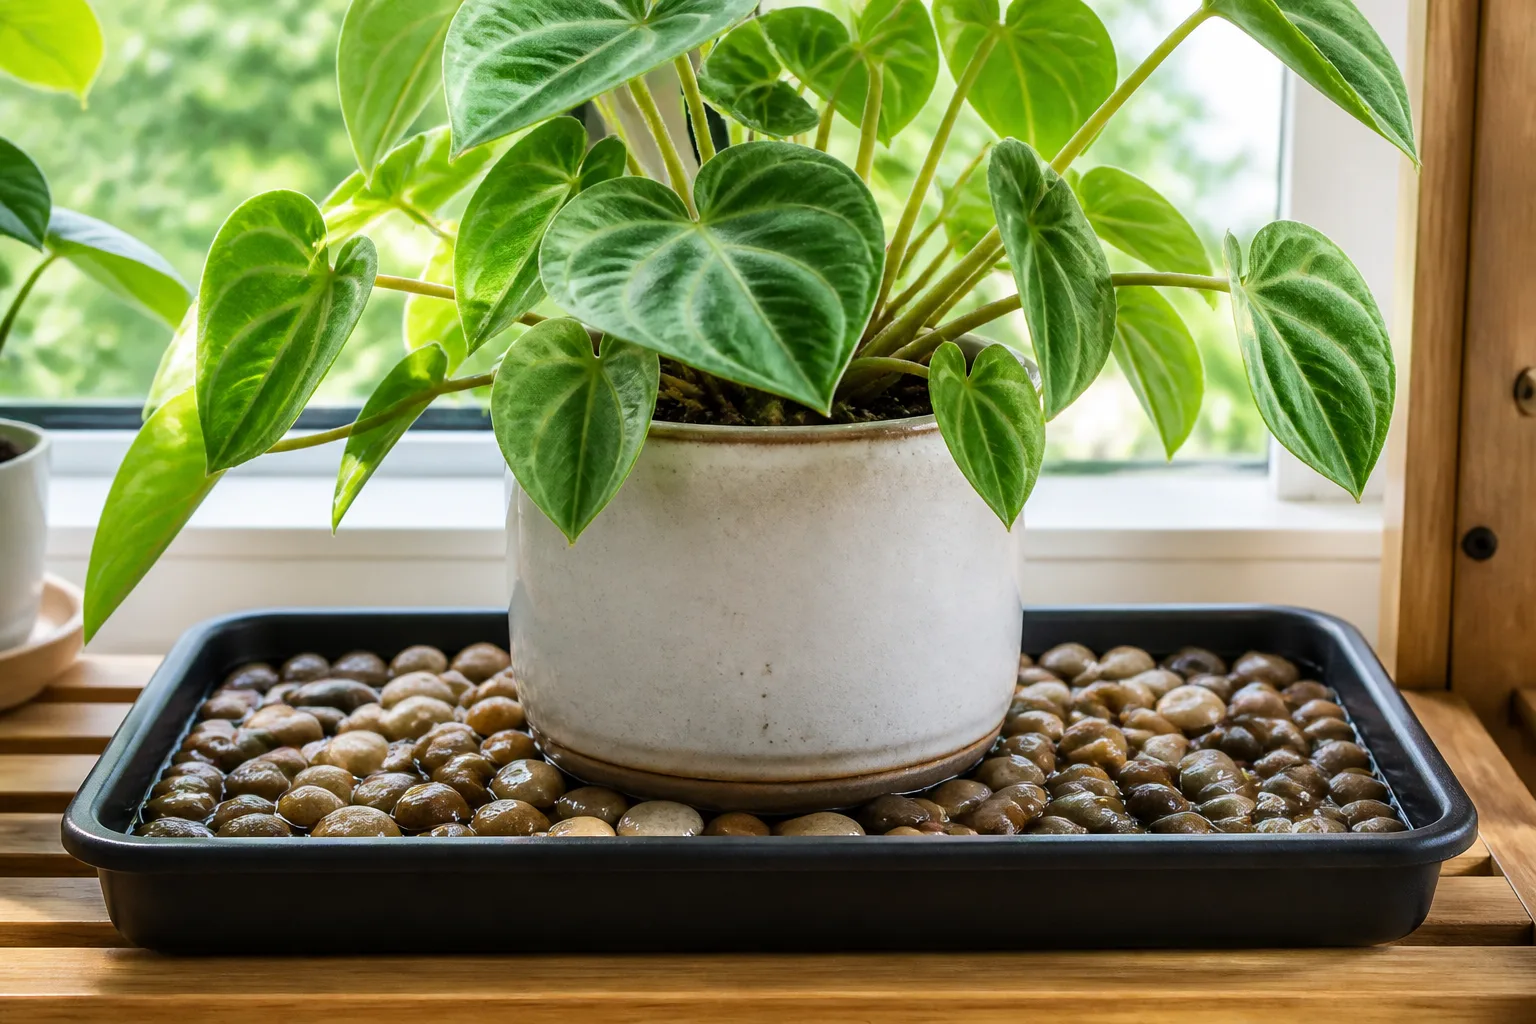
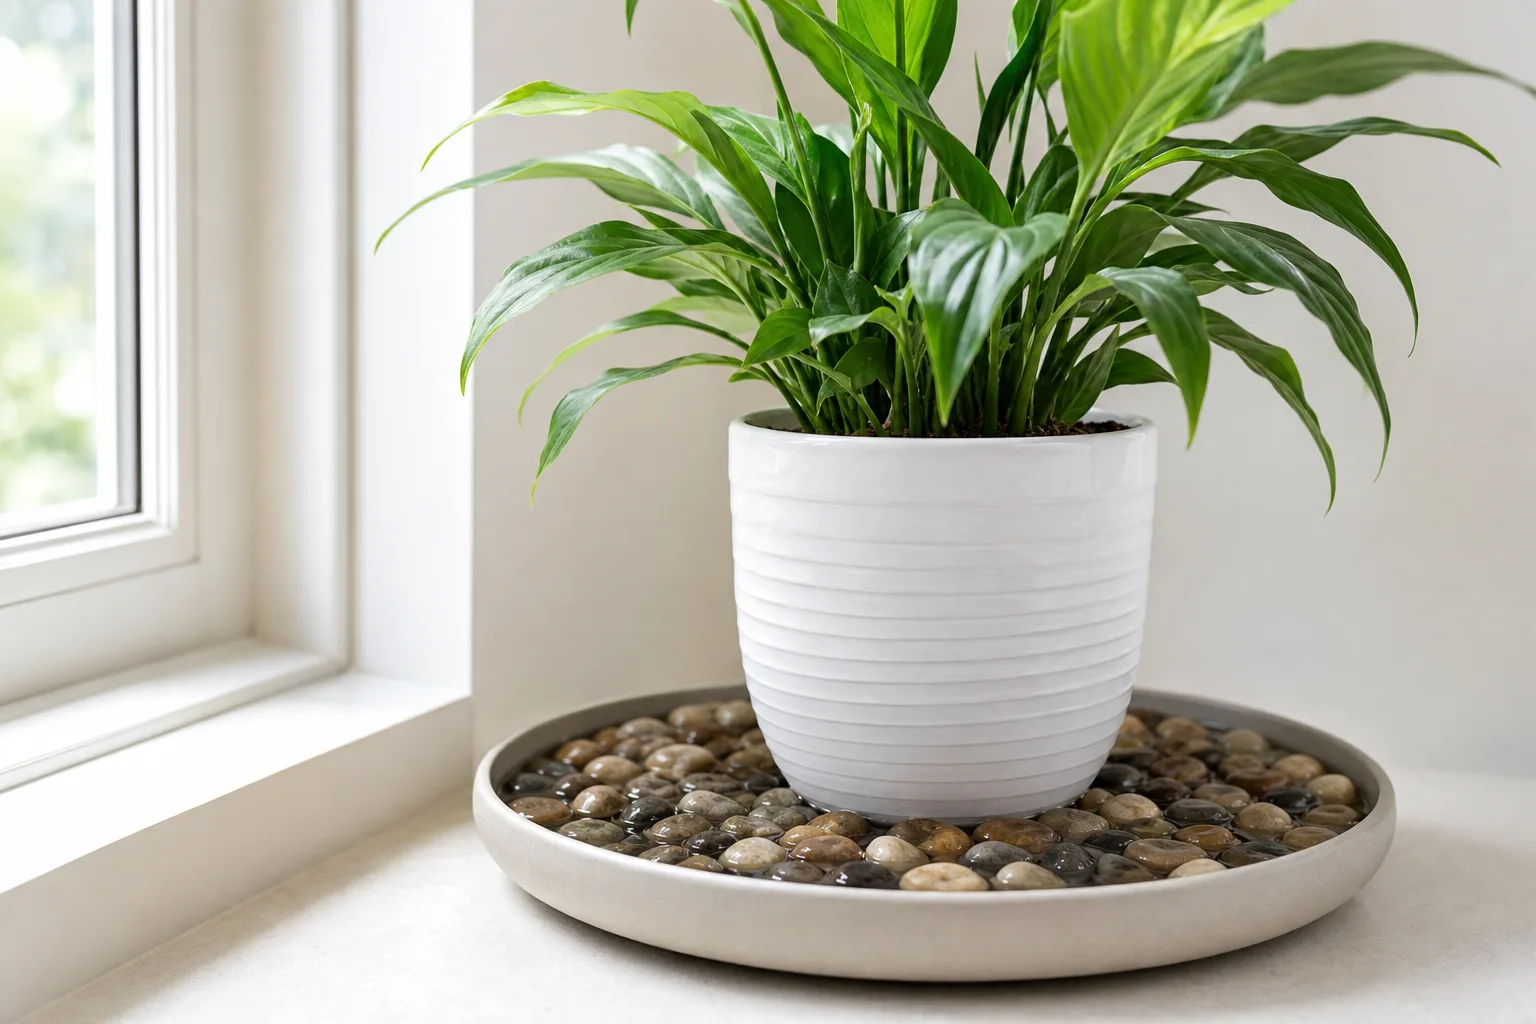
The pot must rest above the waterline.
That is the whole build in one sentence. Missouri Botanical Garden, University of Illinois Extension, and Nebraska Extension all describe the same idea: a shallow tray, stones, water below the stone tops, pot resting on the stones.
If the drainage holes or pot base touch the water, the tray stops being a humidity aid and starts becoming constant bottom watering.
Decide Whether the Plant Is a Good Candidate Before You Build
A correct tray can still be the wrong tool for the plant.
Better candidates:
- compact ferns
- fittonias
- prayer-plant relatives
- small orchids
- other low-growing humidity-aware tropicals
Poorer candidates:
- cacti
- most succulents
- tall floor plants with foliage far above the pot
University of New Hampshire Extension treats trays as one local option, not a universal humidity requirement for all houseplants.
Pick the Right Tray
The tray needs to be:
- waterproof
- wide enough to expose water surface beyond the pot
- shallow enough to manage safely
- stable enough that the pot will not wobble
Any watertight saucer, shallow dish, or similar tray can work if it does those jobs. Decorative is fine. Functional is mandatory.
Width Matters More Than Depth
People often focus on how much water the tray can hold. For evaporation, surface area usually matters more than simply having a deeper reservoir.
Use these practical starting points:
| Pot diameter | Good starting tray width |
|---|---|
| 4 to 6 inches | 10 to 12 inches |
| 6 to 8 inches | 12 to 14 inches |
| 8 to 10 inches | 14 to 18 inches |
That is not a law of nature. It is a useful home-growing rule so the pot is not sitting on a tray that is barely wider than itself.
Choose the Pebbles or Other Support Material
The support material can be:
- washed gravel
- river pebbles
- aquarium stones
- LECA or clay pebbles
- other inert stable stones
The material matters less than the function:
- it must elevate the pot
- it must stay stable when wet
- it must be easy to rinse clean
Do not use muddy outdoor material without washing it first. You do not need “special humidity stones.” You need clean stable support.
Build It in Five Steps
1. Wash the Tray and Fill Material
Rinse away dust, grit, and residues before the setup sits inside your home. Starting with a dirty tray makes algae and grime harder to manage later.
2. Spread an Even Pebble Layer
Use enough material to create a stable platform rather than a steep mound. The plant should sit flat, not teeter on a pile of stones.
3. Add Water Below the Top of the Pebbles
Pour in water until it sits under the surface where the pot will rest. University of Illinois Extension and Nebraska Extension both support this below-the-pot setup.
4. Set the Pot on Top and Check the Clearance
Look from the side if possible. You want visible separation between the pot base and the reservoir. If the pot touches water, add more support material or reduce the water level.
5. Move the Whole Assembly to the Growing Spot
Do not build the tray in isolation and then place the plant somewhere that defeats the point with strong vent airflow or weak light. The tray only helps in the place where the plant actually lives.
Placement Rules After the Build
The best tray build still underperforms in the wrong location.
Avoid:
- heater blasts
- AC vents
- fan-heavy spots
- dark corners that are already causing other stress
University of New Hampshire Extension notes that calmer air improves the effect. Good placement is part of the build, not an afterthought.
How to Check That You Built It Safely
After the tray is in place, confirm:
- the pot is stable
- the pot does not rock
- the drainage holes are above water
- the tray does not overflow when watered nearby
- runoff from normal watering is not being allowed to sit indefinitely
Oklahoma State Extension is clear that houseplants should not be left standing in water. A correctly built tray respects that rule at all times.
Maintenance: Keep It Clean Enough to Stay Useful
Refill when the exposed water surface has dropped enough that evaporation is clearly reduced. There is no universal refill schedule because room dryness, temperature, tray width, and airflow all change the rate.
Cleaning matters more than many guides admit. University of Maryland Extension and EPA moisture guidance are reminders that wet surfaces can become dirty moisture surfaces fast.
Practical rule:
- rinse when film appears
- scrub when algae or slime starts
- wipe off mineral crust when hard water leaves residue
The Three Most Common Build Mistakes
Using a Tray That Is Too Narrow
A tray barely larger than the pot offers little exposed surface area. It holds water, but it does not create much local evaporation.
Letting the Pot Touch the Water
This is the big one. It changes the function of the whole setup and makes root stress more likely.
Building the Tray for the Wrong Plant
A perfect tray under a poor candidate still gives you a poor result. Build quality cannot compensate for bad plant selection.
When to Upgrade From a Tray to Something Stronger
Use a humidifier or a broader humidity strategy when:
- the room is extremely dry
- several plants need help
- the plant is large
- airflow strips away the benefit
- you built the tray correctly and still see little local effect
The tray is a small tool. Some problems need the bigger tool.
Where to Go Next
Use the next page based on what remains unanswered:
- Do pebble trays really increase humidity for houseplants? for the evidence and limits
- How pebble trays fit into a plant care routine for when to use one versus skip it
- What is a pebble tray? if you want the concept in one clean definition page
This page should get you from “I think I want one” to “I built one correctly.”
Conclusion
A DIY pebble tray is simple to build when you keep the goal clear: expose water for local evaporation while keeping the pot above the reservoir. The tray choice, width, waterline, and placement matter more than fancy materials.
Build it for the right plant, check that the pot never sits in water, and keep the setup clean. That is the version of a pebble tray that is worth testing.