Root Rot on Venus Flytrap: Causes, Checks & Fixes
Quick answer
Confirmed root rot on Venus flytrap shows a soft or black rhizome crown, sour anaerobic peat smell, and traps blackening from the base inward while soil stays wet. First step: lift the pot from standing water and unpot gently-if any rhizome tissue is still firm and white, trim all black mush with sterile scissors before emergency repotting into fresh unfertilized peat-perlite mix.
Root Rot on Venus Flytrap: Causes, Checks & Fixes
This guide covers root rot on Venus Flytrap. See also the general Root Rot guide, watering, and light pages for this plant.
Root Rot on Venus Flytrap: Causes, Checks & Fixes
Quick answer
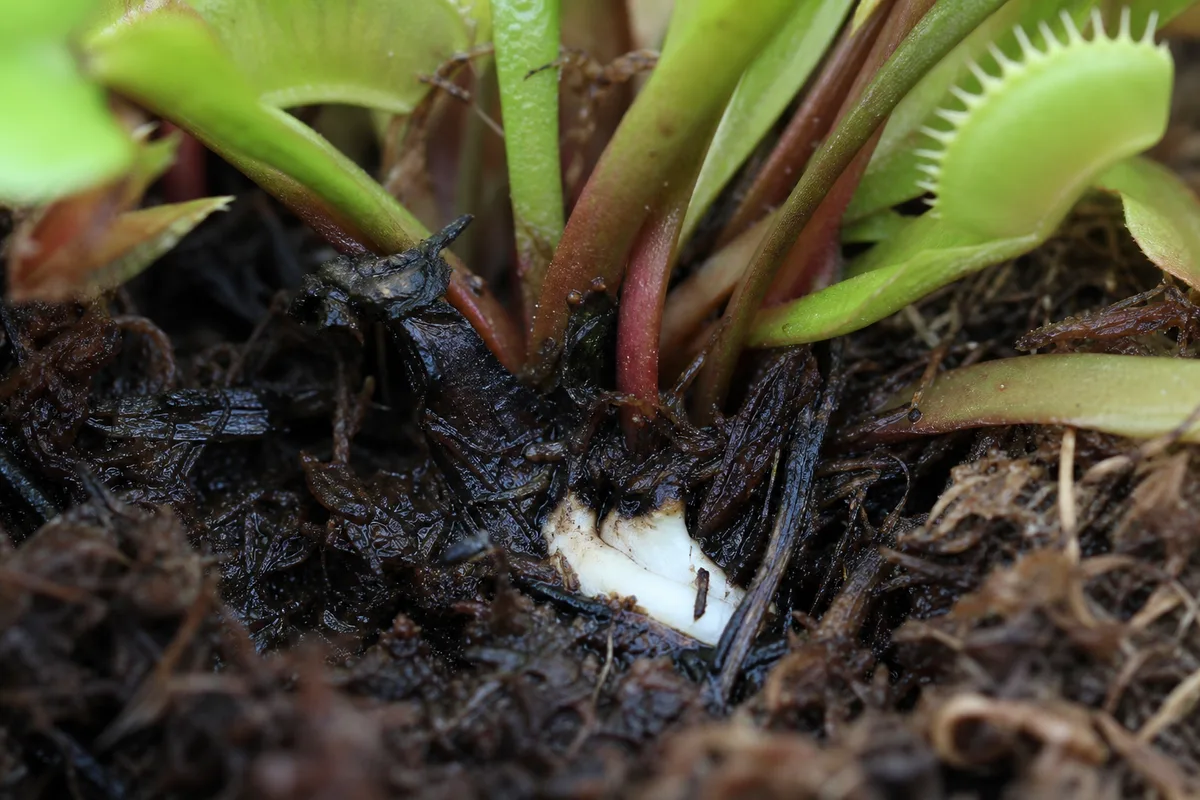
Root rot on Venus flytrap (Dionaea muscipula) is confirmed rhizome decay-not the early wet-soil stress covered in our overwatering triage guide. The signature pattern is a soft or black rhizome crown, sour anaerobic smell from peat, and traps blackening from the base inward while the medium stays wet. Healthy flytraps hold a firm white rhizome at soil level where flat petioles radiate from the growing point.
First step: lift the pot from standing water now and slide the plant out gently. Press the rhizome with a clean finger-firm and white means salvage is possible; mushy, black, or eggy-smelling tissue means trim-and-repot is urgent before anything else.
This page is the post-confirmation salvage deep-dive: numbered inspection, seven-step rhizome rescue, discard rules, and dormancy-specific prevention. For tray depth, water chemistry, and keeping the crown above the saturated zone, start with Venus flytrap watering. For routine repot timing and division, see repotting. Species hub: Venus flytrap overview.
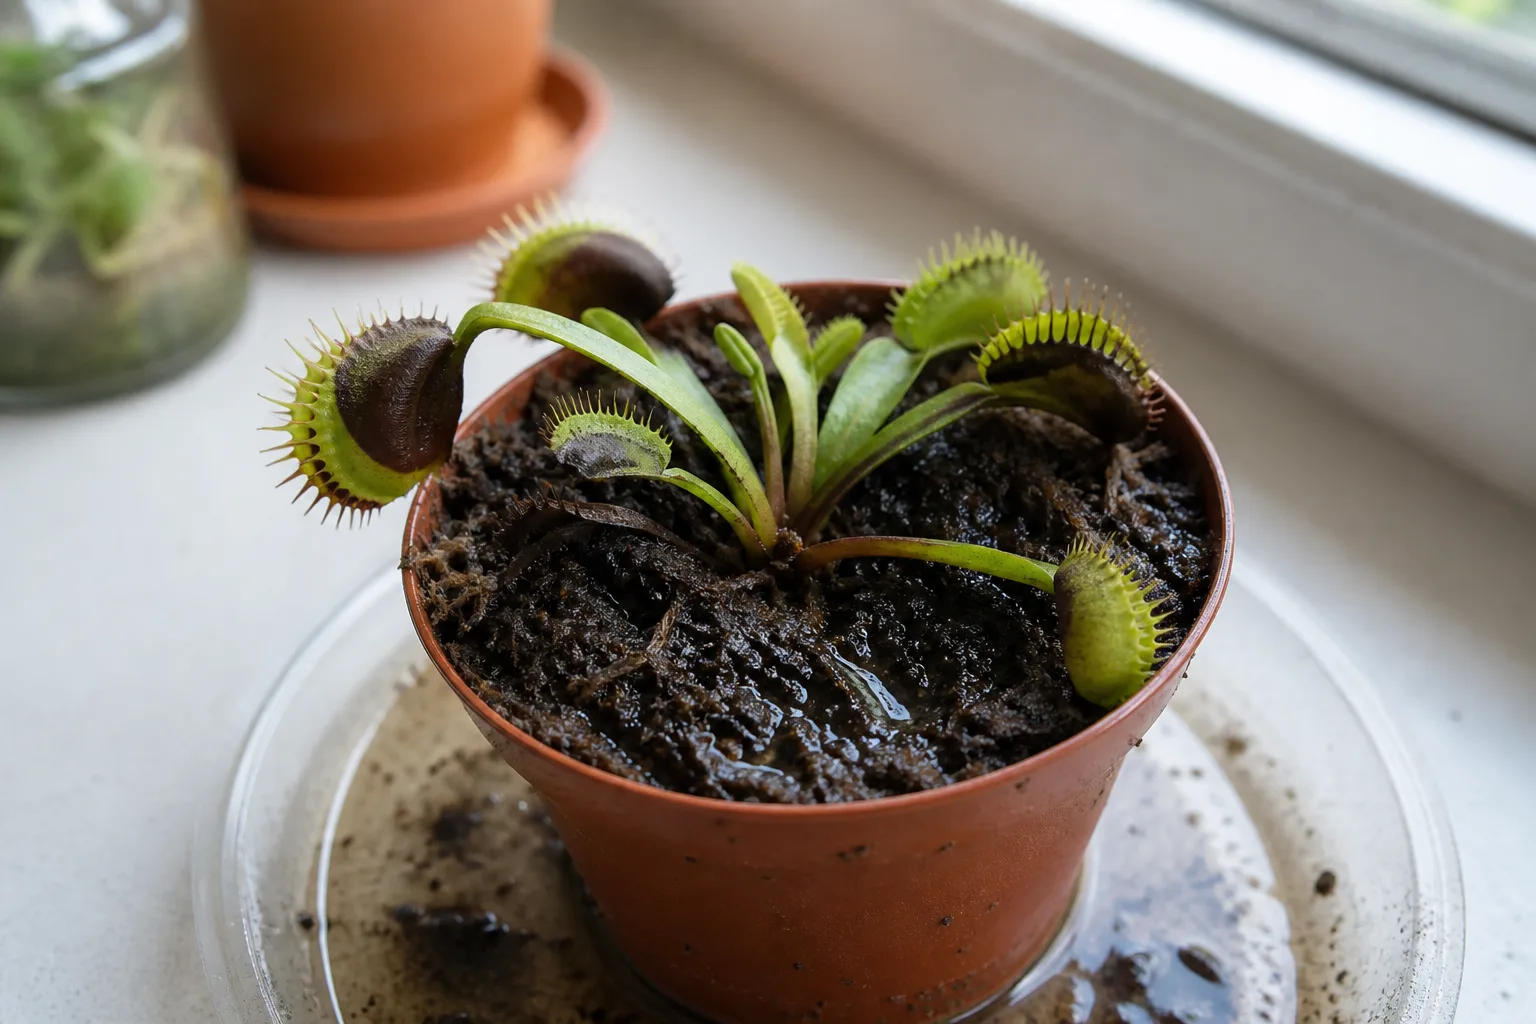
What root rot looks like on Venus flytrap
Root rot on Dionaea attacks the short horizontal rhizome at the soil surface-not deep taproots like a tree. Traps attach to petioles that emerge from this crown; when the crown rots, water uptake fails and traps die from the center outward or from the base of each petiole upward.
Root Rot symptoms on Venus Flytrap - compare with healthy tissue on the same plant.
Rhizome and crown signs
- Black, brown, or rust-orange tissue on the rhizome when you brush peat away-healthy tissue is white and firm
- Soft or squishy crown when you press gently at soil level; healthy rhizome resists pressure like a firm potato
- Sour, rotten, or sulfurous smell from peat-not the neutral earthy scent of fresh sphagnum
- Growing point collapse-new traps fail to open or blacken within days of emerging
- White roots turning black and mushy when rinsed-healthy flytrap roots are pale and firm
Trap and leaf pattern
- Multiple traps blackening at once on wet soil-not one old trap aging out after several closures
- Wilting or limp traps despite saturated peat (overlap with wilting-check rhizome firmness to separate)
- No rebound after you reduce tray water-rot is tissue death, not temporary turgor loss
- Outer traps may look normal briefly while the crown is already failing-always unpot if smell or softness is present
Smell and soil clues
- Anaerobic peat smells sharp and rotten when compacted, old, or permanently submerged
- Mineral crust on the pot rim without mushy rhizome suggests tap-water damage that can overlap with rot-both may require full media replacement
- Peat that stays waterlogged for weeks in a cool room is high-risk even with distilled water
Why Venus flytrap gets root rot
Venus flytraps evolved in nutrient-poor acidic bogs where soil stays damp but the rhizome crown sits above the permanent water table. Indoor tray culture recreates the moisture half of that equation; the failure mode is when the crown drowns in saturated peat or cold standing water.
Too-deep tray water and drowned crowns
The ICPS growing guide stresses that the pot must always sit in pure water, but the water level should stay more than 5 cm (2 inches) below the soil surface-the crown needs air exchange even while roots wick moisture from below. A tray filled so high that peat at the crown stays permanently saturated suffocates tissue that cannot tolerate long anaerobic periods. In warm bright conditions, 1–2 cm of tray water works; in cool, low-light rooms, the same depth can linger too long and rot the rhizome even with distilled water.
Tap-water minerals and peat salt buildup
Never use tap water or fertilizer on Venus flytraps-dissolved minerals accumulate in peat because carnivorous roots did not evolve to excrete excess salts. Calcium and sodium bind to sphagnum, raise conductivity in the rhizome zone, and damage fine roots over weeks. Mineral injury softens the crown and mimics fungal rot; by the time traps collapse, salt creep and anaerobic decay often overlap. Switching to pure water alone cannot flush bound minerals from old peat-a full repot into fresh mix is usually required once damage is visible.
Cold dormancy plus wet soil
Dionaea is a temperate perennial that expects cool winter rest. During dormancy, metabolism slows and roots tolerate less oxygen. Growers who keep a deep winter tray on a cold windowsill invite crown rot: the plant cannot outgrow waterlogging while dormant. NC State extension notes that wild flytraps survive winter underground in the rhizome while above-ground traps die back-your job indoors is barely damp medium, not a standing pond, until spring growth returns.
Compacted or aged peat
Peat decomposes in closed pots over one to two years, collapsing from airy to dense sludge. Perlite delays but does not stop this. Sour, compacted media holds water around the crown without fresh oxygen-one reason annual or biennial repotting prevents rot better than tray tweaks alone. Store-bought flytraps in sealed cups or generic potting soil rot within weeks; emergency repot into mineral-free peat-perlite is non-negotiable.
Lookalike symptoms to rule out
| Pattern | Rhizome feel | Smell | Soil moisture | Likely cause |
|---|---|---|---|---|
| Gradual outer-trap blackening in late fall; firm white crown | Firm, white | Neutral earthy | Damp, not swampy | Normal dormancy |
| Traps limp on light, dry pot; rhizome firm | Firm, white | Neutral | Dry at crown | Underwatering |
| Smaller traps, slow closure; firm rhizome; white pot rim crust | Firm or slightly soft | Neutral | Moist | Mineral burn from tap water-repot, may not be fungal rot |
| Sudden limp after heat spike; firm rhizome | Firm | Neutral | Variable | Heat stress-relocate before repotting |
| Soft black crown; sour peat; wet cold soil | Mushy, dark | Rotten | Waterlogged | Root rot-this page |
| Cottony wax at crown; sticky petioles | Often firm initially | Neutral | Moist | Mealybugs-dab pests before assuming rot |
If you are unsure whether wet stress is still reversible, use overwatering for early triage first. Return here once the rhizome is soft, discolored, or foul-smelling.
How to confirm root rot (six steps)
Work through these in order. Confirmation requires seeing the rhizome-not guessing from traps alone.
- Note onset speed - Traps failing over 48–72 hours on wet soil fit rot; gradual blackening over weeks in November may be dormancy if the rhizome stays firm.
- Lift the pot from the tray - Pour out standing water. A pot that stays heavy and cold with soggy surface peat strengthens rot suspicion.
- Smell the medium - Sour or sulfurous odor at the crown is urgent; fresh peat smells neutral or lightly earthy.
- Press the rhizome gently - Brush peat from the crown. Firm white tissue resists; mushy, black, or waterlogged tissue confirms decay.
- Slide the plant out - Support the rosette; invert the pot and tap the rim. Do not yank traps-they snap easily.
- Rinse roots with distilled, rain, or RO water - Healthy roots are pale and firm. Black strands that pull away easily, plus a discolored crown, confirm root rot and start the salvage protocol below.
Document what you find before trimming-photos help you compare recovery weekly.
First fix: firm rhizome vs. mostly mushy
Your first action depends on what step six revealed:
If any firm white rhizome remains (even a small section with a green growth point): proceed to the seven-step salvage below the same day. Do not wait for traps to recover on their own.
If the rhizome is entirely soft, black, and foul-smelling with no firm core after gentle probing: discard the plant and sterilize the pot and tray before reusing. Salvage is unlikely once the growing point has liquefied.
If the rhizome is firm but peat is sour and black only on roots (crown still white): trim dead roots, discard all old media, and emergency repot-lighter tray watering for two weeks. Skip division.
Make one major intervention today-either salvage repot or discard. Do not stack fertilizer, pesticides, and deep watering on the same day; stressed Dionaea cannot signal which treatment helped.
Step-by-step rhizome salvage
Follow these seven steps when firm white tissue remains. Allow 30–45 minutes; work on a clean surface with distilled water ready.
-
Gather supplies - Sterile scissors or a sharp blade, fresh 1:1 unfertilized peat moss and plain perlite (pre-moistened with pure water), a clean plastic pot with drainage holes at least 10 cm deep, distilled water, and a shallow tray. Never use standard potting soil or fertilized media. Mix details: soil guide.
-
Unpot and discard all old media - Shake peat free gently; do not rip roots. Bag and trash sour peat-do not compost near carnivorous plants.
-
Rinse the rhizome and roots - Use distilled, rain, or RO water to wash away peat fragments so you can see tissue color clearly.
-
Trim all decayed tissue - Cut away every black, brown, rust-orange, or mushy section until only firm white rhizome remains. On shallow Dionaea crowns, you may peel outer rotten layers like an onion before cutting. Sterilize blades between cuts if rot was advanced. A freshly cut surface may brown on exposure to air-that is normal; the interior on the next slice must be firm and white.
-
Optional wound treatment - Some growers dust cuts with cinnamon or sulfur; others repot immediately into fresh mix. Skip hydrogen peroxide soaks unless a carnivorous society guide you trust recommends them-they can stress already weakened tissue.
-
Repot shallow with crown elevated - Plant so the white rhizome sits at or just above the soil surface with the growing point exposed to air. The New York Botanical Garden carnivorous guide recommends keeping the crown above the saturated zone-critical after rot. Fill with pre-moistened mix; do not pack tightly.
-
Reset tray watering conservatively - For the first two weeks, bottom-water lightly: add 1–2 cm pure water to the tray only when the lower mix approaches dry, and skip tray water entirely if the room is cool. Increase to normal growing-season tray depth only after new green traps emerge without immediate blackening. No fertilizer, no feeding traps during recovery.
Recovery timeline by severity
| Severity | What you trimmed | Light | Typical recovery marker |
|---|---|---|---|
| Mild | Small black root tips; firm white crown intact | Bright direct sun or strong LED | New trap in 3–5 weeks |
| Moderate | Up to one-third of rhizome; growth point intact | Bright direct sun | First clean trap in 4–8 weeks |
| Severe | More than half the rhizome; tiny firm remnant | Bright sun; stable temps | 8–12+ weeks or may fail-watch for new green center |
| Failed salvage | All tissue mushy after trim | - | Discard; sterilize container |
Judge success by new traps opening green and staying firm-not by old black traps greening up. Old damaged traps do not heal; they are shed while the crown rebuilds. A stable firm rhizome at weekly checks is the root-zone marker that matters.
What not to do
- Do not keep a deep water tray “to help” a rotting plant-standing water accelerates crown death.
- Do not use tap water, spring water, or bottled mineral water during salvage rinses or tray refills.
- Do not repot into standard potting soil, fertilized peat, or a sealed terrarium without airflow.
- Do not divide the rhizome during active rot-give the remnant every intact root hair to stabilize first.
- Do not feed traps or apply fertilizer while the crown recovers; carnivorous plants must not be fertilized.
- Do not assume distilled water alone fixes advanced rot-trim plus fresh media is required once tissue is mushy.
- Do not confuse dormancy dieback with rot and aggressively trim a firm dormant crown.
How to prevent root rot next time
Prevention is mostly water level, water purity, seasonal tray adjustment, and fresh media-not a mystery fungicide schedule.
- Use only distilled, rain, or RO water under 50 ppm TDS; test tap if you must experiment. Full chemistry rules: watering guide.
- Keep tray water 1–2 cm deep during active growth in warm bright conditions; let the tray dry briefly in cool weather before refilling.
- Keep the crown above the saturated zone-the ICPS guide recommends water level more than 5 cm below the soil surface inside the pot.
- Reduce or pause standing tray water during dormancy; aim for barely damp peat, not a pond, in cool rooms.
- Repot every one to two years into fresh peat-perlite before peat goes sour and compacted.
- Give full sun-at least six hours of direct light daily during the growing season so the plant uses moisture predictably.
- Inspect the rhizome at each repot; catch firmness loss before every trap collapses.
When to discard the plant
Throw away the plant when:
- The rhizome liquefies or turns fully black with no firm white tissue after careful trimming
- Rot smell persists on clean white cuts
- New traps blacken within days of a salvage repot despite corrected tray depth and pure water
- Only translucent mush remains at the growing point
Keep trying when a firm white sliver with a green bud remains-even if most traps are gone. Dionaea can regenerate from a small healthy crown if light and watering are correct.
Practical checks
Urgency check
Treat as same-day urgent if the rhizome is soft, peat smells rotten, multiple traps collapse on wet soil, or black tissue climbs the crown. Monitor weekly if the rhizome is firm but roots show early black tips on sour-smelling old peat-schedule repot before the crown is involved.
Best inspection order
Tray depth and smell → rhizome firmness at soil level → unpot and rinse → trim decision → emergency repot → weekly new-trap check.
Severity note
Spreading black tissue and softness-not a single old black trap-define how fast to act.
Related Venus flytrap guides: overview · watering · soil · repotting · overwatering · underwatering · wilting · light · mealybugs
When to use this page vs other Venus Flytrap guides
- Venus Flytrap watering guide - Use for routine moisture checks before assuming root rot is the main issue.
- Venus Flytrap problems hub - Browse all 18 common issues on this species.
- Overwatering on Venus Flytrap - Different entry point when symptoms overlap with root rot.
- Yellow Leaves on Venus Flytrap - Different entry point when symptoms overlap with root rot.
- Wilting on Venus Flytrap - Different entry point when symptoms overlap with root rot.