Mold Around Tillandsia: Wet Moss, Soil, and Crown-Rot Risk
Quick answer
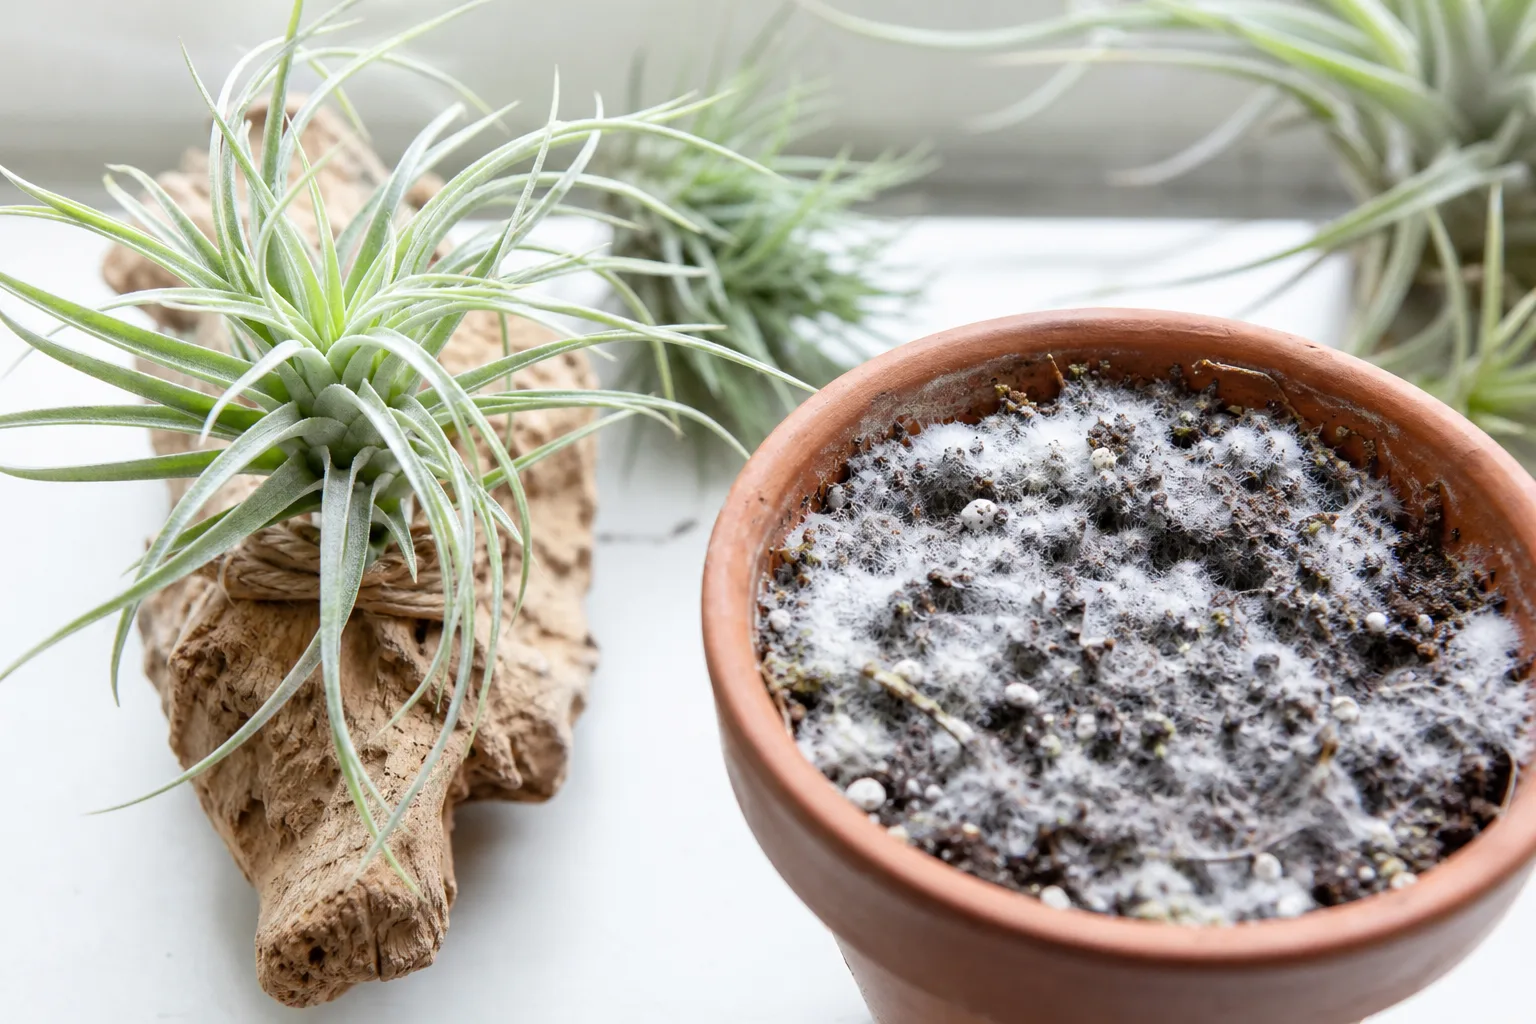
Tillandsia should not sit in wet soil or packed moss. White, gray, or green fuzz around the base is usually mold growing on damp display material, but the real risk is trapped moisture at the crown. First step: remove the plant from the wet material, check whether the base is still firm, and remount it so the crown dries quickly after watering.
Mold Around Tillandsia: Wet Moss, Soil, and Crown-Rot Risk
This guide covers mold on soil on Tillandsia. See also the general Mold on Soil guide, watering, and light pages for this plant.
Mold Around Tillandsia: Wet Moss, Soil, and Crown-Rot Risk
Quick answer
If you see mold on moss, gravel, or soil around Tillandsia, the first useful question is not “which fungicide?” It is why is this air plant sitting in wet material at all?
UF/IFAS Gardening Solutions describes Tillandsia as epiphytes that grow attached to other surfaces rather than rooted into potting mix. Michigan State University Extension warns that putting tillandsias in soil can kill them. So the mold itself is often the visible clue that the display is wrong for the plant.
First action: remove the Tillandsia from the wet material, clear the base, and check whether the crown is still firm. If the plant is firm, this is usually a display correction problem. If the base is soft or sour, treat it as rot risk immediately.
Why mold shows up around air plants
Mold grows where moisture stays trapped on organic material long enough for fungi to colonize it. Around Tillandsia, that usually means one of three setups:
- the plant is tucked into damp decorative moss
- the base was pushed into potting soil or peat
- the display does not dry well after watering
The key point is that the mold is often feeding on the wet display material, not directly attacking a healthy leaf surface. That is why scraping it away without changing the setup rarely solves anything.
Why soil is the wrong environment for Tillandsia
UF/IFAS Gardening Solutions explains that Tillandsia get moisture and nutrients from the air and are typically displayed on bark, cork, shells, or dry pebbles. Michigan State University Extension makes the practical consequence plain: burying them in soil or wet media creates conditions they are not built to handle.
That is why “mold on soil” is such a common search phrase for this plant. People see a houseplant-shaped object and give it houseplant treatment. The fungus is then just the first visible sign that the base is staying too wet.
Surface mold vs. crown rot
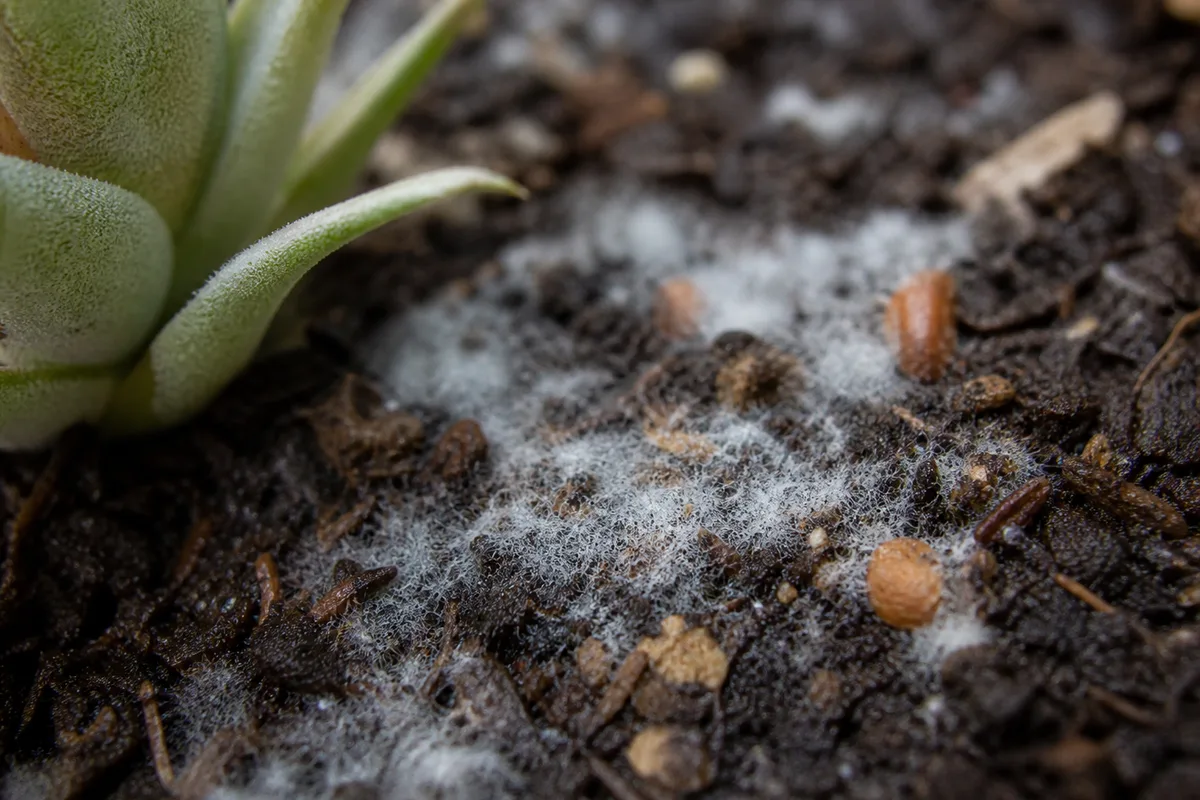
Mold on Soil symptoms on Tillandsia — compare with healthy tissue on the same plant.
This is the distinction that matters most.
Usually surface mold
Surface mold is more likely when:
- the fuzz is on moss, gravel, or soil rather than in the center of the plant
- the base still feels firm
- there is no sour smell
- inner leaves stay attached normally
In that case, the mold is often a warning that the display is too wet, but the plant may still be fully recoverable once you fix the setup.
Possible crown rot
Penn State Extension emphasizes drying after watering, and University of Minnesota Extension notes that crowns rot when water is not drained well. Treat the situation as urgent if:
- the base is soft
- the crown smells sour
- inner leaves pull out easily
- dark tissue is spreading upward from the base
At that point, the problem is no longer just mold on surrounding material. The growing point itself may be failing.
What normal Tillandsia texture can be mistaken for mold
Air plants confuse people because many species already look dusty or silvery. Their trichomes are a natural part of the leaf surface, not a fungal growth. Normal trichomes are even, dry, and attached to the leaf. Mold is a separate fuzzy growth on the surrounding wet material, or sometimes on rotting tissue.
When you are unsure, check where the growth is located. If it is mostly on moss or potting mix, think display moisture first. If it is deep in the center of the plant and the tissue is soft, think rot first.
The first fix that actually helps
Remove the plant from the wet material. That is the move that changes the outcome.
Brush or peel off any moss, potting mix, or fine gravel that is packed against the base. Do not leave “just a little” for support. If the plant is still firm, set it somewhere airy and let the base dry fully before you decide on the new display.
This is why generic houseplant mold advice often fails here. “Let the top inch of soil dry” is not useful for a plant that should not be sitting in soil at all.
How to recover a firm plant
If the base is firm and there is no sour smell, recovery is usually straightforward.
- Discard the moldy material.
- Clean and dry the container or abandon it if it traps too much moisture.
- Let the Tillandsia dry with the base angled down so trapped water can escape.
- Remount it on a surface that does not hold water.
Penn State Extension recommends allowing plants to dry after soaking. UF/IFAS Gardening Solutions recommends mounts that do not hold water. Those two rules solve most non-rot mold cases faster than treatment sprays do.
What to do if the base is already soft
If the base feels mushy or the center is coming apart, stop thinking in terms of cosmetic cleanup.
Trim only clearly dead or black tissue with clean scissors, then let the plant dry before remounting anything. If the center itself is collapsing, the mother plant may not be recoverable. Check for firm pups that can be saved separately.
The real mistake here is optimism without inspection. A soft crown hidden under decorative moss can look “mostly fine” until it fails all at once.
Why closed terrariums and wet moss keep causing this problem
They look good in photos, but they often work against the plant. Moss stays wetter than cork or bark, and enclosed displays slow evaporation around the exact part of the plant that needs airflow. That is why the same mold problem keeps repeating in decorative globes, bowls, and retail gift arrangements.
If the display depends on surrounding the base with damp material, it is probably solving décor and creating plant stress.
How to prevent the problem from coming back
The durable fix is simple:
- keep the base out of wet material
- water the plant, not the decorative nest
- use an open display that dries quickly
- inspect the base regularly instead of trusting the setup
UF/IFAS Gardening Solutions specifically notes that whatever you mount the plant on should not hold water. That one rule prevents more mold problems than trying to sanitize moss over and over.
When to get more help
If the display has been corrected and the plant still keeps softening, or if multiple plants from the same setup are failing, the issue may be more advanced than surface mold. A bromeliad society grower, a cooperative extension office, or a specialty air-plant nursery can help distinguish persistent bacterial or fungal rot from a simple moisture mistake.
Conclusion
The useful way to read mold around Tillandsia is as a setup warning. The fuzz is often not the real problem; the real problem is moisture trapped around an epiphyte that should be drying quickly between waterings.
Remove the plant from wet material first, then judge the base. If it is firm, fix the display and move on. If it is soft, act like you are dealing with crown rot, not cosmetic mold. For Tillandsia, the best treatment is usually not stronger chemicals. It is a drier, more honest growing setup.
When to use this page vs other Tillandsia guides
- Tillandsia soil guide - Use this if the plant is still sitting in moss, gravel, or potting mix and you need a better display setup.
- Tillandsia watering guide - Use this if your display is open but the plant still stays wet too long after watering.
- Stem Rot on Tillandsia - Use this when the base is already soft or sour and you need rot-first triage.