Black Spots on Swedish Ivy: Causes, Checks & Fixes
Quick answer
Black spots on Swedish Ivy usually come from direct sun scorch or fungal leaf spot on wet foliage-not fertilizer shortage. Window-side dry patches need shade; wet circular halos on inner crowded leaves need dry-leaf culture. First move: pull the basket out of direct sun and snip leaves more than half covered in spots.
Black Spots on Swedish Ivy: Causes, Checks & Fixes
This guide covers black spots on Swedish Ivy. See also the general Black Spots guide, watering, and light pages for this plant.
Black Spots on Swedish Ivy: Causes, Checks & Fixes
Quick answer
Black spots on Swedish Ivy (Plectranthus verticillatus, still sold as P. australis on many tags) almost always trace to light or moisture on leaves, not fertilizer shortage. Window-side dry patches → move to shade. Wet circular halos on inner crowded leaves → stop wetting foliage and improve airflow.
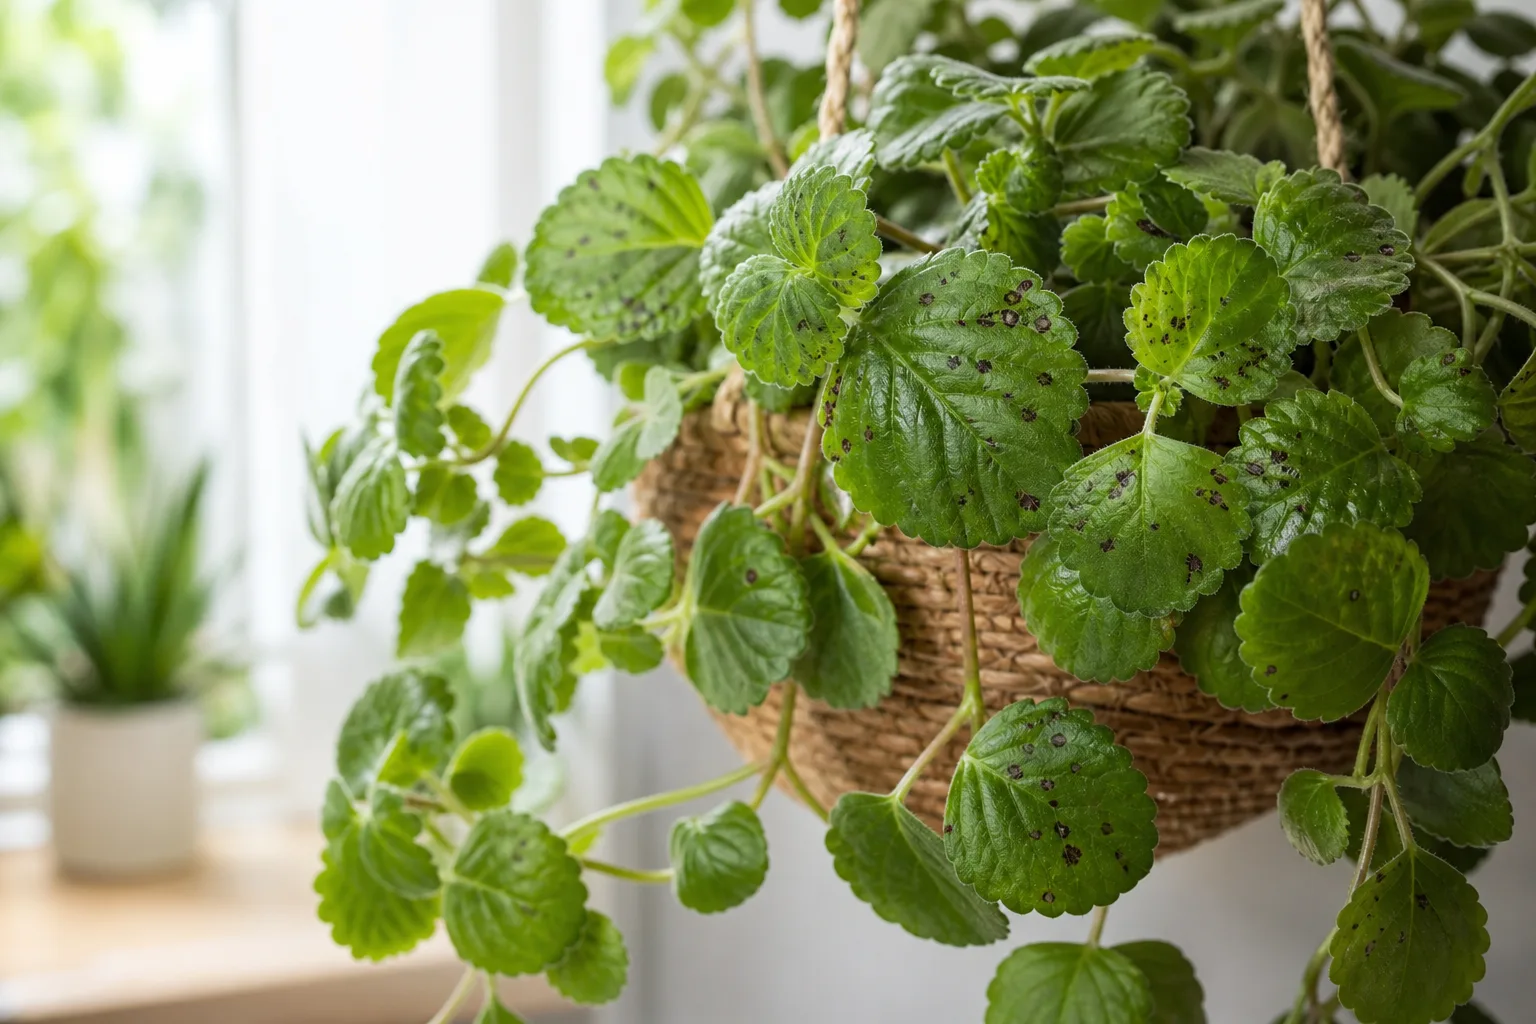
Direct sun burns the glossy, scalloped blades on this shade-adapted woodland trailer, leaving dry dark patches on outer runners. Wet foliage in a crowded hanging basket invites tan-to-black circular fungal leaf spots on lower inner stems. First move: pull the basket out of any direct sun beam and snip off leaves more than half covered in spots.
Routing check: If damage is dry, brittle edges and tips only with no wet halos or spreading lesions, use the crispy leaves guide instead- that pattern is usually drought, scorch margins, or dry air, not active leaf-spot disease. This page covers solid dark lesions, yellow halos, and water-soaked spotting that can spread leaf to leaf.
Black spots vs. crispy leaves on Swedish Ivy
Swedish ivy keepers often search both symptoms at once because sun and moisture stress overlap on trailing baskets. Use this split before you treat:
| What you see | Texture | Typical location | Start here |
|---|---|---|---|
| Tan-to-black dry patches, sometimes bleached first | Crisp, papery | Outer leaves facing south or west glass | Shade fix on this page; margin-only crisping → crispy leaves |
| Round brown-black spots with yellow halos | Papery center, not watery | Lower inner leaves in crowded crown | Dry-leaf culture + prune (this page) |
| Water-soaked dark spots enlarging fast | Soft, may smell off when wet | Any leaf after misting or splash | Isolate; possible bacterial spot (this page) |
| Brown tips and edges only, no halos | Brittle, crumbles | Longest trailing stems | Crispy leaves - thirst or dry air |
| Whole plant limp on wet sour soil | Soft stems at base | Crown and soil line | Root rot - not foliage treatment alone |
Black spots and crispy leaves can coexist after a plant sat in direct sun and was misted daily-outer scorch plus inner fungal spots are a common bathroom-basket combination.
What black spots look like on Swedish Ivy
On this glossy, scalloped-leaf trailer, spots stand out sharply against healthy green tissue.
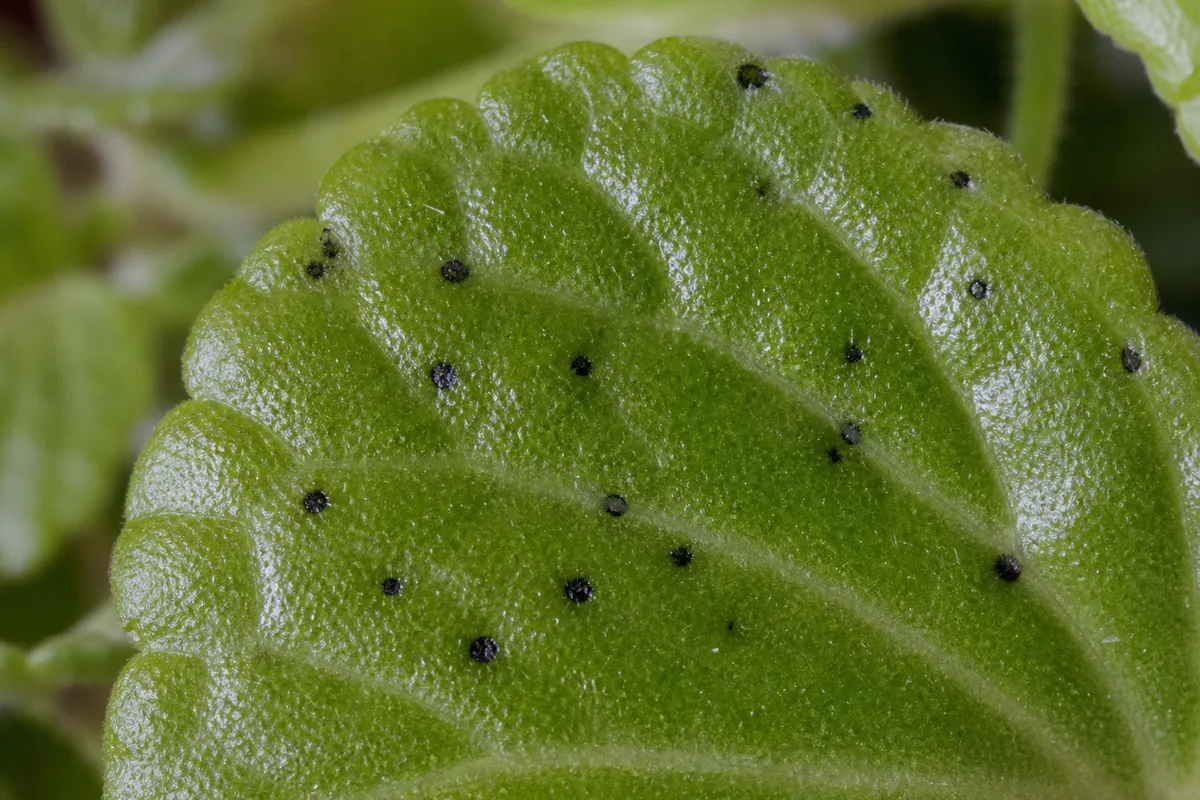
Black Spots symptoms on Swedish Ivy - compare with healthy tissue on the same plant.
Sun scorch usually hits the upper or outer leaves that face a window-patches are dry, papery, and sometimes bleached at the center before turning dark brown or black. On variegated Swedish ivy, pale cream or white zones often scorch first because thinner tissue loses water faster than solid green blades.
Fungal leaf spot more often starts on lower, crowded leaves where airflow is weakest; lesions are roughly round, may show yellow halos, and can merge into larger dead patches. Leaf spots and root rot may occur on Swedish Ivy, so check whether stems at the soil line stay firm while you inspect foliage.
Bacterial spotting looks water-soaked and dark, sometimes angular between veins, and affected tissue may feel soft rather than crispy. Collapsed tissue may develop an unpleasant odor when bacteria are active indoors.
What to photograph for your own records: One sun-facing leaf with dry necrosis, one inner leaf with a haloed lesion, and one clean tip after pruning-side-by-side phone photos make week-to-week spread easy to judge without guessing from memory.
Why Swedish Ivy gets black spots
Direct sun scorch on shade-adapted trailers
Swedish Ivy is built for part shade and bright, mostly sunny indoor exposures-not hot afternoon sun through glass. A south- or west-facing sill scorches trailing runners fast, especially variegated forms with thinner leaf tissue. Review light placement if you recently moved the basket closer to glass or removed a sheer curtain.
Fungal leaf spot on wet crowded foliage
Disease pressure rises when leaves stay wet: overhead watering, frequent misting in a steamy bathroom, humidifier plumes hitting foliage, or stems piled on damp saucer water all prolong leaf moisture. Lowering humidity, decreasing leaf wetness, and increasing air circulation reduces fungal infection risk. In a fast-draining hanging basket that stays crowded at the crown, inner leaves can remain damp long after the surface mix feels dry.
Bacterial spotting and fast spread
Bacterial leaf spots often begin water-soaked and may enlarge quickly on multiple leaves after shared misting bottles or unsanitized shears. There are no cures for systemically infected plants-severe cases are discarded rather than repeatedly treated.
Root stress as a secondary weakness factor
Overwatering the root zone does not directly cause black spots, but stressed roots produce weak leaves that spot more easily. If the pot stays heavy for days and stems feel dull, cross-check overwatering and root rot before you focus only on foliage.
How to confirm the cause
Work through these checks in order:
- Light history - Did you recently move the basket closer to a window, outdoors, or rotate it so new leaves face afternoon sun? Dry spots on sun-facing leaves point to scorch.
- Spot texture - Crisp and dry suggests abiotic burn; soft, watery, or haloed spots suggest bacterial or fungal disease.
- Watering habit - Do you wet leaves when watering, mist daily, or run a humidifier against foliage? Spots after overhead moisture favor pathogens.
- Spread pattern - Scorch stays on exposed leaves; disease climbs from lower inner leaves toward new growth.
- Spread speed - Static marks on a few old leaves differ from lesions enlarging on fresh tips within days.
- Stem base - Soft stems with sour soil mean root rot, not classic leaf spot-see the root rot guide instead.
- Collection context - Matching spots on multiple plants after shared pruning or misting points to splash spread-isolate suspects.
If more than a third of foliage is spotted and new leaves keep spotting weekly, treat as moderate to severe and isolate the basket away from pothos, peperomia, and other moisture-sensitive trailers on the same shelf.
Severity ladder
| Level | Pattern | Action |
|---|---|---|
| Cosmetic scorch | Dry patches on a few outer leaves; firm stems; no spread | Move to bright indirect light; trim worst leaves; watch tips |
| Active fungal | Round halos on multiple leaves; slow spread | Prune, dry-leaf culture, airflow; hold fungicide 7–10 days |
| Bacterial / systemic | Water-soaked fast spread, odor, collapse | Isolate; discard if most new leaves spot within days; propagate clean tips first |
Mild sun burn on a few outer leaves is cosmetic; trim and adjust light. Escalate when the ladder moves from cosmetic to active spread despite dry leaves.
First fix for Swedish Ivy
Move Swedish Ivy to bright indirect light with zero direct sun on the leaves-an east window or a few feet back from south glass works well, matching Swedish ivy light guidance. With clean scissors, remove any leaf that is more than half black and discard it in the trash, not compost. Individual leaves with spots can be picked off and destroyed. Then water at the soil line only when the top inch of mix feels dry, and empty the saucer afterward.
That single shade-and-prune step is the safest first action before fungicide, extra misting, or fertilizer.
Step-by-step recovery
- Isolate spotted baskets away from dense plant shelves when lesions are spreading-splash and shared tools move pathogens faster than scorch alone.
- Prune every leaf more than half necrotic; bag trimmings in household trash.
- Clear debris from the soil surface so fallen tissue does not re-wet and reinfect.
- Relocate to bright indirect light with gentle airflow past trailing stems-not a closed bathroom corner during recovery.
- Water early at soil level when the top inch dries; water early in the day so leaf surfaces dry quickly.
- Sanitize shears with alcohol before touching other plants.
- Hold fungicide unless spots keep spreading after seven to ten days of dry-leaf culture. Registered products can be used on houseplants, but removal of infected parts and drier conditions should help first in typical home setups.
- Hold fertilizer until new tip growth looks firm and glossy again.
- If bacterial odor or rapid collapse appears, discard severely affected plants rather than treating repeatedly-systemically infected plants should be discarded. Propagate healthy tip cuttings before disposal if stems above the damage are still firm.
Recovery timeline and what improvement looks like
Sun scorch: New growth at pinched stem tips should emerge clean within two to three weeks after relocation. Old black tissue never re-greens-judge success by unstained new scalloped leaves, not repaired scars.
Fungal leaf spot: Spots often stabilize within one to two weeks once leaves stay dry and infected blades are removed. Plan a weekly prune pass for three weeks if lower inner leaves were heavily crowded. New clean tips may take two to four weeks in bright indirect light during active growth.
Winter slowdown: Cool rooms and shorter days slow trailing growth; allow an extra week before you assume cultural fixes failed.
When improvement stalls: If clean tips do not appear after four weeks of dry-leaf culture and firm roots, consider a labeled houseplant fungicide per product directions-or submit photos to your local extension office if the pattern still does not match scorch or classic leaf spot.
Lookalike symptoms to rule out
| Pattern | Likely cause | Route to |
|---|---|---|
| Dry margins and tips only, no halos | Underwatering or low humidity | Crispy leaves |
| Sticky residue with spots | Mealybugs or aphids | Mealybugs |
| Pale webby undersides, stippling | Spider mites | Spider mites |
| Silver stippling, distorted new growth | Thrips - not classic solid black patches | Inspect undersides; isolate; extension ID if unsure |
| Cold draft damage | Darkened leaves after sitting below 10°C (50°F) | Move off winter glass; draft stress |
| Yellowing + mushy stems on wet soil | Root rot | Root rot |
Swedish ivy is often the first plant infested with mealybugs in a collection-cottony axils with honeydew differ from dry scorch or haloed leaf spot.
Mistakes to avoid
Do not mist leaves while spots are active-extra surface moisture worsens fungal and bacterial spread, especially in a steamy bathroom basket. Do not assume black spots need fertilizer; feeding stressed foliage can burn tender new growth. Do not leave heavily spotted leaves attached hoping they recover; necrotic tissue will not re-green and can harbor spores. Do not blast leaves with cold tap water late in the evening when they cannot dry before night. Do not apply fungicide before pruning and fixing wet-leaf culture-the RHS notes stressed houseplants need stable culture before chemical intervention.
How to prevent black spots next time
Hang Swedish Ivy where it gets bright light but never direct sun that burns leaves. Use well-draining mix, water at soil level when the top inch dries per the watering guide, and pinch stem tips after flowering to keep dense, airy foliage. Rotate hanging baskets weekly so one side does not bake against glass while inner leaves stay shaded and damp.
Space plants so air circulates between them when you group baskets. Sanitize scissors between plants if you prune multiple trailers in one session. Skip vanity misting if your room already holds moderate humidity-the species tolerates average indoor conditions when roots and light are stable.
When to worry
Escalate when black spots cover most new leaves within a week, stems soften at the crown, or a sour smell rises from wet mix while foliage spots-unpot and inspect roots before you treat leaves alone. If lesions do not match scorch or leaf-spot patterns and you see silver stippling or twisted new growth, inspect for thrips and isolate the basket; pest damage needs a different protocol than shade and dry leaves.
Prominent rule-out: sour soil plus soft stems is a root rot emergency, not a foliage-spray problem. Mild sun burn on a few outer leaves is cosmetic; trim and adjust light.
Closing routing reminder
Match the pattern, then pick the guide: dry window-side patches → shade and light check; wet halos on inner leaves → dry foliage and airflow; water-soaked fast spread → isolate and consider discard; edge-only crisping → crispy leaves. Watch new tip growth-not old scars-for proof the fix worked. For general culture context, start from the Swedish ivy overview.
Related Swedish ivy care and problems
- Swedish ivy overview - general care and troubleshooting entry
- Crispy leaves on Swedish Ivy - dry margins and tips without disease halos
- Swedish ivy light - placement to prevent scorch
- Swedish ivy watering - soil-level moisture rhythm
- Root rot on Swedish Ivy - sour soil and soft stems
- Mealybugs on Swedish Ivy - sticky residue lookalike
- Spider mites on Swedish Ivy - stippling lookalike
When to use this page vs other Swedish Ivy guides
- Swedish Ivy watering guide - Use for routine moisture checks before assuming black spots is the main issue.
- Swedish Ivy problems hub - Browse all 18 common issues on this species.
- Leaf Drop on Swedish Ivy - Different entry point when symptoms overlap with black spots.