Swedish Ivy Propagation: Stem Cuttings Guide
Swedish Ivy Propagation: Stem Cuttings Guide
Swedish Ivy Propagation: Stem Cuttings Guide
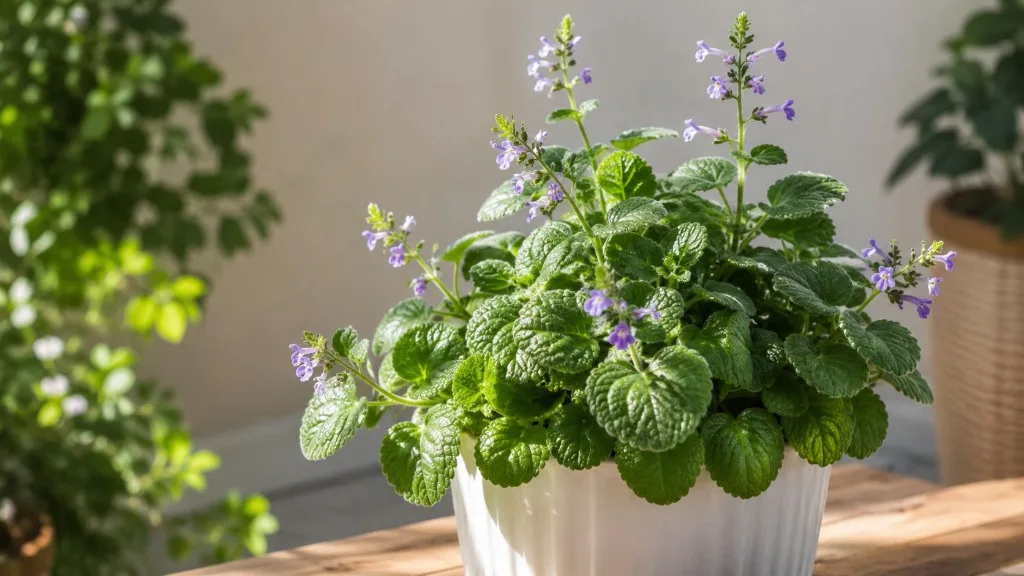
Swedish ivy propagation is one of the most approachable projects in indoor gardening because the plant is built for it. Most plants sold as Swedish ivy belong to Plectranthus verticillatus - sometimes labeled creeping Charlie or whorled plectranthus - though Plectranthus australis appears under the same common name in some nurseries. Both are soft-stemmed trailing members of the Lamiaceae (mint) family from southern Africa, and both root readily from stem cuttings placed in clean water or lightly moist potting mix. You are not coaxing a reluctant species; you are giving a fast-growing vine the same restart it would attempt after a stem touches damp soil in its native habitat.
The practical workflow is simple: choose a healthy non-flowering stem, cut just below a node, strip the lower leaves, root in water or soil under Swedish Ivy light guide, then pot up when roots are strong enough to handle mix. What separates a lush new hanging basket from a jar of mushy stems is almost always node placement and water hygiene, not propagation talent. This guide walks through every decision - timing, cutting length, water changes, soil moisture, transfer timing, and how to read the early signs that rooting is working or failing.
If symptoms persist, see the Brown Leaves on Swedish Ivy guide.
Why Stem Cuttings Are the Best Method for Swedish Ivy
Swedish ivy is a trailing houseplant that produces roots along its square stems wherever a node contacts moisture. Unlike species that must be divided at the crown or grown from seed, a 8–15 cm (3–6 inch) cutting with one or two nodes already contains the blueprint for a full plant: roots from buried nodes, new shoots from buds above the soil or water line. Division is possible on large mature specimens but damages the parent’s shape and is unnecessary for most home growers. Seed propagation is slow and irrelevant when you already own the exact cultivar you want to copy.
Stem cuttings also clone the parent genetically. Leaf color, growth speed, and trailing habit carry over intact - valuable when you are filling a hanging basket to match an existing display or sharing a plant that has thrived in your conditions. The Royal Horticultural Society lists multiple Plectranthus species as indoor-friendly trailers propagated by cuttings, reflecting a well-established horticultural pattern: soft-stemmed mint-family plants root faster from nodes than from leaf tissue alone.
How Swedish Ivy Biology Makes Rooting Easy
Square stems and opposite leaf pairs mark Swedish ivy as a typical Lamiaceae vine. Each leaf attaches at a node - the slightly swollen joint where roots and new shoots emerge. Unlike succulent cuttings that need a callus before planting, Swedish ivy’s soft herbaceous tissue roots directly when warmth, oxygen, and moisture align. Crush a leaf lightly and you may notice a faint mint-family aroma; that same tender stem physiology means cells at the cut face divide into root initials within days under good conditions.
Nodes submerged in water or buried in mix send out adventitious roots - roots that form from stem tissue rather than from an existing root system. Above the water or soil line, buds at nodes can break into new trailing stems once the root mass supports them. A cutting without a node may stay green for weeks but will not become an independent plant because it lacks the meristematic tissue required for both roots and shoots. This is the single most important propagation rule for Swedish ivy, and it applies whether you root in a glass jar or a nursery pot.
What a Single Cutting Can Become
One well-rooted cutting is a starter plant, not a finished basket. In active growth, Swedish ivy can produce visible new stem length within two to four weeks after roots establish - faster than many comparable trailers. Most growers take three to six cuttings from a single pruning session and root them together so a new pot fills out quickly. Because each cutting is genetically identical, they grow at the same pace and weave into a uniform cascade without the patchy look of mismatched specimens.
A rooted cutting potted alone in a 10 cm (4 inch) nursery pot will look sparse for a month or two before side shoots develop. That is normal, not failure. Patience in the starter pot - or grouping several cuttings from the start - produces a fuller display than rushing a single stem into a large hanging basket where wet mix outpaces a tiny root system.
When to Propagate Swedish Ivy
Timing influences speed more than success with Swedish ivy. Because the plant roots in cool dim conditions too, you can propagate year-round indoors. Rooting simply accelerates when the parent is in active growth - usually spring through early autumn in temperate climates - because stem cells divide faster and the parent replaces pruned material quickly.
Avoid taking cuttings during obvious stress: immediately after shipping, during a pest outbreak, while the soil has been soggy for days, or when the plant is dropping leaves from chronic underwatering. Propagation copies the condition of the tissue you remove. A wilted stem from a dehydrated parent may root but often stalls or rots because its cells lack the energy reserves of firm active growth.
Best Season for Fastest Rooting
Spring and early summer offer the best combination of warmth, lengthening daylight, and parent vigor. Room temperatures of roughly 18–24°C (65–75°F) support root emergence in one to three weeks for water-rooted cuttings and a similar window for soil-rooted ones in a humid setup. Mid-summer works equally well if the parent is not heat-stressed; avoid propagating from sun-scorched stems taken from a plant baking in direct afternoon sun.
Fall propagation succeeds in bright homes but expect slower progress as daylight shortens. Winter rooting is viable near a bright window or under supplemental grow lights, yet cool windowsills below 15°C (59°F) can stretch the timeline to four weeks or more without indicating failure. If roots are clean and the stem firm, waiting beats discarding a slow cutting.
Signs Your Parent Plant Is Ready
A propagation-ready Swedish ivy shows firm new tips, evenly spaced nodes along trailing stems, and leaves that are fully expanded rather than pale emerging growth. Leggy vines with long bare sections between leaves are ideal donors - you trim back to encourage bushiness on the parent while converting the removed stems into new plants. Stems actively producing small flower spikes are lower priority; flowering diverts energy away from root formation, so choose vegetative side shoots when possible.
Inspect the parent for mealybugs, spider mites, and scale before cutting. Pests travel on stems into propagation jars where they multiply in sheltered conditions. If you find insects, treat the parent and wait until clean new growth appears before propagating. A two-week quarantine for new cuttings in a separate room protects the rest of your collection when pest history is uncertain.
Supplies and Setup Before You Cut
Gathering materials before you cut reduces the time stems sit open to the air and keeps the process sanitary. Swedish ivy is forgiving, but clean tools and fresh media prevent the bacterial cloudiness that turns water propagation from satisfying to frustrating.
Tools and Materials Worth Having
Sharp bypass pruners or scissors sterilized with rubbing alcohol or a flame are sufficient for most stems. Dull blades crush tissue and slow rooting. You will also want clear glass jars or small vases for water propagation, 10 cm (4 inch) nursery pots with drainage holes for soil rooting, and a standard well-draining potting mix amended with perlite if your base mix is heavy. Optional but useful: rooting hormone powder or gel (indole-3-butyric acid), clear plastic bags or propagation domes for humidity, and labels if you are running several batches at once.
For water propagation, choose containers narrow enough that stems rest upright without submerging upper leaves. For soil propagation, pre-moisten mix until it feels like a wrung-out sponge - evenly damp, not dripping. Have your rooting station in bright indirect light before you cut so cuttings move directly from parent to setup without sitting on a dry counter.
Choosing Water or Soil From the Start
Water propagation wins on visibility and beginner confidence. You watch roots emerge, catch problems early, and avoid guessing about moisture in opaque mix. Soil propagation wins on fewer transfer steps and often produces roots adapted to mix from the start, which some growers prefer for long-term vigor. Swedish ivy succeeds with both; your choice depends on whether you want a teaching moment in a jar or a straight path to potted plants.
If you plan to root many cuttings for one basket, water lets you monitor each stem and pot only the winners. If you prefer minimal handling, soil with a humidity tent reduces daily maintenance. Do not feel locked in - experienced growers use water for quick checks and soil for bulk propagation. The sections below cover each method in full detail so you can switch approaches on the next batch if the first feels awkward.
How to Take Swedish Ivy Stem Cuttings
Taking cuttings is a pruning decision as much as a propagation step. Each cut changes the parent’s shape, so work from the outside of the trailing mass inward, removing leggy lengths while keeping enough foliage on the parent to photosynthesize. Aim for cuttings 8–15 cm (3–6 inches) long with at least two nodes - one to submerge or bury, one to remain above the medium with leaves attached.
Selecting Healthy Stems With Strong Nodes
Choose stems that are green, firm, and unblemished. Avoid yellowing sections, stems with blackened nodes, or tips showing cold damage. The best material often comes from the middle of a long vine: mature enough to store energy, young enough that cells still divide rapidly. If the parent has been overwatered and stems feel soft at the base, take cuttings only from firm growth higher on the vine.
Each node should show a visible leaf pair or leaf scar - the small mark left after a leaf falls. Roots emerge from that zone. Cuttings taken too close to the growing tip may wilt before rooting because they have fewer stored reserves; cuttings from woody basal stems on an old plant root more slowly. The sweet spot is semi-soft green stem that bends slightly without snapping.
Making Clean Cuts and Preparing the Stem
Make a 45-degree cut just below a node using sterilized blades. The angle increases surface area for water uptake and root initiation without leaving a long stub that can rot. Remove leaves from the lower half of the cutting - anything that would sit underwater or underground. Submerged leaves decay quickly and foul water or soil. Keep one or two leaf pairs at the top for photosynthesis; if leaves are very large, trimming them by one-third reduces transpiration while roots form.
If using rooting hormone for soil propagation, dip the cut end briefly and tap off excess powder. Hormone is optional for Swedish ivy but can shave a few days off rooting on slow winter batches. Proceed immediately to your water jar or prepared pot; letting cuttings desiccate on a windowsill for hours works against you even though callusing is not required.
Rooting Swedish Ivy Cuttings in Water
Water propagation is the method most beginners picture first, and Swedish ivy rewards it with visible white roots often within seven to fourteen days in warm bright conditions. Royal Horticultural Society lists Plectranthus verticillatus as easily propagated by stem-tip cuttings at any time of year - fast enough to feel dramatic if you have only propagated slower plants before. Success depends on node submersion, water freshness, and light quality rather than on special additives.
Jar Setup, Light, and Water Changes
Place the prepared cutting in a clean glass with enough room-temperature water to cover one or two lower nodes while keeping upper leaves dry. Position the jar in bright indirect light - near an east window or a few feet back from a south or west exposure. Direct sun through glass overheats water and cooks tender stems.
Change the water every three to five days, or sooner if it clouds or smells stale. Fresh water replenishes dissolved oxygen, which roots need for healthy growth. Algae on the glass is cosmetic; rinse the jar when you refresh water. Multiple cuttings can share one container if stems do not crowd each other, but separate jars make it easier to remove a failing stem without disturbing neighbors.
Roots first appear as small white bumps at submerged nodes, then extend into fine filaments. Avoid disturbing the cutting during this phase. A gentle lift after ten days is enough to confirm progress; constant handling breaks fragile root tips.
When and How to Move Cuttings Into Soil
Transfer when roots reach roughly 2.5–5 cm (1–2 inches) and begin branching - long enough to anchor in mix but not so long that they tangle and snap during potting. Waiting until water roots are 10 cm (4 inches) or more often causes transplant shock because fine water-adapted roots struggle in soil and may rot if kept too wet.
Use a small pot with drainage and pre-moistened well-draining mix. Create a hole with a pencil, lower the cutting so buried nodes sit at the previous water line depth, and firm mix gently around the stem. Water once to settle soil, then let the top inch dry slightly before the next thorough drink. Keep bright indirect light and avoid fertilizer for the first three to four weeks. Some leaf drop after transfer is normal; new firm growth indicates the root system is adapting.
Rooting Swedish Ivy Cuttings Directly in Soil
Soil propagation skips the jar stage and suits growers who want finished pots sooner or who root many cuttings at once in a tray. The same node rules apply: bury at least one node where leaves were removed, keep upper leaves in air, and maintain evenly moist - not waterlogged - mix throughout the rooting window.
Potting Mix, Depth, and Container Size
Fill small pots or cell trays with standard indoor potting mix blended with 20–30% perlite for extra aeration if your mix is peat-heavy. Heavy garden soil compacts and causes stem rot. Make a hole with a dibber or pencil, insert the cutting so one or two nodes sit below the surface, and firm mix lightly so the stem stands upright without being crushed.
Match pot size to cutting size. A single cutting belongs in a 10 cm (4 inch) pot at most until roots fill it. Overpotting surrounds a tiny root zone with wet mix that stays saturated for days - the most common soil-propagation failure for beginners. Three to five cuttings can share a slightly wider starter pot if you plan to divide later, but ensure each stem has independent node contact with mix.
Optional rooting hormone on the cut end before planting may accelerate root initials; Swedish ivy roots well without it. If stems wilt the first day, mist the air lightly or cover with a clear plastic bag propped on stakes so plastic does not touch leaves. The bag creates a humid microclimate that reduces water loss until roots form.
Humidity, Warmth, and Daily Moisture Checks
Place soil-rooted cuttings in bright indirect light at room temperature. Check moisture daily by touching the top of the mix. It should feel like a wrung-out sponge - damp throughout the rooting zone, never muddy. Water lightly when the surface begins to dry; soggy mix for multiple days invites stem rot at buried nodes.
After two to three weeks, test for resistance with a gentle tug. Firm resistance usually means roots have anchored; a cutting that pulls out cleanly with no roots visible needs more time or warmer/brighter conditions. New leaf growth or a fresh green tip is an even better sign than the tug test, which can break delicate new roots if done aggressively.
Remove humidity domes or bags once new growth appears or after three weeks, whichever comes first. Long-term enclosure without airflow encourages fungal issues on soft Lamiaceae foliage.
Aftercare for Newly Rooted Swedish Ivy
Newly rooted Swedish ivy is not a mature trailing specimen yet. Treat the first four to six weeks after confirmed rooting as stabilization: consistent bright indirect light, careful watering, no fertilizer rush, and no immediate upsize into a huge hanging basket.
Water when the top 2–3 cm (1 inch) of mix approaches dryness - typically every five to seven days in active growth, less in cool months. The root mass is still small relative to leaf area, so both overwatering and underwatering show quickly as wilting or yellow lower leaves. Empty saucers after watering so the pot never sits in runoff.
Hold fertilizer until new growth hardens - usually three to four weeks after roots establish in soil. Then a quarter-strength balanced liquid feed once monthly during spring and summer is sufficient. Swedish ivy is not a heavy feeder; excess nitrogen on a young root system produces soft leggy growth vulnerable to pests.
When roots circle the bottom of the starter pot or emerge from drainage holes - often six to ten weeks after rooting - move to the next pot size or combine several rooted cuttings into one hanging basket. Use the same well-draining mix, water in thoroughly, and keep light bright but filtered for two weeks while roots explore the new volume. If you propagated to share plants, this is a good stage to pass them on; each rooted cutting is independent and acclimates faster than a freshly cut stem.
Common Swedish Ivy Propagation Mistakes
Even an easy propagator fails when basic rules stack wrong. Most Swedish ivy propagation problems trace to nodes, moisture, or water hygiene - not bad luck.
Mushy stems in water usually mean submerged leaves were not removed, the jar sits in hot direct sun, or water was not refreshed and bacteria consumed oxygen. Trim back to firm green tissue above the rot, strip lower leaves again, and restart in a clean jar with fresh water. Discard stems that are soft along their full length.
Cuttings that shrivel without rooting often sit in dim light, dry air without humidity support, or were taken from weak parent tissue. Move to brighter indirect exposure, use a humidity bag for soil cuttings, and verify at least one node contacts moisture. A wilted cutting sometimes recovers once roots initiate; give two weeks before abandoning firm stems.
No roots after four weeks in a cold room may be slow metabolism rather than death. Warm the setup toward 20–24°C (68–75°F), confirm nodes are submerged or buried, and inspect for hidden rot by gently unpotting soil cuttings. Replace mix if it smells sour.
Cloudy water with no root progress signals bacterial buildup. Empty, wash the jar with hot water, trim the stem end by 0.5 cm (¼ inch) to fresh tissue, and restart with more frequent water changes.
Propagating from a sick or pest-infested parent spreads problems to every new jar and pot. Stabilize and treat the donor first, then take cuttings only from clean regrowth.
Waiting too long to pot water-rooted plants produces tangled, fragile roots that break during transfer. Pot when roots are 2.5–5 cm (1–2 inches), not when they fill the entire jar.
Overpotting after rooting drowns small root systems. Match container to current root mass; scale up gradually as trailing stems justify larger baskets.
Conclusion
Swedish ivy propagation from stem cuttings is one of the fastest, most reliable ways to multiply a trailing houseplant - because Plectranthus verticillatus and its close relatives root directly from nodes on soft green stems without a long drying period. Choose firm non-flowering material, cut just below a node, strip lower leaves, and root in clean water or lightly moist well-draining mix under bright indirect light. Spring and summer speed the process, but firm cuttings and fresh water matter more than the calendar.
If you remember only three rules, make them these: always include a node below the water or soil line, refresh water every few days or keep soil evenly moist - never soggy, and pot water-rooted cuttings when roots reach 2.5–5 cm (1–2 inches). Get those right and Swedish ivy becomes a plant you share freely - spare jars of rooting stems on the windowsill, hanging baskets filled from a single pruning session, and the quiet confidence that comes from understanding how the plant actually grows rather than hoping a leaf in water will magically become a vine.
When to use this page vs other Swedish Ivy guides
- Swedish Ivy overview - Start here for whole-plant context before deep-diving this topic.
- Swedish Ivy problems hub - Jump to symptom-specific fix guides when this care topic does not resolve the issue.