Swedish Ivy Repotting: When, How, and Mistakes to Avoid
Swedish Ivy Repotting: When, How, and Mistakes to Avoid
Swedish Ivy Repotting: When, How, and Mistakes to Avoid
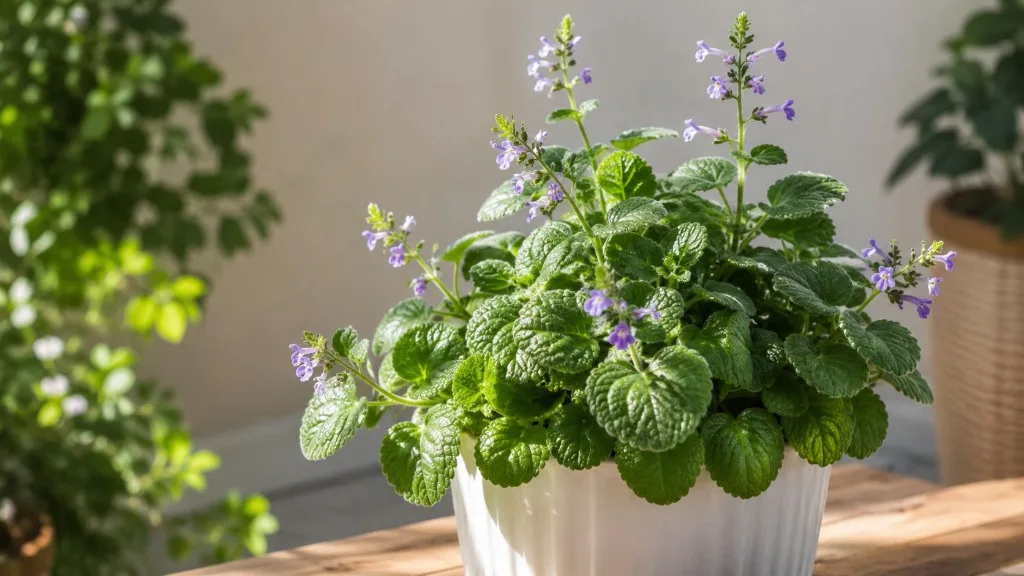
Swedish ivy repotting is one of those tasks that sounds disruptive but usually goes smoothly when you match the move to the plant’s growth rhythm. Plectranthus verticillatus - the species most often sold as Swedish ivy or creeping Charlie - is a fast-growing, trailing member of the mint family (Lamiaceae) native to southern and southeastern Africa. Indoors it pushes long stems with rounded, scalloped leaves and roots that fill a container faster than many slow houseplants. Fresh soil, a modest pot upgrade, and a spring timing window give those roots room to breathe without drowning them in unused mix.
The practical goal is straightforward: repot when the root system or degraded soil is limiting the plant, not on a rigid calendar. Go up only one pot size - roughly 2–5 cm (1–2 inches) wider in diameter - use a light, well-draining peat-based mix amended with perlite, and hold off on fertilizer for three to four weeks while the plant settles. Water lightly after the move, keep the plant in bright, indirect light away from harsh sun, and expect mild wilting or a brief growth pause for one to two weeks. That is normal transplant shock on a plant that otherwise recovers quickly when conditions are right.
This guide covers when Swedish ivy actually needs repotting, how to choose a pot and soil mix, a full step-by-step repot routine, what recovery should look like, and the mistakes that turn a simple upgrade into weeks of yellow leaves and soggy stems.
If symptoms persist, see the Brown Leaves on Swedish Ivy guide.
Why Repotting Matters for Swedish Ivy
Swedish ivy is not a static tabletop plant. In good light it produces trailing stems that root easily at nodes, and below the soil line the root system expands to match that vigor. Over time, even a quality potting mix breaks down: peat and compost compress, fine particles wash to the bottom, air pockets collapse, and soluble salts from tap water and fertilizer accumulate on the surface. The result is a root zone that holds water differently than it did when the plant was new - often staying wet at the core while the top dries quickly, or shedding water so fast that roots never get a steady drink.
Repotting solves three separate problems at once. It refreshes the growing medium so roots get oxygen and even moisture again. It gives circling roots space to grow outward instead of strangling themselves against the pot wall. And it is your best opportunity to inspect root health - catching brown, mushy tissue from chronic overwatering before the whole plant collapses. Missouri Botanical Garden describes Plectranthus verticillatus as a trailing plant used in hanging baskets and containers, noting its relatively fast growth under favorable conditions (Missouri Botanical Garden - Plectranthus verticillatus). That growth rate is exactly why repotting belongs in routine care rather than emergency-only territory.
Repotting is not a cure-all - it will not fix leggy stems from low light or pest damage on existing leaves. Treat it as root-zone maintenance. When light and watering are already correct and the plant still dries out in two days, stalls in midsummer, or wilts right after a normal drink, the pot and mix are the next place to look.
When to Repot Swedish Ivy
Most healthy Swedish ivy plants need a full repot every one to two years when they are young and actively filling a container. Mature, slower-growing specimens in moderate light can often go two to three years between full repots if the mix still drains well and growth stays steady. Frequency follows the plant, not a date on the calendar. A specimen in a sunny window that you water twice a week in summer will outgrow its pot faster than one in a north-facing room that you water every ten days in winter.
Give new purchases two to four weeks to acclimate before repotting unless roots are escaping drainage holes or the mix smells sour. Do not delay when multiple warning signs stack up during active growth - a root-bound plant in degraded mix works against itself every time you water.
Signs Your Plant Is Root-Bound or Outgrowing Its Pot
Root-bound Swedish ivy sends consistent signals if you know what to look for. The most reliable signs appear together rather than in isolation, which helps you separate a true pot problem from a one-off watering mistake.
Roots visible at drainage holes or wrapping tightly when you slip the plant from its pot mean the current container has run out of usable space. Water running straight through without absorbing - pouring in a full cup and seeing it exit the bottom in seconds - often indicates the root mass has displaced most of the mix or the remaining soil has gone hydrophobic. Extremely fast drying is the flip side: the plant wilts within a day or two of watering because the crowded roots drink every drop and the little soil left cannot hold moisture. Slowed or stunted growth in spring and summer, despite adequate light and feeding during the prior season, frequently traces to a root system that cannot expand. Salt crust - white or tan mineral deposits on the soil surface - suggests the mix is aged and leaching poorly; repotting refreshes the chemistry better than scraping the top alone. Top-heaviness in a hanging basket, where the plant tips or the hanger strain increases, can mean the root ball is too small to anchor trailing stems.
One sign alone is not always urgent. Wilting after a missed watering is normal. Wilting two hours after a thorough drink, plus roots circling the pot wall like a solid sleeve, is a repot candidate. If you are unsure, the inspection takes thirty seconds: water the day before, tilt the pot, and slide the root ball out. White or tan, firm roots with visible soil structure mean you can wait until spring. A dense mat of roots with almost no visible mix means schedule a repot in the next active growth window.
Best Season to Repot Swedish Ivy
Spring through early summer is the ideal window for routine Swedish ivy repotting. Rising day length and warmer room temperatures trigger new stem tips and root growth, so the plant re-establishes quickly in fresh mix. Early spring - when you first see new shoots extending - is the sweet spot for most homes in temperate climates. Early summer works as a backup if you missed spring, provided the plant is not heat-stressed in a sun-baked window.
Avoid winter repotting for routine upgrades. Swedish ivy slows in cooler, dimmer months even indoors. Roots that are not actively growing take longer to colonize new soil, which leaves unused mix wet for extended periods - a common path to root rot on a species that prefers consistent moisture but hates stagnant water. The exception is emergency repotting: active root rot (sour smell, black mushy roots, collapsing stems) cannot wait for spring. In that case, trim damaged tissue, repot into fresh, airy mix, and accept slower recovery as the price of saving the plant.
Fall sits in the middle. If the plant is only slightly root-bound and still growing, a September repot in a bright room can work. If growth has already slowed, top-dressing - replacing the top 3–5 cm of mix - is often smarter than a full disturbance heading into winter.
Choosing the Right Pot for Swedish Ivy
The right pot for Swedish ivy balances drainage, weight, and proportion to the root ball. Drainage holes are non-negotiable for long-term indoor care. University of Florida IFAS Extension emphasizes that containers without drainage or with blocked holes trap water and increase root disease risk (UF/IFAS - Container Gardening). Swedish ivy is especially sensitive to that pattern because growers often keep the mix evenly moist during active growth - fine when excess water exits freely, dangerous when it pools at the bottom.
Shallow, wide pots suit trailing Swedish ivy better than tall cylinders that hold a deep column of wet mix below a small root mass. Hanging baskets are the classic display; ensure the liner drains and you can lift the plant to inspect roots. Stability comes from a wide base and appropriately sized root ball, not excess soil volume.
How Much Bigger Should the New Pot Be?
Move up one pot size only: about 2–5 cm (1–2 inches) wider in diameter than the current container. That rule exists because Swedish ivy performs well when slightly snug in its pot. A root system that fills most of the container uses water at a predictable rate. An oversized pot surrounds a small root mass with a large volume of mix that stays wet long after the plant has drunk its share. Overpotting is the single most common reason repotted Swedish ivy turns yellow, drops leaves, or develops soft stems two to three weeks after the move - not because repotting failed, but because the new home holds too much idle moisture.
If the plant is severely root-bound in a 15 cm pot, the next stop is roughly 17–20 cm, not 25 cm. When upgrading a hanging basket, increase the liner diameter by the same incremental amount rather than jumping to a dramatically larger display piece. Depth should increase only modestly - an extra 1–2 cm of depth is plenty unless the root ball is unusually deep. When in doubt, choose the smaller of two reasonable options; you can repot again next spring, but you cannot undo rot from a pot that stayed soggy all winter.
Hanging Baskets, Plastic, and Terracotta Compared
Plastic pots are lightweight, retain moisture slightly longer, and work well for Swedish ivy in average household humidity. They are the default choice for hanging baskets where weight matters. Ceramic pots with drainage holes add stability for top-heavy trailers on a shelf but dry more slowly if the glaze reduces evaporation through the walls - watch watering after repotting. Terracotta breathes through porous walls and dries faster, which can help growers who tend to overwater, but it demands more frequent checks in dry, air-conditioned rooms. None of these materials fixes poor drainage without holes; pick based on your watering habits and display needs.
For hanging baskets specifically, verify that the chain or hook rating matches the wet weight after repotting - fresh mix plus a thorough watering is heavier than a dry nursery pot. A cachepot without holes is fine for display only if the grow pot inside lifts out easily for watering and inspection. Never plant Swedish ivy directly into a sealed decorative pot.
Best Soil Mix for Repotting Swedish Ivy
Swedish ivy wants a light, well-draining, peat-based houseplant mix that holds moderate moisture without compacting into a wet brick. A reliable starting blend is three parts quality indoor potting soil to one part perlite. Perlite increases air space and drainage speed; it is the cheapest insurance against root rot when you are learning your Swedish Ivy watering guide in a new pot. Some growers add a small amount of orchid bark or coarse sand for extra structure in humid rooms where mix stays wet longer - aim for roughly 10–15 percent of the total volume if you go that route.
Avoid garden soil, heavy topsoil, or straight peat without amendment - all hold too much water or compact in containers. Pre-mixed succulent soil alone is often too lean; blend one part succulent mix with two parts standard potting mix only in humid rooms or if you tend to overwater. Replace essentially all old mix except what clings to healthy roots. Standard commercial mixes already sit near 6.0–7.0 pH; drainage and structure matter more than fine-tuning.
Tools and Materials You’ll Need
Gather a new pot one size up with drainage holes, pre-moistened potting mix, hand trowel, clean scissors, chopstick, watering can, and saucer before you start. Have a spare pot ready if rot forces aggressive root trimming - reduced root mass sometimes needs a slightly smaller container while it regenerates.
Step-by-Step: How to Repot Swedish Ivy
Repotting Swedish ivy follows the same broad sequence as most houseplants, with two species-specific priorities: do not overpot, and do not strip the root ball bare. Work calmly, keep tools clean, and plan ten to twenty minutes for an average container - longer if you are untangling a severely root-bound hanging basket.
Pre-Repot Prep and Watering the Day Before
Water the plant one day before repotting, not thirty minutes before. Lightly moist soil holds the root ball together when you slide the plant out, reducing breakage of fine root hairs that absorb water and nutrients. Same-day soaking makes the ball heavy and messy; dry soil crumbles and exposes roots to air stress. The day-before rhythm is the same advice extension publications give for reducing transplant shock on container plants generally.
Choose your workspace - kitchen counter, potting bench, or outdoor table in mild weather. Pre-fill the new pot with enough damp mix that the top of the root ball will sit 1–2 cm below the rim, leaving headroom for watering. Place a small piece of mesh or a coffee filter over the drainage hole if mix falls through; do not add a layer of gravel “for drainage,” which does not improve drainage and can create a perched water table at the bottom of the pot.
Inspecting and Pruning the Root Ball
Gently tilt the pot and support the plant at the base. For plastic nursery pots, squeeze the sides to loosen; for rigid ceramic, run a knife around the inner edge if needed. Slide the root ball out and look at the bottom and sides. Healthy roots are white to tan, firm, and scattered through the mix. Problem roots are black, brown, mushy, or smell like sour milk - trim those back to firm tissue with clean scissors.
If roots circle the bottom in a tight mat, tease them outward with your fingers or make two vertical cuts halfway up the root ball - about 2 cm deep - to encourage new growth into fresh mix. Do not remove more than one-third of the root mass in a single repot unless rot leaves you no choice. Avoid washing every speck of old soil away; those fine root hairs cling to the old mix and recover faster when some familiar medium remains.
Set the plant in the new pot so the stem sits at the same depth as before - burying the crown deeper invites stem rot on a trailing plant whose nodes root easily but whose main stem still needs air at the soil line. Backfill with fresh mix, working it in with a chopstick while holding the plant centered. Firm gently with your fingertips; aggressive packing removes air pockets you just added perlite to create. Water lightly until a little drains from the bottom, then empty the saucer.
What to Do Immediately After Repotting
Place the repotted Swedish ivy in bright, indirect light - the same intensity it handled well before the move, or slightly gentler for a few days if the plant looked stressed going in. Avoid direct afternoon sun hitting a freshly disturbed root system; leaves may wilt faster when roots cannot yet take up water at full capacity. Do not fertilize for three to four weeks. Fresh mix already contains starter nutrients, and tender new root tips are sensitive to salt burn from eager feeding.
Adjust watering downward temporarily. The root mass has not yet explored the new mix, so the full pot dries more slowly than the old tight root ball did - a surprise to growers who repot because the plant “dried out too fast” before. Check moisture 2–3 cm deep with a finger or chopstick before watering. Light wilting on day two after a careful watering often means roots are functioning; wilting on soggy mix means back off and verify drainage.
Skip major pruning the same day unless you removed rot and need to balance root loss with top growth. Routine pinching for bushiness can resume once new growth appears - usually within two to four weeks in spring.
Recovery Timeline and Signs of Transplant Shock
Mild transplant shock on Swedish ivy - slight wilting, a few yellow lower leaves, or a pause in new tip growth - commonly lasts one to two weeks when repotting was timed well and the pot size was appropriate. Full root establishment in the new mix typically takes four to six weeks in active season. New leaves opening at normal size and color are the clearest success signal; older damaged leaves will not green up again, but fresh growth tells you the root zone is working.
Worry when wilting persists beyond two weeks, the mix stays wet and smells sour, or stems soften at the base - those patterns point to overpotting, overwatering, or hidden rot. Lift and inspect rather than repotting again out of panic.
Seasonal Adjustments and When to Skip Repotting
In spring, repot freely when signs warrant it - this is the plant’s strongest recovery season. In summer, repot if needed but avoid mid-heatwave stress in rooms above 29°C (85°F) without good airflow; water a bit more attentively as new mix dries unevenly while roots colonize. In fall, prefer top-dressing or wait unless the plant is clearly suffering. In winter, skip routine repotting; maintain moisture checks and resume planning when new growth appears.
Skip repotting when the plant is heavily infested with pests until you treat the infestation - spreading pests through fresh mix and bench space helps nobody. Skip when the only symptom is leggy growth without root signs; fix light and pinch tips first. Skip when you bought it last week and it is adjusting - give it time unless roots are obviously crushed or rotting.
Emergency root-rot repotting overrides season. Trim black tissue, repot into smaller-than-before pot if root loss was severe, keep humidity moderate, and accept that winter recovery will be slow.
Common Swedish Ivy Repotting Mistakes
Overpotting tops the list. A dramatic jump in container size feels generous but creates a wet zone the roots cannot reach for months. Yellow leaves and leaf drop three weeks after an “upgrade” often trace here, not to mysterious Swedish ivy temperament.
Bare-rooting or aggressive soil removal strips fine root hairs that do most of the water uptake. Tease, do not scrub. Fertilizing too soon burns tender roots and shows up as brown leaf margins on new growth. Watering on a pre-repot schedule without checking the new dry-down rate keeps mix soggy. Repotting into a pot without drainage - or leaving the plant in a full saucer - invites rot on a species marketed as easy precisely because it forgives occasional missed water, not chronic drowning.
Repotting for the wrong reason wastes stress budget. Leggy stems need more light and pinching; spotted leaves need pest or fungal diagnosis; winter dormancy needs less water, not a new pot. Match the intervention to the actual problem.
Ignoring root rot during repot - placing a plant with mushy roots into fresh mix without trimming - preserves the infection. Cut until tissue is firm, disinfect scissors between cuts if rot was advanced, and consider a slightly reduced pot size until the plant rebounds.
How Repotting Connects to Watering, Light, and Feeding
Repotting resets the watering rhythm. Expect the new pot to dry more slowly at first even if you upgraded because the old root ball was crowded - unused mix holds moisture the roots have not reached. Relearn the dry-down pattern over two weeks before returning to autopilot. Swedish ivy still prefers water when the top 2–3 cm of mix approaches dry during active growth, but the calendar interval between drinks will change after repot.
Light should stay stable or slightly reduced briefly after repotting. Swedish ivy tolerates medium light but grows best in bright, indirect exposure; do not “reward” a repotted plant with a sudden move to a hot south window. Acclimate over a week if you must relocate.
Feeding resumes after three to four weeks at half strength once new growth appears. Skip feed until spring if you repotted in fall and the plant is not actively growing.
Top-Dressing vs Full Repot: When Each Makes Sense
Top-dressing - scraping away the top 3–5 cm of old mix and replacing it with fresh soil - suits Swedish ivy that drains well but shows surface salt crust, slight compaction, or slow spring wake-up without circling roots at the bottom. It is lower stress than a full repot and fits late summer or early fall when a full disturbance is poorly timed.
Full repot is necessary when roots circle heavily, water runs through instantly, the plant dries out abnormally fast, the mix smells sour throughout (not just at the surface), or you suspect root rot. Top-dressing cannot fix a root-bound core or replace degraded mix in the bottom half of the pot.
If you are on the fence, slide the plant out once. Roots filling 80 percent or more of the visible cross-section mean full repot; loose mix around a modest root mass means top-dress or wait until spring. The ASPCA lists Swedish ivy (Plectranthus australis) as non-toxic to dogs and cats (ASPCA - Swedish Ivy); confirm the botanical name on your tag since related Plectranthus species share the common name.
Conclusion
Swedish ivy repotting succeeds when you treat it as timed root maintenance, not a dramatic intervention. Repot in spring or early summer when roots outgrow the pot, the mix breaks down, or drainage fails - go up one size, use well-draining perlite-amended mix, tease circling roots gently, and pause fertilizer while the plant settles. Watch for fast drying, water running straight through, roots at drainage holes, and stalled summer growth; those signs matter more than any fixed two-year schedule.
After the move, water lightly, keep light bright but not harsh, and give the plant one to two weeks for mild shock to pass. New tip growth is your green light that the repot worked. Overpotting, bare-rooting, and winter routine repots cause most of the failures growers blame on Swedish ivy being “fussy” - it is not. Match pot size to roots, match timing to active growth, and the same plant that trailed beautifully last season will fill the new container faster than you expect.
When to use this page vs other Swedish Ivy guides
- Swedish Ivy overview - Start here for whole-plant context before deep-diving this topic.
- Swedish Ivy problems hub - Jump to symptom-specific fix guides when this care topic does not resolve the issue.