How to Propagate Rosemary from Cuttings
How to Propagate Rosemary from Cuttings
How to Propagate Rosemary from Cuttings
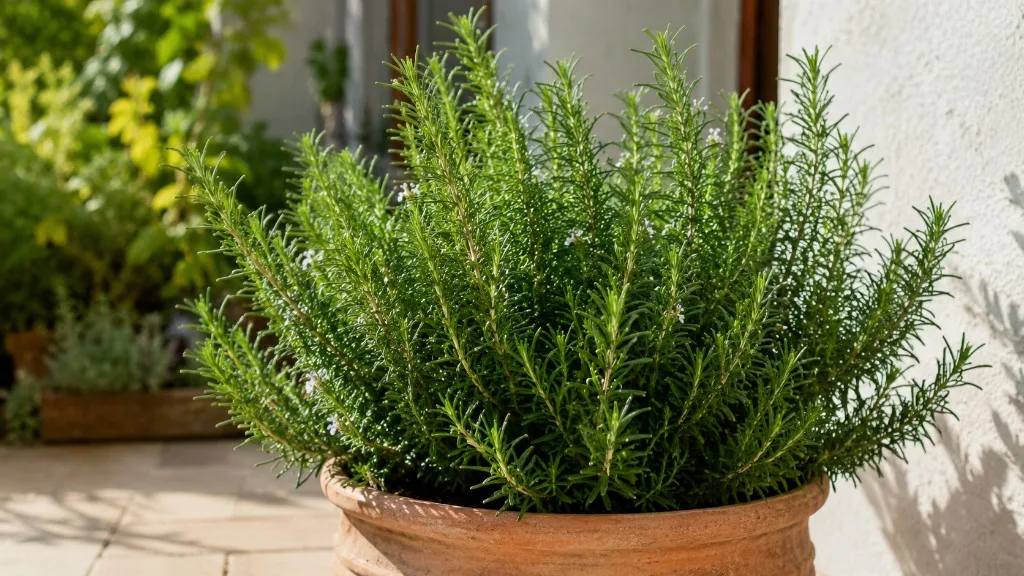
Rosemary propagation from cuttings is the most practical way to turn one healthy plant into several - whether you want backup stock for a cold winter, free plants for a herb garden, or clones of a cultivar you already love. Rosemary (Salvia rosmarinus, formerly classified as Rosmarinus officinalis) is a woody Mediterranean perennial in Lamiaceae, the mint family, and it roots reliably from stem cuttings when you choose the right tissue at the right time. Layering works on established outdoor shrubs, but cuttings fit pots, windowsills, and kitchen counters far better. The goal of this guide is not to sell you a miracle method. It is to walk you through selection, setup, timelines, and aftercare so you can root cuttings in soil or water without the mushy stems and false starts that waste a whole season.
Rosemary is grown for harvest and display, so propagation timing matters beyond curiosity. A rooted cutting taken in late spring can become a productive plant by summer. One started in early autumn can carry you through an indoor winter in USDA zones where outdoor rosemary dies back. Mature plants reach roughly 60–150 cm tall and 60–90 cm wide in favorable conditions, but young rooted cuttings need months of steady care before they match that scale. Treat propagation as a slow, observant process - not a weekend craft - and your odds improve sharply.
Why Stem Cuttings Are the Best Way to Multiply Rosemary
Among home propagation methods, stem cuttings give rosemary growers the best balance of speed, control, and success. Seeds are slow and genetically variable; division is awkward on a woody, single-trunk shrub; and layering requires an attached parent plant with low branches you can bury. Cuttings let you clone the exact plant in front of you - same needle fragrance, same cold tolerance if you propagate ‘Arp’, same trailing habit if you propagate ‘Prostratus’ - using nothing more than sharp pruners and a gritty pot.
Softwood and semi-softwood cuttings taken during active growth contain cells that can still form adventitious roots at buried nodes. That is the biological foundation of rosemary stem cuttings. The stem must include living tissue below the cut surface and at least one node where leaves attach; roots emerge from those nodes when moisture, warmth, and oxygen stay in balance. Rosemary’s needle-like leaves reduce surface area compared with broad-leaf herbs, which helps cuttings resist desiccation, but the plant still hates wet, airless conditions at the wound. Propagation succeeds when you mimic Mediterranean drainage and bright light - not when you treat rosemary like a tropical houseplant that wants constant humidity and saturated soil.
Cuttings also solve a real regional problem. In USDA zones 8–10, rosemary often survives outdoors year-round. In colder zones, gardeners replace plants annually or struggle through indoor winters. Taking cuttings during the growing season gives you young, manageable plants to overwinter under grow lights or in a cool bright room, preserving genetics without hauling a massive pot indoors. That practical use case is why cutting propagation appears in extension herb guides and major garden publications as the default recommendation for rosemary multiplication.
When to Take Rosemary Cuttings
The best time to take rosemary cuttings is late spring through summer, when the plant pushes fresh softwood growth and ambient warmth supports rooting. Penn State Extension recommends stem cuttings as the standard propagation method because named cultivars do not stay true from seed. In the Northern Hemisphere, think roughly May through August, adjusted for your local climate - the plant’s behavior matters more than the calendar.
Early autumn cuttings are a deliberate second window, especially in cold climates. Soft growth is still available on many plants in September, and rooted cuttings potted before frost can spend winter indoors as insurance stock for spring planting. Autumn attempts root more slowly as day length drops, so start early in the month and provide consistent warmth. Avoid taking cuttings during winter dormancy, immediately after hard frost damage, or while the parent is recovering from root rot on Rosemary, severe dehydration, or recent Rosemary repotting guide shock. A stressed donor plant produces stressed cuttings; propagation amplifies weakness rather than fixing it.
Morning harvest beats afternoon on hot days. Stems hold more turgor before midday transpiration stress, and you get a full day to prep and insert cuttings while wounds are fresh. If you must store cuttings briefly before rooting, keep them in a sealed bag in the refrigerator for up to a few days, misting lightly - but insert them into soil or water as soon as practical. Delay increases desiccation and bacterial growth on the cut face.
Choosing the Right Stems
Stem quality decides rosemary propagation outcomes more than brand of pot or rooting hormone. You are looking for 3- to 6-inch segments of healthy, non-flowering shoots with pliable green growth at the tip and firm but not brittle tissue below. Each cutting needs at least two to three nodes - the slightly swollen points where leaf pairs attach. Strip leaves from the lower third to half of the stem so buried nodes contact the medium while upper foliage continues photosynthesis.
Walk around the parent plant before you cut anything. Choose branches that look actively growing, with no pest damage, no yellowing needles, and no blackened tips from fungal issues. Bypass the oldest woody sections at the base unless you enjoy waiting twice as long for roots that may never form. Take several more cuttings than you need; redundancy costs little and accounts for normal attrition.
Softwood vs Woody Growth
Softwood cuttings come from the current season’s flexible growth - stems that bend without snapping cleanly like dry twigs. They root fastest because cambium cells are still dividing. Semi-hardwood cuttings from slightly older base tissue on the same shoot can work in summer but root more slowly. Hard woody stems from the lower trunk or aged scaffold branches are poor propagation material for most home growers; lignified tissue resists root formation and often rots before it roots.
The fingertip test is reliable. Bend a candidate stem gently. If it flexes and the skin does not crack, you are in softwood territory. If it snaps with a dry crack and brown interior, move upward on the plant toward greener growth. Rosemary naturally woodifies at the base as it ages; that is normal plant architecture, not a sign the whole shrub is unusable. Always harvest from the younger upper and outer shoots.
Avoiding Flowering and Stressed Stems
Non-flowering shoots root more reliably than stems already forming buds. Flower and seed development redirects carbohydrates away from root initials. If the only available material has small buds, pinch them off at propagation time and accept slightly slower rooting. Completely skip stems that are mid-bloom with woody flower stalks unless you have no alternative.
Do not propagate from store-bought culinary sprigs unless they are visibly fresh, refrigerated for only a short time, and cut from stem bases that include nodes. Many grocery bundles are leaf-heavy tops stripped of rooting tissue; they may hydrate in water for kitchen use but fail as propagation stock. When in doubt, use a potted nursery plant or a friend’s garden specimen you know is healthy.
Tools and Supplies You Actually Need
Good rosemary propagation from cuttings requires clean tools and fast-draining media - not a greenhouse full of gadgets. Gather bypass pruners or a sharp knife wiped with 70% isopropyl alcohol, small nursery pots with drainage holes (typically 3–4 inches for individual cuttings or a shallow tray for multiples), and a light, airy rooting mix. A practical blend is equal parts perlite and peat-free seed-starting mix, or half perlite and half cactus/succulent mix. Some growers use straight perlite or coarse sand blended with compost; the constant is excellent drainage with enough moisture retention to prevent desiccation.
For water propagation, use a clear glass or jar so you can monitor water quality and root development without disturbing the cutting. Optional but useful extras include liquid or powder rooting hormone containing indole-3-butyric acid (IBA), a seedling heat mat set around 65–75°F (18–24°C), and a clear humidity dome or loose plastic bag supported on stakes so it does not touch foliage. Labels matter when you run multiple cultivars side by side - ‘Tuscan Blue’ and ‘Barbecue’ look similar early on.
Light setup belongs in the supply list because it is non-negotiable. Place propagations in Rosemary light guide - an east window, a few feet from a south window with sheer curtain, or under full-spectrum grow lights for 14–16 hours daily if natural light is weak. Direct midday sun on unrooted cuttings can scorch needles and overheat small pots. Room temperature near 60–70°F (15–21°C) matches Texas A&M AgriLife Extension guidance for rosemary cutting rooting and suits most indoor propagation benches.
Method 1: Rooting Rosemary Cuttings in Soil
Soil propagation is the method most extension herb guides recommend for long-term plant health. Roots form in the same medium the plant will eventually live in, which reduces transplant shock compared with moving fragile water roots into potting mix. Penn State Extension cites 10 to 20 days as a typical rooting range for stem cuttings with bottom heat at 70–75°F, depending on temperature, light, and stem quality - with checking starting around week four via a gentle tug test.
Preparing the Cutting
- Sanitize blades with alcohol between plants if you take cuttings from multiple sources.
- Cut a 3- to 6-inch softwood segment just below a node at a 45-degree angle, maximizing exposed cambium surface.
- Remove leaves from the lower two-thirds of the stem, leaving four to five needle sets at the top. Needles submerged in soil or water rot quickly.
- Optional: Dip the bare lower stem in rooting hormone per product label; tap off excess powder so hormone does not burn tissue.
- Insert immediately or stand cuttings in a damp paper towel for no more than an hour - do not let them wilt.
If you are rooting multiple cuttings in one container, space them so leaves do not overlap and air can move between stems. Crowding raises humidity locally and encourages fungal spotting on needle surfaces.
Potting and Environment Setup
Fill pots with premoistened mix - damp like a wrung-out sponge, not dripping. Poke a hole with a pencil or dibber so you do not scrape hormone off when inserting. Bury two nodes below the surface; press mix gently around the stem without compacting it into concrete. Firm anchoring matters because new roots are fragile when they first form.
Place pots on a heat mat if your room runs cool; bottom warmth speeds rooting without cooking the foliage. A loose clear cover over the pot can reduce water loss from needles during the first 7–10 days, but vent daily to prevent mold. Rosemary is not a tropical cutting that needs saturated humidity for weeks; think moderate moisture retention, not jungle conditions. Position everything in bright indirect light and keep the setup out of cold drafts from air conditioners or winter window gaps.
Watering and the Tug Test
Watering discipline separates success from rot during rosemary propagation from cuttings. After initial potting in premoistened mix, water lightly to settle soil around the stem, then let the surface dry slightly before the next drink. The medium should stay lightly and evenly moist through the rooting zone - never soggy, never bone dry for days in a hot window. A small pot drying on the surface within 24–48 hours in warm conditions usually signals healthy airflow; if mix stays wet for a week, reduce water and improve light or drainage.
Start the tug test around week four. Grasp the cutting gently near the base and apply the slightest upward pressure. Resistance means roots are anchoring - success is likely underway. No resistance with green upper foliage means wait another one to two weeks before checking again. Brown, dry needles dropping with mushy stem base means failure; discard and restart with fresher material. NC State Extension notes that cuttings typically root in four to six weeks; if you feel no resistance after eight weeks, the cutting has probably failed - do not leave rotting stems in mix indefinitely.
When roots are confirmed, transplant into a slightly larger pot with a sandy, gritty, alkaline-leaning mix suited to mature rosemary - the same drainage logic your established plants use. Move gradually to stronger light over 7–10 days rather than jumping straight into all-day direct sun, which can stress newly independent root systems.
Method 2: Rooting Rosemary Cuttings in Water
Water propagation is visually satisfying and can produce visible roots in two to six weeks under warm, bright conditions in home setups, though NC State Extension recommends soil cuttings that typically root in four to six weeks as the more reliable method. It works best as a short-term rooting stage rather than a permanent hydroponic home - rosemary cuttings rooted in water eventually need soil nutrients and the oxygen dynamics of a terrestrial root zone to thrive long term.
Water Propagation Steps
- Prepare a cutting exactly as for soil - 3–6 inches, lower needles removed, no leaves below the water line.
- Fill a clear glass with room-temperature water. Some growers prefer filtered or distilled water in hard-water areas; tap water is usually acceptable if changed frequently.
- Submerge only the bare lower stem, keeping four to five needle sets above the water surface.
- Place the jar in bright indirect light - not direct sun, which heats water and promotes algae.
- Change water every two to three days, or whenever it clouds. Fresh oxygen and clean water reduce bacterial rot at the stem base.
- Watch for white root initials from nodes underwater. Wait until roots reach roughly ½ inch to 1 inch (1–2.5 cm) before potting.
Never let foliage contact water; wet needles are a fast path to mold. If you propagate multiple cuttings, give each jar enough space that stems do not crowd. Algae on glass walls is cosmetic unless water turns foul - scrub the jar at each water change if buildup accelerates.
Moving Water-Rooted Cuttings to Soil
Transition is the fragile step. Water roots are structurally different from soil roots - thinner and adapted to liquid oxygen levels. Pot gently into moist, well-draining mix in a small container. bury the rooted section and nodes as you would a soil-started cutting, supporting the stem if needed with a loose stake. Keep mix evenly moist but not saturated for the first 10–14 days while soil roots develop; then shift toward rosemary’s normal dry-down watering rhythm - water when soil is dry several centimeters down, not on a calendar schedule.
Avoid pulling cuttings out repeatedly to admire roots; each disturbance breaks fine threads. If upper needles yellow slightly after transplant, improve light and reduce water slightly rather than fertilizing immediately. Unrooted or newly transplanted tissue cannot use concentrated fertilizer effectively, and salts may burn tender initials.
Soil vs Water: Which Method Should You Choose?
Both methods can work; they fail for different reasons. Soil propagation demands patience and moisture restraint but produces plants already adapted to the medium they will live in. Water propagation offers faster visual feedback and can feel easier for beginners who struggle to judge soil moisture, yet it introduces rot risk at the water line and a transplant adjustment when roots meet gritty mix.
| Factor | Soil propagation | Water propagation |
|---|---|---|
| Typical rooting time | 4–8 weeks | 2–6 weeks to visible roots |
| Rot risk | Soggy mix, poor drainage | Stagnant water, submerged leaves |
| Long-term plant strength | Stronger direct transition | Requires careful pot-up |
| Monitoring | Tug test, surface moisture | Root length in clear jar |
| Best for | Growers planning garden/pot permanence | Visual learners, short-term rooting |
If you want one default recommendation for rosemary propagation from cuttings, choose soil unless you have a specific reason to watch roots form in water - and even then, plan to pot up promptly once roots reach ½ inch. Home trials cited in garden community discussions often show higher survival after pot-up for soil-rooted cuttings than for water-rooted ones moved late or into heavy peat mixes. Whichever you pick, softwood material, clean water or airy mix, bright indirect light, and frequent observation matter more than the container material alone.
Using Rooting Hormone and Bottom Heat
Rooting hormone is optional for rosemary but improves odds on slightly firmer semi-softwood stems and when you propagate in cool rooms. Products containing IBA stimulate root formation at the cut surface; gel forms coat evenly, powders require a brief dip and tap-off. Follow label rates - more hormone is not better and can inhibit roots at excessive concentrations. Organic-minded growers sometimes skip hormone on tender spring cuttings and still succeed; hormone helps most when conditions are imperfect.
Bottom heat from a seedling mat accelerates rooting by keeping the root zone near 70°F (21°C) while air stays cooler. Pair heat with light so stems do not etiolate in dim corners. Remove domes or bags once cuttings show new tip growth or confirmed roots; prolonged enclosure after rooting invites fungal issues on needle surfaces.
Neither hormone nor heat compensates for woody stems, flowering shoots, or waterlogged media. Treat them as supporting tools layered onto good material and drainage - not substitutes for selection and watering discipline.
After Propagation: First Months of Care
Newly rooted rosemary behaves like a seedling in an adult’s body - it needs steadier conditions than a mature shrub but must not be coddled with constant moisture. For the first four to six weeks after confirmed rooting or transplant, keep soil lightly moist, provide bright light progressing toward the full sun mature rosemary prefers (six or more hours of direct sun daily when acclimated), and hold off on heavy fertilizer until the plant has been independently established through at least one normal dry-down watering cycle.
Temperature comfort for young plants sits around 15–28°C (60–82°F) during active growth. If you overwinter rooted cuttings indoors, a cool bright room near 10–13°C (50–55°F) with strong supplemental light often outperforms a hot dry windowsill - rosemary tolerates drought but struggles with low light plus warm indoor air. Humidity in the 30–50% range typical of most homes suits rosemary; it dislikes prolonged high humidity without airflow.
Pinch soft tip growth lightly once the plant is rooted and actively growing to encourage bushiness, but avoid hard pruning until the root system clearly fills its pot. Repot when roots circle the drainage hole or water runs straight through dry mix in minutes - usually into a container one size larger with the same sandy, gritty, alkaline-leaning mix your rosemary soil guide recommends. Quarantine new propagations from existing collections for two to three weeks if pests were ever present on the parent; aphids and spider mites transfer on tools and benches.
Propagating Rosemary to Overwinter in Cold Climates
Gardeners in USDA zones 7 and below often treat rosemary as a tender perennial. Autumn cuttings taken in early to mid-September - while soft growth still exists - can root indoors before outdoor frost and serve as backup plants when in-ground specimens fail. Root in soil on a heat mat under grow lights, pot individually once established, and keep young plants in a cool, bright indoor location rather than a heated room with weak window light.
This strategy preserves cold-hardy cultivars like ‘Arp’ that might otherwise die in a harsh winter. Label pots clearly; a tray of anonymous rosemary looks identical until mature habit reveals trailing versus upright forms. In spring, after last frost, harden off rooted plants outdoors over 7–10 days - increasing sun exposure and wind gradually - before planting into garden beds or larger containers.
Do not confuse propagation success with instant outdoor hardiness. A September-rooted cutting is still a juvenile plant entering its first winter; protect it more carefully than a three-year-old shrub. Mulch, wind shelter, and container placement against a south wall help, but realistic expectations prevent discouragement when a young clone struggles while an older neighbor plant survives.
Troubleshooting Failed Rosemary Cuttings
Most failures trace to material quality, moisture imbalance, or impatience - not mysterious rosemary stubbornness. Mushy brown stem bases in soil mean mix stayed too wet, drainage was poor, or the cutting was woody and rotted before rooting. Black water and foul smell in jars mean change water more often and keep leaves above the line. Needles browning from the tip down while the base stays firm often indicates desiccation - increase ambient humidity briefly or check that soil is not fully dry through the pot; needles browning from the base up usually means rot - discard.
No roots after eight weeks on green but limp cuttings suggests wrong stem type, cool dim conditions, or constant overwatering on Rosemary. Restart with spring softwood, warmer root zone, and drier surface between waterings. Mold on needles under sealed domes means vent more daily or remove cover sooner. Aphids on new growth after rooting require isolation and manual removal; do not propagate heavily infested parent material without treatment.
If the same issue repeats across attempts, compare your propagation setup with the plant’s watering, light, and soil care before changing several variables at once. Propagation exposes weaknesses mature plants tolerate; fixing parent culture often improves cutting quality more than switching from soil to water or vice versa.
Conclusion
Rosemary propagation from cuttings rewards growers who respect Mediterranean logic: choose soft, non-flowering stems, keep the rooting zone moist but never soggy, provide bright indirect light with warmth at the base, and wait four to eight weeks in soil - or two to six weeks for initial water roots - before expecting a firm tug test. Soil rooting remains the strongest default for long-term plants; water rooting works when you monitor cleanliness and pot up promptly. Take cuttings in late spring through summer, with early autumn as a strategic option for cold-climate overwintering stock.
If you remember three habits - softwood over woody, drainage over drowning, and patience over daily digging - most attempts produce usable plants. Take more cuttings than you need, label cultivars if you grow several, and treat a failed stem as information about timing or moisture rather than proof that rosemary cannot be propagated. One well-rooted ‘Tuscan Blue’ on a sunny balcony beats a jar of cloudy water and rotting needles every time.
When to use this page vs other Rosemary guides
- Rosemary overview - Start here for whole-plant context before deep-diving this topic.
- Rosemary problems hub - Jump to symptom-specific fix guides when this care topic does not resolve the issue.