Best Soil for Geraniums: Mix, pH, and Container Guide
Best Soil for Geraniums: Mix, pH, and Container Guide
Best Soil for Geraniums: Mix, pH, and Container Guide
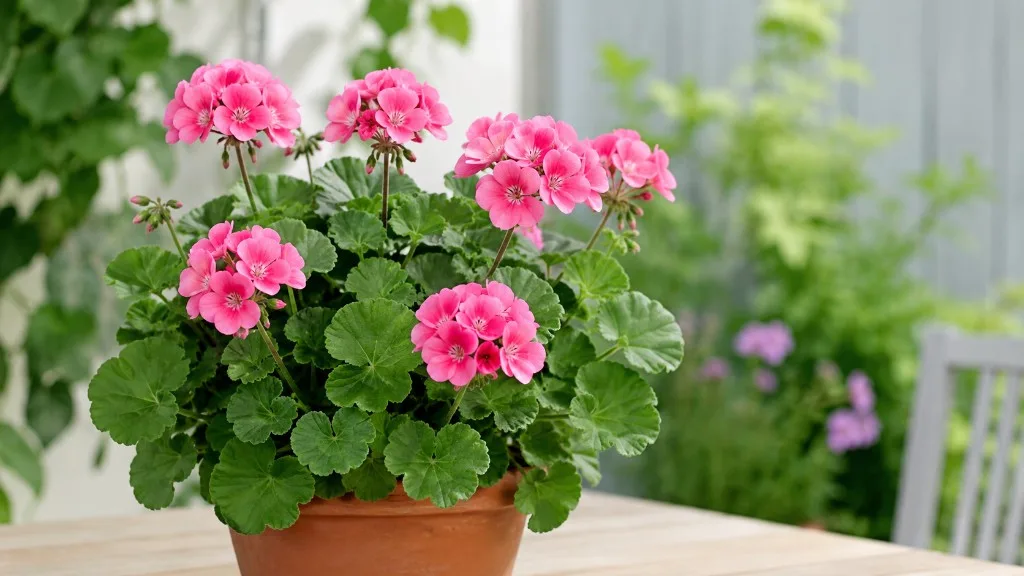
The plants sold as geraniums at nurseries are almost always Pelargonium species - most commonly Pelargonium × hortorum, the zonal geranium with the round, banded leaves and big flower clusters. They look tough. They bloom for months. And they fail quietly when the soil holds water a day too long. Yellow lower leaves, stalled buds, stems that darken and collapse at the base - those symptoms often trace back to a root zone that drains too slowly, compacts over time, or sits in a pot that is the wrong size for the root mass.
The best soil for geraniums is a well-draining potting mix with enough structure to hold moisture briefly without staying soggy, a pH between 6.0 and 6.5, and a container with drainage holes matched to the plant’s current root ball. Get those three right and watering, light, and fertilizer become straightforward. Get any one wrong and the plant spends its energy surviving the mix instead of pushing flowers.
This guide covers what geraniums need from soil, a reliable DIY recipe and store-bought shortcuts, how to test and adjust pH, how to pick a container that supports drainage rather than fighting it, and how to spot root-zone trouble before the whole plant declines.
What geraniums actually need from their soil
Geraniums need three things from the mix around their roots, in roughly this order: fast drainage, steady aeration, and mild acidity in the correct pH band. They are not desert succulents, so the mix should not dry to dust in hours. They are also not moisture-loving tropicals, so the mix should not stay damp for days after a thorough watering. The sweet spot is a porous, loam-based or gritty compost that lets water pass through quickly while retaining enough structure for roots to anchor and absorb nutrients.
Fast drainage protects geranium roots from the pathogens that thrive in waterlogged mix. Clemson Cooperative Extension notes that geranium soil should be well-drained, and that garden soils used straight in pots often become waterlogged and lead to root rot on Geranium. That is not a minor footnote - it is the central design constraint for every mix decision in this article.
Steady aeration means the mix stays open. Peat-heavy indoor blends that feel fluffy on day one can compact within a season, squeezing out the air pockets roots need. A geranium in compacted mix may look fine until a heat wave or an extra watering session pushes the root zone past its limit. Adding perlite, coarse sand, or pumice keeps the structure open longer than peat alone can manage.
The pH band matters because geraniums rely on soluble iron and manganese for healthy green foliage. The Spruce and multiple extension sources converge on 6.0 to 6.5 as the practical target. Below 6.0, iron and manganese uptake can become excessive and damage foliage; above 7.0, those micronutrients lock up and leaves may yellow even when fertilizer is present.
The Southern African context that shapes root-zone care
Pelargoniums evolved in Southern Africa, where rainfall is often brief and soils drain rapidly between events. Roots encounter moisture, absorb what they need, and then sit in aerated mix as it dries. That rhythm is why geraniums tolerate a missed watering better than a pot that never fully dries.
Matching the substrate to that native pattern does not mean replicating desert sand. It means building a mix that dries on a predictable schedule in your home or patio - usually within one to three days after a full watering in active growth, depending on pot size, light, and humidity. If your mix is still wet at the two-inch depth three days after watering in summer, drainage is too slow regardless of what the bag label promises.
Zonal, ivy, and scented geraniums: one drainage rule for all
Three geranium types show up most often in home gardens. Zonal geraniums (Pelargonium × hortorum) are upright bedding plants with the classic round leaves and large flower heads. Ivy geraniums (Pelargonium peltatum) trail from window boxes and hanging baskets with waxy, ivy-shaped foliage. Scented geraniums (Pelargonium graveolens and relatives) are grown mainly for fragrant leaves rather than showy blooms.
Their growth habits differ, but the root-zone requirement is the same: well-drained, aerated mix. Ivy types in hanging baskets dry faster because exposed pots lose moisture from all sides, so they may need slightly more organic matter in the blend. Scented types kept indoors year-round benefit from the same fast-draining base with a modest compost fraction for slow nutrients. Do not reach for heavy, moisture-retentive mixes for any of these types just because one cultivar looks delicate above the soil line.
The ideal geranium potting mix at a glance
A reliable geranium potting mix combines a quality potting soil base with mineral amendments for drainage and a small organic fraction for structure and slow nutrition. One practical recipe that works for containers on patios, window boxes, and indoor overwintering pots:
- 40% high-quality potting soil (sterile, peat- or coir-based commercial mix)
- 30% perlite or pumice (aeration and drainage)
- 20% coarse horticultural sand or builder’s sand (weight and friability)
- 10% compost or worm castings (slow-release organic matter)
Mix thoroughly in a clean bucket until the texture is uniform. The finished blend should feel loose in your hand, not sticky or dense. When you squeeze a handful, it should hold together briefly and then crumble apart - not form a tight ball that stays wet.
That ratio is a starting point, not a law. The goal is observable behavior: after watering until water runs from the drainage hole, the top inch should approach dry within 24 to 48 hours in typical summer conditions on a sunny patio. Adjust from there.
The core ratio: potting soil, perlite, sand, and compost
Each component plays a specific role. Potting soil supplies organic structure and a baseline nutrient charge. Use a commercial bag labeled for containers, not topsoil and not garden soil scooped from a bed. Perlite or pumice creates permanent air pockets. Perlite is lighter and cheaper; pumice is heavier, more durable, and less likely to float to the surface over time. Either works. Coarse sand adds weight and mimics the gritty mineral fraction of native soils. Fine play sand compacts - use horticultural or builder’s coarse sand with visible particle size. Compost or worm castings at 10% adds biology and slow nutrients without turning the mix into a sponge.
University of Georgia Extension offers region-specific guidance for gardeners mixing their own: in clay-heavy areas, equal parts soil, peat moss, and perlite by volume; in sandy regions, three parts soil, two parts coarse peat, one part perlite. Those recipes assume outdoor garden soil as a component. For pure container culture, skip the garden soil entirely and use the 40/30/20/10 potting-base recipe above - it avoids compaction and pest introduction while meeting the same drainage standard.
For a single 6-inch pot, that works out to roughly 2 cups potting soil, 1½ cups perlite, 1 cup sand, and ½ cup compost. Scale proportionally for larger batches. Moisten the mix slightly before potting so dry peat does not repel the first watering.
How to adjust the mix for humid vs dry homes
Climate and placement change how fast a pot dries. In humid, low-airflow conditions - a shaded porch in the Gulf South, a kitchen window in a steamy apartment - increase perlite or pumice to 35–40% of the total volume. The extra mineral fraction speeds dry-down and reduces Botrytis and Pythium pressure on stems that stay damp overnight.
In hot, dry, windy conditions - a west-facing balcony in Arizona, a rooftop in Geranium light guide - the mix can retain slightly more moisture so you are not watering three times a day. Reduce perlite to 25% and keep compost at 10–15%, or add a small fraction of coconut coir for even moisture distribution without waterlogging. Watch the plant, not the calendar: if leaves wilt between daily waterings despite adequate drainage holes, the mix may be drying too fast for that exposure.
Why drainage speed matters more than the bag label
Every bag of potting mix claims to drain well. What matters is how your mix behaves in your pot after a full watering. Geraniums are vulnerable to black stem rot (Pythium splendens), black leg (Fusarium spp.), and gray mold (Botrytis cinerea) when the medium stays wet and dries slowly - exactly the conditions Penn State Extension and Pacific Northwest Pest Management Handbooks warn about in container geranium culture.
Drainage speed is the rate at which excess water leaves the root zone and air refills the pore spaces. Slow drainage does not always mean you overwatered today. It can mean the mix compacted, the pot is oversized, the drainage hole is blocked, or a saucer is holding runoff against the bottom of the pot. Each of those mimics overwatering on Geranium even when your watering hand is disciplined.
A geranium in chronically slow-draining mix shows stress gradually: lower leaves yellow and drop, new buds abort, growth stalls, and stems near the soil line may darken. By the time leaves tell the full story, root damage is often advanced. That is why drainage checks belong in routine care, not only in troubleshooting.
The one-minute drainage check after every watering
After you water thoroughly - until a steady stream runs from the drainage hole - run this quick check:
Surface behavior: Water should soak in within seconds, not pool on top for minutes. Pooling means the mix is hydrophobic (too dry initially) or compacted (too dense). Pre-moisten Geranium repotting guide mix and fluff compacted surface soil before the next full watering.
Runoff timing: Within 30 to 60 seconds of watering, water should exit the bottom. If it never runs out, the mix may be too dense, the hole may be blocked, or the pot may be sitting in a full saucer.
Weight change: Lift the pot after watering, then lift it again 24 hours later. A healthy geranium pot in active growth should feel noticeably lighter within a day or two in summer. If it still feels heavy after 72 hours indoors, drainage is too slow.
Depth probe: Push a dry wooden chopstick or your finger two inches into the mix. It should come out barely damp, not muddy, within 48 hours of watering during the growing season. Muddy at depth means roots are sitting in moisture the plant cannot use fast enough.
Make this check habit when you first repot or when the plant moves to a new location. Once you know the dry-down rhythm for that specific pot, you can water on observation instead of a fixed schedule.
Building a DIY geranium soil mix step by step
You do not need a soil laboratory to build a batch that performs. Work on a tarp, in a wheelbarrow, or in a large clean tub so you can mix evenly without losing perlite to the wind.
Step 1 - Gather materials. One bag of quality potting mix, one bag of perlite or pumice, coarse sand, and a small bucket of compost or worm castings. Optional: dolomitic limestone if a pH test shows acidity below 6.0.
Step 2 - Measure by volume, not weight. Use the same scoop for every ingredient. For a 10-quart batch, combine 4 quarts potting soil, 3 quarts perlite, 2 quarts sand, and 1 quart compost.
Step 3 - Mix dry, then moisten lightly. Turn the pile until no streaks of plain peat or white perlite remain isolated. Add water gradually until the mix is evenly damp, not dripping.
Step 4 - Test texture. Grab a handful and squeeze. It should form a loose clump and fall apart when you open your hand. If it stays in a tight wet ball, add more perlite and sand.
Step 5 - Pot with a gap for watering. Fill the container so the geranium sits at the same depth it was in the nursery pot - never bury the crown deeper than before. Leave ½ to 1 inch of headspace below the rim so water does not spill over the edge before soaking in.
Step 6 - Water in thoroughly. The first watering settles the mix around roots and reveals whether drainage holes are truly open. Empty the saucer after 15 minutes so the pot is not standing in runoff.
Store unused mix in a sealed bucket in a cool, dry place. DIY blends without slow-release fertilizer charge should be used within a few months before organic components break down further.
Safe ingredient substitutions when supplies run short
Not every garden center stocks every component on the same day. These swaps preserve drainage performance:
No perlite: Use pumice at the same volume, or increase coarse sand to 30% and reduce potting soil to 35%. Do not substitute vermiculite alone - it holds more moisture than perlite and can slow dry-down in humid climates.
No coarse sand: Use additional perlite or pumice, or add a small fraction of fine pine bark (¼-inch minus) for friability. Avoid beach sand, which carries salt, and avoid fine play sand, which compacts.
No compost: Worm castings at the same 10% volume work. A slow-release granular fertilizer applied at label rates after potting can replace the nutrient fraction compost would have supplied - but do not double up fertilizer and rich compost in the same repot.
No peat-based potting soil: Coconut coir-based mixes work if you compensate for coir’s higher moisture retention by increasing perlite by 5–10% above the standard recipe.
Only pre-made cactus mix on hand: Cactus and succulent mixes drain aggressively. For geraniums, blend 60% cactus mix with 40% regular potting soil and compost to add back modest moisture retention without losing drainage entirely.
Why garden soil fails in containers
It is tempting to fill a patio pot with rich garden soil. Geraniums in flower beds certainly grow in soil amended with compost and perlite. But garden soil in a closed container behaves nothing like garden soil in the ground.
In a bed, water moves laterally and downward through a large volume of earth. Roots spread wide. Soil organisms and worms maintain structure. In a pot, the root zone is a small, enclosed column. Every watering saturates that entire column. Heavy clay or loam garden soil holds that saturation too long, reducing oxygen at the roots. Clemson Cooperative Extension is explicit: select containers with adequate drainage holes, plant in a well-drained soil mix, and do not allow pots to sit in water.
Garden soil also introduces weed seeds, soil pathogens, and inconsistent texture. One scoop may be sandy; the next may be pure clay. Commercial potting mixes are engineered for consistency and sterility. For containers, start with bagged potting mix and amend for drainage - do not start with native diggings.
In in-ground beds, the approach differs. Incorporate 3 to 4 inches of a 50/50 organic matter and perlite blend into the top 8 to 10 inches of planting area, test pH, and lime to 6.5 if needed per soil test. That bed prep shares the drainage goal but uses soil volume and earth drainage paths that containers do not have.
pH for geraniums: target range, testing, and correction
Geranium soil pH should sit between 6.0 and 6.5 - mildly acidic to slightly acidic. University of Minnesota Extension recommends balanced fertilization for geraniums in standard potting mixes that typically land near this range. Treat 6.0–6.5 as the practical container target; most quality potting mixes land there out of the bag.
pH controls nutrient chemistry. In the correct band, nitrogen, phosphorus, potassium, calcium, magnesium, iron, and manganese remain available for root uptake. Outside the band, nutrients may be present but unusable, or toxic in excess.
Test pH when:
- Lower leaves yellow with green veins (possible iron chlorosis in alkaline mix)
- Leaf edges brown despite careful watering (possible salt or pH stress)
- You are mixing a large batch of DIY soil from peat-heavy components
- The plant has not responded to reasonable fertilizer over six weeks of active growth
Use an inexpensive soil pH meter or colorimetric test strips on a slurry of mix and distilled water. Test the mix before potting, not only the runoff after fertilizer salts accumulate.
If pH reads below 6.0, incorporate dolomitic limestone sparingly. NC State Cooperative Extension notes that peat-based mixes may need limestone to raise pH toward 5.5 to 6.5 because peat alone can sit near 4.0. UGA suggests about 1 teaspoon dolomitic limestone per 6-inch pot of mix when no soil test is available - a useful starting scale, though a test is always better than guessing.
If pH reads above 7.0, avoid lime entirely. Refresh with a peat- or coir-based potting mix, add elemental sulfur only if you are comfortable with precise small-batch math, or repot into a fresh commercial blend known to run slightly acidic. Do not chase pH with vinegar or other household acids; the dose is unpredictable and can shock roots.
Iron and manganese uptake when pH drifts
Geraniums are sensitive at the acidic extreme. Pacific Northwest Pest Management Handbooks note that geraniums grow best at pH 6.0 to 6.5; symptoms can resemble deficiency - interveinal yellowing, brown speckling, stunted new growth - which sends many growers to fertilize when the real fix is correcting pH or refreshing mix.
On the alkaline side, iron becomes insoluble. Leaves yellow while veins stay green; buds may fail. Fertilizing with iron chelate can help temporarily, but correcting the mix pH or repotting into appropriate soil solves the underlying problem. If you are adjusting pH, change gradually and retest after two weeks before adding more amendment.
Choosing containers that protect geranium roots
Soil and container work as a system. The best geranium potting mix in a pot without drainage holes will still kill roots. Drainage holes are non-negotiable for long-term container culture. One hole is minimum; three to four holes across the bottom of larger pots improve flow on wide containers.
Avoid “self-watering” reservoirs for geraniums unless you fully understand the water table they maintain. Most geraniums want a brief wet period followed by aeration - not a constant bottom moisture supply.
Place a small piece of mesh or a coffee filter over holes to keep mix from washing out, not a thick layer of gravel. Research on perched water tables shows gravel layers do not improve drainage; they raise the saturated zone closer to the roots. Mesh over the hole is enough.
If you use a decorative cachepot, grow the geranium in a plain nursery pot with holes and lift it out to water. Let it drain completely before returning it to the outer pot. Never let an inch of standing water sit in the cachepot bottom.
Pot depth, diameter, and the oversizing trap
Geraniums have a moderately fibrous root system, not a deep taproot. They perform well in pots 8 to 12 inches in diameter for mature specimens, per UGA Extension guidance on container sizing for outdoor geraniums. A 4-inch nursery plant should move to a 6- to 7-inch pot, not a 12-inch bowl. A 6-inch plant can step up to 8 or 10 inches when roots circle the inside wall.
The oversizing trap is one of the most common soil-related mistakes. A pot much larger than the root ball holds a large volume of mix that stays wet around roots that cannot drink it fast enough. The plant looks fine for weeks while roots suffocate in unused wet soil. Match pot size to current roots plus one season of growth, not to the size you hope the plant becomes by fall.
Depth matters less than diameter for zonal types, but trailing ivy geraniums in baskets need enough depth - 6 to 8 inches - for root mass without the basket becoming a waterlogged trough. Shallow window boxes dry fast; use the slightly moister mix adjustment from the humid-climate section only if you are watering twice daily in peak heat.
Terracotta vs plastic vs glazed ceramic
Terracotta unglazed clay is the classic geranium pot for good reason. Walls breathe. Moisture evaporates through the sides, speeding dry-down and reducing root-rot risk on sunny patios. Clemson Cooperative Extension recommends selecting containers with adequate drainage holes and a well-drained soil mix. Downsides: pots dry faster (more frequent watering in heat), they are heavy, and they can crack in hard freezes.
Plastic nursery pots and resin containers retain moisture longer - useful in windy, dry sites where terracotta would need watering twice daily, but risky in shaded, humid spots where mix already dries slowly. Plastic is light, cheap, and fine if you compensate with a grittier mix and strict saucer emptying.
Glazed ceramic sits between the two. The glaze reduces side evaporation compared with raw terracotta, but the pot is still rigid and heavy. Treat glazed pots like plastic for drainage planning: verify holes, avoid oversizing, and lean toward more perlite in the mix if the plant sits in part shade.
Hanging baskets - popular for ivy geraniums - behave like plastic in reverse: sun and wind hit all sides, so they dry fastest of all. You may need more organic matter in the mix and more frequent watering, but still not a moisture-retention-heavy blend that sags wet overnight.
When to repot and refresh spent mix
Potting mix is not permanent. Organic components decompose, perlite breaks down, salts from fertilizer accumulate, and the physical structure collapses. Refresh geranium soil when:
- Roots circle the pot wall or emerge from drainage holes
- Water runs down the gap between mix and pot wall instead of soaking in
- The mix smells sour, musty, or stagnant
- Dry-down time has doubled compared with when the mix was new
- The plant wilts shortly after watering (a classic sign of damaged roots in old, compacted medium)
Most actively growing geraniums benefit from fresh mix every 12 to 18 months, even if the pot size stays the same. Root-prune lightly and replace the outer third of mix if a full repot is not yet needed.
Spring repotting vs emergency refresh
Scheduled spring repotting - after last frost when new growth accelerates - is ideal. The plant has months of bright light ahead to recover root disturbance and fill the pot with roots. Step up one pot size or refresh in the same pot with new mix.
Emergency refresh happens when you discover blackened stems, sour smell, or roots that are brown and mushy. Remove all old mix, trim dead roots back to firm white tissue, repot into fresh gritty mix, and water once lightly. Place in bright indirect light until new growth shows. Do not fertilize until the plant is clearly recovering - new white root tips or fresh leaf unfoldings.
Avoid repotting a stressed geranium into an oversized pot “to help it recover.” A smaller root zone in fresh, appropriate mix heals faster than a swampy mansion of wet soil.
Reading early warning signs in the root zone
Leaves lie. Roots tell the truth first. Learn to read these early signals:
Slow dry-down after months of normal rhythm: Compaction or salt buildup. Scratch the top inch - if it is crusty white, flush with water equal to twice the pot volume letting it run through, or refresh mix at repot.
Sour or swampy smell at the drainage hole: Anaerobic conditions. Roots are losing oxygen. Inspect immediately; repot if smell persists after one careful flush.
Mold on the soil surface: Often linked to overwatering, poor airflow, or decaying organic matter sitting wet. Scrape the surface, reduce watering, improve air movement, and confirm dry-down with the one-minute check.
Darkened stem at soil line: Possible Pythium or Fusarium. Reduce moisture, improve drainage, remove affected stem tissue if it is limited, and repot into sterile mix if spreading.
Wilting in wet mix: Root function is compromised - rot, compaction, or salt injury. Do not water again until you inspect roots through the drainage hole or slip the plant out of the pot.
Catching these signs early converts a repot-and-refresh job into a minor adjustment instead of a plant loss.
Common geranium soil mistakes to avoid
Using plain garden soil in pots. It compacts, waterlogs, and introduces pathogens. Use bagged potting mix amended for drainage.
Adding a gravel layer at the bottom. It does not create better drainage; it creates a perched water table higher in the pot. Use mesh over the hole and a well-blended mix instead.
Oversizing the pot. More soil means more wet soil around small root systems. Step up one size at a time.
Choosing “moisture control” potting mix without amending. Water-absorbing polymers hold moisture geranium roots do not want. Cut those blends with 30% perlite minimum or choose a standard mix.
Ignoring the saucer. Standing water is standing water whether it entered from the top or collected from the bottom. Empty saucers after every watering.
Burying the crown deeper at repot. Stems that sit in wet mix rot. Match the previous planting depth exactly.
Testing pH only after years of decline. Test fresh mix at repot time; it is cheap insurance against chlorosis and micronutrient chaos.
Treating all Pelargoniums as identical above soil but different below. Zonal, ivy, and scented types share the same drainage requirement; only watering frequency and pot format change.
Conclusion
The best soil for geraniums is not a mystery formula locked in a proprietary bag. It is a well-draining potting mix - roughly 40% potting soil, 30% perlite or pumice, 20% coarse sand, and 10% compost - held at pH 6.0 to 6.5 in a container with drainage holes sized to the current root ball. That combination mirrors the fast wet-dry rhythm Pelargoniums evolved with in Southern Africa and protects against the root rots that end most container geraniums.
Build or buy mix that passes the squeeze test and the one-minute drainage check. Match pot material to your climate - terracotta for slow dry-down sites, plastic with grittier mix where pots bake dry. Refresh soil before compaction and salt buildup steal root function, and read smells, dry-down speed, and stem color at the soil line before leaves show the full damage.
Get the soil system right once, and geraniums repay the effort with months of blooms on a plant that feels genuinely easy to keep - not because you got lucky, but because the roots finally have the air and drainage they were asking for all along.
When to use this page vs other Geranium guides
- Geranium overview - Start here for whole-plant context before deep-diving this topic.
- Geranium problems hub - Jump to symptom-specific fix guides when this care topic does not resolve the issue.
- Root Rot on Geranium - Escalate here when soil adjustments are not enough.
- Mold on Soil on Geranium - Escalate here when soil adjustments are not enough.