How to Propagate Fittonia: Water, Soil, and Dome
How to Propagate Fittonia: Water, Soil, and Dome
How to Propagate Fittonia: Water, Soil, and Dome
Fittonia propagation is one of the most forgiving projects in indoor plant care because the nerve plant is built to recover from damage on a humid forest floor. A short stem cutting placed in a glass of water or tucked into moist soil under a humidity dome routinely produces roots within two to four weeks. The method that works best for you depends on whether you prefer to watch roots form in a jar or skip straight to soil, but both paths start the same way: a healthy stem with at least one node, clean tools, and enough moisture in the air to keep tender leaves from collapsing before roots take over.
This guide covers stem cuttings in water, stem cuttings in moist soil with a humidity dome, and division at Fittonia repotting guide for Fittonia albivenis and its common cultivars. You will learn how to turn stems from routine pruning into viable cuttings, how to set up a dome that actually maintains humidity without cooking the plant, when roots are ready for their own pot, and what to do when a cutting wilts despite your best effort.
Why Fittonia Propagates Easily from Stem Cuttings
Biology of rooting on a tropical ground-cover plant
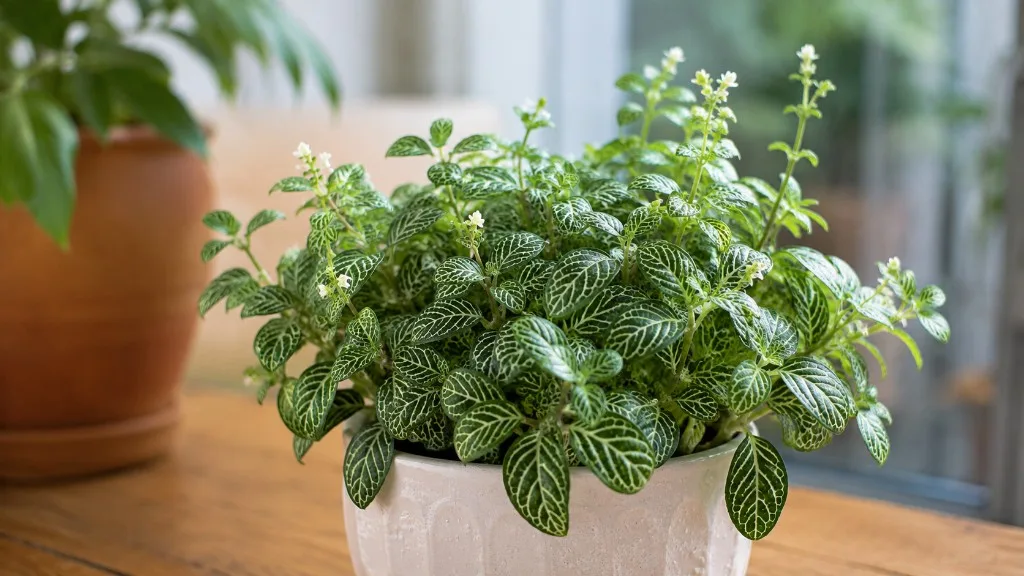
Fittonia (Fittonia albivenis), commonly called the nerve plant or mosaic plant, belongs to the Acanthaceae family and grows naturally as a low-spreading ground cover on the rainforest floors of Peru and Colombia. In that environment, stems frequently contact moist leaf litter, and the plant roots readily from nodes that touch damp substrate. That evolutionary habit is exactly what makes fittonia propagation straightforward indoors.
The critical structure is the node - the joint where leaves attach to the stem and where dormant root initials wait for moisture and oxygen. Cut a stem that includes at least one node submerged in water or buried in moist mix, and adventitious roots emerge from that point. Because Fittonia stays soft-stemmed and actively branching throughout much of the year indoors, cuttings taken from fresh growth root faster than woody, leggy stems from the base of an old plant.
Fittonia also tolerates pinching well - pinching stem tips promotes denser foliage and yields propagation material from trimmings. That is one reason experienced growers treat nerve plant pruning and propagation as the same task: pinch for shape, root the trimmings for new pots or terrarium fillers.
Water versus soil versus division: choosing your method
Use this decision framework before you start:
- Water propagation when you want to watch root development, when you are new to propagation and want visible feedback, or when you are rooting several stems at once in a single jar on a bright counter. Water rooting is the most popular fittonia propagation method for beginners because you can see white root tips appear day by day and know exactly when the cutting is ready for soil.
- Soil propagation with a humidity dome when you want roots adapted to the medium from the start, when you prefer not to manage water changes, or when you are setting up a propagation tray with multiple cuttings at once. Soil rooting demands more attention to moisture balance but skips the water-to-soil transition shock that catches some growers off guard.
- Division at repotting when you have a mature, multi-stemmed plant with several crowns and a tangled root ball. Division gives you full small plants immediately - no rooting wait - but only works when the parent is large enough to split without leaving any section rootless.
All three methods rely on the same environmental foundation: Fittonia light guide, warmth between 65 and 80°F (18 and 27°C), and humidity above 50%, ideally closer to 60 or 70%. Fittonia is not a dry-air plant. Propagation fails most often because humidity drops, not because the cutting lacks potential.
When to Propagate Fittonia for Best Results
Fittonia roots fastest during active growth - typically spring through early autumn indoors. Missouri Botanical Garden lists stem cuttings as the standard propagation method and notes stems root at nodes when they touch moist substrate. You can propagate in winter, but rooting slows noticeably when temperatures fall below 65°F (18°C) and when light levels drop.
Avoid propagating from a plant that was just shipped, recently repotted into soggy mix, or recovering from root rot on Fittonia, pest damage, or severe dehydration. Stressed tissue rots before it roots. If the parent plant looks wilted, yellowing, or limp, stabilize it for one to two weeks before taking cuttings - or take material only from visibly healthy stems at the growing tips.
The best cutting source is actively growing stem tips with firm leaves and bright vein color. Leggy stems from low-light conditions still root, but they produce weaker starts. If you are pinching the plant to control shape, take cuttings from the fresh growth you remove rather than scraping material from the woody base.
Timing also matters for division. Split Fittonia when you would repot anyway - when roots fill the container or the plant has outgrown its terrarium. Dividing a dormant, winter-stressed plant adds unnecessary risk. Spring repotting season gives divided sections the longest runway of favorable conditions before growth slows again.
Tools and Materials for Fittonia Propagation
You do not need a propagation station. For cuttings, gather sharp scissors, snips, or a razor blade, a clean clear glass or jar (for water method), and eventually a small pot with drainage holes and well-drained potting mix. For soil propagation, add a clear humidity dome, propagation tray, or a clear plastic bag large enough to tent over the pot without crushing leaves.
Sterilize blades with soap and water or a quick wipe of 70% isopropyl alcohol if you are cutting from a plant with past pest issues. A ragged crush-cut bruises soft Fittonia tissue and invites rot at the cut surface. Make one clean slice through the stem.
Choose a well-draining potting mix amended with 20 to 30% perlite or coarse sand for soil rooting and final potting. Fittonia prefers moist but not waterlogged conditions - the same mix you would use for a mature plant works for cuttings. Some growers top-dress with a thin layer of sphagnum moss inside the dome to raise local humidity around the stem base, but plain mix is sufficient if the dome seals well.
Rooting hormone is optional. Fittonia roots readily from soft stems without it. If you root directly in soil and want a slight speed boost, a light dip in IBA rooting powder on the cut end before planting can help - tap off excess, because too much burns tender tissue.
For water propagation, use room-temperature water. Tap water left to sit overnight allows chlorine to dissipate; if your tap water is very hard or treated aggressively, filtered water reduces mineral buildup on roots and container walls. Label jars if you are running multiple cultivars - white-veined, pink-veined, and red-veined Fittonia look similar at the rooting stage.
How to Take Stem Cuttings (Including Pruned Stems)
Identifying nodes and making a clean cut
Select a stem 2 to 4 inches (5 to 10 cm) long from a healthy parent plant. The stem should be green and pliable, not brown and stiff at the base. Aim for two to three leaf nodes on each cutting - more nodes mean more rooting points and better odds if one node fails.
Locate a node by finding where leaves meet the stem. You will see a slight ridge or a pair of tiny leaf buds in the leaf axil. Make your cut just below a node, about ¼ inch (6 mm) beneath it. That node is where roots will form. Make a second cut at the top of the cutting if needed to leave two or three leaves at the tip for photosynthesis.
Remove all leaves from the lower half of the stem. Any leaf that would sit below the waterline in a jar or below the soil surface in a pot must come off - submerged or buried leaves rot within days, foul water, and invite fungal problems. If top leaves are large relative to the small cutting, trim them halfway to reduce water loss while roots form. Do not strip the cutting bare; it needs some leaf surface to fuel rooting.
For water propagation, at least one node must stay submerged. For soil propagation, bury the lowest one or two nodes while keeping remaining leaves above the surface.
Saving stems from routine pruning and pinching
Fittonia responds to pinching by branching from nodes below the cut, which makes pruning and propagation a natural pair. When you pinch back long stems to keep a compact, bushy shape, examine each trimmed piece before discarding it. If the stem is green, has at least one node, and the leaves look healthy - not yellowed, not pest-damaged - it is propagation-ready.
Process pruned stems immediately. Fittonia cuttings wilt quickly on a dry counter. Place stems in water or into prepared soil within minutes of cutting, or store them briefly in a damp paper towel inside a loosely closed bag if you need a few minutes to set up.
If you are doing a larger shaping prune, sort stems by quality. The tip sections with the newest growth root fastest. Middle sections with two nodes still work well. Discard woody base sections with few leaves and slow meristem activity - they root poorly and often rot instead.
A single pruning session on a mature Fittonia can yield five to ten viable cuttings without harming the parent plant, provided you leave enough foliage on the original plant to sustain it. That is one of the most practical reasons nerve plant owners learn propagation early: routine maintenance generates free plants for terrariums, gifts, and backup pots.
Step-by-Step Water Propagation for Fittonia
Water propagation is the most visible fittonia propagation method and the one most growers try first. Fill a clean clear glass or jar with 2 to 3 inches of room-temperature water. Insert the prepared cutting so the cut end and at least one node are submerged. Leaves must sit above the waterline - never let foliage touch or sit in water.
Place the jar in bright, indirect light. An east-facing windowsill or a spot a few feet from a south- or west-facing window works well. Avoid direct afternoon sun on the jar; it heats the water, encourages algae, and can scorch delicate Fittonia leaves through the glass.
You can root multiple cuttings in one jar if leaves are not crowded. Spacing helps each cutting receive light and reduces fungal transfer if one stem fails.
Managing water level, light, and regular water changes
Change the water every two to four days to maintain oxygen and limit bacterial growth. Stagnant water turns cloudy, develops a sour smell, and causes stem rot before roots appear. When you change water, rinse the jar, inspect the stem for mushiness at the cut end, and trim any soft tissue back to firm green stem if needed.
First white root tips usually appear in 7 to 14 days under warm, bright conditions. By two to three weeks, most healthy cuttings show a visible root cluster - consistent with stem cutting propagation timelines for Fittonia overview (Missouri Botanical Garden).
Allow roots to reach at least 1 inch (2.5 cm) before moving to soil. Shorter roots snap during transplant. Roots left in water much beyond 2 inches (5 cm) become brittle and break easily when handled - if you missed the window, pot up carefully or trim broken roots and give the cutting a few more days in fresh water to regrow.
Fittonia cuttings may wilt slightly for the first day after cutting - that is normal while the stem adjusts. If a cutting collapses completely and does not recover after 48 hours in fresh water on a warm, bright counter, discard it and take a new one from fresher growth. Partial wilt with recovery usually means humidity was low during handling, not that the cutting is doomed.
Algae in the jar is cosmetic unless water turns thick and green. Block excess light on the lower jar with paper or move to slightly less intense light if algae becomes heavy. Clean the jar at each water change.
Step-by-Step Soil Propagation with a Humidity Dome
Soil propagation skips the water stage and produces roots adapted to the medium where the plant will live. For Fittonia, this method requires a humidity dome or equivalent enclosure - bare soil and open air almost always produce wilted, dead cuttings because nerve plant leaves lose water faster than stem tissue can replace it before roots form.
Fill a small pot - 2 to 3 inches (5 to 8 cm) is enough - with pre-moistened, well-draining potting mix. Insert the prepared cutting so the lowest one or two nodes are buried and remaining leaves sit above the surface. Firm the mix gently around the stem without compacting it into a dense plug.
Optional: dip the cut end in rooting hormone before inserting. Tap off excess powder.
Place the pot in bright, indirect light at 65 to 80°F (18 to 27°C). Do not put the dome setup in direct sun - trapped heat inside a plastic cover can cook cuttings in hours.
Dome setup, venting, and soil moisture targets
Cover the pot with a clear humidity dome, propagation tray lid, or clear plastic bag supported by stakes or chopsticks so plastic does not rest on leaves. The enclosure creates a mini greenhouse that keeps relative humidity high around the cutting while roots develop.
Vent daily. Open the dome or lift one corner of the bag for 5 to 15 minutes to exchange stale air and prevent mold on soil surface and leaf edges. Heavy condensation on every surface means humidity is adequate; no condensation at all means the dome is too loose or ambient air is too dry.
Keep the mix consistently moist but not waterlogged - think wrung-out sponge, not mud. Water lightly when the top ¼ inch of mix feels dry to the touch. overwatering on Fittonia in a sealed dome is a common failure mode: stems rot at the soil line while leaves still look green.
Roots typically form in two to four weeks, sometimes faster with bottom warmth. You cannot see roots forming, so watch for new top growth or firm resistance when you give the stem a very gentle tug after three weeks. Do not yank. New leaves emerging from the tip or axils are the most reliable sign of success.
Soil-rooted cuttings transition to normal care more smoothly than water-rooted ones because they never had to switch environments. For growers who tend to leave cuttings in water too long, soil rooting avoids brittle-root breakage - but only if the dome stays in place until roots are clearly working.
Propagating Fittonia by Division at Repotting
Division is the fastest way to multiply Fittonia when you already have a mature, multi-crowned plant. Unlike cuttings, divided sections arrive with roots attached and skip the rooting wait entirely.
Choose a plant with multiple stems emerging from separate points in the soil and a root ball large enough to split without leaving any section bare-root and leafless. The best time is during spring repotting, when active growth helps sections recover quickly.
Remove the plant from its pot and gently tease apart stems and roots with your fingers. Fittonia roots are fine and fibrous - work slowly. Each division needs its own roots and several leaves. If two crowns share a connected rhizome, you can cut through it with a clean knife, but each piece must retain root tissue.
Pot each section into its own container with fresh, moist, well-draining mix. Water once to settle soil around roots, then place in bright, indirect light with high humidity for the first week - a loose bag tent helps while cut surfaces heal. Avoid fertilizing until you see new growth, usually within one to two weeks.
Division works well for terrarium refreshes: split an overgrown mat into smaller patches and replant at equal spacing. It is less ideal when you want many plants from a single small pot - cuttings scale better from one parent than repeated division of immature plants.
Knowing When Roots Are Ready to Pot Up
The transition from propagation setup to independent pot is where many Fittonia projects succeed or fail. Move too early and roots tear; move too late and water-grown roots become fragile; remove the dome too soon on soil cuttings and the plant collapses.
For water-rooted cuttings, pot up when roots reach 1 to 2 inches (2.5 to 5 cm) long and appear white and firm, not translucent and mushy. Prepare a small pot with drainage and pre-moistened mix. Create a hole, lower the cutting in, and gently firm mix around roots without burying the stem deeper than it sat in water. Water lightly and keep high humidity for the first week - a loose bag tent or dome vented daily reduces transplant shock while soil roots supplement water roots.
For soil-rooted cuttings, wait for visible new top growth before removing the dome permanently. Gradual acclimation works better than abrupt exposure: vent the dome more each day over four to seven days, then remove it once leaves stay firm in open air.
For divisions, treat each section like a new plant once potted. New growth within two weeks confirms the split succeeded.
Signs of successful rooting in water and soil
In water, success looks like white root tips emerging from submerged nodes, then branching into a cluster. The stem stays green and firm at the cut end. Top leaves may look slightly soft initially but recover as roots lengthen. Cloudy water with a blackening stem base means failure - start over with fresh material.
In soil under a dome, success looks like new leaves or bud break at the tip or axils, firm stem tissue when gently touched, and slight resistance to a very gentle tug after three weeks. The mix should smell earthy, not sour. Mold on the soil surface alone is not failure if you vent daily - but blackened stem tissue at the soil line is.
In division, success looks like perky leaves within 48 hours and new stems or leaf expansion within one to two weeks. Wilt that does not recover after watering suggests a section lost too many roots - repot it under a dome and reduce light stress until it stabilizes.
Aftercare for Newly Propagated Fittonia Plants
New Fittonia plants need steadier conditions than established ones for the first three to four weeks after potting. Keep the mix consistently moist - water when the top ½ inch (1 cm) approaches dry, not when the plant is already collapsed. Fittonia wilts dramatically when dry, but repeated wilt cycles weaken freshly rooted tissue.
Maintain humidity above 50%, ideally 60 to 70%. A pebble tray, grouping with other plants, bathroom placement, or a small humidifier all help. Missouri Botanical Garden notes that Fittonia requires high humidity to thrive indoors - propagated plants are even less tolerant of dry air than mature specimens.
Provide bright, indirect light. Avoid direct sun on new plants; leaves scorch easily. Low light produces leggy, weak growth - if stems stretch toward the window, move the pot slightly closer to the light source without exposing it to sunbeams.
Do not fertilize until you see active new growth - typically three to four weeks after potting rooted cuttings or two weeks after division. A half-strength balanced liquid fertilizer applied monthly during spring and summer is enough once the plant is established. Early feeding on weak roots causes salt burn and tip browning.
Repot into the next container size only when roots circle the pot - Fittonia stays compact and prefers shallow pots that dry evenly. A 3-inch starter pot often houses a young propagated plant for several months.
If you are building a terrarium, acclimate the rooted plant to enclosed humidity gradually unless it was propagated inside a terrarium already. Sudden shifts from open air to sealed glass cause leaf drop in some cultivars.
Why Fittonia Propagation Fails and How to Recover
Most fittonia propagation failures trace back to a short list of causes. Understanding them saves you from blaming the plant when the setup was the problem.
Low humidity is the number one killer. Fittonia leaves transpire rapidly in dry room air. Without a dome (soil method) or without adequate ambient moisture, cuttings wilt beyond recovery before roots form. Fix: use a dome, mist the enclosure lightly (not the leaves in open air), or propagate inside a terrarium or humidity tray setup.
Submerged or buried leaves rot and contaminate water or soil. Fix: strip lower leaves ruthlessly before placing cuttings.
Stagnant or foul water deprives stem tissue of oxygen. Fix: change water every two to four days; discard rotting stems immediately.
Overwatering in domes suffocates stem bases. Fix: keep mix moist, not saturated; vent daily; ensure pots have drainage holes even inside a tray.
Cold windowsills below 65°F (18°C) slow or stop rooting. Fix: move cuttings to a warmer spot - top of a refrigerator, propagation mat on low, or a room that stays consistently warm.
Weak parent material from stressed, pest-infested, or winter-dormant plants. Fix: wait for active growth; take cuttings only from firm green stems.
Leaving water roots too long produces brittle roots that break at potting. Fix: pot at 1 to 2 inches root length; handle gently; maintain humidity after transplant.
Leaf-only propagation - attempting to root a single leaf without stem tissue - rarely produces a full plant. Fittonia needs node-bearing stem tissue to regenerate shoots. Fix: always include stem with at least one node.
When a cutting fails, discard it cleanly, sterilize the jar or replace the top layer of soil, and start fresh rather than nursing rotting tissue for weeks. Fittonia propagates easily enough that restarting costs little.
Fittonia Cultivars and Propagation Notes
Most nerve plants sold as houseplants are Fittonia albivenis cultivars grouped by vein color - white-veined, pink-veined, and red-veined forms are common. All root by the same stem-cutting methods. Fittonia verschaffeltii is sometimes listed separately in older references, but modern commerce often treats these as cultivar groups within F. albivenis; propagation technique does not change.
White-veined cultivars such as ‘Skeleton’ and ‘White Anne’ may show slightly slower rooting in very dry air and are worth extra dome attention. Pink- and red-veined types root at similar speeds in comparable conditions. Variegation and vein color are preserved through stem cuttings - you get a genetic clone of the parent.
Fittonia is non-toxic to cats and dogs according to the ASPCA, which makes propagated extras safe to share with pet-owning friends - though keeping any plant out of reach of chewing pets remains good practice.
Patented or trademarked cultivars may carry propagation restrictions for commercial resale. Home propagation for personal use is standard practice; selling unlicensed copies of patented cultivars is a separate legal question outside the scope of home care.
If a propagated plant loses vein color intensity, the issue is usually light or fertilizer, not propagation method. Maintain bright indirect light and avoid overfeeding to keep colors vivid.
Conclusion
Fittonia propagation rewards a simple formula: take green stem cuttings with at least one node, keep humidity high, provide bright indirect warmth, and wait two to four weeks for roots. Water propagation lets you watch progress in a jar; soil propagation under a humidity dome skips the water-to-soil transition; division at repotting instantly multiplies a mature plant. The easiest source material is often already in your hand - stems removed during routine pinching root just as readily as carefully selected tip cuttings.
Success depends less on rooting hormone or specialized gear than on moist air, clean cuts, and patience during the dome phase. Pot up when roots are firm and long enough to handle, acclimate gradually to open air, and hold off on fertilizer until new growth confirms the plant is self-sufficient. Once you propagate one nerve plant successfully, you will rarely buy a second - every shaping prune becomes a chance to fill a terrarium, share with a friend, or keep a backup pot ready when winter dry air stresses the parent plant.
When to use this page vs other Fittonia guides
- Fittonia overview - Start here for whole-plant context before deep-diving this topic.
- Fittonia problems hub - Jump to symptom-specific fix guides when this care topic does not resolve the issue.