Ficus Audrey Propagation: Cuttings & Air Layering
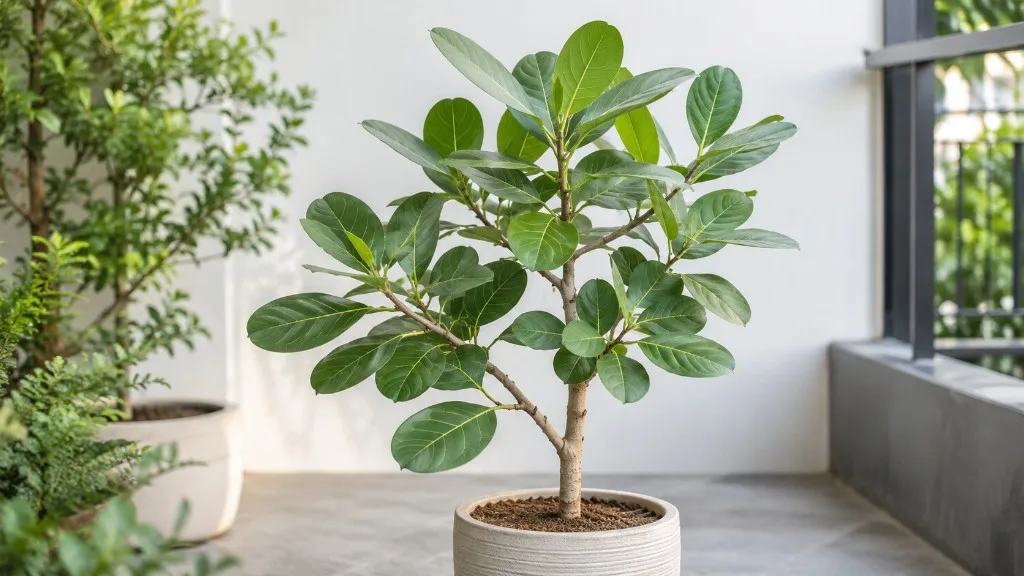
Ficus Audrey Propagation: Cuttings & Air Layering
Ficus Audrey Propagation: Cuttings & Air Layering
Why Ficus Audrey Needs Node-Bearing Stem Cuttings, Not Leaf Cuttings
Ficus Audrey (Ficus benghalensis) is a woody Moraceae tree in its native range across the Indian subcontinent, where wild specimens develop the sprawling aerial-root architecture of a true banyan. Indoors, it stays compact, but the stem tissue retains that semi-woody character. That biology shapes every propagation decision. Ficus Audrey multiplies through stem cuttings that include at least one node or through air layering on branches still attached to the parent plant. A leaf pulled off without stem tissue and a node cannot restart as a full plant, no matter how long it sits in water.
The node is the only place on a stem where new roots and shoots can emerge. On Ficus Audrey, a node appears as a slight ring or scar where a leaf petiole attaches or once attached. The pale bump just above or below that scar is living meristem tissue. Everything between two nodes - the internode - is transport tissue. It moves water and sugars but cannot sprout roots on its own. That is why propagation guides for pothos or African violets do not transfer cleanly to Ficus Audrey. Those plants can regenerate from leaf or petiole tissue under the right conditions. Ficus Audrey cannot.
Why a lone leaf cannot become a new plant
A single Ficus Audrey leaf dropped into a jar may stay green for weeks. The petiole might even callus at the cut end. But without a node attached to viable stem cambium, there is no growth point to push roots or a new shoot. The leaf is a solar panel attached to a stem segment that has been severed from the plant’s vascular system. It cannot reverse that amputation. Community forums and social posts sometimes show a rooted leaf, but in nearly every verified case the cutting included a sliver of stem with a node - the node did the work, not the leaf blade.
If you want a reliable clone, take a 4 to 6 inch (10 to 15 cm) stem section with one or two nodes and at least one or two healthy leaves at the tip. Strip the lower leaves so no foliage sits below the water line or buried in soil. The node you keep is the insurance policy. Everything else - water versus soil, hormone versus no hormone - is optimization around that non-negotiable requirement.
When to Propagate Ficus Audrey for the Best Results
Propagation speed depends less on the calendar than on whether the parent plant is actively growing. Ficus Audrey follows a tropical growth rhythm: a strong push from mid-spring through summer, slower but workable growth in early fall, and near dormancy through winter in most temperate homes. Iowa State University Extension notes that early spring is ideal for layering propagation, but most houseplants root successfully at any time of year if warmth and light are adequate. The practical home rule is simpler: propagate when the plant has been producing new leaves for several weeks and indoor temperatures hold steady between 65 and 80°F (18 and 27°C) - the range NC State Extension recommends for Bengal fig houseplants.
Avoid propagation during stress windows. A Ficus Audrey that just arrived from a nursery, dropped half its leaves after a move, or is recovering from root rot on Ficus Audrey does not have the carbohydrate reserves to fuel both healing and rooting. Wait until new growth is firm and green before you cut. Similarly, skip propagation in the middle of a pest outbreak. Mealybugs and scale travel on cuttings, and a fresh wound on a stressed plant is an open invitation for infection.
Spring and early summer remain the sweet spot because long days and warm nights accelerate callus formation and root initiation. A cutting taken in May at 75°F may root in three weeks. The same cutting taken in January in a drafty room may sit unchanged for two months. If you must propagate in winter, add a seedling heat mat set to 75°F under the propagation pot and accept a slower timeline.
Tools, Safety, and the Setup That Prevents Rot
Almost every failed Ficus Audrey propagation traces back to one of three problems: a dull blade that crushed the stem, wet latex going directly into soggy soil, or a jar left in direct sun. The right setup is unglamorous but effective. You need a sharp, sterilized cutting tool, nitrile or gardening gloves, paper towels for sap, clean water or fresh rooting medium, small pots with drainage holes, and a bright spot with no direct sun.
Latex sap safety is non-optional. Ficus Audrey bleeds milky white latex from every cut. The sap contains ficin and related compounds that irritate skin and eyes and are toxic to cats and dogs if ingested, per ASPCA toxic plant listings for Ficus species. NC State Extension also notes that Bengal fig sap can cause skin irritation and recommends protective gloves when handling the plant. Keep sap away from eyes and broken skin. Wash tools and hands after the session. If a pet chews a freshly cut stem, contact your veterinarian or the ASPCA Animal Poison Control Center.
Sterilize blades with 70 percent isopropyl alcohol or a brief dip in diluted bleach solution (one part bleach to nine parts water), then air dry. A crushed stem wound invites rot before roots ever form. Use small containers - 4-inch nursery pots for soil cuttings, a clear wide-mouth jar for water cuttings - so you can monitor progress without disturbing the cutting. Bright, indirect light two to three feet from an east- or north-facing window, or set back from a filtered south window, is the baseline. Direct sun heats water in a jar to lethal temperatures and desiccates leaves on a cutting with no roots to replace lost moisture.
How to Read the Stem: Nodes, Internodes, and Viable Cutting Material
Before you cut, learn to read the plant. Ficus Audrey exposes its anatomy clearly once you know what to look for, and most propagation mistakes come from cutting the wrong piece.
A node is a stem region capable of producing a leaf, a shoot, or a root. On Ficus Audrey, look for the ring where a leaf petiole meets the stem. You may see a small bump, a slight swelling, or a pale scar from a dropped leaf. That scar is often still a viable node if the surrounding stem is firm and green. The internode between two nodes is smooth stem tissue. It cannot sprout on its own.
For a standard tip cutting, choose a young branch with firm green stem, at least one obvious node in the lower third of your cutting, and two or three healthy leaves at the top. Semi-woody lower stem is fine; mushy or shriveled tissue is not. For air layering, pick a branch at least pencil-thick with healthy leaves above the intended wound site. Thin, floppy new growth layers poorly because it dries out inside the moss wrap.
Viable cutting material means green to light-brown stem with visible nodes, firm leaf tissue, and no active pest damage. Yellowing leaves, sticky residue, or blackened nodes are disqualifying. If the only healthy growth is at the very tip of a leggy plant, that is still usable - but consider air layering on the woody section below rather than discarding it.
Method 1: Stem Cuttings in Water (Step-by-Step)
Water propagation is the most visible method and the one beginners reach for first. It works on Ficus Audrey when the cutting is young enough, the node is submerged, and the sap has been allowed to dry before the stem enters water. It is less reliable on thick, woody stems than air layering, but for a fresh tip cutting with green tissue, water is a legitimate starting point.
Choosing, cutting, and drying the sap before rooting
Select a healthy stem 4 to 6 inches (10 to 15 cm) long with at least one node in the submerged portion. Using sharp, sterilized pruners, make a clean cut just below a node at a slight angle to maximize exposed surface area. Immediately blot the cut end with a paper towel - latex will flow steadily for several minutes. Strip any leaves that would sit below the water line, leaving one or two leaves at the top.
Let the cut end dry for one to two hours at room temperature until the latex forms a dry scab. Skipping this step is one of the most common causes of water-clouding and basal rot. The wet latex mixes with standing water and creates a bacterial soup that attacks the cambium before roots form. Once the scab is dry, optionally dip the lower inch in rooting hormone (powder or gel), then place the node in a clean jar of room-temperature water. Only the node and lower stem should be submerged - leaves must stay above the water line.
Maintaining the jar and recognizing healthy water roots
Set the jar in bright, indirect light at 70 to 80°F (21 to 27°C) if possible. Change the water completely every five to seven days, rinsing the jar and lightly rinsing the stem each time. Stagnant water is the enemy. If the water turns cloudy within 48 hours, change it immediately and check the stem tip for mushiness.
Healthy progress looks like a dry callus at the cut end followed by small white or cream-colored root initials emerging from the node zone. Timeline: three to six weeks for most water cuttings in warm, bright conditions. Longer is normal in cool or dim rooms. Roots are ready for soil when they reach 2 to 3 inches (5 to 7 cm) and appear firm and white, not gelatinous or brown. Do not wait until roots circle the entire jar - transplant before they become brittle.
Method 2: Stem Cuttings in Soil (Step-by-Step)
Soil propagation skips the water-to-soil transition and often produces tougher roots that adapt faster to pot culture. The trade-off is less visibility - you cannot watch roots form without disturbing the cutting - and a slightly higher rot risk if the mix stays too wet.
Mix, potting depth, and humidity dome setup
Use a well-draining propagation mix: roughly equal parts peat-based potting soil and perlite, or potting soil with 30 percent perlite and a handful of orchid bark for extra air. The mix should hold moisture without staying saturated. A 4-inch pot with a drainage hole is the right size; oversized pots stay wet too long.
After cutting and drying the sap as described above, optionally dust the lower inch with rooting hormone powder. Insert the cutting so the lowest node sits 1 to 2 inches below the soil surface, with the remaining stem and leaves above the mix. Firm the soil gently around the stem without compacting it. Water lightly until a few drops exit the drainage hole, then let the top inch dry before watering again.
Create a humidity dome by placing a clear plastic bag over the pot, supported by stakes so it does not touch the leaves. This reduces transpiration while roots form. Set the pot on a heat mat at 75°F if ambient temperatures run cool. Bright, indirect light is essential. Expect roots in four to eight weeks. Test gently by tugging the stem after week four - resistance means roots are anchoring. New leaf growth is the clearest success signal.
Method 3: Air Layering for Leggy or Mature Ficus Audrey Plants
Air layering is the most reliable method for Ficus Audrey when the stem is thick, woody, or high on a leggy plant you want to shorten. The cutting roots while still attached to the parent, so it continues receiving water and sugars through the intact vascular tissue above the wound. Iowa State University Extension lists woody Ficus species - including weeping fig, rubber tree, and fiddle-leaf fig - among houseplants best propagated by air layering, and NC State Extension recommends stem cuttings or air layering for Bengal fig houseplants.
Choose air layering when the stem is too woody for a water jar, when you want to shorten a tall plant without wasting the top, or when previous stem cuttings failed on the same material. The method takes more supplies and patience, but success rates on mature Ficus tissue are substantially higher than detached cuttings.
Girdling the stem and wrapping the moss ball
Select a healthy branch at least pencil-thick, ideally 12 to 18 inches below the leafy tip. Wearing gloves, make two parallel cuts completely around the stem, one inch apart, penetrating through the bark to the woody center. Connect the cuts with a vertical slice and remove the ring of bark and cambium. Scrape the exposed woody surface lightly to ensure no green cambial tissue remains. This girdling interrupts downward carbohydrate flow and triggers root formation at the wound.
Dust the exposed area with rooting hormone powder. Soak sphagnum moss in water, squeeze out excess, and wrap a generous ball around the wound. Cover the moss with clear plastic wrap, securing it above and below the moss ball with twist ties, electrical tape, or string. No moss should protrude from the ends. The package should be snug but not crushing the stem.
Monitor weekly. If the moss feels dry and lightens in color, peel back the top tie, add a little water, and reseal. Roots typically appear in four to twelve weeks, visible as white threads through the moss. Once the moss ball is packed with firm roots at least 2 to 3 inches long, cut the stem just below the root mass with sterilized pruners. Remove the plastic, keep the moss intact around the roots, and pot in well-draining mix. Water thoroughly and place in bright, indirect light.
Rooting Hormone: When It Helps and When to Skip It
Rooting hormone is optional for Ficus Audrey but useful, especially on woody stems and air-layer wounds. The synthetic auxin indolebutyric acid (IBA) promotes root initiation at the application site. Iowa State Extension recommends powder or liquid forms for air layering woody Ficus, with concentration matched to the propagation type - generally higher concentrations for woody air-layer wounds, lower for soft cuttings.
Apply powder by dipping the dried cut end or girdled surface into a small separate container of hormone (never dip directly into the original jar to avoid contamination). For liquid forms, submerge the stem for a few seconds per label directions. Do not over-apply; excess hormone can slow rooting on some species.
Skip hormone if you do not have it. A clean cut, a viable node, warm temperatures, and proper moisture will still produce roots - just potentially a week or two slower. Hormone matters most when you are air layering thick wood or retrying a cutting that failed once before.
Transitioning Water Roots to Soil Without Transplant Shock
Water roots are structurally different from soil roots - thinner, more fragile, adapted to an oxygen-rich aquatic environment. Moving a cutting directly into dry, dense potting soil snaps those roots and sets the plant back weeks.
The transition protocol: when water roots reach 2 to 3 inches, pot the cutting into a moist but not soggy well-draining mix in a small 4-inch pot. Pre-moisten the mix so it clings without compacting. Create a hole with a pencil, lower the roots in gently without forcing them, and firm the soil around the stem. Water lightly after potting.
Keep the plant in bright, indirect light with higher humidity for the first two weeks - a loose plastic bag dome works. The soil should stay evenly moist but never waterlogged. Expect some leaf drop; Ficus species commonly shed leaves after any root disturbance. New firm growth at the tip means the transition succeeded. Hold off on fertilizer for four to six weeks.
How Long Ficus Audrey Takes to Root (and What Speeds It Up)
Rooting timelines vary with method, temperature, light, and stem maturity. Use these ranges as guides, not guarantees:
Water stem cuttings: three to six weeks in warm, bright conditions. Cool or dim rooms can stretch this to eight weeks or longer.
Soil stem cuttings: four to eight weeks. Bottom heat at 75°F can shave one to two weeks off the lower end.
Air layering: four to twelve weeks depending on stem thickness. Thick woody branches on the longer end; younger semi-woody branches often root in four to six weeks.
Factors that speed rooting: active parent growth, warm root-zone temperatures (70 to 80°F), Ficus Audrey light guide, clean tools, dried latex before submersion, fresh water changes, and rooting hormone on woody tissue. Factors that slow or kill rooting: winter dormancy, cold drafts, direct sun on a jar, undried sap in wet soil, buried leaves rotting in the mix, and taking cuttings from a stressed plant.
Aftercare for Newly Rooted Ficus Audrey Plants
A newly rooted Ficus Audrey needs steadier conditions than an established plant, but not coddling. Keep the pot in bright, indirect light and water when the top inch of mix dries - roughly the same rhythm as a mature Ficus Audrey, but err slightly drier rather than wetter while roots expand. Do not fertilize for the first four to six weeks; fresh roots are sensitive to salt burn.
Resist Ficus Audrey repotting guide into a large container. A 4-inch pot is appropriate for a young rooted cutting for several months. Upsizing too early leaves excess wet soil around a small root system and invites rot. When new growth is vigorous and roots circle the pot edge, step up one pot size only.
Ficus Audrey reacts to change before it reacts to bad care. Expect one to three old leaves to yellow and drop after propagation - that is normal adjustment, not failure. Repeated leaf drop over several weeks means light, drafts, or watering are still unstable. Fix one variable at a time.
What Happens to the Mother Plant After You Propagate
Propagation does not have to leave the parent plant looking butchered. What happens next depends on the method.
After a tip cutting, the mother plant often pushes new shoots from buds just below the cut within a few weeks, especially during active growth. A leggy Ficus Audrey can become bushier after a strategic tip removal. If the remaining stem is bare wood with no leaves, buds may still break along the cane - give it four to six weeks in bright light before assuming the worst.
After air layering, the stem below the removed top may sprout multiple branches from nodes near the cut. This is one of air layering’s hidden benefits: you get a new rooted plant and a fuller parent. Prune any weak or crossing shoots once they have hardened.
If the mother plant looks unbalanced, rotate it weekly for even light and wait for new growth before making additional cuts. Do not stack propagation, repotting, and fertilizing in the same week.
Common Mistakes and How to Recover from Each
Taking a leaf without a node. The leaf stays green, then dies. Recovery: start over with a proper stem cutting.
Planting before the latex dries. Basal rot and cloudy water within days. Recovery: remove the cutting, let the end dry 24 hours, trim back to healthy tissue, restart.
No node submerged or buried. Nothing happens for weeks. Recovery: re-cut just below a visible node and retry.
Direct sun on a water jar. Cooked roots and bleached leaves. Recovery: move to indirect light; change water; trim damaged tissue if mushy.
overwatering on Ficus Audrey soil cuttings. Mushy stem at the soil line. Recovery: unpot, trim rot, let dry, repot in fresh perlite-heavy mix with less moisture.
Skipping gloves. Sap dermatitis is real and uncomfortable. Recovery: wash skin thoroughly; avoid further contact until healed.
Propagating a sick plant. Cutting inherits the problem. Recovery: stabilize the parent first; take material only from clean growth.
Fertilizing too early. Burned root tips and leaf edge browning. Recovery: flush the pot with plain water and withhold feed for a month.
Conclusion
Ficus Audrey propagation is straightforward once you respect the plant’s woody Moraceae biology. Stem cuttings must include at least one node - a leaf alone will never become a new plant. Water and soil cuttings work well on young, green growth when the sap is dried, the tools are clean, and the setup stays warm and bright. Air layering is the better bet for thick, leggy stems and the most reliable route on mature tissue. Handle the milky latex with gloves, propagate during active growth, and give rooted plants stable light and controlled moisture while they establish. Choose the method that matches your stem - tip cutting for fresh growth, air layering for woody branches - and you can multiply a single Ficus Audrey into a second plant without gambling on techniques that Ficus Audrey overview was never built to support.
When to use this page vs other Ficus Audrey guides
- Ficus Audrey overview - Start here for whole-plant context before deep-diving this topic.
- Ficus Audrey problems hub - Jump to symptom-specific fix guides when this care topic does not resolve the issue.