Dahlia Soil and Planting: Mix, pH, and Tuber Depth
Dahlia Soil and Planting: Mix, pH, and Tuber Depth
Dahlia Soil and Planting: Mix, pH, and Tuber Depth
Dahlia tubers store everything the plant needs to break dormancy, push stems, and produce the show-stopping blooms gardeners wait all winter for. That storage system works beautifully in loose, fertile, well-draining soil - and fails quickly in soil that holds water like a sponge. If you get soil and planting depth right before the first sprout appears, most of the hard work is done. Get them wrong, and no amount of fertilizer or staking will save a rotting tuber underground.
This guide covers the full soil-and-planting workflow: diagnosing your native soil, building or amending beds for drainage, hitting the pH sweet spot of 6.5 to 7.0, mixing container media, and planting tubers at the correct depth with the eye facing up. Whether you are preparing an in-ground border, a raised bed, or a patio pot, the principles are the same - roots need air, tubers need warmth, and excess water needs somewhere to go.
Why Dahlia Soil Matters More Than Most Garden Plants
Dahlias are not ordinary fibrous-rooted perennials. They grow from thickened underground tubers - energy storage organs that sit directly in the soil profile where drainage problems show up first. A tomato or pepper with slightly heavy soil might limp along; a dahlia tuber in the same conditions often rots before it sprouts, leaving you with an empty hole and a mystery about what went wrong.
The rot mechanism is straightforward. Saturated soil pushes out air from pore spaces around the tuber. Without oxygen, beneficial soil biology stalls and anaerobic conditions take over. The tuber tissue breaks down, often before any green growth appears above ground. Extension guides from Oregon State University and Washington State University consistently rank well-drained soil as the single most important soil requirement for dahlias, ahead of fertility tricks or exotic amendments.
That does not mean dahlias demand perfect loam out of the box. They grow successfully in clay, sand, and everything between - but only after the soil behaves like loam at the root zone: crumbly when moist, quick to shed excess water, and rich enough in organic matter to hold nutrients without staying wet for days. Soil is the system that determines how much air, moisture, and recovery time the tuber gets after every rain or watering. Treat it as infrastructure, not decoration.
What the Ideal Dahlia Soil Looks and Feels Like
The best dahlia soil is what gardeners call friable loam: a balanced mix of sand, silt, and a modest amount of clay, enriched with decomposed organic matter. Pick up a handful after a light watering. It should hold its shape briefly, then crumble apart when you poke it with a finger. That crumb structure means water moved through, air remains in the pore spaces, and roots can expand without hitting a concrete-like wall of compacted clay.
Color tells you part of the story. Dark brown to black soil usually indicates healthy organic content. Pale, gray, or blue-tinted soil in low spots often signals poor drainage and periodic waterlogging - exactly the conditions dahlias reject. Smell matters too. Good soil smells earthy and fresh. Sour, swampy, or rotten-egg odors mean anaerobic decomposition is already happening, and that spot needs structural improvement before you plant a single tuber.
Fertility matters, but timing matters more. Dahlias want rich soil, not a nitrogen bomb at planting time. Swan Island Dahlias warns that overly enriched topsoil, pre-fertilized potting mix, or heavy compost applications at planting can burn tender sprouts and produce tall, weak stems with small flowers. Organic matter incorporated weeks before planting - not dumped on top of a fresh tuber - builds fertility safely.
The Crumb Test and Friable Loam Standard
You do not need a laboratory to evaluate soil structure. Dig a shovelful from the planting zone, moisten it slightly if dry, and squeeze it in your fist. Ideal dahlia soil forms a loose ball that falls apart with light pressure. Clay-heavy soil forms a tight, shiny ball that holds together when poked - a sign you need amendment. Pure sand runs through your fingers and will not hold shape at all - a sign you need organic matter for moisture and nutrient retention.
Run a secondary drainage check while you are at it. Dig a hole roughly 12 inches deep and fill it with water. If water remains pooled after several hours, that zone drains too slowly for bare tubers without raised beds or significant amendment. If water disappears within an hour in warm weather, drainage is likely adequate for dahlias once organic matter is incorporated. The crumb test and the hole test together give you a honest picture faster than guessing from surface appearance.
Understanding Soil Texture: Clay, Sand, and Loam for Dahlias
Clay soil is the most common problem for dahlia growers. It holds water long after rain, compacts under foot traffic, and cracks into hard plates when dry. Dahlias can grow in clay that has been structurally improved - but not in raw, sticky clay where a tuber sits in a saturated pocket for days. The fix is organic matter and, often, elevation. Work in aged compost, leaf mold, peat moss, or coconut coir to loosen texture. For persistent clay, a raised bed lifts the root zone above the worst drainage layer and is often the most reliable long-term solution.
Sandy soil presents the opposite challenge. It drains fast - sometimes too fast - and leaches nutrients before roots can use them. Dahlias in pure sand may sprout fine but struggle to stay hydrated through hot summer weeks, producing smaller blooms and thin stems. Sandy soil needs organic matter not for drainage but for water-holding capacity and nutrient retention. A 2-to-3-inch layer of compost worked into the top 8 to 12 inches usually transforms sand into something dahlias tolerate well.
Loam is the baseline you are aiming for regardless of what you started with. If you already have natural loam, your main jobs are testing pH, adding modest organic matter annually, and avoiding compaction from walking on wet beds. Most gardeners are converting clay or sand toward loam, not maintaining perfect loam from the start - and that is a workable, realistic goal for a single season of preparation.
Amending Sandy Soil So It Holds Enough Moisture
Sandy beds benefit from a different amendment ratio than clay. Incorporate 3 to 4 inches of well-decomposed compost into the top foot of soil rather than the heavier peat additions clay often needs. Compost adds both moisture retention and slow-release nutrients without the nitrogen spike that concerns some dahlia growers at planting time. A light mulch layer after sprouting - not before - reduces evaporation on hot days without keeping the tuber zone cold and wet during spring warm-up.
If you are growing in very coarse sand, consider a small amount of clay loam subsoil or vermiculite mixed with compost to increase cation exchange capacity. This is a refinement, not a requirement. The practical test is whether the bed stays evenly moist for two to three days after a deep watering in summer without staying soggy at the tuber level. Adjust organic matter up or down based on that observation rather than a fixed recipe.
Target pH for Dahlia: Why 6.5 to 7.0 Works Best
Dahlia soil pH between 6.5 and 7.0 - slightly acidic to neutral - keeps essential nutrients available without locking out phosphorus, iron, or manganese. OSU Extension lists 6.5–7.0 as the target range for dahlias and notes that correcting pH before planting is easier than chasing leaf symptoms mid-season. A simple home test kit or county extension soil test gives you a number to work from. Test in fall if you are preparing spring beds - lime and sulfur both need time to move through the soil profile and stabilize pH before tubers go in.
Do not obsess over decimal points in a hobby garden. Normal loam amended with compost usually lands close enough to the target that dahlias perform well. pH adjustment becomes important when tests show readings below 6.0 or above 7.5, or when you are planting in known problem soil such as limestone-derived alkaline clay or long-term pine-needle acid beds.
How to Test and Adjust Dahlia Soil pH
Collect soil samples from several spots across the planting area, mix them in a clean bucket, and follow your test kit instructions. Extension offices in many counties offer low-cost or free pH testing and can recommend lime (to raise pH) or elemental sulfur (to lower pH) application rates based on your soil type and target shift. Agricultural lime and dolomite lime work slowly - often several months - so fall application before a spring planting is ideal. Fast-acting lime products begin correcting pH sooner but cost more.
Apply amendments evenly across the bed and work them into the top 6 to 8 inches. Retest before planting if you made large adjustments. A common mistake is dumping lime on one corner of a bed and assuming the whole area shifted. Dahlias will not forgive localized pH extremes any more than they forgive localized waterlogging.
Building Raised Beds for Better Dahlia Drainage
Raised beds for dahlias solve drainage problems that in-ground amendment cannot fix quickly - heavy clay subsoil, high water tables, and low spots where cold air and water collect. Elevating the root zone 8 to 12 inches above grade often means the difference between reliable sprouting and annual tuber loss. Raised beds also warm faster in spring, which helps you hit the 60°F soil temperature threshold for planting sooner in cool climates, per RHS guidance.
Build with untreated lumber, stone, or composite boards. Avoid creosote railroad ties and any material leaching chemicals into root zones. Line the bottom with hardware cloth if burrowing rodents are a problem in your area, but do not line with plastic - that traps water and defeats the purpose. The bed should drain freely through its entire depth into the soil below unless you are gardening on concrete, in which case ensure drainage holes or a gravel layer at the base.
Fill raised beds with a blend that mimics good garden loam rather than pure potting mix. Potting mix alone dries too fast in large volumes and can shrink away from bed edges. A practical fill is 60% quality topsoil, 30% compost, and 10% coarse sand or perlite for aeration. Adjust based on your climate: increase compost slightly in sandy regions, increase sand or perlite in wet climates.
Raised Bed Dimensions and Fill Layers
Aim for 12 to 18 inches of workable soil depth minimum. Dahlia feeder roots mostly occupy the top foot, but deeper beds resist drying out and give tall varieties a more stable anchor. Width of 3 to 4 feet allows reach from both sides without stepping on soil. Length is flexible - just maintain 18 to 24 inches between tuber planting positions along the row for standard varieties, wider for dinnerplate types that grow into large bushes.
If filling a new bed, add soil in layers and water lightly between layers to settle air pockets without creating compaction. Top-dress with 1 inch of compost after the first season rather than digging deeply again - dahlias dislike disturbed root zones once established. A raised bed built in fall and allowed to settle through winter is ideal for spring tuber planting.
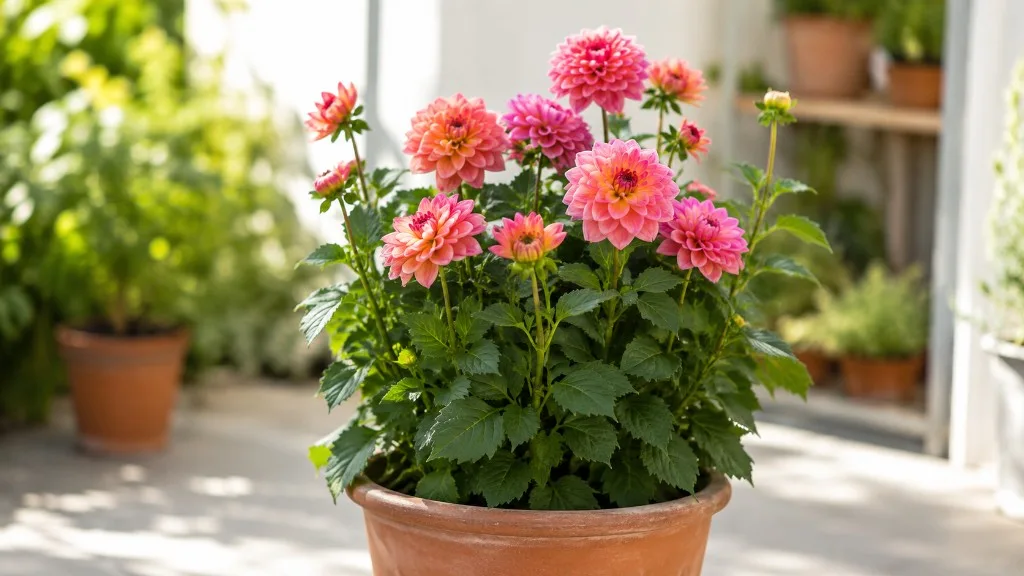
The Best Container Mix for Dahlia Pots
Container dahlias depend entirely on the mix you provide - there is no subsoil buffer. The best soil for dahlias in pots is a well-draining, organically rich potting blend that holds moisture in the middle range without staying wet at the bottom. A reliable starting recipe is 50% high-quality potting mix, 25% compost, and 25% perlite or coarse sand. In very hot, dry climates, shift to 40% potting mix, 30% compost, and 30% perlite to increase water retention slightly while keeping drainage sharp.
Avoid garden soil alone in containers. It compacts in pots, reducing aeration and often introducing pathogens and weed seeds. Also avoid bagged mixes labeled with slow-release fertilizer or wetting agents unless you know the nitrogen level is moderate - some pre-fertilized mixes are too hot for dormant tubers. Plain commercial potting mix plus your own compost gives you control.
Pot size matters as much as mix. Start tubers in at least 3-gallon pots for most varieties, larger for tall dinnerplate types. OSU Extension recommends a 1-gallon pot with fresh sterilized potting soil for early indoor starts, then transplanting to larger containers or the garden after danger of frost. The tuber should sit comfortably with room for root expansion - cramming a large tuber into a tiny pot guarantees fast drying or root bind, both of which stress the plant before bloom.
Choosing Pots and Drainage Hardware
Every dahlia container needs multiple drainage holes - one is rarely enough for a full-sized plant in summer. Drill additional holes if needed, and never rely on a layer of gravel at the bottom to “improve drainage.” Research consistently shows gravel layers create a perched water table that keeps the root zone wetter, not drier. Use pot feet or a saucer you empty after watering to keep the bottom holes open to air.
Terracotta breathes well and dries evenly but needs more frequent watering. Plastic retains moisture longer - helpful in hot dry climates, risky in cool wet ones. Glazed ceramic looks polished but verify drainage holes before planting. Whichever material you choose, the drainage hole is non-negotiable for dahlia tubers that spend months in the same soil volume.
Step-by-Step Dahlia Soil Preparation Before Planting
Start soil preparation three to four weeks before your expected planting date, or the previous fall for best results. First, clear the area of weeds, debris, and old tuber fragments that might harbor disease. Dahlias are sensitive to pre-emergent herbicides - soil treated with products like Preen or Casoron may fail to support healthy growth even if it looks clean. Hand weeding and clean soil are the safe path.
Second, loosen the planting zone 8 to 12 inches deep with a fork or tiller, working backward so you do not compact soil you just aerated. Third, incorporate 2 to 3 inches of aged compost or leaf mold across the bed and mix thoroughly. Skip fresh manure, especially chicken manure, which can burn tubers and introduce excess salts. WSU Extension specifically warns against fresh manure amendments for dahlias.
Fourth, if drainage is marginal, form raised mounds or install formal raised beds at this stage rather than after planting. Fifth, rake the surface level and water lightly to settle the soil. Let the bed rest at least a week so biology stabilizes and you can see whether puddles form. If they do, add more organic matter or elevation before tubers go in - not after rot appears.
How Deep to Plant Dahlia Tubers (and Why Depth Varies)
Dahlia planting depth is not one-size-fits-all. General guidance from extension sources and experienced growers places most tubers 4 to 6 inches deep measured from soil surface to the top of the tuber. Shorter bedding dahlias that mature under 18 inches often perform well at 2 to 3 inches deep. Tall varieties exceeding 4 feet benefit from 6 to 7 inches, and sometimes deeper with a staggered fill technique described below.
Depth affects sprouting speed, stem stability, and frost protection. Shallow planting warms the tuber faster and produces earlier sprouts - useful in short seasons but risky where late frosts or heavy rain can expose or wash out tubers. Deep planting slows sprouting slightly but anchors tall stems better and protects eyes from surface temperature swings. The eye - the small bud where growth emerges, like a potato eye - must face upward, with the tuber lying horizontally in the hole.
Dig the planting hole wider than the tuber rather than merely deep. Roots spread outward more than downward in the first weeks. A wide loosened zone gives feeder roots an easy path into amended soil. Place the tuber at the target depth, backfill with the same improved soil you prepared, and firm gently - not packed - to remove large air voids without compressing drainage pores.
Staggered Backfill for Tall Varieties
For dahlias expected to exceed 4 feet tall, the staggered backfill method reduces early rot risk while still achieving deep anchoring. Dig a hole 12 inches deep. Add 6 inches of soil back into the bottom. Set the tuber on that shelf with the eye up, and cover with only 1 inch of soil initially. Once the sprout emerges and reaches a few inches tall, add another inch of soil. Repeat until the hole is filled to grade.
This approach keeps the tuber near warm soil at the start - when rot risk from cold wet conditions is highest - then deepens the crown gradually as the plant proves it is actively growing. Install stakes at planting time for tall varieties so you never drive a stake through a developing tuber later. WSU Extension and multiple commercial growing guides recommend staking during planting for any dahlia expected to need support.
Planting Day: Spacing, Orientation, and First Water
Plant dahlias outdoors when soil temperature at 4 inches depth holds at 60°F (15°C) or above for several consecutive days - typically late April through May in temperate climates, later in cold regions. An inexpensive soil thermometer removes guesswork. Planting into cold, wet soil is one of the fastest routes to tuber rot, even if the air feels warm for a few sunny afternoons, as OSU Extension warns.
Space standard dahlias 18 to 24 inches apart center to center. Dinnerplate varieties and large bush types need 24 to 36 inches. Crowding creates humidity around stems, competes for water and nutrients, and makes division harder at season’s end. Rows should allow walkway access for cutting, staking, and pest inspection without trampling root zones.
Orientation is simple and non-negotiable: eye up, tuber horizontal. If you cannot identify the eye, set the tuber on its side and let gravity and warmth guide the sprout - but identifiable eyes should always point upward. Cover to the target depth for your variety, label the stake with the cultivar name, and resist the urge to water heavily immediately.
The first watering should settle soil lightly around the tuber, not saturate the zone. If soil was prepared days ahead and is already moist, you may not need water at all on planting day. Tubers carry internal moisture to support initial sprouting. Excess water before sprouts appear is more dangerous than slight dryness. Once green growth shows, shift to keeping soil evenly moist but never waterlogged.
Managing Moisture in Dahlia Soil Through the Season
Moisture management changes in three phases. Pre-sprout: minimal water, focus on drainage and warmth. Early growth: light, consistent moisture as roots and stems establish - the plant uses little water but cannot tolerate drying to dust. Active bloom period: deep, less frequent watering that wets the full root zone without surface puddling. OSU Extension notes that dahlias in dry climates need about 1 inch of water per week from rain plus irrigation combined during peak growth.
Water slowly at the soil line rather than overhead when possible. Fast heavy watering compacts surface soil and runs off raised beds before penetrating. Drip irrigation or soaker hoses work well for rows. In containers, water until a small amount runs from drainage holes, then stop - never let pots sit in filled saucers through the growing season.
Mulch after plants are 6 to 8 inches tall and soil has warmed. Early mulching keeps beds cold and wet when tubers need warmth to sprout. Later mulching with straw, shredded leaves, or compost conserves moisture, moderates soil temperature, and suppresses weeds that compete for nitrogen. Pull mulch a few inches back from the stem base to avoid collar rot in humid climates.
Common Dahlia Soil Mistakes and How to Fix Them
Planting in cold, wet soil tops the mistake list. Fix: wait for 60°F soil temperature and workable, non-soggy beds. overwatering on Dahlia before sprouts appear runs a close second. Fix: water lightly at planting if needed, then wait for green growth. Using pre-fertilized or herbicide-treated bagged soil can burn eyes or prevent sprouting entirely. Fix: read bag labels, choose plain mixes, and amend yourself.
Burying tubers too deep in cold clay delays sprouting and increases rot risk. Fix: raise depth in heavy soil or use staggered backfill. Planting too shallow in exposed sites leads to frost damage and tuber drying. Fix: add 1 to 2 inches of depth or hill soil after sprouting. Adding gravel to pot bottoms creates wet root zones. Fix: remove gravel layers and ensure side and bottom holes drain freely.
Fresh manure amendments burn tubers and skew nitrogen high, producing weak floppy growth. Fix: use only well-aged manure incorporated weeks before planting, and sparingly. Ignoring pH extremes leaves plants unable to uptake nutrients you applied. Fix: test and adjust in fall. Walking on wet beds compacts soil exactly where roots need air. Fix: use board paths or dedicated stepping stones between rows.
When Heavy Rain or Clay Threatens Your Dahlia Bed
Even well-prepared beds face seasons of abnormal rain. If water stands around dahlia stems after storms, fork narrow channels between rows to speed surface drainage - avoid deep digging near tubers. Temporarily remove mulch if it is trapping moisture against stems. For chronically wet spots, consider lifting tubers early before rot spreads, drying them in a sheltered area, and replanting in improved soil next season - a rescue option when the current site cannot be fixed mid-year.
Long-term fixes for wet gardens include French drains, swales directing water away from beds, higher raised beds, and berm planting on sloped ground. Dahlias tolerate moderate summer heat if soil moisture stays even, but they do not tolerate standing water at the tuber level for any extended period. Choosing a site with Dahlia light guide - 6 to 8 hours daily - helps surface soil dry faster between rains and reduces fungal pressure on crowns.
If your native soil is heavy clay and raised beds are not an option, mound planting still lifts the tuber above the worst saturation layer. Form a mound 8 to 10 inches high and 18 inches wide, plant at standard depth within the mound, and ensure water sheds off the sides rather than pooling at the base. Mounds erode over a season - refresh them when you divide and replant tubers annually or biennially.
Conclusion
Dahlia soil and planting success comes down to a short list of non-negotiables: soil that drains fast enough to keep tubers breathing, fertility built gradually through aged organic matter rather than hot amendments at planting time, pH held between 6.5 and 7.0, and tubers set at the right depth with the eye up once soil warms to 60°F. Raised beds, thoughtful container mixes, and texture-specific amendments turn imperfect native soil into something dahlias thrive in.
Planting depth adapts to variety height - shallow for compact types, deeper with staggered backfill for tall ones - and the first weeks after planting demand restraint with the hose until green growth proves the tuber is alive. Monitor drainage after heavy rain, avoid compacting wet beds, and treat soil as living infrastructure that needs seasonal top-dressing rather than a one-time recipe. Get these foundations right, and the blooms above ground will take care of themselves.
When to use this page vs other Dahlia guides
- Dahlia overview - Start here for whole-plant context before deep-diving this topic.
- Dahlia problems hub - Jump to symptom-specific fix guides when this care topic does not resolve the issue.
- Root Rot on Dahlia - Escalate here when soil adjustments are not enough.
- Mold on Soil on Dahlia - Escalate here when soil adjustments are not enough.