Dahlia Repotting: Timing, Pots & Dividing
Dahlia Repotting: Timing, Pots & Dividing
Dahlia Repotting: Timing, Pots & Dividing
Dahlia repotting is not the same routine you use for a pothos or a peace lily. Dahlias grow from tuberous underground storage organs, not a fibrous root ball that gradually fills a pot over two years. Most container growers plant fresh or divided tubers each spring, size up only when the root mass and stem count genuinely demand it, and lift tubers for dry storage after frost rather than treating the pot as a permanent home. If you understand that rhythm - spring wake-up, careful pot choice, optional division, restrained first watering, and a deliberate overwinter decision - repotting and transplanting become predictable instead of a gamble against rot.
This guide covers container sizing, moving tubers between pots, dividing at repot time, spring timing, and overwinter storage in pots versus lifted tubers. It assumes you are growing dahlias for seasonal bloom in containers or moving garden-grown clumps into pots, not maintaining a year-round indoor foliage plant.
What Repotting Means for Dahlia
For most houseplants, repotting means refreshing compacted mix and giving circling roots another inch of space. For dahlias, repotting usually means one of three jobs: starting a stored tuber in fresh mix for the new season, moving an established container plant into a larger pot mid-season because it has outgrown its space, or transplanting a lifted garden clump into a container after division. All three share the same non-negotiables: excellent drainage, correct planting depth, protection from cold wet soil, and minimal disturbance of the crown where eyes form.
Dahlias are seasonal performers. They sprout from tubers when soil warms, grow rapidly through summer, bloom heavily, then die back to the tuber after frost. Repotting should align with that arc. Spring is the primary window because tubers are waking, roots are forming, and the plant has months to recover from any handling stress. Fall repotting is mostly about lifting, labeling, dividing if you choose, and storing - not refreshing mix around an actively blooming plant unless you have a specific problem like rot or a pot that has clearly become too small.
Tubers vs Traditional Houseplant Roots
A dahlia tuber is a thickened storage stem, not a bulb in the botanical sense and not a typical fleshy root. The crown sits at the base of last year’s stem, and eyes - small pink or green bumps - form on the crown and upper neck. Those eyes become shoots. The tuber body stores energy to fuel early growth. When you repot, you are protecting that crown and eye zone more carefully than you would tease apart fibrous houseplant roots.
Fine feeder roots develop after the eye sprouts, not before you plant. That timing matters for watering: a freshly planted tuber in new mix can rot in saturated soil long before it sends up green growth. Houseplant repot advice - water thoroughly right after the move - does not transfer cleanly here. Dahlia repotting rewards lightly moist mix and patience until shoots appear, then a normal deep-Dahlia watering guide once stems and feeder roots are active.
When to Repot or Transplant Dahlia
The best repot window for container dahlias is spring, after the last frost, when soil temperature reaches about 60°F (15°C). Oregon State University Extension recommends planting when soil is warm - in many climates that aligns with tomato planting time, because both crops want warm soil, not just air that feels pleasant. In storage, tubers are dormant; in cold wet mix they sit idle and vulnerable to decay. In warm drained mix they root and shoot within weeks.
Mid-season repotting is justified when a fast-growing cultivar has clearly outgrown its container - roots visible at drainage holes, mix drying twice as fast as neighboring pots, or the plant becoming top-heavy and unstable despite staking. Avoid repotting during peak bloom unless the alternative is losing the plant to rot or catastrophic wilting. If you must move it, accept that bud drop and a short pause are likely.
Fall is for lifting and storage, not routine mix refresh. After frost blackens foliage, allow about a week for tubers to harden, then dig or unpot, dry briefly, label, and store. You can divide in fall if you are confident finding eyes, but many growers divide in spring when eyes are visible - a trade-off between smaller storage footprint (fall) and easier cutting accuracy (spring).
Spring Timing Windows
Plan spring repotting in two phases. Phase one - wake-up: two weeks before you intend to divide or plant, move stored tubers from a cold dark area (around 40–50°F / 4–10°C) to a warmer spot at 60–65°F (15–18°C). The RHS dahlia guide recommends this wake-up period because dormant eyes are nearly invisible in cold storage; warmth swells them into obvious pink or green points you can orient upward when planting.
Phase two - plant: once frost danger has passed and your mix will stay above 60°F, plant tubers horizontally 4 to 6 inches (10 to 15 cm) deep with the eye facing up. In short-season climates, starting tubers in pots indoors four to six weeks before the last frost date - then moving pots outdoors after hardening off - buys bloom time without risking cold soil outdoors.
If spring is wet and cold, delay rather than force. A tuber planted in saturated 45°F mix is more likely to rot than one held in storage another ten days.
Signs Your Container Dahlia Needs More Room
Not every dahlia needs a bigger pot every year. Size up when two or more of these appear together: roots protruding from drainage holes, the plant drying out within a day in normal summer weather despite thorough watering, visible crowding of multiple strong stems competing from one small crown, or a top-heavy habit that stakes cannot stabilize because the root mass is too shallow for the stem height. Slow bloom production on an otherwise well-fed plant in Dahlia light guide can also indicate root crowding, though light and feeding mistakes cause the same symptom - check roots before upsizing.
Do not repot simply because the calendar says so. A single healthy tuber with one or two stems often performs better in a right-sized pot than in an oversized one filled with unused wet mix.
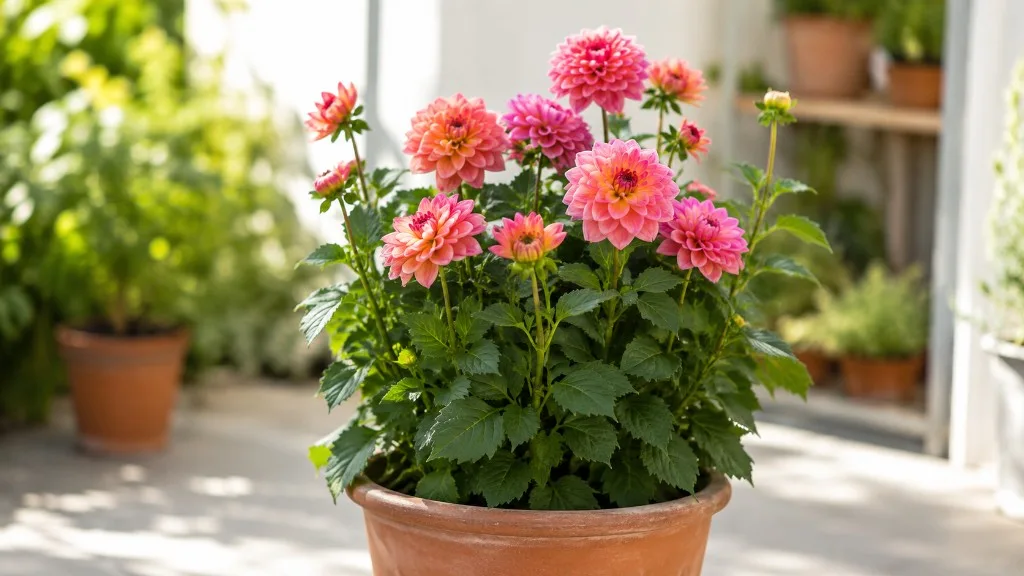
Choosing the Right Container Size
Dahlias in containers need depth for anchoring, width for tuber spread, and weight at the base because mature stems can reach 1 to 1.5 m on large cultivars and act like sails in wind. Oregon State University Extension recommends a minimum of about 12 × 12 inches (30 × 30 cm) for medium to dwarf types - a baseline, not a ceiling. Larger dinnerplate types often need 15 to 18 inches (38 to 45 cm) diameter and similar depth to stay stable and support root development through summer.
Every container must have drainage holes. Decorative outer pots are fine only if you empty runoff and never let the inner pot sit in standing water. Plastic, terracotta, fabric, and ceramic all work; terracotta dries faster (helpful in cool cloudy springs, demanding in hot dry summers), while plastic retains moisture longer (adjust watering accordingly).
Minimum Dimensions by Dahlia Type
Use cultivar scale as your guide. Bedding and gallery dahlias - compact types under about 60 cm - often thrive in 12-inch (30 cm) pots when planted as single-tuber divisions. Border and mid-height cultivars in the 90 to 120 cm range usually want 12 to 15 inches (30 to 38 cm). Large dinnerplate types need 15 inches (38 cm) or more, plus heavy staking and sometimes a half-whiskey-barrel scale tub for balcony safety.
Depth matters as much as width. Shallow bowls force tubers too close to the surface where they dry quickly and heat unevenly; they also fail to anchor tall stems. Aim for at least 12 inches of usable soil depth below the tuber for any cultivar you expect to exceed 60 cm.
When to Size Up vs Divide Instead
If the plant outgrew its pot because multiple tubers and stems crowded the space, division usually beats jumping two pot sizes. One strong tuber with one eye can produce a full-size plant; three tubers in one pot compete for the same volume and water. If a single tuber filled the pot with healthy roots but the cultivar’s mature size demands more anchoring, move up one size - roughly 2 to 5 cm wider in diameter, not double.
Oversized pots are a common rot trap. Unused mix stays wet around a dormant or slow-starting tuber, especially in spring and during cool weather. When in doubt, divide to reduce crowding rather than upsizing dramatically.
How to Move Dahlia Tubers Between Pots
Moving a dahlia tuber - whether from storage, from a nursery bag, or from an old pot - follows the same core sequence. Inspect the tuber for firmness and visible eyes. Trim soft rot with a clean knife until you reach firm tissue; dust cuts with sulfur or cinnamon if you have it, and allow cuts to dry for a day in shade before planting. Prepare new mix in the destination pot, leaving room to set the tuber 4 to 6 inches below the eventual soil surface. Place the tuber horizontally with the eye up, backfill gently without compacting, and insert a stake now if the cultivar will exceed 60 cm - driving stakes later risks piercing the tuber.
If you are moving an actively growing container dahlia mid-season, water lightly the day before, slide the root ball out intact, and disturb only broken or circling roots at the bottom. Keep as much original mix around feeder roots as practical. Position at the same depth as before - burying the crown deeper invites stem rot and delayed shooting.
Before any move, prepare stored tubers carefully. Brush off dried soil and old mix; do not power-wash dormant tubers unless you can dry them thoroughly before replanting. Firm and plump is healthy. Mushy, black, or foul-smelling tissue is rot - cut back to clean white or cream flesh. Wrinkled but firm tubers often rehydrate after planting; paper-thin shriveled ones may fail. If eyes are invisible, run the wake-up step before you commit to division. A tuber without an eye will not sprout, no matter how large the body looks.
Dividing Dahlia Tubers at Repot Time
Division turns one stored clump into several plantable tubers and prevents overcrowding. You can divide in fall at lift or spring before planting; spring is easier for beginners because swollen eyes show where to cut. Each division must include one eye, a piece of crown, a neck connecting crown to body, and enough tuber body to fuel startup - UC Master Gardeners advise each piece include crown tissue with at least one eye and firm tuber flesh. Smaller pieces can work with a strong eye but may produce fewer blooms the first year.
Use clean, sharp shears or a knife. Split large clumps in half through the old stem base first, then separate individual tubers, taking a sliver of crown with each. Better to sacrifice tuber flesh than to cut too close and leave the eye behind on the mother crown. Label divisions with cultivar name if you grow multiple types - dahlia tubers look alike by winter.
Fall division reduces storage volume; spring division reduces guesswork. Neither is wrong. Avoid dividing a clump that failed to store well - weak stock divided becomes multiple weak plants.
Reading Eyes, Neck, and Crown
The crown is the junction where last year’s stem met the tuber cluster. Eyes form on the crown and upper neck - pink, white, or green bumps that swell and may sprout in wake-up. The neck is the narrower stem between crown and tuber body; a broken or cracked neck is a common failure point in storage. The body stores starch. When you divide, every piece needs that chain intact: eye on crown → neck → body. A detached tuber with no eye is compost, not a plant.
If you cannot find eyes after wake-up, give the clump more warmth and indirect light for a few days before you cut. Rushing division on a still-dormant clump produces blind pieces.
Spring Repotting Step by Step
A reliable spring repot sequence looks like this. First, gather materials: clean pot with drainage, fresh well-draining mix, stake, labels, and optional sulfur for cuts. Second, wake stored tubers two weeks ahead if eyes are not visible. Third, divide if needed, letting cut surfaces dry briefly. Fourth, moisten mix to barely damp - not wet enough to squeeze water out. Fifth, plant horizontally 4 to 6 inches deep, eye up, stake in place. Sixth, water lightly once to settle mix, then hold off on heavy watering until green shoots break the surface. Seventh, place in full sun - dahlias want 6 to 8 hours of direct sun for best bloom - and protect from late cold snaps with row cover or moving pots indoors overnight if frost threatens.
Once shoots are 10 to 15 cm tall, begin normal deep watering when the top 3 to 5 cm of mix dries, and start feeding at quarter to half strength on a balanced fertilizer according to your broader dahlia feeding plan. Do not bury emerging shoots with extra mix during hilling - that differs from potato culture and can rot dahlia stems.
Transplanting Ground-Grown Dahlias to Containers
Moving an in-ground dahlia into a pot - for patio display, relocation, or saving a favorite cultivar from a bed - happens after frost in fall or during spring division, not at midsummer peak unless necessary. Dig 12 to 18 inches around the clump, lift with a fork, shake off excess soil, and divide or trim to fit a container that matches the remaining root mass. A garden clump too large for a 12-inch pot must be divided, not forced into too small a space or left in an enormous pot with wet unused mix.
In spring, you can lift overwintered in-ground clumps in mild climates where tubers stayed in soil, divide, and replant into pots the same day. In cold climates, treat in-ground storage as the exception and lift in fall for dry storage, then pot in spring like stored tubers.
Harden off potted transplants moved from greenhouse or indoor starts: one week of increasing outdoor hours prevents scorched young leaves. Full sun remains the goal, but arrive there gradually from bright shade.
Overwinter Storage: Pots vs Lifting Tubers
You have two overwinter paths with container dahlias. Path A - lift tubers: after frost, cut stems to 10 to 15 cm, unpot or tip the container, dry tubers for a few days in shade, brush off mix, label, and store in slightly moist vermiculite, wood shavings, or peat at 40–50°F (4–10°C) in darkness, per RHS storage guidance. Check monthly for rot or shriveling. Replant in spring. This is the default best practice for most growers because it saves space, reduces rot risk, and lets you inspect divisions.
Path B - leave in pot: You can move a potted dahlia to a cool dark room for winter, but lifting the tuber is usually smarter than hauling a heavy pot indoors and back out, as OSU Extension notes for cold-winter regions. If you store the whole pot, withhold water after frost, keep it cool and dry, and expect higher rot risk if mix stays damp. Many experienced growers remove the tuber from the pot in fall, store the tuber dry, and repot into fresh mix in spring - effectively treating the pot as seasonal, not permanent.
Storing Potted Dahlias Indoors for Winter
If you must store an intact potted tuber, choose a cool basement or garage that stays above freezing but below 50°F. Let foliage die back naturally after frost before cutting stems. Do not water through winter unless tubers shrivel severely - then add a few tablespoons of water to the storage medium, not a full soak. In spring, wake the pot as you would loose tubers: warmer spot, then replant into fresh mix even if the pot size stays the same, because old mix compacts and carries disease spores.
Never store dahlias in a heated living room all winter; warmth and dryness desiccate tubers, while accidental watering initiates weak etiolated growth without adequate light.
Soil Mix and Drainage After Repotting
Dahlias demand rich, loose, well-draining soil with strong organic content. A workable container blend mirrors in-ground preferences: roughly 40% quality potting mix, 30% compost or leaf mould, 20% perlite, and 10% coarse sand, targeting pH 6.0–7.0. Avoid heavy garden soil in pots - it compacts, drains poorly, and invites tuber rot in spring.
Fresh mix at repot resets drainage speed and air space around the developing root zone. Do not reuse last season’s mix from a pot that showed rot or persistent fungus gnats. Drainage holes remain mandatory; bottom gravel layers do not fix bad mix above them.
After repotting into fresh mix, expect the surface to dry at a different rate than before - usually slower in spring when shoots are small, faster by midsummer when roots fill the pot. Adjust checking frequency, not a fixed calendar.
Watering and Staking After Transplant
Watering after dahlia repotting is a restraint exercise. Lightly settle mix once at planting, then keep barely moist until shoots emerge - often 1 to 3 weeks depending on temperature. Heavy watering on a dormant tuber is the fastest route to rot. Once stems are actively growing and feeder roots are obvious at drainage holes on inspection, shift to deep watering when the top 3 to 5 cm dries, always emptying saucers.
Stake at planting for any cultivar expected to exceed 60 cm or produce large flower heads. Tie stems loosely as they grow, adding ties every 20 to 30 cm. Top-heavy container dahlias tip easily in summer storms; a stable pot diameter and early staking prevent crown damage that opens paths for disease.
Hold fertilizer until active growth is established - at least 2 to 3 weeks after shoots appear, and skip feeding entirely if the plant looks stressed after a rough transplant. Fresh mix with starter charge may supply early nutrients without supplemental feed.
Common Repotting Mistakes
The mistakes that kill container dahlias are repetitive and preventable. Oversized pots with early overwatering on Dahlia rot tubers before shoots appear. Planting too shallow dries the crown and overheats the eye zone; too deep delays emergence and increases stem rot risk - stay in the 4 to 6 inch band unless your climate extension specifically advises otherwise for your soil type. Dividing without eyes produces empty pots. Repotting during bloom sacrifices flowers and stresses a plant that will die back in weeks anyway. Storing wet potted dahlias in warm rooms causes mold. Bare-rooting and scrubbing stored tubers removes protective layers and breaks necks. Skipping labels loses cultivar identity by spring.
Mild transplant pause - no new growth for a week, slight wilt on hot afternoons - can occur even when you do everything right. Persistent yellowing, stem mush at soil line, or sour-smelling mix after two weeks point to rot or depth error, not normal adjustment. Unpot, trim rot, dry, and replant into fresh mix with less water rather than waiting for collapse.
Conclusion
Dahlia repotting and transplanting reward a seasonal mindset: warm-soil spring planting, right-sized containers with drainage, optional eye-bearing divisions, restrained water until growth starts, and lift-and-store overwintering unless you have a cool dry room and accept higher risk. Match pot size to cultivar scale, divide when crowding - not when you want a bigger decorative pot - and treat fresh mix plus correct depth as non-negotiable. Get those decisions right and dahlias are among the most reliable summer container stars; get them wrong and tuber rot ends the season before the first bloom.
When to use this page vs other Dahlia guides
- Dahlia overview - Start here for whole-plant context before deep-diving this topic.
- Dahlia problems hub - Jump to symptom-specific fix guides when this care topic does not resolve the issue.
- Root Rot on Dahlia - Escalate here when repotting adjustments are not enough.