How to Propagate Dahlia: Tubers, Cuttings, Seeds
How to Propagate Dahlia: Tubers, Cuttings, Seeds
How to Propagate Dahlia: Tubers, Cuttings, Seeds
Dahlia propagation is less about one magic trick and more about matching the method to what you are trying to produce. If you want the same flower color, form, and habit as a plant you already love, you divide tubers or take basal stem cuttings - both create vegetative clones. If you want genetic surprise and are fine with unknown outcomes, you start from seed. The Royal Horticultural Society lists division, cuttings, and seed as the three standard routes for making new dahlia plants, and Oregon State University Extension confirms that tubers, cuttings, and seeds all work when timing and anatomy are respected. What does not work, despite internet folklore, is treating a random leaf like a houseplant cutting. Dahlias do not propagate reliably from detached leaves, and this guide focuses on the three methods that actually deliver plants.
The through-line across all successful dahlia propagation is living crown tissue. Whether you are splitting a stored clump or snipping a sprout from a waking tuber, the new plant needs a growth point - the eye - and enough connected tissue to feed it until roots or shoots take over. Miss the eye and you get a handsome piece of root that never wakes up. Include the eye with a sound neck and tuber body, and you have a plant worth potting. That anatomy lesson sounds technical until you have held a smooth, eyeless tuber in your hand in February and wondered why nothing happened in May. Once you can spot crown bumps, dahlia propagation stops feeling like guesswork.
Why Dahlia Propagation Divides Into Three Main Paths
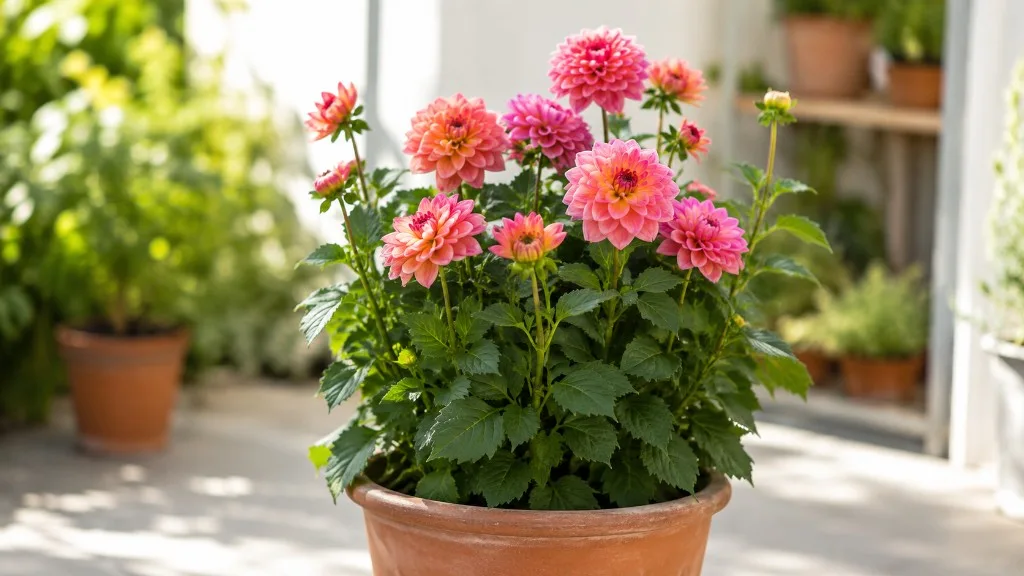
Dahlias are grown for late-summer and autumn color, often as cut flowers, container statements, or seasonal garden anchors. Most named cultivars are maintained clonally because growers and gardeners want predictable results. Tuber division is the default home method: one overwintered clump becomes several plantable pieces, each genetically identical to the parent. Basal stem cuttings push the same cloning logic further - a single sprouted tuber can yield many rooted plants in a few weeks if you have warmth, light, and sterile medium. Seed starting plays a different game entirely. Dahlia breeder Kristine Albrecht, quoted in Martha Stewart’s propagation coverage, notes that tubers and cuttings are clones of the mother plant, while seeds produce genetically unique offspring. That distinction is not academic. It decides whether you are preserving ‘Café au Lait’ or rolling the dice on flower shape.
Division suits gardeners who already lift and store tubers and want more plants without specialized equipment. Cuttings suit growers who want volume fast - five, ten, or more plants from one mother tuber before outdoor planting season. Seeds suit experimenters, bedding displays, and breeders, especially with smaller-flowered types sold in mixed seed packs. None of these methods replaces good post-propagation care: dahlias are cold-sensitive, bloom-driven plants that punish soggy soil, weak light, and rushed outdoor planting. Propagation gets you the plant; aftercare gets you the flowers.
Understanding Dahlia Tuber Anatomy
Before you cut anything, learn what you are cutting. A dahlia tuber is a thickened root that stores energy. UC Master Gardeners of San Luis Obispo County describe three functional parts: the body, the neck, and the crown. The body is the fleshy storage zone. The neck is the narrower connection between body and crown. The crown sits at the top of the neck, at the junction with last year’s stem base, and it is the only place eyes form. Oregon State University Extension puts it plainly: eyes develop along the crown, beginning as bumps that swell into sprouts. You will want at least one eye on any piece you plant.
The Body, Neck, Crown, and Eye
The eye is a small raised bud on the crown - sometimes pinkish or greenish once it wakes, sometimes nearly invisible in deep dormancy. A tuber with a fat body but no crown tissue bearing an eye is called a blind tuber. It may look healthy. It will not produce a shoot. Longfield Gardens and multiple dahlia growers stress that cutting off a beautiful tuber without crown and eye yields a root that eventually rots in place. Summer Dreams Farm, a commercial dahlia farm, teaches dividers to keep roughly 1 cm² of crown attached to each tuber body even when an eye is not yet visible, because crown tissue is where eyes emerge. That is not a guarantee - crown without any eventual eye still fails - but it explains why expert dividers focus on crown area rather than tuber size alone.
The neck must stay intact and firm. A wobbly or cracked neck separates storage tissue from the crown and invites rot. When you evaluate purchased tubers or mail-order divisions, check all three zones: firm body, unbroken neck, crown with a visible or soon-to-appear eye. Varieties differ in how fast they eye up. Some cultivars show sprouts within a week or two of warmth; others, such as varieties growers nickname slow eyeers, may take six or seven weeks. Patience is part of the anatomy lesson.
Method 1: Dividing Dahlia Tubers With Eyes
Tuber division is the most common dahlia propagation method and the one the RHS recommends for gardeners multiplying stock in spring. You lift a clump - or unpack stored tubers - and separate it into pieces that each include body, neck, crown, and at least one eye. Done correctly, every division is a clone of the parent cultivar, carrying the same flower genetics you saved last season.
When to Divide: Fall Versus Spring
You can divide in fall right after digging or in spring before planting. UC Master Gardeners note the process is the same either season, but the visibility of eyes changes everything. In fall, eyes are often dormant and hard to see on a cold, freshly dug clump. In spring, warmth wakes tubers, eyes swell, and sprouts may turn green or pink - a roadmap for your knife. Longfield Gardens recommends spring division for beginners precisely because waking eyes show where to cut. OSU Extension adds a practical fall option: after a hard frost kills stalks, you can cut stems, leave tubers in ground briefly if frost is not imminent, and sometimes see eyes sooner - but if freeze threatens, dig the same day.
Fall division frees garden space, lets you cull rot early, and pairs with immediate storage prep. Spring division reduces blind-cut mistakes and pairs with potting up into individual containers for a head start indoors. If your winters are mild and soil does not freeze deeply, you may dig in spring instead, as UC Master Gardeners describe for Mediterranean-climate gardens - cut stems to crown level, mulch, and divide when you are ready to replant. Cold-climate gardeners typically dig before the ground freezes, store whole clumps or pre-divided pieces, then refine divisions once eyes show in late winter or early spring.
If tubers look eyeless out of storage, do not panic immediately. Place them in a warm 60–70°F (15–21°C) spot with slight humidity for one to two weeks and check again. This eye-up period converts smooth crowns into identifiable bumps. If the crown stays featureless after a fair wake-up attempt, the tuber may truly lack a viable growth point.
Step-by-Step Tuber Division
Work with clean, sharp tools. UC Master Gardeners advise sterilizing blades between every clump so disease does not spread from rot on one tuber to healthy tissue on the next. Rubbing alcohol on a knife takes seconds and prevents heartbreaking losses across a collection.
Start by brushing off excess soil and removing dried stem remnants, broken tubers, and mushy sections. White flesh is healthy; brown or black soft tissue gets cut away until you reach firm material. Some growers dust cut surfaces with antifungal powder; it is optional but helpful in humid storage climates. Identify eyes on the crown. On multi-tuber clumps, eyes cluster near the old stem collar. Plan cuts so each division keeps at least one eye, a sound neck, and enough body to fuel early growth. When eyes crowd one crown, you may split crown tissue carefully so each piece retains an eye rather than gambling on one oversized division.
Cut with decisive strokes - sawing crushes tissue. After dividing, let cut surfaces dry and callus for about 24 hours before planting or bagging for storage, as Longfield Gardens and multiple storage guides recommend. This reduces entry points for rot fungi.
Plant divisions eyes up, roughly 15 cm (6 inches) deep in rich, loose, well-draining soil, per RHS and OSU guidance. In containers, use a gallon pot or larger with fresh sterilized mix for early indoor starts. Hold off on watering until you see the first leaves above soil. Dahlia breeder Kristine Albrecht notes it can take four to six weeks for new growth on a tuber to break the surface; premature soaking of dormant tissue encourages decay. Once shoots are active, water deeply when the top few centimeters dry, and provide strong light so stems do not stretch weakly indoors.
Method 2: Taking Basal Stem Cuttings
If division gives you one plant per eye, basal stem cuttings turn one sprouted tuber into a small nursery. Horticulturist Kate Walz, cited in Martha Stewart’s dahlia propagation piece, calls stem cuttings the easiest high-output route for many home growers. The technique harvests young shoots from a tuber that has been started indoors in late winter or early spring - typically February or March in temperate zones - and roots them as stem cuttings. Each rooted cutting is still a clone of the parent, identical to a divided tuber in flower genetics.
The word basal matters. You are not randomly snipping mature garden stems in July. You take compact sprouts emerging from the tuber crown, usually 5–8 cm (2–3 inches) tall, with a thin sliver of tuber tissue at the base when possible. That sliver carries concentrated growth hormones, as Longfield Gardens explains, and improves rooting consistency. Remove lower leaves so nothing sits below the medium surface. A clean cut just below a leaf node on the sprout gives roots a standard stem-cutting anchor.
Preparing and Rooting Dahlia Cuttings
Root cuttings in a sterile, moist, well-draining medium - peat-free potting compost blended with perlite, or sterile rooting cubes. The American Dahlia Society emphasizes three environmental levers: humidity, temperature, and day length. Humidity must be high enough to prevent wilting but not so high that the medium stays waterlogged. Air and medium temperatures should stay 65–75°F (18–24°C). Day length should be 14 hours or longer during rooting.
That day-length detail surprises people who treat cuttings like passive houseplants on a short winter windowsill. Dahlias are facultative short-day plants. Under long days, cuttings push feeder roots; under short days, they tend toward tuber formation and can stall rooting. The American Dahlia Society reports most varieties form roots within 10–14 days when humidity, temperature, and long-day lighting align. Home growers without grow lights often see two to four weeks to a functional root system in a bright, warm room - still workable, but slower if days are naturally short and light is weak.
Use a humidity dome or clear cover that does not crush leaves, venting briefly daily to limit mold. Bottom heat at roughly 70–74°F (21–23°C) media temperature speeds rooting and is standard in commercial propagation, per greenhouse culture reports. Rooting hormone is optional - dahlias carry natural hormones near the tuber base - but a light dip in powder or gel can improve uniformity for beginners, as Longfield Gardens notes.
Insert cuttings so the base is stable and lower leaves stay above the medium. Keep the mix damp, not saturated. Check for roots gently after two weeks; resist pulling daily. Once rooted, pot individually, label cultivars meticulously - rooted cuttings look identical - and grow on in bright light until outdoor planting time. Cuttings often flower the same season if planted out with a full growing window ahead of them.
Method 3: Starting Dahlias From Seed
Seed starting is the propagation path for curiosity, not cloning. The RHS describes smaller bedding dahlias widely available as seed, often in mixed colors, quick to grow, and capable of flowering within a few months under good conditions. Unlike tubers and cuttings, seeds produce genetically unique plants. Kate Walz notes you will not know colors and characteristics in advance - part of the appeal for gardeners who enjoy surprise. If your goal is to duplicate a specific named cultivar, seeds are the wrong tool. If your goal is mass color for borders, pollinator patches, or breeding experiments, seeds are ideal.
Sow indoors four to six weeks before your last expected frost, using seed trays and fine seed-starting mix. The RHS recommends early to mid-spring sowing in a propagator with warmth and bright light. Seeds need consistent moisture and temperatures roughly 16°C (61°F) or above for reliable germination. Cover lightly if your mix dries quickly, but avoid burying tiny seeds too deep. Germination is often quick - days to a couple of weeks depending on variety and temperature - followed by a fragile seedling stage that demands strong light to prevent leggy collapse.
What to Expect From Seed-Grown Plants
Manage expectations explicitly. Open-pollinated seedlings may resemble species tendencies or general dahlia traits - single flowers, smaller blooms, variable height - or may produce happy accidents nothing like either parent if garden genetics mixed last year. No reputable source promises that seed from your show bench dinnerplate will yield identical dinnerplates. Some seed lines are bred for relative uniformity within a series; even then, expect modest variation compared with clonal tubers.
Grow seedlings under bright light, transplant into individual modules when true leaves develop, and feed lightly with diluted liquid fertilizer every couple of weeks once established, following standard seedling practice. Harden off before planting outdoors only after night temperatures stay above roughly 12°C (54°F) and frost danger has passed. Seed-grown dahlias can be excellent garden plants - just not predictable replicas of a favorite clone.
Choosing the Right Propagation Method
Your goal determines your tool. Use this comparison when deciding how to spend your season’s effort.
| Factor | Tuber division | Basal stem cuttings | Seed starting |
|---|---|---|---|
| Genetic match to parent | Exact clone | Exact clone | Unique seedling |
| Equipment needs | Knife, storage | Lights, heat, sterile mix | Seed trays, warmth, light |
| Best for preserving cultivars | Excellent | Excellent | Poor |
| Speed to many plants | Moderate | High from one tuber | Moderate to high |
| Skill curve for beginners | Moderate - eyes required | Moderate - environment critical | Lower - if you know seedlings |
| Winter storage tie-in | Yes | Starts from stored tuber | No |
| Flower surprise factor | None | None | High |
Choose division if you already store tubers and want dependable clones with minimal indoor infrastructure. Choose cuttings if you have one premium tuber and want many identical plants for a cutting garden or show bench. Choose seeds if you want volume color cheaply, enjoy variation, or breed new combinations. Many serious growers use all three: divide to preserve stock, cut to multiply winners, sow seeds to scout new genetics.
Tools, Materials, and Sanitation
Dahlia tubers are thin-skinned and rot-prone. Clean tools are not optional. Keep sharp knives or bypass pruners, 70% isopropyl alcohol for blade wipes, soft brushes for dry soil removal, labels that survive damp hands, and trays or crates for callusing divisions. For cuttings, add sterile propagation mix, small pots or cell trays, humidity domes, optional bottom heat mats, and grow lights on timers if natural photoperiod is under 14 hours. For seeds, use fresh seed-starting mix, fine mist sprayers, and module trays.
Avoid reusing muddy garden soil for cuttings or seedlings. It compacts, harbors pathogens, and stays cold. Peat-free commercial mixes with perlite improve drainage and warmth penetration. Gloves help when handling fungicide dust or if you have sensitive skin. None of this needs to be expensive; it needs to be clean and consistent.
Timing Dahlia Propagation to Your Climate
Dahlias are tender relative to frost. Oregon State University Extension recommends planting tubers outdoors when soil holds 60°F (15°C) or warmer consistently - often late April through May in many US zones, with regional adjustment. Indoor starts begin earlier: wake tubers in shallow trays in early spring (around February) per RHS, divide when eyes show, pot up, and grow in a frost-free bright space until hardening off. Cuttings follow the same indoor calendar from sprouted tubers. Seeds count backward from last frost: sow indoors four to six weeks ahead, then harden off after frost risk drops.
In mild climates where tubers can overwinter in ground with mulch, you may shift digging and division later, but eye visibility still improves with spring warmth. In cold climates, dig before ground freezes 4–6 inches deep, as UC Master Gardeners advise for zones where soil freezes, typically by mid-November or after first hard frost. Storage quality determines whether spring propagation starts strong or with shriveled, moldy losses.
Match propagation to plant readiness, not only the calendar. A tuber that eyes up in March is ready to divide. A cutting sprout that is 2–3 inches and firm is ready to snip. A seedling with three or four true leaves is ready to pot on. Forcing any of these steps early in cold, dim conditions produces weak plants that fail outdoors regardless of method.
Aftercare for New Dahlia Plants
New dahlias - whether from divisions, cuttings, or seedlings - need steadier conditions than mature field plants. Indoors, prioritize bright light so stems stay stocky. Dahlia light guide outdoors is the long-term goal for maximum flowers, but freshly planted divisions and young seedlings benefit from protection from harsh midday heat and drying wind during establishment. Water deeply when the top 3–5 cm of soil dries, rather than sprinkling daily. Oversaturated cold soil is the fastest route to tuber rot for divisions and to damping-off for seedlings.
Hold fertilizer until active growth is obvious. Once leaves are expanding steadily, use a balanced or bloom-appropriate feed at modest rates, increasing as plants size up. Pinch or disbud early if you want bushier plants for border use; leave leaders if you are growing for single long stems for cutting - propagation method does not change that training choice.
For cuttings and small potted divisions, harden off before permanent outdoor placement: gradually increase outdoor hours over seven to ten days, bringing back under cover if frost threatens. Label plants. Clonal divisions and cuttings look alike early; labels prevent planting the wrong cultivar in the wrong bed.
Common Dahlia Propagation Mistakes
Most failures are anatomical or environmental, not mystical bad luck.
Dividing without eyes produces blind pieces that never sprout. If you already planted one, wait a reasonable eye-up window, then replace rather than watering hope into rot.
Cutting off crown tissue while keeping only fat tuber bodies is the same mistake in another shape. Crown matters more than tuber girth.
overwatering on Dahlia dormant tubers before shoots appear invites decay. Wait for visible growth, then water with purpose.
Rooting cuttings in short-day, dim conditions stalls roots and encourages premature tubering or bud formation, per American Dahlia Society guidance. Add light hours before blaming the variety.
Soggy cutting medium causes damping-off - stems blacken at the base. Reduce moisture, improve airflow, lower temperature slightly toward 65–70°F, and use sterile mix on the retry.
Expecting seeds to clone the parent leads to disappointment. Seeds are for variation by design.
Skipping tool sterilization spreads tuber rot through a whole crate. One contaminated knife can waste a winter’s storage work.
Planting outdoors before soil warms chills tubers and sets back growth. Soil temperature matters as much as air temperature on the calendar.
When the same problem repeats - divisions mold in storage, cuttings wilt under domes, seedlings stretch and fall - fix one variable at a time: eye visibility, moisture level, photoperiod, or planting depth. Stacking random changes makes diagnosis harder.
Storing Tubers Between Digging and Dividing
Propagation does not always happen the day you dig. Whole clumps often store until spring. Brush off soil, trim stems to a few inches above the crown, cure briefly in a cool dry area, then pack in lightly moist media - peat, vermiculite, wood shavings, or commercial storage mix - in crates or bags with ventilation holes. Ideal storage is 40–50°F (4–10°C), dark, and checked monthly for shriveling or mold. Too dry shrinks tubers; too wet rots them.
If you divided in fall, callus cuts before bagging. If you store whole clumps, divide in spring when eyes swell - often four to six weeks before outdoor planting - then pot up for indoor growth. OSU Extension recommends checking stored tubers for at least one eye before planting; if sprouts break accidentally in storage, do not panic. Broken sprouts usually regrow from crown tissue if the tuber remains firm and disease-free.
Frost, Hardiness, and When to Plant Out
Dahlias are not hardy where ground freezes deeply. Treat outdoor planting as a warm-soil decision, not an impulse on the first sunny March afternoon. Divisions, rooted cuttings, and hardened seedlings all need protection from late frosts. In marginal zones, keep spare tubers or potted backups indoors until weather stabilizes. A late freeze after planting can kill new shoots; tubers may resprout if rot has not set in, but you lose weeks of growth.
For indoor-started plants, transition gradually. A cutting rooted under 14-hour lights will stress if moved straight into exposed windy beds without acclimation. Hardening is propagation’s last step and the one rushed most often.
Scaling Your Dahlia Collection Responsibly
Multiplying dahlias is addictive once division and cuttings succeed. Scale with storage reality in mind: every clone becomes a tuber clump that needs winter space. Cuttings multiply fast before bloom season but still produce tubers by autumn that must be stored or lifted. Seeds multiply cheaply but require culling - keep only seedlings that earn their bed space.
Maintain cultivar records if you show flowers or sell tubers. Clonal integrity is a trust issue in dahlia circles. Label at division, label at sticking cuttings, label at potting on. A mixed crate of unnamed tubers is a propagation success that becomes a planning failure by July.
Respect variety temperament. Some cultivars eye slowly, root slowly, or divide reluctantly because crown tissue is tight. Others cooperate aggressively. Your first successful ‘Cornel’ division does not mean every breeder’s introduction behaves identically. Good propagators repeat what works, document what fails, and adjust humidity, heat, or timing rather than assuming the tuber is defective.
Conclusion
Propagating dahlias comes down to three honest paths. Divide tubers with body, neck, crown, and at least one eye - spring division with visible eyes is the safest beginner route. Take basal stem cuttings from sprouted tubers in sterile medium at 65–75°F with long days and steady humidity to clone a favorite fast. Start seeds when you want new genetics and accept that flower color and form are a deliberate mystery, not a copy of last year’s winner.
None of these methods works from crownless tuber chunks, waterlogged dormant soil, or dim short-day cutting benches. All of them work when you respect dahlia anatomy, sanitation, frost timing, and the difference between cloning and seed variation. Learn to spot the eye, match the method to your goal, and propagation stops being a winter gamble and becomes a reliable way to fill beds, pots, and cutting rows with plants you chose on purpose.
When to use this page vs other Dahlia guides
- Dahlia overview - Start here for whole-plant context before deep-diving this topic.
- Dahlia problems hub - Jump to symptom-specific fix guides when this care topic does not resolve the issue.