Best Soil for Areca Palm: Mix, Drainage & Pots
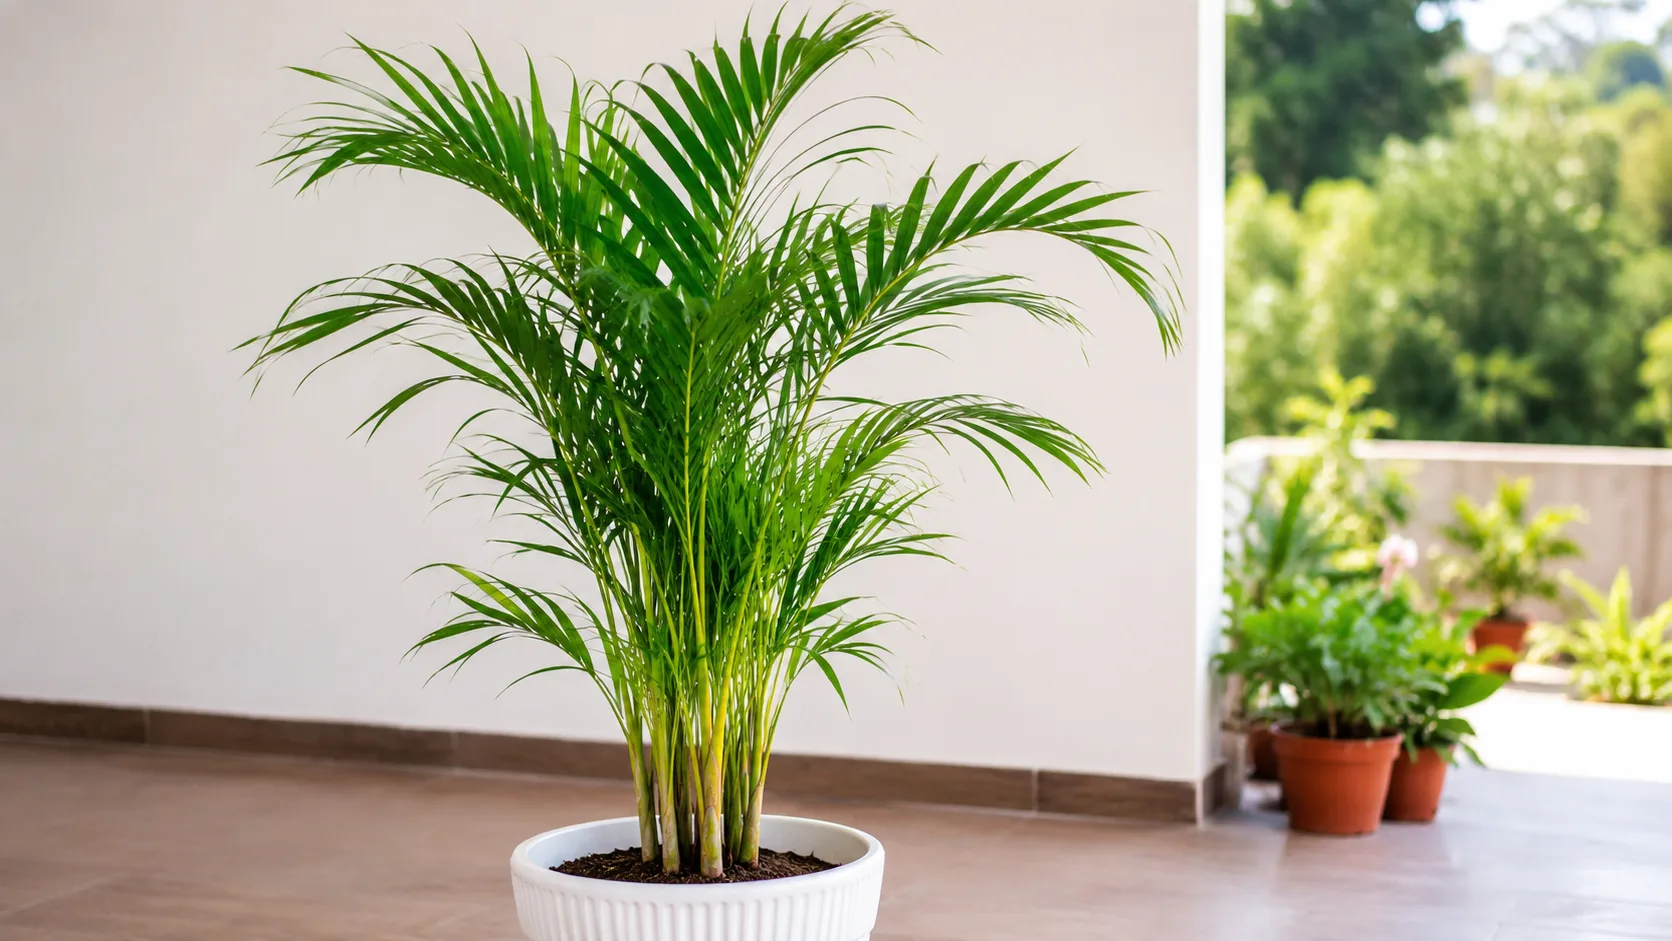
Best Soil for Areca Palm: Mix, Drainage & Pots
Best Soil for Areca Palm: Mix, Drainage & Pots
Areca palm soil should feel light in your hands, drain within minutes after a thorough watering, and still hold enough moisture that the top inch or two dries on a predictable schedule-not overnight, and not after a week of sitting wet. That balance is the whole job. Dypsis lutescens, the clumping palm sold as Areca, Bamboo, or Butterfly palm, comes from Madagascar’s humid forests, where roots sit in rich, aerated organic matter that never stays waterlogged. Indoors, you recreate a slice of that environment inside a container with no groundwater table and no natural drainage path except the hole in the bottom of the pot. When growers ask what went wrong with an areca palm that slowly yellows or develops crisp brown leaflet tips, the answer often starts in the root zone long before the leaves tell the full story.
NC State Extension’s plant profile for Dypsis lutescens recommends growing this palm in well-drained potting soil and keeping it moist but not soggy during the growing season, with Areca Palm repotting guide every two or three years in a bright, warm room. (NC State Extension Gardener Plant Toolbox) That single sentence contains the practical target: drainage first, moisture second, refresh before the mix collapses. The best soil for areca palm is not the richest bag on the shelf. It is the mix that keeps fibrous palm roots breathing while you maintain the Areca Palm watering guide Areca Palm overview prefers-slightly dry between waterings, never bone dry for long stretches, and never submerged in stale wet peat.
What Areca Palm Soil Must Do for Healthy Roots
Areca palms produce dense clusters of slender stems from shared root mass. Those roots are fibrous rather than thick and woody, which means they explore the pot quickly and suffer fast when oxygen drops. Good areca palm potting mix has to perform four jobs at once: anchor multiple stems without compacting, hold water long enough to prevent stress swings, release excess water so the lower root zone does not saturate, and maintain open pore space so air reaches roots after every soak. A mix that only drains well but dries out in a day will produce fronds with brown tips and chronic wilt. A mix that holds water beautifully but compacts after a few months will produce a heavy pot, sour smell, and eventual root decline even if you water carefully.
Think of soil as a timed-release moisture system paired with an air-exchange system. Your room’s light, humidity, pot material, and how root-bound the plant has become all change how fast that system runs. The recipe matters, but so does the container and your watering check-not a calendar date on the fridge.
Drainage Speed and Root Oxygen
Drainage speed is the first test most areca palms fail indoors. After you water thoroughly, excess water should exit the drainage hole within a few minutes, and the mix should not remain visibly pooled on the surface. If water sits on top, runs down the gap between soil and pot wall, or the saucer stays full for hours, roots are spending too long in saturated conditions. Palm roots need oxygen as much as they need moisture; when pore spaces fill with water and stay full, aerobic root tissue begins to decline. root rot on Areca Palm in areca palms rarely announces itself with a dramatic collapse on day one. It builds quietly while lower fronds yellow, new spears slow down, and the soil smells earthy-fresh turning slightly sour.
The useful home check is simple. Water until it runs freely from the bottom, then wait ten minutes and lift the pot if you can. It should feel lighter than when water first drained, not like a saturated sponge you could wring. Stick a finger into the top two inches the next day; they should be moving toward dry while the middle of the root ball remains lightly moist. If the top is still wet and cold after 48 hours in normal room conditions, your areca palm drainage setup-mix, pot size, or hole clearance-needs correction before you adjust fertilizer or light.
Consistent Moisture Without Soggy Roots
Areca palms are often described as liking “consistent moisture,” which sounds like keeping soil wet all the time. That interpretation kills plants. What the species actually wants is even moisture availability without saturation: the root ball should rarely go fully dust-dry, yet the upper layer should dry slightly between waterings so you do not re-soak an already wet core. In its native range, Dypsis lutescens grows where rainfall is frequent but soils drain through volcanic and organic layers quickly. Indoors, peat-heavy mixes in oversized plastic pots recreate the rain but not the drainage, which is why “moist but not soggy” from extension guidance is the line to respect.
Watch the plant, not the schedule. In Areca Palm light guide and warm air, a healthy areca in the right mix may need water every five to seven days during active growth. In a cool north room or dim corner, the same mix might take ten to fourteen days to dry enough for another full soak. Season matters too: growth slows in lower light winters, and the mix should dry more slowly-your watering should slow with it. If you must choose between a mix that errs slightly dry versus one that errs wet, choose slightly dry and compensate with attentive watering. Wet-root error is harder to reverse in palms.
Core Ingredients in a Good Areca Palm Mix
The best areca palm soil ingredients each solve a specific problem. Peat or coir holds moisture. Perlite or pumice creates air channels. Bark or coarse organic chunks resist compaction and mimic forest-floor structure. Optional charcoal helps keep media fresh in large pots. You are building texture, not chasing a brand name. When every ingredient has a job, adjusting the recipe for your home becomes logical instead of guesswork.
Peat Moss or Coconut Coir
Peat moss has been the default base in tropical potting mixes for decades because it holds water evenly, supports root colonization, and stays lightweight. For areca palms, peat-based indoor potting soil is a reasonable starting point if you amend it heavily with drainage materials. Raw peat alone is a mistake: it compacts, can become hydrophobic when allowed to dry too far, and holds too much water in a deep pot without perlite or bark to open the structure.
Coconut coir is the peat alternative most indoor growers reach for today. Coir rewets more easily than dry peat, tends toward a more neutral starting pH, and holds moisture with a slightly different texture-often a bit more open when blended with perlite. Either base works. Choose coir if you prefer peat-free mixes or struggle to rehydrate dried-out peat in large palm pots. Choose peat if you are amending a proven commercial tropical blend you already trust. In both cases, the base should be roughly one-third to one-half of the finished volume, with the rest dedicated to aeration and structure-not the other way around.
Perlite, Pumice, and Bark for Structure
Perlite is expanded volcanic glass. It does not decompose quickly, it creates permanent air pockets, and it improves drainage without collapsing. For areca palms, perlite is the most reliable amendment in the average home because it is easy to find and predictable. Pumice plays a similar role with slightly more weight and less tendency to float to the surface over time; either is fine.
Pine bark fines or orchid bark chips are underrated in palm mixes. Bark particles keep the matrix chunky, resist compaction as peat ages, and give fibrous roots something to grip. NC State Extension lists high organic matter, loam, and sand with good drainage for Dypsis lutescens - indoors, bark approximates that open organic layer. A handful of horticultural charcoal in large containers can help limit sour odors and may absorb some impurities, though it is optional, not required.
Avoid fine play sand as a primary drainage amendment in small indoor pots. It can settle and reduce pore space if overused. If you add sand, choose coarse horticultural sand in small proportion alongside perlite, not as a substitute for it. Worm castings or a small amount of compost can enrich the mix, but keep the total below roughly ten percent of volume so you do not create a dense, moisture-retentive core in an already large root ball.
Best DIY Areca Palm Soil Mix Recipes
No single areca palm soil mix recipe is perfect in every home. These formulas are starting points. Adjust based on whether your pot dries too fast (add a little more peat or coir) or stays wet too long (add perlite and bark, shrink the pot, or improve light/airflow).
Standard Indoor Mix for Most Homes
For a typical clump in a 10–12 inch pot with drainage holes, in bright indirect light:
- 2 parts high-quality indoor potting soil or peat/coir-based mix
- 1 part perlite or pumice
- 1 part pine bark fines or orchid bark
Moisten dry peat or coir slightly before blending so components integrate evenly. Fill the pot so the root ball sits at the same depth it occupied before-never bury stems deeper to “stabilize” the plant. Water once after repotting, let excess drain fully, and skip fertilizer for three to four weeks while roots settle. This standard indoor mix drains well, holds moderate moisture for five to ten day drying cycles in many homes, and stays open enough for areca palms to remain healthy through a full growing season.
If the finished blend looks dark and uniform with only a few white specks, you probably need more perlite. A good palm mix should look visibly chunky when you squeeze a moist handful lightly-it should hold shape briefly, then crumble apart rather than form a muddy clump.
High-Drainage Mix for Heavy Waterers or Cool Rooms
Some growers chronically overwater. Some palms sit in cool, dim rooms where evaporation is slow. Some nursery palms arrive in dense peat that never dries on the top before the core rots. For those cases, push aeration harder:
- 2 parts potting soil or coir
- 2 parts perlite or pumice
- 1 part pine bark
- Optional: small handful of horticultural charcoal per gallon of mix
This high-drainage mix dries faster and forgives watering mistakes less on the dry side-but it protects roots far better than a moisture-control blend in a cool room. Pair it with disciplined checks: water only when the top 1–2 inches are dry, and never let the pot sit in a full saucer. If fronds wilt between waterings every time, you pushed drainage too far; add a little more base peat or coir, not heavier garden soil.
Rescue Mix After Root Stress
When an areca palm has been in wet, compacted soil and shows yellowing lower fronds, soft stems at the base, or a sour smell, repotting into a lighter rescue mix is often necessary. Trim mushy roots with clean scissors, remove completely rotted stems if any, and pot into:
- 3 parts perlite
- 1 part peat or coir
- 1 part fresh potting soil or bark
This mix prioritizes oxygen while the plant rebuilds root function. Keep the palm in bright indirect light, maintain humidity around 50–60% if possible, and water sparingly-only when the upper mix is dry and the remaining root mass is firm. Do not fertilize until you see stable new spear growth. Rescue mixes are temporary scaffolding, not a forever formula; after a season of recovery, shift the plant into the standard recipe above if drying speed allows.
Store-Bought Potting Mix Options
Some growers use a palm-specific commercial mix straight from the bag; others amend standard indoor mix with extra perlite. Missouri Botanical Garden notes that areca palm prefers moist but well-drained soil indoors.
Palm Blends vs All-Purpose Potting Soil
Palm and cycad blends from reputable suppliers are formulated for species that hate wet feet but still need steady moisture-conceptually aligned with areca palm needs. Read the label: if the mix is mostly fine peat with minimal perlite visible, plan to add one part perlite and one part bark per three parts bagged mix before using it in a large areca container.
All-purpose indoor potting soil can work as the “2 parts” base in the standard recipe. On its own, without amendment, it is often too moisture-retentive for areca palms in plastic pots, especially when the plant is slightly root-bound and the pot is more than one inch wider than the root ball. Do not use moisture-control potting mixes with water-absorbing polymers for this species unless you are an experienced grower who monitors dryness daily; they extend wet time in the root zone exactly where areca palms are least forgiving.
Cactus or succulent mix alone is usually too fast-draining for Dypsis lutescens. The palm will dry sharply between waterings, and frond tips may brown even when you water often. If you already have cactus mix on hand, blend it rather than using it straight: try 2 parts potting soil, 1 part cactus mix, 1 part perlite. That adds grit without turning the pot into a desert tray. Never use outdoor garden soil or topsoil in indoor areca containers; it compacts, introduces pathogens and weed seeds, and behaves unpredictably as salt and mineral levels shift with tap water.
pH, Minerals, and Tap Water Sensitivity
Soil chemistry matters for areca palms because they stay in the same container for years, and minerals from water and fertilizer accumulate. NC State lists acid to neutral pH and good drainage among outdoor cultural preferences for Dypsis lutescens; indoor growers typically target pH 6.0 to 7.0 in potting mixes, which supports nutrient availability without pushing toward alkaline conditions that can lock out micronutrients over time. (NC State Extension Gardener Plant Toolbox)
Ideal pH Range and Salt Flushing
Most commercial peat-based potting soils arrive near the acceptable range. Problems appear when salt buildup forms a white crust on the soil surface, leaf tips burn despite adequate watering, or new growth comes in pale and weak. Areca palms are among the houseplants sensitive to fluoride and chlorine in municipal tap water; chronic exposure shows as brown, crisp leaflet margins even when soil moisture seems correct. The soil is not always “wrong,” but the combination of dense old mix plus accumulating salts magnifies the damage.
Flush the root zone every few months during active growth: water slowly and deeply until a volume equal to roughly one-quarter of the pot size runs from the bottom, or repot on schedule before salts dominate. If your tap water is hard or heavily treated, rainwater, distilled water, or filtered water reduces long-term mineral load in the mix. When repotting, replace old soil rather than simply top-dressing; top-dressing hides compaction and salt layers while roots still sit in the degraded zone below.
You do not need a pH meter for every repot if you use fresh, quality potting components and refresh on time. Reach for testing when problems persist despite good light and corrected watering-especially if multiple stems show tip burn simultaneously. Dolomitic lime is rarely needed in areca palm mixes and can push pH upward; avoid adding it unless you are deliberately adjusting raw peat from scratch with a testing plan.
Pots, Drainage Holes, and Container Tips
Soil and container work as one system. The best areca palm soil mix in a pot without drainage, or in a pot five sizes too large, will still fail. Container choice changes drying speed as much as perlite ratio does.
Choosing Pot Size and Material
Repot areca palms into a container only one to two inches wider than the current root ball unless you are dividing a large clump. Oversized pots hold excess wet mix around roots that are not yet exploring that space-a classic setup for slow root rot in palms. Multiple stems in one nursery pot can stay together if healthy; divide only when you want separate plants or when crowding makes watering uneven.
Drainage holes are non-negotiable for long-term indoor care. One hole is minimum; three or four across the bottom are better in large pots. If you use a decorative cachepot, lift the grow pot out after watering and never let the outer vessel trap standing water. Terracotta breathes and dries faster, which helps heavy-handed waterers. Plastic retains moisture longer-fine if your mix is airy and your room is warm and bright, but risky in cool, low-light conditions without extra perlite. Glazed ceramic behaves similarly to plastic regarding moisture retention; treat it as a slower-drying option and adjust mix accordingly.
Match pot depth to root habit. Areca palms are not deep tap-rooters like some trees, but they are also not shallow succulents. A pot slightly deeper than wide often suits clumping root mass better than a wide, shallow bowl that dries unevenly.
Why a Gravel Layer Does Not Fix Drainage
The myth persists: a layer of rocks, gravel, or pot shards at the bottom “improves drainage.” Physically, it does the opposite in a container. Water does not move freely from fine potting mix into coarse gravel until the upper layer is saturated; the gravel creates a perched water table where the fine and coarse media meet. Roots sit in wet peat longer, not shorter. If drainage is poor, fix the mix composition, increase hole size or count, or reduce pot volume-not gravel.
What does help at the bottom is a small piece of mesh or a coffee filter over the hole to prevent mix from washing out while still allowing free flow. Bark chips mixed through the lower third of the root zone add structure without creating a sudden texture boundary the way a gravel slab does. Focus on homogeneous, chunky mix from top to bottom of the pot.
When to Repot and Refresh the Mix
NC State Extension suggests repotting Dypsis lutescens every two or three years as part of normal houseplant care. (NC State Extension Gardener Plant Toolbox) You do not need to wait for roots to circle aggressively; peat-based mixes break down, lose pore space, and accumulate salts even when the plant has not outgrown the pot. Refresh soil when you see any combination of these signs: roots visible at drainage holes, water running straight through without absorbing, white mineral crust on the surface, sour smell, mix that stays wet more than a week after a normal watering, or new spear growth that stalls for a full season despite adequate light.
Spring and early summer are the safest windows-active growth helps roots recover. Avoid repotting a severely stressed palm in winter unless the soil is clearly failing (sour, wet, rotting roots). When you repot, tease apart only the outer root mass lightly; palms dislike aggressive root shaving. Water once, drain fully, and hold fertilizer until new growth confirms the plant has settled. If you divide clumps, give each section a pot sized to its root mass, not its leaf spread; areca fronds can look large while the divided root ball is modest.
Even when the plant fits its pot, annual top removal of degraded surface peat and replacement with fresh mix can improve oxygen at the crown zone-provided you do not bury stems deeper in the process. The crown should remain at the same soil line as before. Deep planting invites stem rot in clumping palms.
Conclusion
The best soil for areca palm is a well-aerated, well-draining potting mix that still holds steady moisture-typically built from peat or coir, perlite or pumice, and pine bark in a 2:1:1 ratio, then adjusted for your room, pot, and watering habits. Dypsis lutescens rewards growers who treat soil as an active system: fast drainage after each soak, slight drying at the top before the next watering, fresh mix every few years, and containers with real holes rather than decorative traps. Extension guidance boils down to well-drained potting soil kept moist but not soggy; everything else in this guide is how you make that sentence true in an average living room. Build the mix, match the pot, watch how fast the top inch dries, and refresh before peat collapses into the dense, sour medium that turns a graceful palm into a slow decline of yellow fronds and brown tips. Get the root zone right, and light, humidity, and watering become easier to manage instead of a constant rescue project.
When to use this page vs other Areca Palm guides
- Areca Palm overview - Start here for whole-plant context before deep-diving this topic.
- Areca Palm problems hub - Jump to symptom-specific fix guides when this care topic does not resolve the issue.
- Root Rot on Areca Palm - Escalate here when soil adjustments are not enough.
- Mold on Soil on Areca Palm - Escalate here when soil adjustments are not enough.