Anthurium Repotting Guide: When, How, and Best Soil Mix
Anthurium Repotting Guide: When, How, and Best Soil Mix for Blooms
Anthurium Repotting Guide: When, How, and Best Soil Mix for Blooms
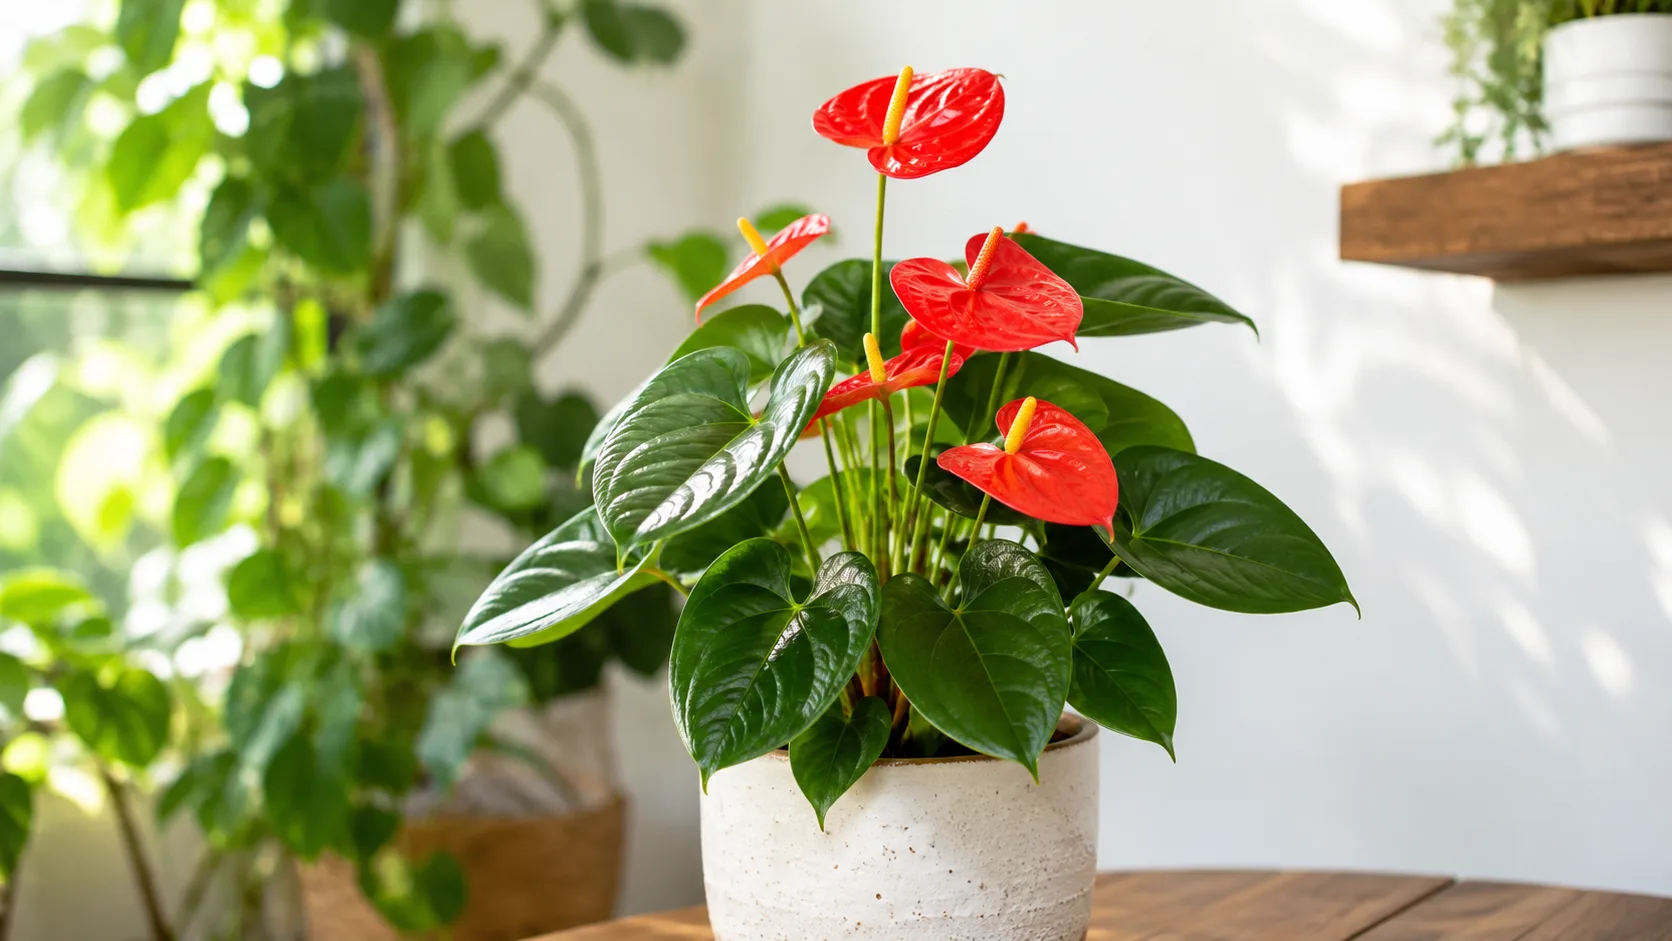
Anthuriums are some of the most rewarding houseplants you can grow, with glossy leaves and those almost waxy, long-lasting spathes in red, pink, white, or coral. They are also one of the easiest plants to accidentally kill with kindness, and most of that damage happens at repotting. The fix is rarely more water, more fertilizer, or a bigger pot. It is a smaller pot, a chunkier mix, and a calmer approach to the weeks that follow.
This guide walks through what actually matters when you repot an anthurium: when to do it, what to put it in, how to handle the roots, and how to keep it stress-free for the next six to eight weeks. It is built on guidance from the Missouri Botanical Garden, the Royal Horticultural Society, the University of Florida IFAS Extension, and the day-to-day habits of growers who keep these plants blooming for years.
Why Anthuriums Need a Different Repotting Approach
Most houseplant advice is written for plants that evolved in soil. Anthuriums did not. Treating them like a pothos or a peace lily is the most common reason a healthy-looking plant stalls, yellows, and slowly fades after a repot.
Anthuriums Are Epiphytes, Not Garden Plants
In the wild, anthuriums grow on the rainforest floor and climb up tree trunks, sending thick aerial roots into bark crevices, moss, and leaf litter. Their roots are built to grip and breathe, not to push through dense, water-retentive potting soil. The Missouri Botanical Garden describes their preferred medium as a “well-drained, peaty potting mixture,” while the Royal Horticultural Society recommends a sharply draining, acidic blend of two parts ericaceous peat-free compost, one part perlite, and one part medium orchid bark.
What this means in practice is simple. The closer your mix gets to a tree-bark environment, the closer the root system gets to what it is actually built for. The University of Florida IFAS Extension, which has run commercial anthurium production for decades, recommends a 1:1:1 ratio of peat, perlite, and bark for both propagation and mature plants. That is the floor of any good mix, not the ceiling.
Why Anthuriums Prefer a Slightly Snug Pot
The other half of the epiphyte story is the pot itself. Roots that grip a small surface area send out more feeder roots, more frequent blooms, and stay drier between waterings. A pot that is even slightly too large holds moisture the root system cannot use, and that is where root rot on Anthurium starts.
This is not folklore. The Royal Horticultural Society explicitly warns that using a “significantly larger pot” causes compost to “stay wet for too long, risking root rot.” Multiple grower sources put a number on it: anthuriums do best in a container only 1 to 2 inches wider in diameter than the previous one. Anything beyond that is not generosity; it is a setup for soggy soil and a stalled plant.
When to Repot an Anthurium
Repotting too often is just as harmful as repotting too rarely. The plant needs time to grow into its container and to cycle through the nutrients in the mix. Repot on the plant’s schedule, not yours.
The 2- to 3-Year Baseline and When to Break It
The most widely cited guideline, repeated by the Royal Horticultural Society, Proven Winners, and most specialist growers, is to repot anthuriums every two to three years. Missouri Botanical Garden, slightly more aggressive, suggests frequent repotting “every 2 years” specifically to flush out unabsorbed minerals and salts that accumulate from tap water and fertilizer.
Use the 2- to 3-year window as a starting point, not a rule. Some vigorous anthuriums outgrow their pots in 18 months. Slower growers in low light can stay put for closer to four. The point is that the calendar is a backstop, not a trigger.
Signs Your Anthurium Needs a New Pot Now
Skip the calendar entirely if the plant is telling you something. Common signs include roots circling the bottom of the pot or pushing out of the drainage holes, water running straight through the mix without wetting it, the plant needing water far more often than it used to, and a hard, compacted root ball that holds its shape when you lift the plant out. Growth that stalls in spring or early summer, when light and warmth should be triggering new leaves, is another reliable indicator that the roots have run out of room or the mix has broken down.
A quick clarification: roots peeking out of a drainage hole is not, on its own, an emergency. Healthy roots often grow downward in search of moisture. The trigger is roots that circle heavily, fill the bottom third of the pot, and have nowhere else to go. Lift the plant gently and look. If the root mass is dense and tightly wound, it is time, regardless of when you last repotted.
The Best Season to Repot an Anthurium
Timing matters because the plant’s ability to recover is not the same all year. Repotting into active growth gives roots a chance to repair and expand before the next stress event. Repotting into dormancy often leads to a long, slow decline.
Spring and Early Summer as the Default
Spring and early summer are the consensus window, supported by every major source from the Royal Horticultural Society to specialist growers like The Girl with a Shovel and Anthurium Expert. The plant is pushing new roots and new leaves, daytime temperatures are warm, and humidity is naturally higher in most homes. All of this combines into a faster, cleaner recovery. Most plants settled into fresh mix in April or May will push their first new leaf within four to six weeks.
When an Emergency Repot Beats the Calendar
There is one big exception to the spring rule: emergency repotting. If the plant is sitting in soggy, sour-smelling soil with blackened, mushy roots, if a serious pest infestation has taken hold, or if the pot has cracked and the root ball is exposed, repot immediately, regardless of season. The cost of waiting is usually higher than the cost of repotting out of season. Just plan to keep the plant warmer and more humid than usual for the next month or two to compensate for the slower winter growth.
The other timing note worth keeping in mind: avoid repotting while the plant is in full bloom if you can help it. Blooming draws energy away from root repair. If your anthurium is currently flowering and you are not in an emergency, wait a few weeks for the spathes to fade before you disturb the root system.
Choosing the Right Pot Size
Pot size is the single most important decision in the whole process, and it is also the one most beginners get wrong. The instinct is to upgrade as much as possible to “give the plant room.” For anthuriums, that instinct is exactly backwards.
The 1- to 2-Inch Rule, Explained
Move up only 1 to 2 inches in diameter from the current pot. A 6-inch anthurium goes into a 7- or 8-inch pot, not a 10-inch. The plant’s small, slow-growing root system cannot pull moisture from a large volume of fresh mix, and that unclaimed moisture becomes the perfect home for root-rot fungi.
This is one of the few rules in houseplant care that has near-universal agreement. The Royal Horticultural Society, Proven Winners, Anthurium Expert, Cafe Planta, and Lifetips all converge on the same 1- to 2-inch increment. The reasoning is consistent: every step beyond that increases the volume of wet, unused mix around the roots, and the risk of rot scales with that volume. Lifetips, citing the Royal Horticultural Society, notes that exceeding the increment can raise the risk of saturated media zones dramatically. The exact multiplier is hard to verify independently, but the direction is unambiguous.
Depth should also be matched to width. Round pots with similar height and diameter encourage even drying and horizontal root spread, which is closer to how anthuriums grow in nature. Tall, narrow pots dry unevenly and concentrate moisture at the bottom.
Quick Pot Size Reference
| Current pot diameter | Recommended new pot | Notes |
|---|---|---|
| 4 inches or smaller | 1 inch larger (5 inches max) | Young plants are sensitive to overwatering on Anthurium in larger pots |
| 6 to 8 inches | 1 to 2 inches larger | Standard increment for most established anthuriums |
| 10 inches or larger | 2 inches larger | Mature plants tolerate a slightly bigger jump, but stay within the rule |
If your plant is in a 4-inch pot and you are tempted to jump to a 6-inch, you are doubling the soil volume around roots that may not fill half the current container. Stick to 5 inches and reassess in a year.
Terracotta vs Plastic: Picking the Material
Pot material matters less than drainage, but the right match for your watering style can prevent most of the common post-repotting issues.
Terracotta is unglazed, baked clay. The walls are porous, so moisture evaporates through them, and air can reach the root zone from the sides as well as the top. For anthuriums, that means a more forgiving buffer against overwatering, which is the most common cause of decline. Terracotta is heavier, which is helpful for top-heavy plants, and it pulls a small amount of soluble salts out of the mix as water evaporates. The trade-off is that you will water a bit more often, especially in dry indoor air. The Healthy Houseplant and Cafe Planta both recommend terracotta for owners who tend to overwater or who live in humid climates where mix stays wet too long.
Plastic is non-porous and holds moisture longer. It is lighter, cheaper, and easier to drill extra drainage holes into. It suits forgetful waterers, drier homes, and growers who like to see clear nursery pots so they can check root health. The trade-off is that you have to be more careful about watering volume and frequency, because the mix stays wet longer and there is no evaporative safety net.
Glazed ceramic sits in between. It is non-porous like plastic, often heavier and more decorative. It is a fine choice if it has drainage holes, which many decorative pots do not. If you fall in love with a glazed pot that lacks holes, use it as a cachepot over a plain plastic nursery pot, and empty any standing water after watering.
Net pots and orchid baskets are great for anthuriums in semi-hydroponic setups, where the roots sit in LECA or pon with a reservoir below. For a soil-based repot, stick with a regular nursery pot. A net pot in a standard mix dries out too fast and lets the mix spill.
The honest answer is that there is no single “best” pot. Match the pot to your habits: terracotta if you are heavy-handed with the watering can, plastic or glazed ceramic if you are not. Either way, drainage holes are not optional.
The Best Soil Mix for Anthurium
If pot size is the single most important decision, soil mix is a close second. The wrong mix undoes everything else: it suffocates the roots, holds too much water, and slowly starves the plant of oxygen. The right mix drains fast, holds a little moisture, and lets the roots breathe.
Why Regular Potting Soil Is the Wrong Choice
Standard indoor potting soil is designed to hold moisture. That is what makes it forgiving for beginners, and that is exactly what makes it a problem for anthuriums. The mix compacts around the thick, brittle roots, the air pockets collapse, and the roots slowly suffocate. The first symptom is usually a sudden stop in new growth. The next is yellowing lower leaves. The last, if nothing changes, is blackened, mushy roots and a plant that does not recover.
This is the most common repotting mistake with anthuriums, and it is worth saying clearly: do not transplant an anthurium into a standard bag of all-purpose potting soil and expect it to thrive. The plant evolved for bark, not peat, and the closer the mix gets to bark, the better the plant will perform.
A Reliable 5-Ingredient Aroid Mix
For a long-term mix that mimics commercial production standards, blend the following. This recipe is the most common DIY version of the 1:1:1 base used by the University of Florida IFAS Extension, with two optional upgrades for stability and nutrition.
- Orchid bark (fir or pine, medium grade): 40 to 50 percent. The chunky structure is the foundation. Use pieces roughly 1 to 2 cm across.
- Perlite (coarse grade): 20 to 30 percent. Creates permanent air pockets and prevents compaction.
- Coco coir or peat moss: 15 to 20 percent. A light moisture buffer so the mix does not dry out instantly.
- Horticultural charcoal: 5 to 10 percent. Balances pH toward the slightly acidic 5.5 to 6.5 range anthuriums prefer and helps keep the mix fresh.
- Worm castings (optional): 5 percent. A gentle, slow-release nutrient source for the first few months.
The target texture is loose, light, and quick-draining. A good test: when you water, the water should run through the mix in under 15 seconds. If it pools on top or trickles out slowly, the mix is too dense.
A 3-Ingredient Shortcut When You’re Short on Time
If you do not want to source five ingredients, a 1:1 blend of pre-mixed orchid bark and perlite gets you 80 percent of the way there. It will not have the moisture buffer of coco coir or the slow nutrition of worm castings, but it will drain correctly and give the roots the aeration they need. Water a little more carefully and plan to fertilize monthly with a diluted balanced liquid feed during the growing season.
For a budget version, equal parts standard potting soil, perlite, and orchid bark works for a year or two, though it is denser than the ideal mix and needs more careful watering.
Step-by-Step: How to Repot an Anthurium
Repotting an anthurium is not a long process, but the order of operations matters. Going slow at the start, and respecting the roots, is the difference between a plant that perks up in a week and one that sulks for two months.
What to Prepare Before You Start
Gather everything before you touch the plant. You will need a new pot that is 1 to 2 inches larger in diameter than the current one, with drainage holes; your soil mix pre-blended in a bucket or tub; clean, sterilized pruners or scissors; gloves (anthuriums contain calcium oxalate crystals that can irritate skin); a chopstick or pencil for settling the mix; a watering can with a narrow spout; and a tray to catch the runoff.
If the new pot has been used before, wash it with a 1:9 bleach-to-water solution and rinse thoroughly. Old mineral deposits and any lingering pathogens are not worth the risk.
Water the plant a few hours before the repot, not the day before, and not the morning of. Moist roots flex and bend without snapping. Dry roots are brittle and break at the slightest tug. Aim for damp, not soggy.
Removing the Plant and Inspecting the Roots
Turn the pot on its side, support the base of the plant with one hand, and gently squeeze or tap the pot to release the root ball. If the roots are tightly bound, run a clean knife around the inside edge of the pot to loosen them. Do not yank the plant out by its stems or leaves.
Once the plant is out, shake off the loose old mix and inspect the roots. Healthy anthurium roots are firm, pale tan to whitish, and slightly fuzzy. Dead or rotting roots are dark brown or black, soft to the touch, and may smell sour. Use the sterilized pruners to cut away anything mushy, dark, or papery. Cut back to firm, white tissue. If you removed a significant amount of root, dust the cuts with a little cinnamon or activated charcoal to discourage fungal growth.
This is also a good moment to check for mealybugs, scale, and fungus gnats, all of which like to hide in the root zone and the lower stem. A quick inspection now saves a much bigger problem in two months.
Settling the Plant into Its New Pot
Add a 1- to 1.5-inch base layer of fresh mix to the bottom of the new pot. Hold the plant in position so the crown, the point where the stems meet the roots, sits about a quarter inch below the pot rim. This gives you a small watering basin without burying the crown, which is a common cause of stem rot.
Backfill around the root ball with the rest of the mix, gently tapping the pot on the table to settle the soil into the gaps. Use the chopstick to nudge mix into the corners and along the sides, but do not compact it. You want the mix to stay airy.
Water slowly and thoroughly until liquid runs out of the drainage holes. This settles the mix around the roots and removes any large air pockets. Let the pot drain completely. Do not let the plant sit in standing water.
Dividing Anthuriums at Repotting
Repotting is also the easiest time to make more anthuriums. Mature plants produce basal offsets, small pups that emerge from the base of the main stem with their own leaves and, ideally, their own root system. Separating them at repotting is faster and more reliable than stem cuttings for most common houseplant anthuriums, and the divisions establish in weeks rather than months.
To divide, work the offsets apart from the main plant after you have removed the root ball. Most separations can be done by hand, gently teasing the roots apart with your fingers. If the roots are tightly fused, use a sterilized blade to cut through the smallest possible section to separate them. The Royal Horticultural Society and HappySprout both describe division as the easiest propagation method, with success rates far above stem cuttings for the typical anthurium grower.
Each division needs at least two to three leaves and a healthy cluster of roots. Anything smaller is likely to struggle, even with perfect care. Pot each division into its own appropriately sized container, following the same pot size and soil rules you would use for a single plant. Water lightly, keep humidity high for the first two weeks, and avoid fertilizer until you see new growth.
Post-Repotting Care: The First 6 to 8 Weeks
The work is not over when the plant is in its new pot. The next six to eight weeks determine whether the repotting was a success or a stress event the plant has to recover from.
Light. Place the plant in bright, indirect light. Direct sun scorches leaves that are already working overtime to recover, and deep shade slows the new root growth you are trying to encourage. An east-facing window or a spot a few feet back from a south- or west-facing window works well.
Water. Keep the mix lightly moist but never soggy for the first two weeks. The damaged root hairs cannot take up water as efficiently, and overwatering in fresh, airy mix is a surprisingly common way to lose a plant. After the first two weeks, return to your normal routine: water when the top inch of mix starts to feel dry, then water thoroughly and let the pot drain.
Humidity. Anthuriums want humidity in the 60 to 80 percent range, and that is even more important after a repot. A humidifier nearby is the most reliable option. A pebble tray under the pot helps. Misting the leaves a few times a day is fine in moderation but is not a substitute for real ambient humidity. If the leaf edges start browning, the air is too dry.
Fertilizer. This is the rule most often ignored. Do not fertilize for at least six to eight weeks after repotting. New roots lack the protective layers older roots develop, and soluble salts in fertilizer can burn tender new root tips, setting the plant back by a month or more. After six to eight weeks, resume feeding with a balanced liquid fertilizer at half strength, applied every four to six weeks during the growing season.
Temperature. Keep the plant in a stable 65 to 80°F range, away from cold drafts, heating vents, and air conditioners. Sudden temperature swings add stress that the plant does not need right now.
Handling. Do not move the plant around the house for at least two weeks. Each relocation is a new environment to adjust to. Pick a good spot and leave it there.
Anthurium Recovery Timeline After Repotting
Most anthuriums show mild transplant shock for one to two weeks: slight wilting, a small pause in growth, and the occasional yellow lower leaf. This is normal, not a crisis, and it usually clears on its own with the post-repotting routine above.
Full root re-establishment takes four to six weeks. New growth is the clearest signal of recovery. Damaged leaves will not heal, but new leaves coming in at the right size, color, and glossiness mean the plant has settled in. Flowering typically resumes within six to ten weeks if light, humidity, and temperature have stayed stable. A persistent absence of new growth beyond twelve weeks usually points to insufficient light, low humidity, or a phosphorus deficit, in roughly that order.
One useful habit: note the interval between waterings right after the repot, then again at four weeks. A stable interval means the roots are working. A decreasing interval, where the plant seems thirsty again soon after watering, often means the new mix is too dense or the pot is too large for the root system to keep up with. Either way, the data tells you something.
Common Mistakes to Avoid When Repotting Anthurium
A short list of mistakes catches most of the post-repotting problems.
Oversized pot. The single most common error. Going from a 6-inch to a 10-inch pot does not give the plant more room to grow; it gives the root rot fungi more room to take hold. Stick to 1 to 2 inches up.
Dense, water-retentive mix. Standard potting soil, garden soil, or any mix without a chunky structure will slowly suffocate the roots. The mix should drain in under 15 seconds when you water.
Bare-rooting the plant. Stripping away all the old mix damages the fine root hairs that absorb water and nutrients. Keep some of the original mix around the root ball and only tease out the bottom and sides to remove circling roots.
Burying the crown too deep. The crown should sit a quarter inch below the rim, no lower. Buried crowns stay wet and rot.
Fertilizing too soon. New roots are vulnerable to salt burn. Wait at least six to eight weeks, then resume at half strength.
Repotting during winter dormancy. Unless it is an emergency, wait for spring. The plant cannot replace damaged roots efficiently in low light and cool temperatures.
Repotting during full bloom. The plant is already spending energy on flowers. Wait for the spathes to fade if you can.
Skipping the pot sterilization. Reusing a pot without cleaning it can reintroduce pathogens, mineral buildup, or pest eggs from the previous occupant.
Anthurium Repotting Troubleshooting Quick Reference
| Symptom | Likely cause | What to do |
|---|---|---|
| Wilting for more than two weeks | Transplant shock, oversized pot, or underwatering on Anthurium | Check pot size, raise humidity, water slightly more often |
| Yellow lower leaves after repotting | Normal mild shock, or overwatering | If new leaves look healthy, leave it; if soil stays wet, check drainage and pot size |
| Black, mushy roots or sour smell | Root rot from overpotting or dense mix | Remove plant, trim rotted roots, repot in fresh chunky mix in a snug pot |
| No new growth after 8 weeks | Insufficient light, low humidity, or fertilizer too soon | Move to brighter indirect light, raise humidity to 60 percent or more, hold off on fertilizer |
| Crispy brown leaf edges | Low humidity | Add a humidifier or pebble tray, group with other plants |
| Spathes not returning | Light deficit, phosphorus deficit, or chronic overpotting | Increase light, repot only if truly root-bound, feed at half strength during the growing season |
Conclusion
Anthurium repotting is less about doing more and more about doing less, more carefully. Repot every two to three years, in spring or early summer, into a pot only 1 to 2 inches wider than the old one. Use a chunky, bark-based aroid mix that drains in seconds, not standard potting soil. Settle the plant in at the same depth it was before, water thoroughly once, and then leave the plant alone in bright, indirect light with high humidity and no fertilizer for six to eight weeks. Divide basal offsets at the same time if you want more plants, and watch for new growth as your sign that the repotting worked.
When to use this page vs other Anthurium guides
- Anthurium overview - Start here for whole-plant context before deep-diving this topic.
- Anthurium problems hub - Jump to symptom-specific fix guides when this care topic does not resolve the issue.
- Root Rot on Anthurium - Escalate here when repotting adjustments are not enough.