Anthurium Propagation: Division and Stem Cuttings Guide
Quick answer
Propagate Anthurium by division at repotting when pups have roots, or from stem cuttings with at least one node. Callus cuts 2–4 hours before water or moss rooting; pot up when roots reach 2 inches-usually 4–8 weeks in warm, humid conditions.
Anthurium Propagation: Division and Stem Cuttings Guide
Anthurium Propagation: Division and Stem Cuttings Guide
Author: sai-ananth · Reviewed by LeafyPixels Review Board · Updated 2026-06-15
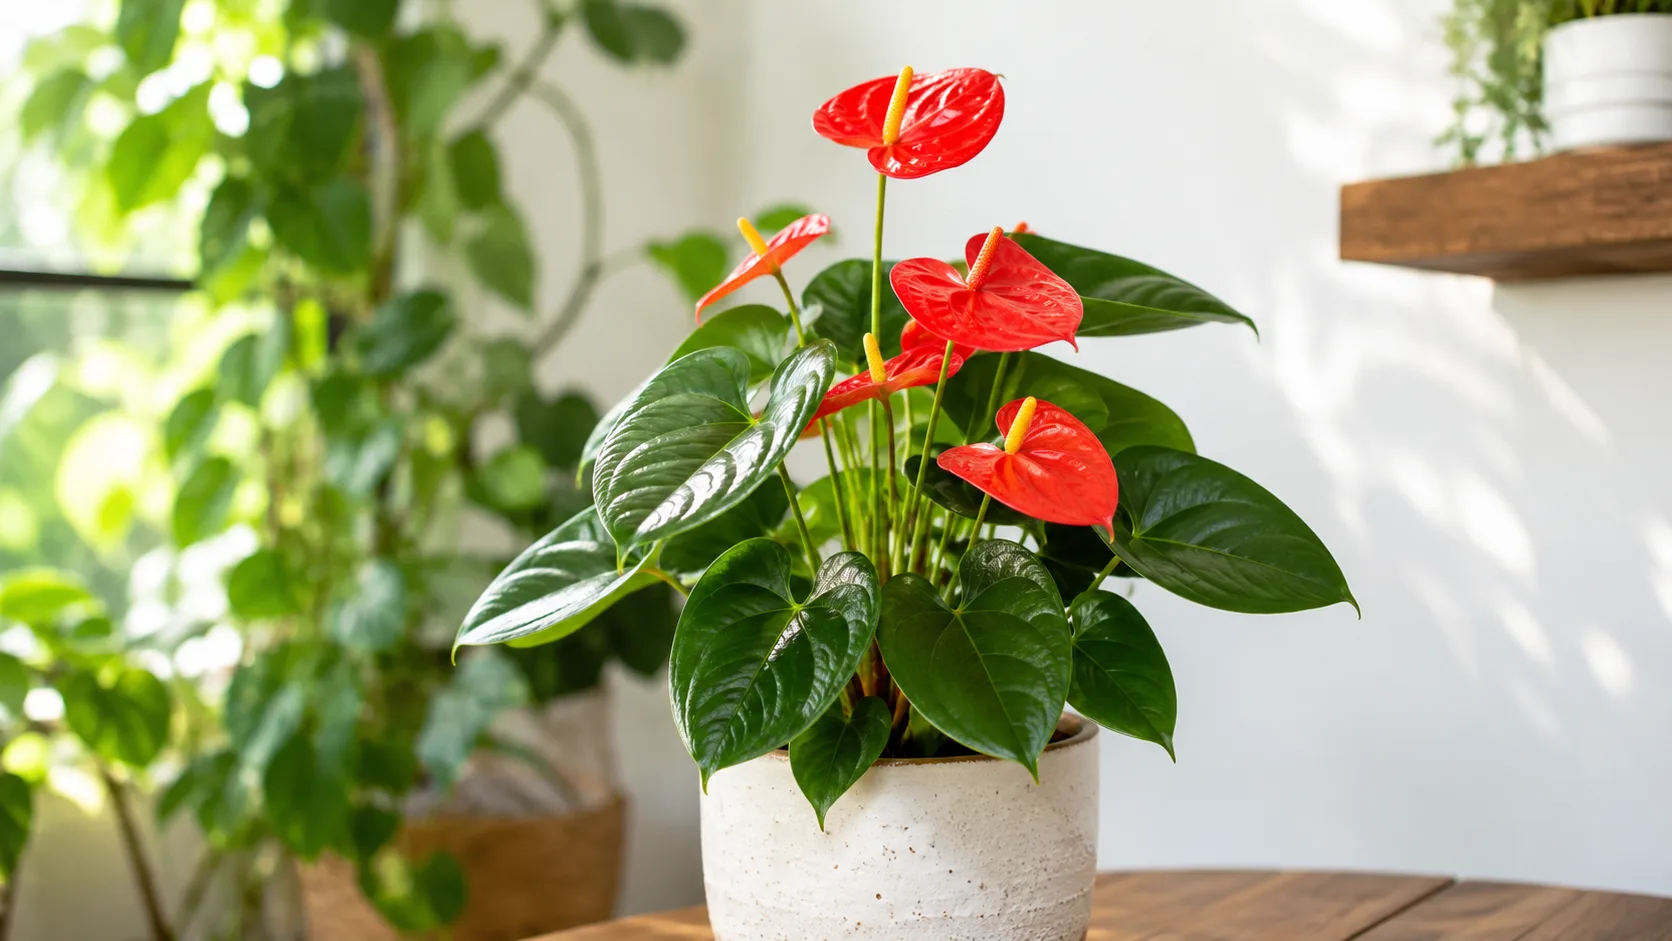
Mature anthuriums do something most houseplants never offer: they climb with rope-thick aerial roots, push basal pups from rhizomes, and - if pollinated - ripen berries whose seeds die within days of drying. That biology is the whole story of propagation. A multi-crown clumper wants division at repotting. A leggy single stem with a bare trunk wants a node-bearing cutting callused and rooted in water or sphagnum. A detached leaf with no node will never become a plant, no matter how long it sits in a jar.
This guide walks through method choice, safe cutting practices, step-by-step division and cutting workflows, seed limitations, failure troubleshooting, and the first eight weeks after potting - with links to the rest of the [Anthurium care cluster](/plants/anthurium/Anthurium overview/) when you need repotting, mix, or watering detail.
Why Anthurium Propagation Starts With Nodes and Offsets
What nodes, aerial roots, and pups actually do
Every viable propagation path on an anthurium leads back to one structure: the node. A node is the swollen joint on the stem where leaves, dormant buds, and aerial root initials cluster - often a slight ring or bump darker than surrounding tissue. It is the only place new roots and shoots can form. Cut stem tissue without a node and it will never root.
Aerial roots are the knobby brown nubs along mature stems. They are pre-formed root initials waiting for humidity and a moist surface. Cuttings that already show one or two nubs typically root faster because the plant does not build a root system from scratch.
Pups and offsets are miniature rosettes the parent produces at the base or along a rhizome. Each has its own crown, leaves, and - once mature - its own roots. A pup is essentially a clone the parent already started, which is why division is the fastest method when offsets are present.
Why anthuriums are aroids, not succulents
Anthuriums belong to Araceae - the same aroid family as philodendrons, monsteras, and peace lilies. Aroids propagate from nodes and crowns, not from detached leaf tissue. A fallen leaf with a long petiole may stay green on stored energy but cannot produce a new plant.
Most species are semi-epiphytic in the wild. The Missouri Botanical Garden notes that Anthurium andraeanum prefers a well-drained, peaty potting mixture with consistent moisture but never waterlogged conditions. Roots evolved for airy, humid environments - tree bark in cloud forests - not dense, soggy soil. Cuttings want humid air and a moist, chunky medium; divisions want a free-draining mix that lets roots breathe. The Royal Horticultural Society recommends free-draining, acidic compost with bark or perlite and warns that compost kept too wet causes roots to rot.
Choosing the Right Method for Your Plant
Division versus stem cuttings: decision table
| Your plant looks like… | Best method | Typical weeks to establish | Main risk |
|---|---|---|---|
| Two or more crowns, or basal pups with own roots | Division at repotting | 2–4 | Over-bagging; oversized pot |
| Single leggy stem, bare lower trunk, nodes visible | Stem cutting (water, sphagnum, or mix) | 4–8 | Rot from un-callused cuts |
| Young, single-crowned, compact | Wait - not enough material yet | - | Forcing immature pups |
| Fresh hand-pollinated berries only | Seed (secondary) | Months to years | Recalcitrant seed dies if dried |
Use division when the plant has two or more distinct crowns, visible basal pups with their own roots, or a branched rhizome with separate growth points. Use stem cuttings when the plant is a single tall stem with a bare lower trunk and a tuft of leaves at the top - each section needs at least one node and ideally aerial root nubs. Reserve seed for growers with freshly harvested berries from a hand-pollinated plant; mail-order anthurium seed is rarely viable.
Best timing, plant maturity, and red flags
The best window is spring through early summer, when light rises and the plant is actively growing. NC State Extension lists division as the recommended propagation strategy for mature anthuriums, and the same seasonal logic applies to cuttings.
Avoid propagating in winter unless you can maintain temperatures above 65°F and humidity above 50%. Cuttings started in cold, dry conditions root slowly and rot easily.
Wait if:
- The pup has leaves but no visible roots of its own
- The parent is stressed from recent repotting, pest damage, or root rot on Anthurium
- You cannot provide a humidity dome or consistent warmth for cuttings
- The only material available is a leaf with no stem node
- The plant is in heavy bloom and you lack stable warmth - flowering drains energy; propagation still works, but recovery is slower
Tools, Sterilization, and Safe Handling
You do not need a propagation lab. Essentials: sharp pruners or a grafting knife, 70% isopropyl alcohol for blade sterilization, small pots with drainage holes, a clear plastic bag or propagation dome, and optionally IBA rooting hormone (0.1% to 0.3% indole-3-butyric acid powder or gel) .
Sterilize blades before every cut and between plants. UF/IFAS commercial anthurium production guidelines emphasize clean tools to prevent bacterial spread - the same principle applies at home.
Sap irritation and basic precautions
Anthurium tissues contain insoluble calcium oxalate crystals. NC State Extension notes that contact with sap can irritate skin and eyes, causing redness and stinging, while ingestion causes oral pain and swelling. The ASPCA lists flamingo flower as toxic to dogs and cats for the same reason.
During propagation you create fresh wounds that release sap. Wear gloves, avoid touching your face, wash hands and tools after handling, and keep cut stems away from pets and children until wounds callus. If sap contacts skin, rinse with water. This is routine precaution, not alarm - but skipping it on a Sunday afternoon division session is how growers learn anthurium sap stings.
The aroid mix you need
For rooting medium and potting, use a chunky aroid mix: one part peat or coco coir, one part perlite, and one part orchid bark, with an optional handful of horticultural charcoal. Target slightly acidic pH of 5.5 to 6.5. Standard potting soil alone holds too much water around fresh roots. Pre-moisten the mix before potting divisions or soil-rooted cuttings. For a full recipe aligned with repotting, see the Anthurium soil guide.
How to Propagate Anthurium by Division
Spotting offsets and multi-crown plants ready to split
Look at the base for pups - small rosettes emerging from soil or a horizontal rhizome just below the surface. A pup is ready when it has at least two to three of its own healthy leaves and a visible set of its own roots. If it is still attached by a thin runner with no roots, leave it on the parent and check again in a few months.
A multi-crown plant - two or more full leaf rosettes sharing one pot - is the ideal division candidate. These plants are already trying to become two; your job is to separate them cleanly at natural division lines rather than force a cut through dense root mass.
Ready vs. not ready: A pup with three firm leaves and white root tips at the base is ready. A pup with two small leaves and only the parent’s shared root mass is not - wait until you see independent roots when you brush soil away.
Five-step division walkthrough at repotting
Combining division with scheduled repotting limits shock because you disturb roots once, not twice in quick succession.
- Water 12 to 24 hours before. Hydrated roots bend; dry roots snap.
- Unpot gently. Squeeze pot sides to loosen the root ball, then tip out. Run a sterilized knife around the inside edge if stuck. Never yank stems.
- Expose the root system. Shake off loose soil or rinse under lukewarm water until you see where one crown’s roots end and the next begins.
- Separate at the division line. Pull crowns apart by hand where they separate cleanly. Where tissue is woody, make one decisive cut with a sterilized blade. Each section needs at least two leaves and a balanced share of roots.
- Pot immediately in fresh, pre-moistened aroid mix. Choose a pot that fits the root mass without excess space. Water once to settle, then place in Anthurium light guide with humidity above 50%. Some leaf droop in the first week is normal transplant stress. New root activity usually appears within two to four weeks.
Do not bag a freshly divided plant the way you would a leafless cutting - trapped moisture around disturbed roots causes rot. Divisions already have functioning roots; they need airflow and moderate humidity, not a sealed greenhouse.
How to Propagate Anthurium With Stem Cuttings
Stem cuttings work for single-stem or leggy plants where division is not an option - often after pruning leaves a bare trunk with nodes exposed.
Identifying nodes and making the cut
Choose a healthy section 4 to 6 inches long with at least one node and ideally two or three aerial root nubs. The RHS advises taking stem with leaves and aerial roots and standing it in water in a warm, bright location.
Finding the node: Trace the stem from a leaf petiole down to the main axis. The node sits at the joint - a ring or bump where the petiole meets the stem, often with a brown aerial nub beside it. On leggy specimens, nodes may be spaced several inches apart on a bare trunk; each bump is a potential rooting point.
Make a 45-degree cut with sterilized pruners about half an inch below the chosen node. Remove leaves that would sit below the waterline or bury in medium - submerged leaves rot within days.
Set the cutting on a clean paper towel for two to four hours to let the wound dry and form a thin callus. Skipping callusing is the most common cause of cutting rot. A callused cut resists bacteria; a raw wet cut placed directly into moisture does not.
Water propagation: setup, changes, and potting up
Fill a clean glass with room-temperature filtered or rainwater. Submerge at least one node while keeping all leaves above the waterline. Place in bright, indirect light. Change the water every two to three days to maintain oxygen and limit bacterial growth.
Roots typically appear in two to four weeks, faster when aerial nubs were present. Wait until new roots reach at least 2 inches (5 cm) long with several white tips before transplanting.
The water-to-soil transition is fragile. Pot into pre-moistened aroid mix and water the first week with a diluted mix of the rooting water so roots adapt gradually.
Sphagnum moss and aroid mix rooting
Sphagnum moss and chunky aroid mix mimic airy, slightly acidic conditions anthurium roots evolved for. Roots formed in moss or mix tend to be thicker and more soil-ready than water roots.
For sphagnum: soak long-fiber sphagnum, squeeze until damp but not dripping, bury the node and aerial nubs, keep leaves exposed. Place in a clear cup inside a humidity dome. Vent 30 minutes daily. Keep moss barely moist.
For aroid mix: pre-moisten the blend, insert the cutting so the node is buried, cover with a humidity dome. Humidity matters more here because the cutting has no external water source.
Roots in moss or mix usually appear in four to six weeks. Test gently after a month: light resistance when you tug means roots are forming. Pot into standard aroid mix once roots reach the 2-inch threshold.
Editorial note - indoor propagation log: In a spring trial on a leggy A. andraeanum, a mid-stem section with two aerial nubs rooted in water in 18 days at roughly 72°F and 65% humidity; a similar section without nubs on the same parent took 31 days. A basal pup divided at repotting showed new white root tips in 12 days with no dome - division remained the faster, lower-stress method when offsets were available.
Rooting Hormone, Humidity, and Temperature
Anthurium cuttings produce their own auxin and root without hormone, especially when aerial nubs are present. A light dusting of IBA-based rooting powder or gel on the callused cut and buried nodes can increase root density. Tap off excess - too much burns tender tissue.
Humidity is the main lever for cuttings. Target 60% to 80% relative humidity while leaves transpire without roots. A dome, clear bag propped away from leaves, or grouping with other tropicals all work. Divisions need less - 50% to 60% - because they already have roots.
Temperature drives speed. Cuttings root fastest at 70 to 85°F (21 to 29°C). Below 65°F, rooting slows and rot risk rises. A heat mat set to about 75°F helps in cooler homes. NC State lists 65–80°F and 60–80% humidity as long-term cultural targets for A. andraeanum - propagation benefits from the warm end of that range.
Seed Propagation: Possible but Slow
Anthurium seed propagation works biologically but rarely makes sense indoors. Anthurium seeds are recalcitrant - they must stay moist from berry ripening and lose viability quickly when dried. Tropical aroid seeds generally cannot survive conventional seed-bank desiccation; viability drops as germination proceeds in moist storage.
Research on Anthurium schlechtendalii reported that stored seeds lost viability within months and were most usable in the first month after harvest - consistent with recalcitrant seed physiology in cloud-forest aroids. For home growers: harvest plump, fully colored berries from a hand-pollinated plant, clean seeds, and sow immediately on moist sphagnum or vermiculite without burying them. Maintain 80%+ humidity and 75 to 85°F. Germination takes two to six weeks for common species; a mature flowering plant from seed typically needs two to three years. Division and cuttings remain the practical choice.
Why Cuttings Fail and How to Avoid Rot
The most common failure is the leaf-only cutting - a petiole without a stem node cannot produce a new plant.
Rot follows three predictable causes: un-callused cuts, medium that stays too wet, and sealed domes with no daily venting. Fix all three: callus two to four hours, squeeze sphagnum until damp not dripping, open the dome 30 minutes daily once condensation builds.
Cold slows rooting and invites decay. Low humidity shows as crisp leaf edges and absent roots. Transition shock after water rooting causes wilt at the soil line - ease with diluted rooting water the first week and pre-moistened, not saturated, mix.
Over-bagging divisions traps moisture around disturbed roots - a common mistake when growers treat every propagation like a leafless cutting.
Aftercare for New Plants in the First Two Months
Whether you divided or rooted a cutting, the first eight weeks are about restraint. Do not overwater, overfeed, repot again, or move the plant repeatedly.
Keep new anthuriums in bright, indirect light - the same conditions the parent thrives in. Water when the top inch of mix approaches dry; freshly rooted plants have fewer roots, so mix dries more slowly. Follow the Anthurium watering guide for rhythm once roots establish.
Skip fertilizer for six to eight weeks. Fresh roots are sensitive to salt burn. When you do feed, start at half strength of a balanced liquid fertilizer once monthly during active growth.
Maintain humidity toward 60% to 80% in the first month. Watch for new leaf unfurling - the clearest sign propagation succeeded. If the plant holds green leaves but produces no new growth for eight weeks, tip it out and inspect roots: white tips are healthy; brown mushy tissue requires trim and repot into fresh mix.
Conclusion
Match the method to the plant on your shelf: divide multi-crown specimens and rooted pups at repotting; take node-bearing stem cuttings for leggy single stems; callus every cut before it touches water or moss; and wear gloves when sap is flowing. Seed is a long-term project for fresh berries, not a shortcut.
When your new plant is potted, continue with the Anthurium overview for the full care picture, the repotting guide if you combined division with a pot upgrade, the soil guide for mix recipes, and the watering guide for the post-propagation rhythm that keeps roots healthy without rot.
How this guide was reviewed: Recommendations were checked against NC State Anthurium andraeanum profile, RHS anthurium growing guidance, Missouri Botanical Garden culture notes, UF/IFAS commercial production guidelines, and ASPCA toxicity data, then aligned with LeafyPixels plant-care data and practical indoor constraints. Author: sai-ananth · Reviewer: LeafyPixels Review Board.
When to use this page vs other Anthurium guides
- Anthurium overview - Start here for whole-plant context before deep-diving this topic.
- Anthurium problems hub - Jump to symptom-specific fix guides when this care topic does not resolve the issue.