Aglaonema Maria Watering: When, How Often & Soil Checks
Aglaonema Maria Watering: When, How Often & Soil Checks
Aglaonema Maria Watering: When, How Often & Soil Checks
By sai-ananth · Reviewed June 2026
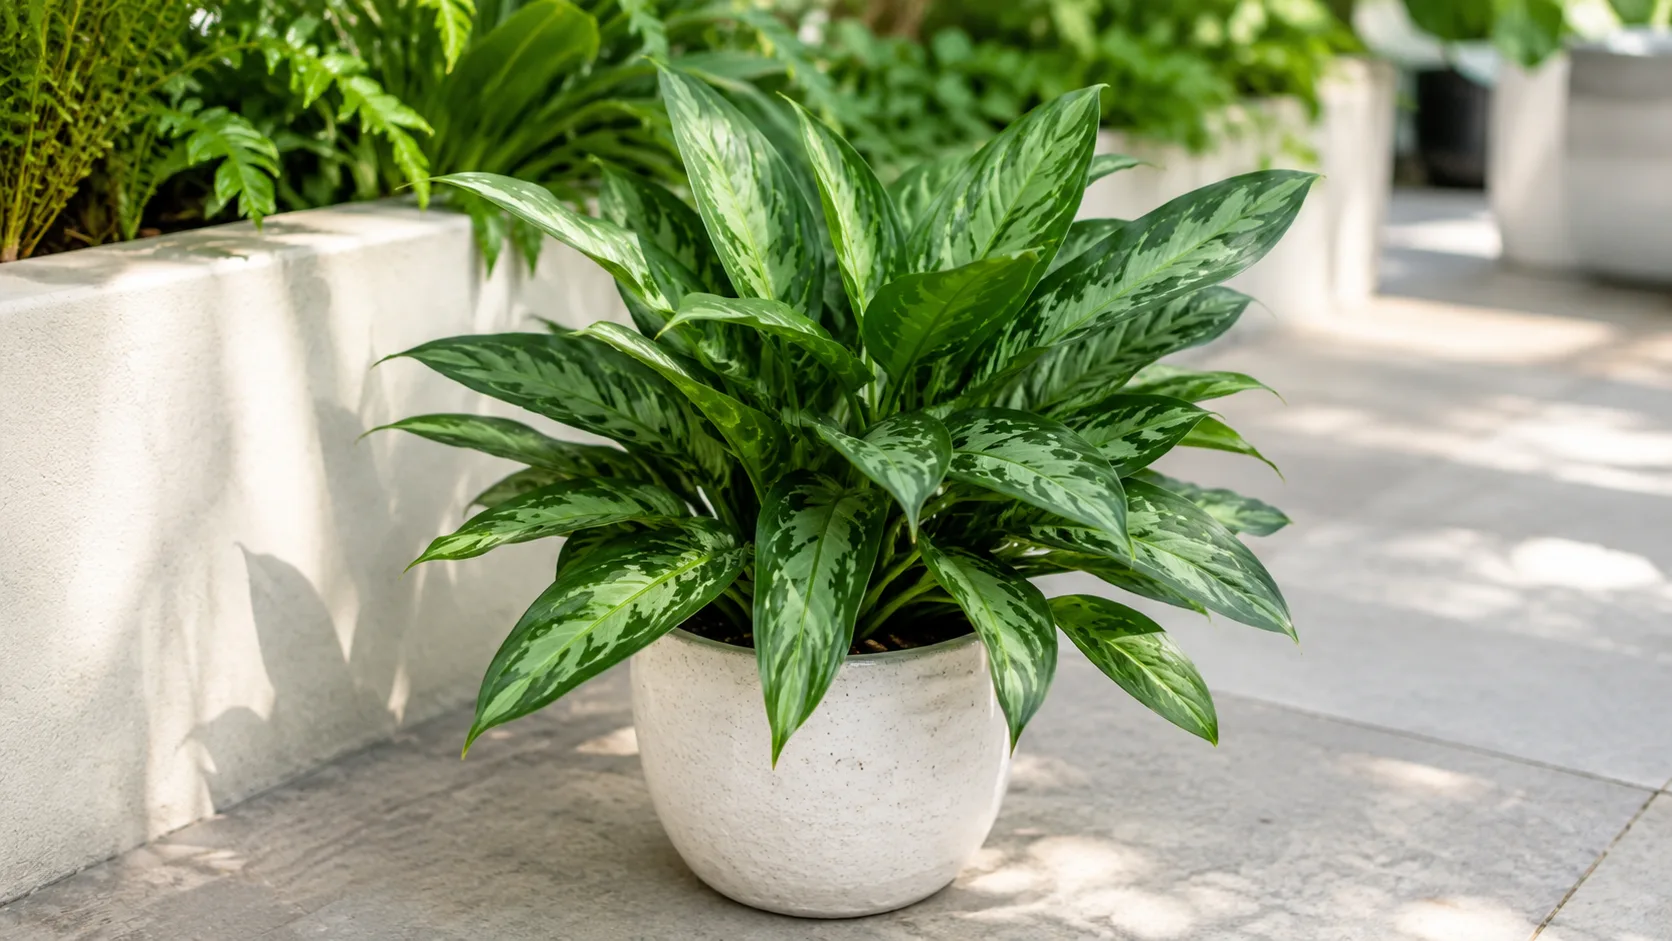
Aglaonema Maria watering is less about memorizing a weekly date and more about reading what the pot is doing today. Aglaonema commutatum ‘Maria’ is a compact Chinese evergreen with dark green leaves and silver chevrons - a cultivar whose fleshy stems and rhizomatous roots tolerate brief drying better than prolonged saturation, but it is not a succulent you can ignore for a month. Water when the upper 1 to 2 inches of mix have dried and the pot feels lighter, soak the entire root ball until drainage runs free, then empty every saucer. That cycle beats “water every Sunday” in a dim office or a bright east window alike.
This page is the cultivar-specific watering guide for Maria. If you own several Chinese evergreens and want genus-wide comparisons, start with the genus Aglaonema watering guide. For full species context - toxicity, placement, and first-month rhythm - see the Aglaonema Maria overview. Light placement changes dry-down speed more than any calendar; the Maria light guide pairs directly with the intervals below.
The Short Answer: Check the Mix, Not the Calendar
Inspect the pot every few days until you learn its rhythm. Insert a finger or wooden skewer into the upper root zone, lift the pot to compare weight, and look at the plant without relying on wilt alone. Water when the upper layer feels dry and the pot is noticeably lighter, provided the lower mix is not still sodden. If the pot feels heavy, cool, and wet, wait.
When watering is due, apply enough room-temperature water to wet the root ball evenly. A small splash moistens only part of the pot and can leave dry pockets, concentrated fertilizer salts, and roots clustered near the surface. Thorough watering is not the same as overwatering on Aglaonema Maria. Overwatering usually means watering too frequently, using a poorly drained setup, or leaving roots submerged - not giving a properly drained plant one complete soak. Clemson Cooperative Extension advises testing the top 1 to 2 inches of soil and watering when that layer is dry while keeping the root zone moist but not overly wet.
After watering, allow the nursery pot to drain before returning it to a cachepot. Remove any standing water. Roots require oxygen as well as moisture, and a saturated container has fewer air-filled pores. ‘Maria’ tolerates brief drying better than prolonged oxygen deprivation, although repeated severe drought also damages roots and leaf margins.
The Right Moisture Target for Maria
Aim for a cycle from evenly moist after watering to partially dry at the top before the next application. Do not keep the entire pot constantly wet, and do not routinely wait until every layer is bone dry. The Royal Horticultural Society’s ‘Maria’ profile recommends moderate watering during growth and more drying in winter - language that matches the partial-dry-then-soak method rather than a permanently damp root ball.
The phrase “top inch dry” should be interpreted in relation to pot size. In a small 4-inch nursery pot, one dry inch represents much of the root ball. In a deep 12-inch container, the top inch can dry while the lower half remains saturated. Check more than one depth and use pot weight for large containers. A wooden skewer inserted deeper can reveal moisture that a surface touch misses.
Texture also affects what “dry” feels like. Bark and perlite create air spaces and may feel dry while fine coir or peat remains moist. Dense compost can feel cool and cling to a probe long after the surface color changes. Learn the behavior of the actual mix rather than following a phrase mechanically. UF/IFAS Gardening Solutions likewise recommends watering Aglaonema only when the top inch feels dry and warns that overwatering can trigger other problems - the dry-down check comes before the pour.
Maria Check Intervals by Light Level
Calendar ranges are starting points for when to check, not automatic watering days. Maria in a warm, bright filtered east window dries faster than the same plant on a north-facing desk under ceiling fluorescents. The table below ties typical check intervals (when to test soil) to common home placements. Water only when the 1-to-2-inch test and pot weight support dryness.
| Light placement | Practical starting point for when to check | Notes |
|---|---|---|
| Bright filtered east or near south/west with sheer | Start checking sooner during active growth | Faster transpiration; pair with Maria light guidance |
| Medium indirect - living room away from glass | Build a baseline from pot weight and skewer checks | Often the easiest indoor placement to manage |
| Low office / interior desk, fluorescent only | Expect checks to be farther apart | Soil often stays wet much longer than owners expect |
| Recently repotted or dense retail peat | Expect slower dry-down than a mature airy mix | Retail greenhouse peat can hold water longer at home |
Maria vs genus average: The genus Aglaonema watering guide covers all cultivars. Maria’s compact habit and dark foliage often mean slightly slower visible wilt than pale, thin-leaved cultivars, but its roots still need oxygen - do not interpret slow leaf response as permission to keep soil wet. Colorful pink or white Aglaonemas in the same light may show drought stress on leaf edges sooner; Maria may look firm while the lower mix is still too wet, which makes skewer depth and pot weight more important on this cultivar.
Build Your Own Two-Week Watering Record
Maria owners learn fastest by recording when they checked and what the pot felt like, not by copying someone else’s interval. For two weeks, note the date, whether the upper mix felt dry or cool, whether the pot felt heavy or light, and whether you actually watered. That simple record shows more about your room than any generic chart can.
Why Fixed Weekly Watering Fails
Water demand is dynamic because leaves lose water through transpiration and the pot loses water through evaporation. Brighter light, warmer air, active growth, a root-bound pot, porous terracotta, and a chunky mix generally shorten the interval. Lower light, cool rooms, oversized pots, plastic containers, and fine water-retentive mixes lengthen it. A weekly schedule ignores all of these variables.
Retail plants create an additional complication Maria owners see often. They may arrive in dense nursery peat that holds water much longer in a home than it did in a warm commercial greenhouse - a pattern commercial growers document for interiorscape Aglaonema, where media is kept moist but not saturated under controlled shade (UF/IFAS EP160). A decorative sleeve or cachepot can trap drainage out of sight. Owners then water according to a care tag and unknowingly keep the lower roots submerged.
The solution is not to replace “weekly” with another rigid number. Build a baseline by recording check and watering dates for a month. If the plant repeatedly reaches the correct dryness after ten days in current conditions, you know when to begin checking, not when watering is mandatory. Reassess after moving the plant, Aglaonema Maria repotting guide, or entering a new season.
How to Tell When Aglaonema Maria Needs Water
Use at least two signals. Surface color alone is weak because the top can look dry while the root zone is wet. Leaf droop alone is also weak because both drought and damaged waterlogged roots can cause wilting - see drooping leaves on Maria when symptoms confuse the picture. Combining a physical mix check with pot weight is simple and accurate enough for most homes.
Check in several places when the pot is large or watering has been uneven. Roots may occupy one side more densely, and direct window exposure may dry one edge faster. If one area is dry while another remains wet, improve application technique and inspect whether the mix has compacted or pulled away from the pot.
Do not dig aggressively through fine roots every week. Gentle probing is sufficient. The goal is to understand moisture, not repeatedly disturb the root system. Over time, lifting the pot may become the fastest cue because the weight difference between freshly watered and ready-to-water soil is obvious.
Finger, Skewer, and Pot-Weight Checks
The finger test works well in small to medium pots: insert a finger 1 to 2 inches and note whether the mix feels damp, cool, and adheres to the skin. It is less useful in deep containers or when a dense root mat blocks access. Do not judge only the crusted top few millimeters.
A plain wooden skewer reaches deeper with little disturbance. Insert it into the root zone, leave it briefly, and withdraw it. Darkened wood, coolness, or adhering mix indicates moisture; a mostly clean, dry skewer supports watering. Sap, decomposed organic material, and fertilizer staining can affect appearance, so combine the result with weight.
Lift the pot before and after a complete watering. The fresh-water weight becomes the “wet” reference. Lift it during checks to learn the transition. This method is especially useful for nursery pots inside decorative covers because you can also inspect and empty hidden drainage water.
Using a Moisture Meter Without Being Misled
Inexpensive analog meters usually estimate electrical conductivity between probes rather than directly measuring every form of soil moisture. Fertilizer salts, mix composition, poor probe contact, and corrosion can distort readings. Treat the meter as one clue, not an automatic watering command. Test more than one location and depth.
Wipe the probe after use and do not leave it in the pot unless the device is designed for continuous monitoring. Compare its reading with a finger or skewer until you understand how it behaves in that substrate. If the meter says “dry” while the pot is heavy and wet material clings to a skewer, trust the broader evidence and investigate the device.
Digital sensors can be useful for trends, but they still measure a limited zone. A single probe near the pot wall may miss a saturated center. Good watering decisions come from context, not from chasing an exact number.
How to Water Thoroughly
Take the plant to a sink or use a saucer that can be emptied. Pour water slowly across the entire surface, pausing so the mix absorbs it rather than channeling it down one gap. Continue until water exits the drainage holes. Let the pot drain for several minutes, then discard all runoff.
Pet-aware sink watering: Aglaonema contains insoluble calcium oxalate crystals that irritate mouths and digestive tracts in cats and dogs. When you water at a sink or tub, keep Maria off counters pets can reach, wipe spilled mix promptly, and wash hands before handling animals. Full toxicity detail lives on the Maria overview.
If water races immediately down the sides and the center stays dry, the mix may have become hydrophobic. Soak gradually in repeated passes or bottom water briefly to rehydrate it, then allow complete drainage. Do not interpret fast runoff as proof that the root ball is saturated. Check the center afterward.
Avoid routinely measuring a tiny fixed volume such as half a cup regardless of pot size. The amount required changes with dryness, root density, and substrate. The correct endpoint is an evenly wetted root ball with drainage, not an arbitrary quantity. This approach also helps carry some accumulated soluble salts out of the container.
Top Watering Versus Bottom Watering
| Method | Strength | Limitation | Best practice |
|---|---|---|---|
| Top watering | Flushes salts downward and reveals drainage | Can channel through gaps if poured too fast | Apply slowly and evenly until runoff |
| Bottom watering | Rehydrates dry mix by capillary action | Does not flush salts; pot can soak too long | Remove after the upper mix moistens, then drain |
Both methods can work. Top watering is the best routine default because it wets the profile and promotes leaching. Bottom watering is useful for hydrophobic mix, a dense canopy, or a pot that is difficult to water evenly from above. Set the pot in shallow water and remove it once moisture has traveled upward, usually within 10 to 30 minutes depending on size and mix.
Do not leave Aglaonema standing in water for hours or days. Alternate with top watering when bottom watering is used regularly so salts do not accumulate near the surface.
Drainage, Pot Size, and Potting Mix
A drainage hole is the simplest protection against excess water. It gives displaced water an exit and lets you verify that the mix is accepting water. A layer of pebbles at the bottom of a holeless pot does not create drainage; water still remains inside the container, and the boundary between fine mix and coarse material can leave the root zone wetter.
Use a nursery pot with holes inside a decorative cachepot if appearance matters. Remove it to water and drain, or empty the outer pot reliably. Inspect the bottom because roots or compacted mix can block holes. Clemson Cooperative Extension reminds growers to ensure containers have drainage holes and to empty standing water from decorative covers.
Pot size should be modestly larger than the root system. An oversized container holds a volume of wet mix that uncolonized roots cannot use quickly. This does not make root rot on Aglaonema Maria inevitable, but it narrows the margin for error. Increase diameter by about 1 to 2 inches during routine repotting unless the root mass justifies more.
A suitable mix balances moisture retention and air. Peat-free houseplant compost amended with bark, perlite, pumice, or another coarse component can work, as can a well-structured coir-based blend. Exact recipes depend on climate and watering habits; the Maria soil guide covers mix ratios that make dry-down checks reliable.
How Light and Temperature Change Water Use
Light is one of the strongest controls. In brighter filtered light, leaves photosynthesize and transpire more, and healthy roots take up water faster. In low light, the plant may remain attractive while using little water. If you move ‘Maria’ away from a window, immediately begin checking for a longer interval rather than maintaining the old routine - the same coupling explained in the Maria light guide.
Temperature influences both the plant and the substrate. Clemson lists a preferred range of 68 to 80 °F with tolerance down to about 55 °F. Warm conditions often speed water use, while cool soil slows root activity and evaporation. A cold windowsill can leave the pot wet for a long time even when upper room air feels comfortable. Protect this tropical plant from cold drafts and glass.
Humidity affects transpiration, but it should not be used alone to predict watering. High humidity may slow drying; air conditioning can lower humidity while simultaneously cooling the pot. Measure moisture directly. Environmental variables explain the pattern, but the root zone decides the action.
Seasonal Watering Adjustments
During spring and summer, longer days and active growth may shorten the interval. Check more often, but do not automatically water more often. Cloudy periods, monsoon conditions, or air-conditioned rooms can still slow drying. New growth is evidence of activity, not permission to keep the mix wet.
In fall and winter, allow somewhat more drying between waterings, as the RHS advises for ‘Maria’, particularly when natural light falls. This may mean checking on the same schedule but watering much less frequently. Do not reduce the amount to a token sip; reduce frequency while still watering thoroughly when the root ball reaches the target dryness.
Indoor heating complicates winter. Warm dry air may crisp leaf tips, yet the root zone can remain cool and wet. Adding frequent water for humidity is a mistake. Use a humidifier if needed, keep the plant away from vents, and continue checking soil independently.
Signs of underwatering on Aglaonema Maria
An underwatered ‘Maria’ may develop limp or inward-curling leaves, dry crisp edges, a very light pot, and mix that has pulled from the sides. Severe drought can cause older leaves to yellow and roots to die. If the mix is dry throughout, water thoroughly and let it drain. Most moderately wilted plants should begin regaining firmness after the root ball rehydrates.
When water runs straight through, rehydrate in stages or bottom water briefly. Do not pour repeated fertilizer solution into a dry pot. Plain room-temperature water is appropriate for recovery. Wait to fertilize until normal hydration and growth resume. Persistent drought patterns are covered in the Maria underwatering guide.
Repeated wilting is not a good watering strategy. Although the plant may recover visually, each severe dry cycle can damage fine roots and create inconsistent nutrient uptake. Adjust your checking interval so watering occurs before pronounced collapse while still allowing the upper mix to dry.
Signs of Overwatering
Overwatering signs include widespread yellowing, soft or translucent areas, drooping while the mix is wet, a heavy pot that stays damp for a long time, sour odor, stem-base softness, and black or brown mushy roots. Fungus gnats can indicate consistently moist organic mix, though their presence alone does not prove rot. Edema-like corky spots can also occur when water uptake exceeds transpiration.
One yellow lower leaf is not proof of overwatering. Old leaves naturally age, and yellowing can also follow cold, drought, nutrient problems, pests, or transplant stress. Check the pot and roots. The combination of wet soil, declining leaves, and soft failed roots is much stronger evidence than leaf color alone - the full symptom list lives in the Maria overwatering guide.
If the mix is merely wetter than intended but roots and stems are firm, stop watering and improve warmth, filtered light, and airflow without blasting the plant with a fan or heater. Do not aerate by stabbing the root ball repeatedly. If decline continues or odor and softness appear, inspect roots promptly.
Root Rot: Inspection and Recovery
Slide the plant from its pot when it wilts in wet soil, the mix smells sour, or the stem base softens. Healthy Aglaonema roots are firm, often pale to tan, and resist gentle pressure. Rotten roots are dark, mushy, hollow, or easily lose their outer layer. Clemson Cooperative Extension notes that root rot in Chinese evergreen usually results from a soil mix that does not drain quickly or from overwatering.
Remove degraded mix and trim clearly rotten roots with sterilized scissors. Keep every firm root; unnecessary cutting reduces recovery capacity. If rot reaches a stem, cut back to clean firm tissue. Wash and disinfect the pot or use a clean container, then repot into fresh, airy mix sized to the remaining roots.
After repotting, moisten the mix enough to settle it but do not repeatedly soak a severely reduced root system. Keep the plant warm in stable filtered light and pause fertilizer. Recovery is indicated by firm tissue and new root or leaf growth, not by existing yellow leaves turning green. Step-by-step rescue detail is in the Maria root rot guide.
Water Quality and Temperature
Most ordinary tap water is acceptable if it is safe to drink and not unusually saline or hard. Letting water stand may allow temperature adjustment, but it does not remove all dissolved minerals. Chlorine levels in municipal water are not automatically toxic to houseplants. Judge local water by actual plant response and utility data. Clemson notes that brown leaf tips can indicate fluoride in the water and recommends switching to distilled or rainwater if local tap water is fluoridated.
Avoid routinely using sodium-softened water. Traditional ion-exchange softeners add sodium, which can accumulate in container mix. Rainwater, reverse-osmosis water blended appropriately, or an unsoftened tap may be better when sodium or total dissolved solids are high.
Use room-temperature or mildly lukewarm water rather than very hot or icy water. If tap water leaves visible mineral crust and tips repeatedly brown despite correct moisture, review fertilizer use and water quality together.
Common Watering Mistakes
The most common Maria failure is watering on a fixed weekday because the tag said “weekly” - while the pot in a north-facing office has not dried in twelve days. A second failure is giving frequent sips instead of wetting the whole root ball, which leaves dry pockets at depth while the surface looks attended to.
Maria-specific trap: assuming dark, firm leaves mean the roots are fine. This cultivar can look stoic in low light while the lower half of a dense peat mix stays saturated for weeks after purchase. Combine skewer depth with pot weight rather than leaf appearance alone.
Other failures include planting directly into a holeless decorative pot, leaving runoff in a cachepot, using an oversized container, and assuming a pebble layer prevents saturation. Misting is not watering - it supplies negligible root-zone moisture. Do not add ice cubes; they distribute cold water unevenly on tropical roots.
A Practical Watering Decision Checklist
Before adding water, ask:
- Are the top 1 to 2 inches dry, and is the deeper mix no longer saturated?
- Is the pot noticeably lighter than after the last watering?
- Is the plant in brighter, warmer, or more active conditions than before?
- Can excess water leave through open drainage holes?
- Is the plant drooping because it is dry, or is it drooping in wet soil?
If the first two answers support dryness and drainage is clear, water thoroughly. If the pot is heavy or a deeper probe is wet, wait even if the surface looks dry. If the plant wilts while wet, inspect roots rather than adding more - start with the overwatering and root rot guides.
Record the date only after watering, along with any move or repot. The record helps predict when to check next and reveals seasonal change. It should never override what the pot tells you.
Conclusion
Successful Aglaonema Maria watering is a cycle, not a schedule. Let the upper 1 to 2 inches dry while the deeper root zone moves out of saturation, then water the entire root ball and drain it completely. Use a finger, skewer, and pot weight together, especially in large or dense containers. Never leave the nursery pot standing in runoff.
Expect the interval to change with light, temperature, season, pot size, mix, and root density. Use the light-band table as a check reminder, not a pour command. When leaves droop or yellow, read moisture and roots before reacting - that habit protects ‘Maria’ from oxygen-starved, rotting roots while still preventing damaging drought.
Related Maria care: overview · light · soil · genus watering comparison · overwatering · root rot
Guide recommendations were checked against the RHS Aglaonema ‘Maria’ profile, Clemson Cooperative Extension Chinese evergreen guidance, UF/IFAS Gardening Solutions, UF/IFAS EP160 interiorscape culture, NC State Extension Araceae overview, and the ASPCA Chinese evergreen toxicity listing. Author: sai-ananth. Reviewed: 2026-06-29.
When to use this page vs other Aglaonema Maria guides
- Aglaonema Maria overview - Start here for whole-plant context before deep-diving this topic.
- Aglaonema Maria problems hub - Jump to symptom-specific fix guides when this care topic does not resolve the issue.
- Overwatering on Aglaonema Maria - Escalate here when watering adjustments are not enough.
- Underwatering on Aglaonema Maria - Escalate here when watering adjustments are not enough.
- Root Rot on Aglaonema Maria - Escalate here when watering adjustments are not enough.
Related Aglaonema Maria guides
- Aglaonema Maria overview
- Aglaonema Maria light
- Aglaonema Maria soil
- Aglaonema Maria propagation
- Aglaonema Maria fertilizer
- Aglaonema Maria repotting
- Overwatering on Aglaonema Maria
- Underwatering on Aglaonema Maria
- Root Rot on Aglaonema Maria
- Wilting on Aglaonema Maria
- Drooping Leaves on Aglaonema Maria
- Mold on Soil on Aglaonema Maria