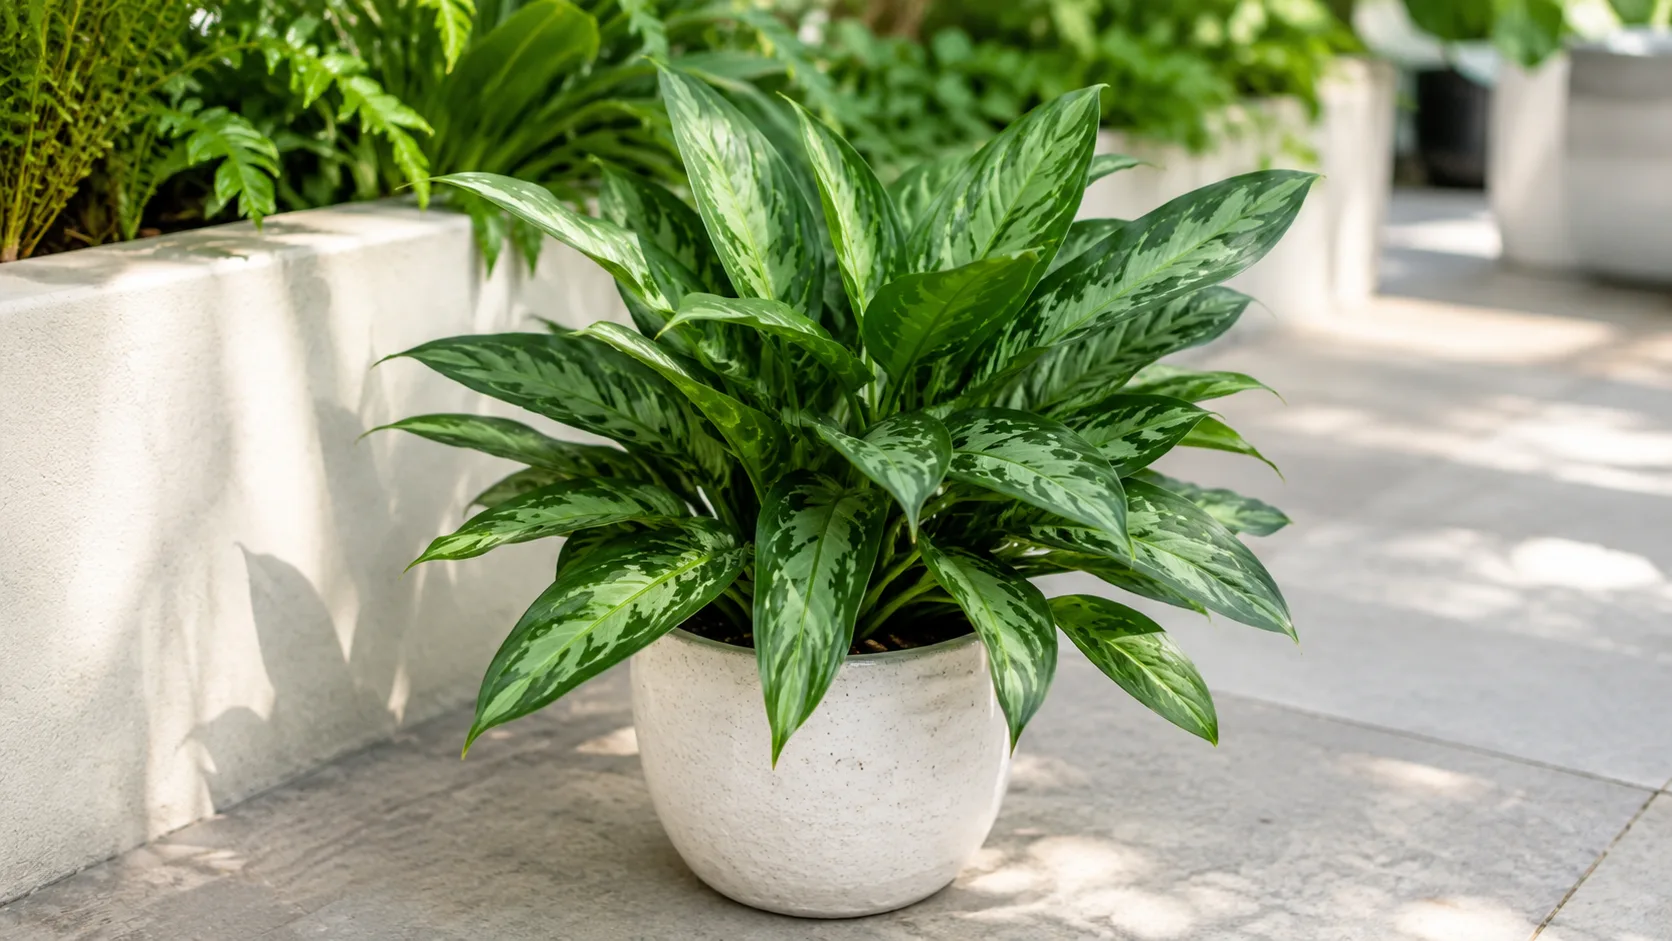
Aglaonema Maria Repotting: Complete How-To Guide
Aglaonema Maria Repotting: Complete How-To Guide
Aglaonema Maria Repotting: Complete How-To Guide
Repotting Aglaonema ‘Maria’ should solve a specific root-zone problem. It may give crowded roots more working space, replace a mix that has collapsed, correct a pot that drains poorly, or remove decayed roots. It should not be an automatic response to every yellow leaf or a yearly ritual performed regardless of plant condition. Maria grows moderately and often remains healthy in the same container longer than fast-growing tropical vines. As a member of the Araceae family native to the tropical Philippines and Sulawesi, Aglaonema tolerates a snug pot and standard indoor aroid repotting intervals.
The central decision is whether the current root-to-soil balance still works. A suitable pot holds enough mix to supply moisture between waterings, yet dries predictably enough that roots receive oxygen. A pot that is too small may dry excessively and restrict new roots. A pot that is too large may keep a broad zone of unused mix wet long after the active root ball has taken up what it can.
Read the Signs That Repotting Is Necessary
Inspect several signals together. Roots circling densely inside the pot, pushing the plant upward, or filling most of the medium indicate genuine crowding. Water that races through channels without wetting the root ball can mean the mix has shrunk or roots occupy nearly all available space. A plant that needs water much sooner than it once did, despite similar temperature and light, may also have outgrown its container.
Substrate condition can justify repotting even before severe root crowding. Old mix may compact, remain wet for an unusually long time, repel water when dry, or accumulate a visible mineral crust. A sour odor, persistent fungus-gnat conditions, or a drainage problem deserves investigation. These symptoms do not prove root rot on Aglaonema Maria by themselves, but they show that the root environment is no longer behaving normally.
One root emerging from a drainage hole is not enough evidence on its own. Roots follow moisture and may leave a pot before the interior is crowded. Similarly, slow winter growth is not a reason to increase pot size. Slide the root ball out for a quick inspection when possible, or look through a clear nursery pot, before committing to a larger container.
Choose the Best Time to Repot
Routine repotting is easiest when the plant is entering active growth and indoor conditions are warm and bright. New roots then have enough energy and environmental support to colonize fresh mix. For many growers this means spring or early summer, but the calendar is secondary to conditions. A warm plant under consistent grow lights can be repotted outside that window.
Emergency repotting follows different rules. If the mix is waterlogged, roots are actively rotting, the pot has no drainage, or a contaminated substrate threatens the plant, waiting for an ideal season can allow damage to spread. Correct the problem promptly, then provide stable warmth and light. Keep the intervention as focused as possible because a sick plant has fewer reserves for unnecessary division or aggressive root pruning.
Avoid routine repotting immediately after bringing a healthy plant home unless the container or substrate presents a clear risk. A new light environment, transport stress, and repotting all change water use at once. Give the plant time to acclimate and observe how quickly the existing mix dries. The exception is an obvious issue such as standing water, severe pests in the medium, active rot, or a constricting nursery component.
Select a Pot Size That Fits the Roots
For a healthy rootbound Maria, move up one modest pot size, often about 2.5 to 5 centimeters or 1 to 2 inches wider in diameter for a tabletop plant. This is a practical convention rather than a botanical law. The correct container is only slightly larger than the cleaned root ball, with room for a surrounding layer of fresh mix. A shallow or reduced root system may need the same size pot or even a smaller one. The Clemson Cooperative Extension likewise advises ensuring containers have drainage holes and planting Chinese evergreen in a commercially available, standard soilless mix with extra humus.
Do not size the pot according to leaf spread. A full canopy can sit above a compact root system, especially after division or rot treatment. Extra potting mix does not make roots grow faster; it changes the amount of water held around them. In low light, cool rooms, or moisture-retentive mixes, that unused volume can stay wet for a long time.
Pot depth matters too. Deep containers hold more substrate and can develop a persistently moist lower zone when roots remain near the top. Match depth to the root system instead of selecting a tall decorative pot for appearance. If a cachepot is much deeper than the nursery liner, raise the liner on a stable platform rather than adding a thick layer of loose gravel beneath the plant.
Compare Container Materials
Plastic, glazed ceramic, and unglazed terracotta can all work. The best material is the one whose drying behavior you understand in your home. Plastic and glazed pots lose little water through their walls, so moisture leaves mainly through the plant, surface, and drainage hole. Terracotta is porous and usually dries faster, which may help a habitual overwaterer but can create sharp moisture swings in hot, dry rooms.
| Container | Useful when | Watch for |
|---|---|---|
| Plastic nursery pot | You want light weight and predictable moisture | Mix may stay wet longer in low light |
| Glazed ceramic | You need stability and a finished appearance | Heavy pots hide remaining water weight |
| Terracotta | Conditions are humid or you tend to overwater | Fast drying and mineral deposits |
| Nursery pot inside cachepot | You want easy drainage plus decoration | Water collecting unseen in the outer pot |
Container material cannot fix a poor watering routine or dense mix. A terracotta pot filled with compact, saturated substrate can still develop root problems. A plastic pot with an airy mix and careful watering can perform very well. Consider pot, mix, light, temperature, and your habits as one system.
Make Drainage Holes Non-Negotiable
Use a functioning drainage hole for conventional pot culture. It allows excess irrigation water to leave and lets you water thoroughly enough to wet the full root ball. A decorative cachepot may have no hole, but the plant inside it should remain in a removable draining liner. Empty the cachepot after watering so the liner does not stand in runoff.
A gravel layer at the bottom is not a substitute for drainage. It reduces the usable soil volume and does not create an exit for excess water. Cover a very large hole with mesh or a curved pottery shard if needed to retain mix, but do not seal it. Before repotting, run water through the empty container and verify that labels, saucers, or manufacturing plugs do not block the opening.
Prepare a Suitable Potting Mix
Aglaonema needs a mix that combines moisture retention with air-filled pores. University of Florida IFAS commercial guidance places Aglaonema culture in a mildly acidic range and emphasizes aerated media; household growers can translate that into fresh indoor potting mix amended with coarse, stable ingredients. The UF IFAS publication specifies a media pH of 6.0 to 6.5 and a target air space of 10 to 20 percent for finished container production, and reports that Aglaonema cuttings root best in well-aerated media with a pH of 5.5 to 6.5. A practical starting recipe is two parts quality peat- or coir-based potting mix, one part perlite or pumice, and one part fine orchid bark.
Adjust rather than treating the recipe as fixed. Add more aeration if the plant grows in low light, the room is humid, the pot is plastic, or you tend to water early. Use somewhat more moisture-retentive base mix if the room is hot and dry, the pot is terracotta, or the plant dries dangerously fast. The finished mix should accept water, drain freely, and remain springy rather than becoming mud when squeezed.
Do not use outdoor garden soil in a houseplant pot. In a container it can compact, drain unpredictably, introduce pests, and behave very differently from soil in the ground. Also avoid building an excessively coarse “aroid mix” around a fine-rooted plant without considering your climate. Large bark and stone particles may create excellent air space but require much more frequent watering than Maria can tolerate in a dry home.
Gather Supplies and Prepare the Work Area
Prepare the new pot, mix, clean pruners, gloves, a blunt stick, and a tray before removing the plant. Pre-moisten very dry potting mix so it hydrates evenly without becoming saturated. Wash reused containers and remove old root debris. Disinfect cutting tools with a suitable product such as 70% isopropyl alcohol, especially if you expect to remove diseased tissue. The University of Minnesota Extension notes that 70% isopropyl alcohol does not require dilution or a prolonged soak on pruners and is effective against bacteria, fungi, and viruses.
Wear gloves if you are sensitive to aroid sap. Aglaonema contains calcium oxalate crystals and should not be chewed by children or pets. The ASPCA lists Chinese evergreen (Aglaonema) as toxic to dogs, cats, and horses due to insoluble calcium oxalates, with clinical signs of oral irritation, pain and swelling of mouth, tongue, and lips, excessive drooling, vomiting, and difficulty swallowing. Protect the stems while working because Maria’s leaf petioles can snap when the plant is lifted by its canopy. Handle the root ball and lower stems instead.
If you plan to divide the plant, prepare separate correctly sized pots in advance. Do not assume every stem can become an independent division. A viable division needs its own roots and crown tissue; otherwise it is effectively an unrooted cutting and requires different aftercare. Keep the scope limited if the plant is already weak.
Remove Maria From Its Old Pot
Water timing should make the root ball cohesive but not dripping. If the mix is dust-dry and roots are brittle, water modestly in advance. If the plant is waterlogged, remove it without adding more. Lay a large plant on its side, support the stem bases, and squeeze or tap the container to release the root ball.
Never pull hard on the leaves. For a rigid pot, run a blunt flexible tool around the inner wall. Roots protruding through drainage holes may need to be eased back or cut if they physically anchor the plant. Cutting a cheap nursery pot is preferable to tearing the crown apart.
Once removed, pause and observe before loosening anything. Note whether roots circle the outside, occupy only the upper portion, or are sparse within a large wet mass. Smell the substrate and check the lower root ball, where chronic saturation often appears first. This diagnosis determines whether you need a simple slip-pot, a partial refresh, or root-rot treatment.
Inspect the Root Ball Before Making Changes
For routine repotting, remove loose exhausted mix and gently loosen a few circling outer roots. You do not need to strip every particle from healthy roots. Complete bare-rooting breaks fine roots and creates more transplant stress without providing a benefit when the old mix is sound and compatible with the new one.
Investigate compact nursery plugs, mesh, foam, or small propagation baskets only when they appear to restrict roots or create a moisture mismatch. Some materials are embedded deeply and removing them aggressively can cause major damage. Cut away accessible constricting material piece by piece while supporting the crown. If roots have integrated safely through a benign component, leaving part in place may be less harmful than tearing them free.
Recognize Healthy Roots and Normal Color Variation
Judge roots by texture and integrity, not color alone. Healthy Aglaonema roots may be cream, tan, yellowish, or light brown depending on age and substrate staining. They feel firm and resist gentle pressure. New root tips are often lighter, while older roots may have a darker outer surface.
Rotten roots are typically soft, hollow, slimy, or easily stripped to a thread. They may smell sour or foul, but odor can be subtle early in decline. Dark color without softness is not sufficient reason to prune. Unnecessary root removal reduces the plant’s water-absorbing capacity and prolongs recovery.
Treat Root Rot as a Separate Procedure
If roots are decaying, remove wet substrate so you can see the extent of damage. Trim roots back to firm tissue with disinfected shears, cleaning the blade between diseased and healthy areas. Remove a stem only if decay has reached it; firm tissue should be preserved. Dispose of the old mix and wash the container before reuse.
Choose a pot that fits the remaining roots, which may be smaller than the original. Use fresh, airy mix and correct the underlying cause: excessive frequency, low light, cold conditions, blocked drainage, oversized pot, or a substrate that stays saturated. A fungicide is not a replacement for environmental correction, and product selection depends on the actual pathogen and local label directions.
Repot Aglaonema Maria Step by Step
Place enough mix in the bottom to position the root crown at its original height. Center the plant and spread flexible roots naturally; do not force them into a tight knot. Add mix around the sides in stages, tapping the pot and using fingers or a blunt stick to fill large voids. Keep the texture open rather than compressing the mix into a hard block.
Leave a watering lip below the rim so irrigation does not wash soil out. Check that the plant stands upright and that no major root remains exposed. A stake can temporarily support a top-heavy plant, but correct pot sizing and root placement should provide the main stability. Do not choose a much larger pot merely as a counterweight; place a light nursery pot inside a stable cachepot instead.
If dividing, pot each rooted section according to its own root mass. The original pot may no longer be appropriate for the reduced parent. Label divisions if you are tracking results, then clean the foliage and pot exterior so later spots or moisture changes are easier to notice.
Keep the Crown at the Correct Depth
The crown and lower petiole bases should sit at approximately the same depth as before. Burying the stem deeply to stabilize a leaning plant places tissue in a persistently moist environment and can invite decay. Planting too high leaves upper roots exposed and causes the root ball to dry unevenly.
Use the old soil line as a guide. If the plant has developed a long bare cane, support or propagate it rather than hiding the whole cane under mix. Firm gently around the root crown and add a stake if required. Correct depth is a small detail with a large effect on long-term stem health.
Handle the First Watering Correctly
After a routine repot with healthy roots, water thoroughly until excess drains. This settles mix around roots and reveals blocked holes or large dry pockets. Discard runoff from the saucer or cachepot. Then wait to water again until the upper portion of the mix has begun to dry and the pot feels lighter.
After extensive rot removal, the decision is more conditional. Slightly moist pre-mixed substrate may provide enough initial moisture without saturating a severely reduced root system. If the fresh mix is dry, water enough to settle it, then allow appropriate aeration. The essential point is not to keep the pot continuously wet because “the plant is recovering.”
Do not add fertilizer to the first watering unless a specific product and situation justify it. Fresh commercial mix often contains nutrients, and injured roots are sensitive to salts. Root growth comes from suitable moisture, oxygen, temperature, and plant reserves. Resume conservative feeding only after recovery and active growth.
Provide Stable Post-Repotting Care
Return Maria to Aglaonema Maria light guide and a warm, draft-free location. Avoid direct sun during recovery, especially if roots were disturbed. Keep it in the same general light exposure it knew before rather than combining repotting with a dramatic relocation. Stable conditions let you interpret the plant’s response.
Humidity around normal household levels is usually adequate when watering is correct, though very dry air can increase leaf loss after major root disturbance. Do not seal a whole repotted plant in stagnant humidity if the root zone is wet. Gentle air movement and an open, aerated mix remain important. Rotate only after the plant regains stability.
Monitor pot weight and actual moisture because the new container will not dry on the old schedule. A larger volume, fresh fine mix, or plastic pot may lengthen the interval. Terracotta, added bark, or a smaller root ball may shorten it. The plant needs observation, not a recurring calendar notification.
Diagnose Drooping and Repotting Stress
Mild drooping for a few days can result from root handling and changed water contact. The plant should remain structurally firm and stabilize rather than decline continuously. One older lower leaf may yellow as resources shift. Do not make another major change solely because the plant looks slightly tired on the first day.
Progressive collapse, a soft crown, spreading yellow leaves, or wet mix that never lightens is not normal recovery. Check temperature, drainage, and root condition. Wilting in wet soil can indicate impaired roots, so adding water may worsen the problem. Wilting in genuinely dry fresh mix may mean water bypassed the old root ball or the new coarse mix dried faster than expected.
Leaf curl or crisp edges can follow dehydration, root loss, low humidity, or concentrated salts. Evaluate the complete pattern and timeline. A plant that remains firm and begins a new leaf within the following weeks is adapting. A plant losing leaves rapidly needs a root-zone reassessment rather than an automatic fertilizer dose.
Avoid Common Repotting Mistakes
The most common mistake is moving from a small root ball into a dramatically larger decorative container. The second is pressing fine mix tightly around roots, which reduces air space. Other avoidable errors include burying the crown, leaving runoff inside a cachepot, using garden soil, fertilizing damaged roots, and repotting repeatedly because recovery is not immediate.
Do not wash healthy roots bare merely because social media demonstrations do so. Do not prune roots to make a plant fit a preferred pot unless there is a considered horticultural reason. Do not add a gravel “drainage layer” instead of using a hole. Each unnecessary intervention increases the number of variables the plant must overcome.
The opposite mistake is refusing to disturb a clearly harmful nursery setup. If a plug remains saturated while surrounding mix dries, a rigid basket constricts the crown, or active rot is spreading, careful correction is warranted. Good repotting is selective: preserve healthy structure and change the part that is failing.
Adapt the Method for Special Situations
For a self-watering container, establish roots in the new substrate before expecting them to use a reservoir. Keep the wick system clean and do not assume constant water availability suits a recently reduced root system. For semi-hydro or mineral substrates, treat the move as a culture-system transition, not routine repotting; root adaptation and nutrient management differ from conventional potting mix.
For a very large, top-heavy Maria, consider dividing rooted clusters or using a heavier cachepot around a correctly sized liner. For a bare, leaning cane, take a top cutting and retain the rooted base rather than burying the stem. For a newly purchased plant containing several cuttings, separation is optional. A full clump can remain together if roots and watering behavior are healthy.
When the old and new mixes differ greatly, remove more of the old substrate only if the moisture mismatch would be difficult to manage. A dense central plug inside a very coarse mix may stay wet invisibly; a tiny dry peat core inside chunky bark may become water-repellent. Blend compatible materials around the transition zone and monitor it directly during the first weeks.
Conclusion
Effective Aglaonema Maria repotting starts with diagnosis, not a date. Repot when roots truly crowd the container, the substrate no longer wets and dries predictably, drainage is inadequate, or disease requires intervention. Choose a pot only slightly larger than a healthy root ball, use an airy moisture-retentive mix, preserve firm roots, and keep the crown at its original depth.
The job is not finished when fresh soil reaches the rim. The new container changes drying time, and disturbed roots need stable warmth, indirect light, and measured watering. Watch texture, pot weight, drainage, and the direction of change in the foliage. When those signals improve, Maria can resume growth without the cycle of oversized pots, wet mix, and repeated rescue repotting.
When to use this page vs other Aglaonema Maria guides
- Aglaonema Maria overview - Start here for whole-plant context before deep-diving this topic.
- Aglaonema Maria problems hub - Jump to symptom-specific fix guides when this care topic does not resolve the issue.
- Root Rot on Aglaonema Maria - Escalate here when repotting adjustments are not enough.