How to Prune Water Lettuce: Thin Mats, Save Water Quality
How to Prune Water Lettuce: Thin Mats, Save Water Quality
How to Prune Water Lettuce: Thin Mats, Save Water Quality
Quick answer
Water lettuce (Pistia stratiotes) spreads across the water surface on horizontal stolons, not upright stems. Pruning here means thinning overcrowded mats, removing decay before it fouls your water, and disposing of every piece responsibly because fragments can restart infestations.
First, lift the mat edge and pinch off every yellow, brown, or mushy outer leaf at its stolon base - decaying tissue is the fastest route to ammonia spikes in closed tanks. Once rot is cleared, assess surface coverage from above. If more than about half the water is solid green, thin outer daughter plants on long stolons until roughly 30–50% of the surface stays open for gas exchange and light. Move all removed material off the water immediately to a drying tray; never leave floating fragments behind.
What pruning means for floating water lettuce
Pruning water lettuce is deliberate biomass removal: whole rosettes, attached daughters, and individual senescing leaves. You are managing surface area and water chemistry, not training a branching habit. Each rosette is a spongy floating head with feathery roots trailing into the water column. Those roots shelter fry, absorb nitrates, and - when too numerous - snag filters and seal the air–water interface.
Unlike terrestrial houseplants, water lettuce does not bush out from a cut on a stem node. New plants arrive almost entirely through vegetative reproduction: stolons extend from a mother rosette, and daughters form at the tips. Pruning thins that network. Removing a decaying leaf prevents localized rot from adding organic load. Removing excess mothers and daughters keeps oxygen dissolving at the surface.
Rosettes, stolons, and daughter plants
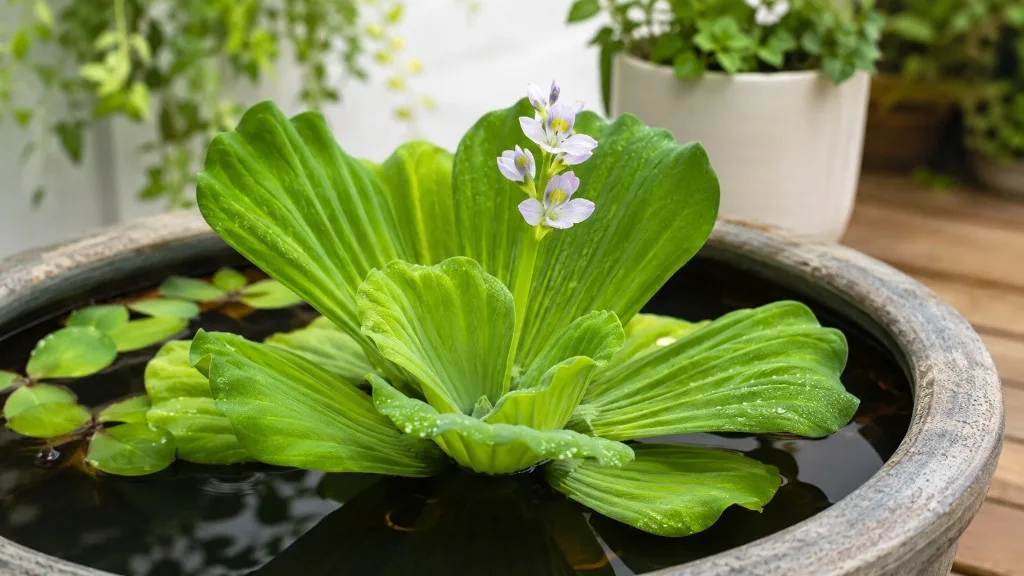
A mature rosette looks like a pale green lettuce head floating on the surface, typically 5–25 cm wide in cultivation, with roots trailing 10–20 cm or more below. From the base, one or more stolons reach outward. At each tip, a daughter plant develops its own miniature rosette and root system. In warm water with adequate light, daughters mature and produce the next generation along extending stolons.
That architecture defines every cut. You trace stolons back to a healthy mother or snip a daughter free once it has three to four leaves and visible white roots. Pinching a yellow leaf means removing it where it meets the stolon - not tearing mid-blade. Severing a stolon between mother and daughter creates two independent plants, which helps propagation but does not reduce total count if both stay in the same pond.
Why aquatic thinning differs from stem pruning
Terrestrial pruning redirects energy to remaining shoots over weeks. Aquatic thinning protects immediate water chemistry. A dense mat blocks light to submerged plants, dampens surface ripple that aids gas exchange, and traps heat on sunny days. Decaying tissue in an enclosed aquarium is a direct ammonia input. UF IFAS notes that dense floating mats prevent air and light diffusion, consume oxygen, and can contribute to fish stress - risks that scale with mat thickness and temperature.
Aquatic pruning also carries biosecurity weight. Pistia stratiotes is managed as an invasive species across many warm regions. A trimmings-bucket mindset - tossing extras near a storm drain or pond bank - can violate local law. Every session should end with plant material off the water, drying or bound for contained compost or trash.
When water lettuce needs pruning
Water lettuce signals overcrowding faster than most floating plants because consequences show on the surface within days. Prune when coverage, decay, or flow problems appear - not on a decorative calendar. In actively growing warm water, that often means weekly checks; in cooler or dimmer conditions, every two weeks may suffice until growth accelerates.
Intervene immediately when you see black mushy tissue, a sour smell at the surface, or rosettes sinking partially. Intervene within the same week when more than half the surface is solid cover, filter intake pulls in roots, or submerged plants below bleach from shade. Preventive thinning before the mat peaks is easier than emergency removal of a sodden blanket that tears into hundreds of fragments.
Signs of an overcrowded surface mat
Overcrowding is visual and mechanical. Look for stacked rosettes two or three layers deep, with younger plants climbing on older ones. Tank edges may show compressed plants pushed against walls, with leaves cupping upward from pressure. Underneath, roots intertwine into a dense curtain that sways as one mass - a reliable sign you have passed useful density.
Functional symptoms matter as much as appearance. Reduced surface ripple under your filter return means the mat is damping movement. Fish gasping at gaps in cover can indicate localized low oxygen under thick insulation, especially overnight when plants respire. Submerged plants melting directly under the mat are losing light. If you must push plants aside to feed fish or reach equipment, you are overdue for thinning.
Yellowing at the outer oldest leaves of an otherwise firm rosette is normal senescence - remove those leaves promptly. Widespread yellow across many rosettes simultaneously often points to crowding plus nutrient competition, low light, cold water below about 18°C (65°F), or nitrogen limitation in low-bioload aquariums. Pruning clears decay and competition first; adjust light, temperature, or fertilizer only if yellowing continues after thinning.
Best timing through the growing season
Late spring through summer is peak growth for outdoor ponds in temperate climates and the period demanding the most consistent thinning. Water in the 21–30°C (70–86°F) range supports rapid stolon extension; under bright light and ample nutrients, populations can double in population size in a few weeks in ideal conditions. Weekly surface passes prevent explosive overcover.
In autumn, shorten sessions to match slowing growth but keep removing decay - wet rotting leaves on cooling water are a common ammonia trigger. Before first frost outdoors, plan a major thin and bring a small indoor stock if you want to overwinter; compost or trash the bulk on land after drying. Winter indoor aquariums may need only light leaf cleanup unless grow lights and warm water keep reproduction active.
New purchases deserve an arrival prune: remove yellow or brown leaves, inspect roots, and float plants separately one to two weeks before adding them to a main display. That prevents introducing a decaying rosette into a clean system.
The first cut to make
Before you thin for density, remove decay. Lift each rosette you can reach, support the underside, and pinch every yellow, brown, translucent, or slimy outer leaf at the stolon base where it attaches. Leaves that pull away with gentle downward pressure are ready; do not rip mid-blade and leave tissue floating.
This single step matters because rotting leaves sink partially and bacterial breakdown releases ammonia faster than removing healthy green biomass. In a closed aquarium, that shows on test kits within a day or two. Only after decay is cleared should you decide how many daughters and excess mothers to remove for open-surface targets.
How to thin overcrowded mats step by step
Thinning is selective harvest. Your goal is fewer, healthier rosettes with space to spread flat - not a bare pond. Work from one corner so you have a staging tray or bucket beside the water, never floating loose nearby where splash returns fragments.
Turn off strong surface skimmers temporarily if they suck bits faster than you collect them. A small aquarium net corrals drifting mini-rosettes after the main pull.
- Skim loose fragments - broken stolons and detached daughters decide nothing while drifting.
- Remove outer daughters on long stolons - trace each runner to its attachment and snip close to the plant you discard.
- Thin duplicate mothers in the interior - slide fingers under a rosette and lift gently; avoid yanking, which tears stolons underwater.
- Pinch remaining yellow outer leaves from kept rosettes.
- Net the surface again the same day and the next morning.
Favor keeping compact, flat rosettes with pale green color and firm spongy texture. Remove cupped, waterlogged tops and torn centers. For large outdoor mats, a hand scoop toward shore works, but UF IFAS emphasizes that water lettuce can regenerate from fragments - collect every piece.
Separating daughter plants from the mother rosette
Daughter separation is the most common recurring prune. Wait until the daughter has at least three to four leaves and visible white root hairs before cutting it free if you plan to keep it. Hold the mother steady and sever the stolon with a fingernail pinch or small scissors as close to the chosen plant as possible without damaging leaves.
If you are reducing population, move the daughter to your drying pile rather than relocating it within the same pond - moving plants around the same water body does not reduce biomass. Never cut all stolons from a single mother at once unless you are removing that mother too; a rosette stripped of daughters and half its leaves may recover slowly or rot in warm stagnant pockets.
When stolons break naturally, floating mini-rosettes are common. Skim them with a net even if you intend to keep some - decide on land which are healthy.
How much open surface to keep
A practical target in aquariums and ornamental ponds is roughly 30–50% of the water surface clear - enough for gas exchange, light penetration, and feeding access while retaining shade and nitrate uptake. A heavily stocked turtle pond with strong filtration may tolerate more cover than a lightly filtered shrimp tank with carpet plants below.
After a heavy thin, avoid removing more than about one-third of the total floating mass in a single session on small enclosed systems. Stagger major reductions over two weeks if fish are sensitive or the mat was buffering oxygen through its root mass.
For severe outdoor infestations, Mississippi State University Extension recommends treating one-third of a pond at a time with at least two weeks between large removal passes - the same staged logic protects fish when you hand-thin dense mats that have shaded water for months.
Removing yellow, brown, and rotting rosettes
Yellow and brown tissue is active decay loading, not a cosmetic flaw. Older outer leaves yellow naturally; leave them attached and they soften, sink partially, and release organic acids.
Work rosette by rosette after your initial decay pass. Inspect the lowest leaves where they meet the central stolon. Brown, translucent, or slimy leaves come off immediately. For whole rosettes that are more yellow than green, mushy at the crown, or smelling sour, remove the entire plant - a half-decayed rosette rarely recovers and can infect neighbors in tight mats.
Crown rot often follows cold damage, water pooling on cupped leaves, or physical crushing in stacked mats. Discoloration confined to older roots while the crown is firm is sometimes normal aging - trim only mushy root tips that shed in clouds, not the whole root mass.
Leaf removal versus whole-rosette removal
Use leaf-level removal when the crown and roots are firm, growth is active, and only peripheral older leaves show yellow or brown. Pinch each leaf at the stolon base. Remove one to three outer leaves per rosette per session rather than stripping the plant bald.
Choose whole-rosette removal when yellowing is central, sponge texture collapses under light pressure, roots are brown and slimy, or pests infest the plant. Also remove entire weak rosettes during thinning when they are clearly outcompeted under a thick canopy.
Do not confuse pruning with herbicide treatment - those are separate tools for large invasive infestations and require label compliance. Home aquarium pruning is physical control only.
Controlling spread between pruning sessions
Spread control sits on top of weekly thinning. Water lettuce moves by stolons, detached daughters, seeds in mature outdoor populations, and fragments - any piece with living tissue can restart in warm still water. Indoors, corral plants away from filter intakes and overflows with floating rings or baffles. Outdoors, barriers at outflows and netting during heavy rain reduce escape when water level rises.
Share plants with other hobbyists only with explicit invasive warnings in regulated regions; in some U.S. states, transport and possession of Pistia stratiotes is restricted or banned. Never release surplus into lakes, canals, or retention ponds.
A weekly maintenance rhythm
A sustainable rhythm fits in ten to twenty minutes once a week during peak season. Skim fragments first. Thin daughters and excess mothers to your open-surface target. Pinch yellow leaves from remaining rosettes. Inspect filter flow. Move all removed material off the water immediately.
Between weekly passes, glance daily after feeding or turtle activity. Turtles shred plants; shredded fragments need netting out the same day.
Legal and environmental responsibility
Treat Pistia stratiotes as a potential invader even when bought legally for a home tank. Queensland biosecurity guidance stresses that new infestations often start from flooding, boating, or domestic disposal of aquarium and pond plants. Your workflow should assume zero plants reach living water outside your system - no compost piles open to rain swales, no drying on banks above rising water.
Physical removal is most effective when populations are small and early - exactly the stage home gardeners control if disposal discipline matches thinning effort.
Composting and disposing removed plants safely
Responsible disposal completes pruning. Wet water lettuce in a closed bag rots, smells, and may leak living tissue when the bag splits. Cornell Cooperative Extension guidance on disposing of water weeds recommends harvesting carefully to limit fragmentation, removing plants on land away from the water, and draining or drying before composting or yard-waste drop-off.
The core rule: desiccate before dispersal. Living water lettuce survives on moist banks and can re-enter water bodies after rain.
Dry and drain harvested plants off the water
After each session, pile plants on pallets, mesh screens, or tarps elevated above ground. Let piles drain 24–48 hours in sun when possible. Turn once to expose wet inner layers. Keep piles away from pond edges, gutters, and storm drains. When material snaps dry and brown, it is far safer for compost or bagged trash.
Compost layering and disposal options
Composting works when the pile is active and aerated. Cornell CCE suggests alternating 2 inches of drained weeds with 4–6 inches of dry brown material - leaves, straw, shredded cardboard. Open wire bins outperform sealed tubs that hold moisture.
Municipal yard waste drop-off is appropriate in many counties if plants are bagged dry; confirm local rules. Trash bound for landfill is acceptable when compost is impractical. Never feed fresh water lettuce to livestock unless you know regional toxin and pollution guidance; urban pond plants can concentrate metals and pesticides.
Recovery after pruning
Water lettuce does not callus like woody stems. Recovery means stable water, flat regrowth, and no new decay. Within 24–48 hours, kept rosettes should sit level on the surface with firm spongy texture. New daughters may appear on stolons within one to two weeks in warm active water - that is normal regrowth, not a sign you pruned too hard unless the mother crown yellows centrally.
Signs pruning worked: improved ripple at the surface, submerged plants regaining color, stable fish behavior overnight, and ammonia/nitrate readings steady or improving after decay removal. Signs you went too far or timed badly: central crown yellowing on multiple kept rosettes, fish bolting into bright open water without shade, or an algae bloom on exposed surface after stripping all cover at once.
If widespread yellow persists after thinning and decay cleanup, look at temperature below 18°C (65°F), nitrogen limitation in low-bioload tanks, or pH stress - pruning cannot substitute for fixing water parameters.
Common water lettuce pruning mistakes
The most damaging mistake is leaving fragments in the water while thinking you thinned adequately. Every torn stolon and floating leaf can root. Net after major work and again the next morning.
Second is pruning without a disposal plan - plants piled on a damp shoreline re-enter the system. Third is stripping all cover at once in a stocked tank, shocking fish with light and reducing oxygen buffering. Fourth is tearing yellow leaves mid-blade. Fifth is ignoring why leaves yellow - repeated pruning of nutrient-starved plants leads to a bare surface and an algae bloom when nutrients finally rise.
Avoid herbicides in home aquariums or turtle habitats without professional direction. Avoid releasing thinned plants into wild water. Tools are simple: hands, aquarium scissors, nets, trays, tarps. Sterilize scissors between systems if you move plants between ponds.
Conclusion
Water lettuce pruning comes down to four linked habits: remove decay at the stolon base first, thin overcrowded mats before they stack and shade everything below, control spread with weekly attention and physical containment, and compost or dispose of every removed plant only after it is drained and dried off the water. Match open-surface targets to your filter, stock, and light - roughly 30–50% clear is a solid starting point - and stage large reductions so fish and bacteria adjust without shock.
Done consistently, pruning keeps Pistia stratiotes in the role you invited it for: floating cover, nutrient uptake, and habitat - without the mat becoming an oxygen barrier, an ammonia source, or an escape risk to local waterways.
When to use this page vs other Water Lettuce guides
- Water Lettuce overview - Start here for whole-plant context before deep-diving this topic.
- Water Lettuce problems hub - Jump to symptom-specific fix guides when this care topic does not resolve the issue.
- Slow Growth on Water Lettuce - Escalate here when pruning adjustments are not enough.