Tradescantia Nanouk Soil: Mix, Drainage & pH
Tradescantia Nanouk Soil: Mix, Drainage & pH
Tradescantia Nanouk Soil: Mix, Drainage & pH
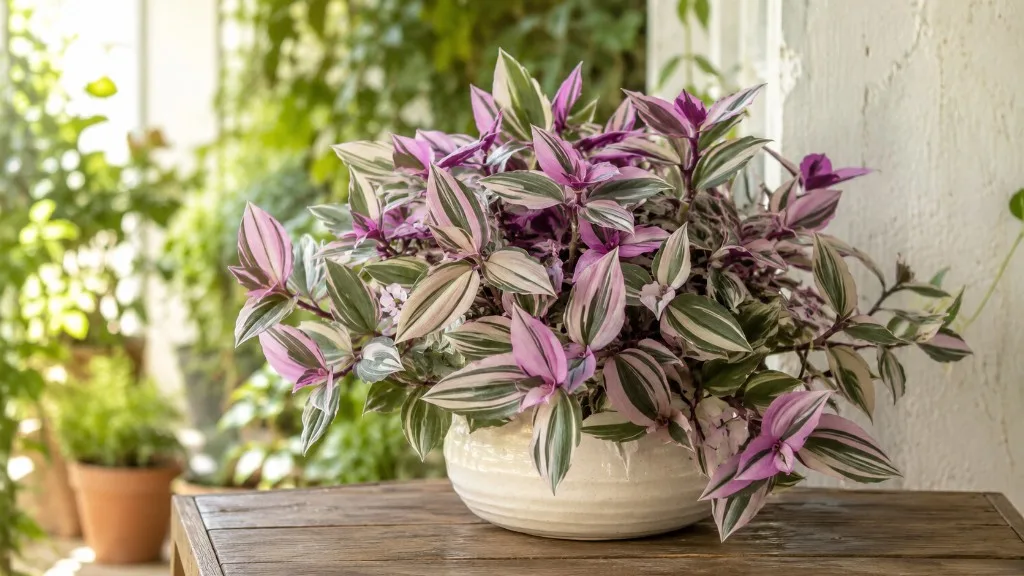
Tradescantia Nanouk soil is the part of care most people get almost right - and almost right is where crown rot starts. Tradescantia albiflora ‘Nanouk’ (also sold under names like Fantasy Venice) is a Dutch-bred cultivar with chunky pink, cream, and green leaves on fast-growing stems. It looks tougher than it is at the root zone. Nanouk wants a mix that holds enough moisture for its shallow roots to drink steadily, yet drains and breathes fast enough that the lower stems never sit in a wet, oxygen-starved pocket after you water. Dense bagged potting soil alone, an oversized pot with no airflow, or a decorative container without a drainage hole will all produce the same sad outcome: soft stems at the crown, yellowing lower leaves, and a plant that looks fine on top while the base quietly fails.
The practical target is a well-draining peat-perlite blend amended with coarse bark or coco chips for extra porosity. A reliable starting ratio is two parts peat-based houseplant mix, one part perlite, and one part orchid bark or coco chips - adjusted up or down depending on your watering habits, room temperature, and how much light the plant gets. Pair that mix with a container that has drainage holes, is only slightly wider than the root ball, and is shallower rather than deep when you have a choice. Water when the top inch or two of mix feels dry, saturate thoroughly, and let excess water exit the bottom. That rhythm only works if the soil structure supports it.
This guide covers what Nanouk roots actually need, how to build and test a peat-perlite mix, pH and mineral considerations, container drainage rules, repot timing, and the soil mistakes that cause more damage than underwatering ever does.
Why Soil Matters for Tradescantia Nanouk
Soil is not a passive holder for roots. In a container, it is the entire life-support system: it stores water, holds air pockets, buffers temperature swings, and determines how quickly excess moisture leaves the root zone after every watering. For Nanouk, that last job - drainage speed - matters disproportionately because the plant’s weakest point is not the tip of a trailing vine but the crown, where multiple stems emerge from soil level. Water that lingers around those stem bases softens tissue, invites fungal breakdown, and produces the blackened, mushy lower stems that are notoriously hard to reverse once established.
Related inch plants prefer moist, well-draining soil, and root rot occurs when mix stays too wet. That pairing - moist and well-draining - is the whole puzzle. Pure fast-draining cactus mix dries the shallow root zone too aggressively between waterings, leaving leaves limp and tips crisp. Pure peat-heavy indoor mix stays wet too long in the middle of the pot even when the surface looks acceptable. Nanouk needs the middle path: moisture-retentive but not soggy, with enough structural openness that water moves through rather than pooling.
Soil also interacts with everything else in your care routine. A Nanouk in a bright, warm south-facing room with strong airflow will dry its pot faster than the same plant in a cool north window. Heavy mix in the bright setup might work; the same mix in the dim corner becomes a swamp within days. Light, pot size, watering frequency, and seasonal growth all change how quickly mix dries - but soil texture sets the baseline for how forgiving your system is when you water a day early or a day late. Better mix buys you margin.
What Nanouk Roots Need From a Potting Mix
Nanouk is not a deep-rooted specimen. Like other Tradescantias, it develops a relatively shallow, fibrous root mass that spreads outward more than downward. NC State Extension notes that related inch plants root at nodes and prefer moist, well-drained potting mix. Those roots evolved for catching moisture near the soil surface in bright, filtered light - not for sitting in a deep column of saturated peat. In a pot, that physiology means the upper and middle zones of the mix do most of the work, and the lowest inch of soil in an oversized container often stays wet longest, exactly where you least want stagnant moisture near crown tissue.
A good Nanouk mix therefore needs four properties working together. Drainage lets excess water exit after irrigation so air can refill pore spaces. Aeration keeps those pore spaces open over time instead of collapsing into a brick after six months of watering. Moisture retention stores water in organic components long enough that roots do not cycle between bone-dry and flooded every forty-eight hours. Structure - from perlite, bark, or pumice - prevents compaction so the first three properties survive more than one growing season.
Shallow Roots and Crown Sensitivity
The crown is where stem tissue meets soil. On Nanouk, those stems are thick and fleshy, and the lower leaves sit close to the mix surface when the plant is young and compact. Overhead watering that repeatedly wets foliage is a separate issue, but soil-level wetness is equally dangerous: if mix around the crown stays saturated, stem bases stay damp overnight, and fungal problems follow. You may not see it immediately because new growth at the tips keeps the plant looking healthy while the base weakens.
Shallow roots also mean Nanouk dries from the top down. Your finger test - checking whether the top inch or two is dry - reflects real root activity better than it would on a deep-rooted Ficus. When that top layer is dry but the center of the pot still holds moisture, you are in the sweet spot. When the top is dry and the whole pot is light, it is time to water. When the top feels dry but the pot is heavy and stems at the base look darker or softer than usual, the middle of the mix may be holding water too long, which is a soil-structure problem even if your Tradescantia Nanouk watering guide looks correct on paper.
Moisture Retention Versus Aeration
These two goals pull in opposite directions, and Nanouk care lives in the tension between them. Peat moss and coco coir excel at holding water and releasing it gradually; they are the moisture-retention side of the equation. Perlite, pumice, and orchid bark create non-compacting voids that let water flow through and let oxygen reach roots; they are the aeration side. Neither alone is ideal for Nanouk. Peat alone becomes a dense, water-logged sponge in a small pot over time. Perlite-heavy mixes drain so fast that you chase wilt every three days in summer.
The art is calibration. In a warm, bright home where you water frequently, lean slightly toward more perlite and bark. In a cooler room or if you tend to forget watering, keep a bit more peat or coir in the blend so the plant does not crash between sessions. Neither extreme - swamp nor desert - supports the pink variegation and compact habit Nanouk is grown for. Variegated tissue is metabolically demanding; roots under stress from bad moisture swings show it first as washed-out color, limp stems, or Brown Tips on Tradescantia Nanouk that get blamed on light when the root zone is the real culprit.
Best Soil Mix for Tradescantia Nanouk
The best soil for Tradescantia Nanouk is an airy houseplant mix built on a peat or coir base, amended heavily enough with perlite and coarse bark that water never sits stagnant around the roots or crown. Commercial “indoor potting mix” from a reputable brand can work as a starting point if you amend it - straight from the bag, many blends are too fine and peat-heavy for Nanouk in a typical home environment. Think of store-bought mix as an ingredient, not the finished product.
If you prefer a single-bag solution, look for labels that mention “well-draining” or “for tropical houseplants” and still plan to add perlite. A 60/40 blend of bagged mix to perlite by volume is a minimum adjustment for most growers. Nanouk responds noticeably within a few weeks when you move it from dense soil to an amended mix: new stems root more readily, existing leaves feel firmer, and the pot weight after watering drops faster because water is actually leaving.
Peat-Perlite Blend: The Reliable Starting Point
A peat-perlite blend is the most tested starting point for Nanouk because it directly addresses the moist-but-not-soggy requirement. Peat (or coco coir as a more sustainable substitute) provides consistent moisture release. Perlite provides drainage channels that do not break down in a single season. Together they create a mix that wets evenly when you water, drains within minutes from a pot with holes, and holds a usable moisture gradient for several days depending on conditions.
A widely useful ratio is 2 parts peat-based potting mix : 1 part perlite : 1 part orchid bark or coco chips. That formula appears in multiple experienced grower recommendations because it balances all four soil properties without requiring exotic ingredients. Perlite grade matters slightly: coarse horticultural perlite (#3 or larger) maintains better airflow than fine dust-grade product. If you only have fine perlite, compensate with a slightly higher proportion or add bark for chunk structure.
Can you use cactus or succulent mix? Sometimes, but rarely straight. Many cactus blends contain extra sand that compacts over repeated watering, and they dry so quickly that Nanouk’s shallow roots stress in bright indoor conditions. If cactus mix is what you have, blend it 50/50 with regular peat-based potting mix and add a handful of bark per quart to reopen structure. Pure cactus soil alone is better than pure dense peat for an overwaterer, but it is not the optimal long-term home for a plant that prefers steady moderate moisture.
Adding Bark or Coco Chips for Extra Air
Perlite alone improves drainage, but orchid bark or coco chips add something perlite cannot: rigid, slow-decomposing particles that keep mix open for a year or more. Bark creates micro-channels water travels through and air follows behind. It also prevents the “hydrophobic dry pocket” problem that happens when peat ages and repels water in the center of the pot while the surface accepts irrigation - a common reason growers think they underwater when the middle of the root zone is actually still wet or unreachable.
Coco chips behave similarly to bark with a more uniform size and slightly higher initial moisture retention. Either works. Avoid fine mulch or shredded bark meant for outdoor landscaping; particles too small clog pore spaces instead of opening them. Target quarter- to half-inch chunks. A bag labeled for orchids or for reptile/vivarium substrate (unscented, untreated) is usually the right texture.
If you skip bark entirely, increase perlite to roughly 40 percent of total mix volume and plan to refresh soil more often because peat-only amended mixes compact faster. Bark is not mandatory, but it is the single cheapest upgrade that makes Nanouk soil behave more predictably month after month.
DIY Recipes and Component Ratios
Recipes are starting points, not commandments. Your home’s light, temperature, pot material, and watering personality should push ratios up or down. Measure by volume (scoop to scoop), not weight - a scoop of perlite weighs far less than a scoop of wet peat.
Standard Mix for Most Homes
This is the default for growers who water when the top inch dries and keep Nanouk in Tradescantia Nanouk light guide:
- 2 parts quality peat-based houseplant potting mix (or 1 part peat + 1 part coco coir if mixing from raw components)
- 1 part coarse perlite or pumice
- 1 part orchid bark or coco chips
- Optional: a small handful of worm castings or compost per quart for slow nutrient release at Tradescantia Nanouk repotting guide - not required if you fertilize during the growing season
Mix dry in a tub until the bark and perlite are evenly distributed. When you squeeze a handful, the blend should hold together briefly then crumble apart - not form a tight wet ball. Pot Nanouk so the crown sits at the same level it was before; never bury stems deeper to stabilize a leggy plant.
Fast-Draining Mix for Heavy Waterers
If you have killed Nanouk before by loving it with too much water, or if the plant sits in a low-light spot where mix dries slowly, shift the ratio toward drainage:
- 1 part peat-based potting mix
- 1 part perlite or pumice
- 1 part orchid bark
- Optional: 10 percent horticultural charcoal by volume for extra microbial buffering in humid rooms
This blend dries faster and forgives overwatering better. Trade-off: you will water slightly more often in summer, and the plant may need more attentive moisture checks during heat waves. That is a fair exchange if the alternative is chronic crown wetness.
For growers who underwater, reverse slightly: 3 parts potting mix, 1 part perlite, 1 part coco coir (instead of bark) adds moisture retention without eliminating drainage entirely. Avoid vermiculite as a perlite substitute here - vermiculite holds more water and reduces airflow, which is the opposite of what most Nanouk growers need.
pH and Mineral Balance in Nanouk Soil
Tradescantia Nanouk performs best in slightly acidic soil, typically in the pH 5.5 to 6.5 range. Peat-based mixes naturally trend acidic, which aligns well with Nanouk’s preference. Coco coir is closer to neutral; if you build a coir-heavy blend, the plant still grows well in practice, but you lose some of peat’s natural acidity. For most indoor growers this difference is minor unless tap water is extremely alkaline or hard.
pH matters because it affects nutrient availability. In overly alkaline mix, micronutrients like iron and manganese become less accessible, sometimes showing up as pale new growth even when fertilizer is present. Nanouk’s variegated leaves make subtle chlorosis harder to spot until color washes out broadly. If you use mostly coco coir and notice persistent pale new leaves despite good light and conservative feeding, a diluted acidifying fertilizer or occasional flush with rainwater or distilled water may help - but fix soil structure and watering first, because those cause similar symptoms more often than pH drift in a fresh mix.
Mineral and salt buildup is the other pH-adjacent concern. Fertilizer residues, hard tap water, and slow compost release all leave soluble salts in container mix over months. A white crust on the soil surface or pot rim is a visible flag. Nanouk leaves may show brown, crisp tips that resemble underwatering but persist even when moisture is correct. If crust appears, scrape the top quarter-inch of old mix, replace with fresh amended soil, and water deeply until runoff exits the drainage holes. At annual repotting, replace mix entirely rather than reusing tired peat that has lost structure and accumulated salts.
You do not need a soil pH meter for Nanouk unless you are troubleshooting persistent nutrition problems. A well-built peat-perlite-bark mix in a pot with drainage, fed modestly during spring and summer, stays within a workable range for Tradescantia Nanouk overview without micromanagement.
Container Drainage: Holes, Size, and Pot Type
Soil does not work in isolation. The container determines whether your carefully mixed peat-perlite blend can actually drain, how much oxygen reaches the lower root zone, and how long moisture stays available after watering. A perfect mix in a pot with no exit hole becomes a closed system - physics wins, and Nanouk loses.
Why Drainage Holes Are Non-Negotiable
Yes, Tradescantia Nanouk needs a drainage hole - or multiple holes - in any pot used for long-term growing. Containers must have holes in the bottom so excess water exits. No layer of gravel at the bottom substitutes for an exit. Gravel creates a perched water table where fine peat above sits saturated longer, which is the opposite of what folklore promises. Cachepots and decorative outer pots are fine as long as the inner grow pot drains freely and you empty standing water from the outer shell after every watering.
Drainage holes also let you observe runoff quality. Clear water exiting the bottom after a thorough soak tells you mix is accepting water evenly. Discolored, sour-smelling runoff or no exit flow at all when the pot feels heavy are diagnostic clues that compaction or root problems are developing. Nanouk is tolerant of many care variations, but sealed-bottom pots convert minor overwatering into crown rot within weeks.
If you adore a hole-less ceramic pot, use it as decoration only. Plant in a plastic nursery pot one size smaller that fits inside, lift it out to water at the sink, and return it only after dripping stops.
Pot Size and Depth for Trailing Stems
Nanouk prefers to be slightly root-bound rather than swimming in excess soil volume. Missouri Botanical Garden advises going up just one pot size - usually 2 inches wider - to avoid root rot from excess wet soil. Oversized pots surround roots with wet mix that roots never reach, extending the time the center stays saturated after each watering. For a trailing plant, wide and shallow often beats tall and narrow because it matches the horizontal root habit and reduces the depth of potentially stagnant mix below the root mass.
Terracotta breathes through porous walls and dries mix marginally faster - helpful for heavy waterers or humid rooms. Glazed ceramic and plastic retain moisture longer, which suits attentive underwaterers but demands better amended mix if you tend toward soggy soil. Hanging baskets work beautifully for Nanouk’s trailing form; use a liner with drainage or a pot-with-saucer setup that never leaves the bottom sitting in drained water for more than thirty minutes.
Match pot upgrade to visible root signals - roots circling the surface, emerging from bottom holes, or mix drying uniformly within two to three days after every watering in peak growth - not to vine length. Long stems hanging over the rim do not by themselves mean the plant needs a bigger pot.
How to Test Whether Your Mix Drains Correctly
Before repotting an entire collection, test any new blend with a simple drainage check that takes five minutes and prevents months of guessing.
First, fill a small pot with your mixed soil and water until water runs freely from the bottom. Note the time. Within two to five minutes, runoff should slow to a drip and the top surface should look evenly darkened, not repelling water into channels down the pot sides. If water pools on top for more than thirty seconds, the mix is too fine or not blended evenly - add perlite and bark and remix.
Second, after twenty-four hours in a typical indoor temperature, stick your finger to the second knuckle. The top inch should feel dry or nearly dry while the lower portion still holds slight coolness - moisture present but not sopping. If the entire column feels wet at twenty-four hours in a small test pot, the mix drains too slowly for Nanouk unless you live in a very hot, bright environment that evaporates aggressively.
Third, pick up the pot after watering and again after three days without watering. You should feel a meaningful weight drop by day three in moderate conditions. If weight stays constant for a week indoors, mix is retaining too much water or the pot is too large for the root mass.
Fourth, when you water an established Nanouk, watch whether water runs straight through gaps between mix and pot wall - a sign of hydrophobic peat or root crowding channeling flow. Gentle pressure around the pot sides or bottom-watering briefly can rewet mix, but chronic channeling means it is time to refresh soil and loosen the outer root mass at repotting.
These tests calibrate your recipe to your environment better than any generic ratio copied from a forum. Keep notes once; reuse the winning blend for every Nanouk, tradescantia cutting, and propagation pot you start.
When to Refresh or Repot Nanouk Soil
Peat-based mix degrades. Organic matter breaks down, perlite floats to the top after repeated watering, and pore spaces collapse. Even perfect care cannot keep original soil structure forever. Refresh or repot Tradescantia Nanouk soil when you see functional decline, not on a rigid calendar - though every twelve to eighteen months is a reasonable inspection interval for fast-growing plants in small pots.
Repot when:
- Roots circle the pot surface or exit drainage holes
- Mix dries in uneven patches - wet center, dry edges - or stays wet too long after watering
- The plant stalls in peak spring growth despite good light and appropriate watering
- Mix has compacted hard enough that water runs down the sides without soaking the root ball
- A sour or stagnant smell comes from the pot bottom
- You are recovering from crown stress and need fresh, airy medium to support regrowth from healthy cuttings
Timing matters. Spring through early summer is ideal, when Nanouk enters active growth and can reestablish roots quickly. Avoid repotting a stressed plant mid-winter in a cold room unless rot is actively progressing and fresh mix is part of emergency surgery. Nanouk recovers well from moderate root disturbance, but combine repotting with other major changes - new window, fertilizer push, heavy pruning - and you multiply stress unnecessarily.
At repot, remove only the outer twenty percent of old mix without bare-rooting unless rot forces full inspection. Trim black, mushy roots with clean shears. Place into fresh amended mix at the same crown depth. Water once lightly to settle, then return to normal moisture checks after a few days. Skip fertilizer for two to three weeks while roots heal.
Soil-Related Problems and How to Fix Them
Many Nanouk problems blamed on light or humidity start in the pot. Mapping symptoms to soil causes saves plants that would otherwise get moved window to window while the crown continues to decline.
Yellow lower leaves with wet-feeling mix usually mean overwatering combined with insufficient drainage - dense soil, no holes, or a pot too large. Fix the mix and container before adjusting light. Remove affected mushy stems if tissue is soft; propagate healthy tips into fresh mix if the base is compromised.
Brown crispy leaf tips on otherwise firm leaves often trace to underwatering or hydrophobic dry pockets in aged mix, not low humidity alone. Submerge the pot bottom in a basin of water for twenty minutes to rewet evenly, then repot into fresh peat-perlite-bark blend within the month if rewetting fails to hold.
Soft, dark stem bases with firm tips are classic crown rot from prolonged soil saturation. Cut healthy stems above the damage, discard contaminated mix and badly affected roots, and restart in a smaller pot with fast-draining amended soil. Prevention - better mix, drainage holes, watering when top inch dries - is far easier than rescue.
Slow growth and washed-out pink variegation can be light-related, but check whether roots have filled the pot and mix has compacted. A root-bound Nanouk in exhausted soil cannot support vivid new growth even under strong light. Repot one size up with fresh mix and reassess color over four to six weeks.
Fungus gnats hovering around the pot surface indicate persistently moist top layer - often dense peat without enough perlite and bark. Let the top inch dry more consistently and amend or replace mix. Gnats are a symptom of soil staying wet too long, not a separate pest problem you can spray away while soil structure stays unchanged.
Common Tradescantia Nanouk Soil Mistakes
Some errors appear so often they deserve explicit call-outs because they undo otherwise good care.
Using garden soil or topsoil in pots is the fastest way to kill Nanouk indoors. Garden soil compacts, holds water unevenly, and harbors pathogens. It is designed for ground planting with drainage through earth, not a six-inch plastic pot on a shelf.
Adding a gravel layer at the bottom does not improve drainage and can raise the wet zone into the root mass. Gravel does not improve drainage in container pots - mix should be uniform from top to bottom with perlite and bark distributed throughout.
Choosing oversized pots “so it can grow into it” leaves wet unused volume around roots. Nanouk prefers snug quarters with occasional modest upgrades.
Relying on unamended bagged potting mix works in dry, bright greenhouses and fails in average apartments where mix stays wet an extra forty-eight hours per cycle. Always add perlite at minimum.
Planting in hole-less decorative pots without an inner draining container traps every watering mistake permanently.
Reusing old, broken-down peat at repotting to save money negates the benefit of repotting. Fresh amended mix is the product; the pot is just the wrapper.
Burying leggy stems deep to make the plant look fuller puts node tissue in a wet zone where it rots. Leggy Nanouk should be cut back and propagated, not buried.
Ignoring weight and smell as soil diagnostics leads to late discovery of problems. Lift the pot, sniff near the drainage hole, and trust those signals as much as leaf color.
Conclusion
Tradescantia Nanouk rewards a soil setup that sounds contradictory until you see it work: moisture-retentive but never soggy, rich enough to support fast growth but open enough to drain in minutes. Build around a peat-perlite base with bark or coco chips, test drainage before you commit a prized plant, and pair the mix with a slightly snug pot that has real drainage holes. Water when the top inch or two dries, not on a blind calendar schedule, because your mix and container determine how long that takes.
Soil is the least glamorous part of Nanouk care and the one that prevents the most dramatic failures. Get the peat-perlite blend and container drainage right, refresh tired mix before it collapses into a waterlogged brick, and the same plant that yellows in dense bagged soil will push out firm pink-striped leaves on stems you can propagate with confidence. When something looks wrong, check the root zone first - the answer is usually in the pot, not the window.
When to use this page vs other Tradescantia Nanouk guides
- Tradescantia Nanouk overview - Start here for whole-plant context before deep-diving this topic.
- Tradescantia Nanouk problems hub - Jump to symptom-specific fix guides when this care topic does not resolve the issue.