Schefflera Propagation: Stem Cuttings Guide
Schefflera Propagation: Stem Cuttings Guide
Schefflera Propagation: Stem Cuttings Guide
Schefflera propagation from stem cuttings is how most indoor gardeners turn one umbrella plant into several - or salvage a leggy branch before it hits the compost bin. The umbrella tree and its compact cousin, dwarf schefflera, both root from leaf nodes on living stem tissue when warmth, humidity, and Schefflera light guide line up. You are not coaxing a miracle from a random leaf; you are working with the same branching biology these Araliaceae rainforest plants use in the wild across Taiwan, Hainan, and northern Queensland, where filtered light and steady moisture encourage new shoots after stems bend or break.
The process is straightforward once you understand what the cutting actually needs. Take a 4–6 inch section with two or three nodes, remove foliage that would sit underground or underwater, root it in moist airy soil or clean water, cover it with a vented humidity tent, and wait three to six weeks. Most failures trace back to three fixable mistakes: cutting above the node instead of below it, burying leaves that rot within days, or propagating during winter when the plant is barely metabolizing. This guide covers every step from stem selection through transplant, plus what to do when a cutting shrivels, blackens, or sits unchanged for a month without giving up too early.
Why Stem Cuttings Are the Best Schefflera Method
Home growers have a few options when they want more Schefflera - seeds, air layering, division, and stem cuttings. Stem cuttings win for most people because they need minimal gear, work on both common species, and produce a genetic clone of the parent plant. Indoor Schefflera rarely flower or set viable seed, so starting from seed is impractical for the typical houseplant owner. Air layering succeeds on thick woody stems but requires wrapping moss around a scored branch and waiting weeks before separation - excellent for a single high-value stem, overkill when you are already pruning back a bushy dwarf schefflera. Division only applies when multiple stems share one root ball, which is common on nursery-grown Schefflera arboricola but not on a single-trunk Schefflera actinophylla trained upright. NC State Extension lists stem cutting as a recommended propagation strategy for the dwarf umbrella tree.
Stem cuttings also match how Schefflera responds to pruning in everyday care. When you shorten a branch, dormant buds at nodes below the cut often wake up and produce lateral shoots. A severed stem section with intact nodes carries the same meristem tissue - it can grow adventitious roots below the buried node and fresh leaf whorls above it. That is why a leaf pulled off without main stem tissue will never become a plant, while a bare stem segment with nodes can restart an entire umbrella-shaped crown.
How Nodes Produce Roots and New Growth
A leaf node on Schefflera is the slightly swollen ring where a petiole attaches to the main stem - the same bump you aim for when pruning to encourage bushier growth. Roots do not sprout from smooth internode tissue between nodes; they emerge from the node zone where vascular bundles and dormant cells can differentiate into root primordia when moisture and warmth signal the cutting to restart. Your cutting needs at least one node buried in soil or submerged in water, and two or three nodes total so enough leaf surface remains to photosynthesize while roots develop.
Cut ¼ inch below the lowest node you plan to bury, at a 45-degree angle. The angle increases surface area for water uptake and directs moisture away from the cut face, which heals faster than a crushed flat cut from dull scissors. Strip every petiole and leaflet from the lower third to half of the cutting - anything that touches soil or water rots within days, and the bacteria that follow travel up the stem. Leave one or two whorls of leaves at the top. Schefflera leaflets are compound; remove the entire petiole, not just individual leaflets, when clearing the lower zone.
Rooting speed depends on temperature, light, and humidity, but plan on three to six weeks indoors during active growth. Schefflera roots more slowly than pothos, tradescantia, or coleus, so a cutting that looks unchanged at week two is not necessarily dead. Confirm roots with a gentle tug test - slight resistance means roots have anchored - and watch for new leaf buds opening at the tip, which is an even stronger success signal than tug resistance alone.
Arboricola vs Actinophylla Propagation Differences
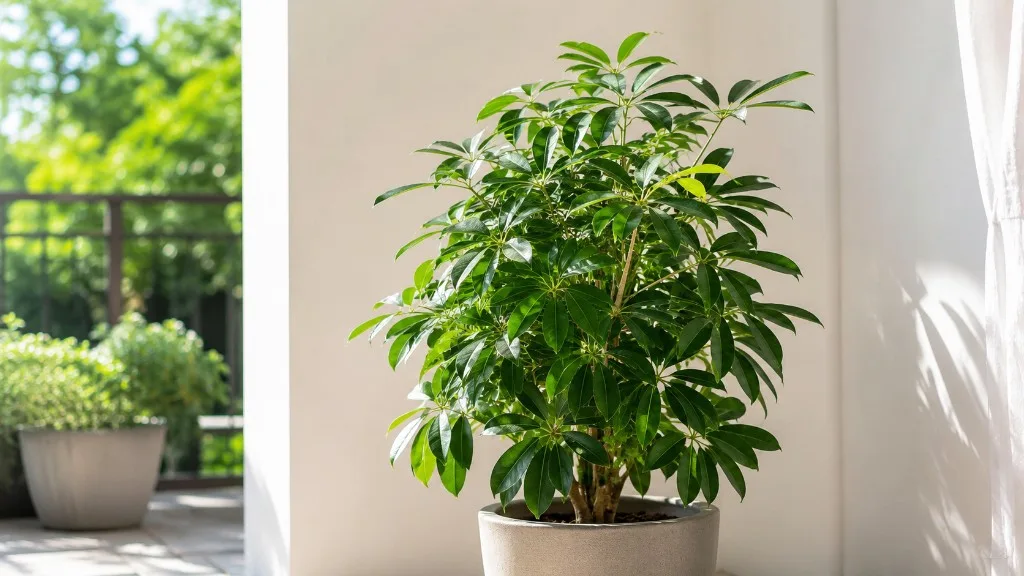
Most indoor Schefflera are Schefflera arboricola, the dwarf or Hawaiian schefflera with smaller leaflets in whorls of seven to nine and a bushy multi-stem habit that rarely exceeds four to six feet indoors. Schefflera actinophylla, the full-size umbrella tree, carries larger leaflets on thicker stems and can reach ten to fifteen feet in bright conditions. Propagation technique is identical; expectations differ.
Dwarf schefflera offers more candidate stems because multiple slender shoots emerge from the base, making it easy to take several cuttings while shaping a leggy plant. Full-size actinophylla cuttings tend to be thicker and slower; choose semi-woody green stems rather than fully hardened brown wood at the base, and expect the upper end of the rooting timeline. Variegated cultivars like Trinette, Norma, and Gold Capella propagate true to type from cuttings but may root slightly slower than all-green forms because reduced chlorophyll limits the cutting’s energy budget during the rootless phase.
If you are unsure which species you have, compare leaflet size and stem structure. Small dense foliage on multiple thin stems points to arboricola; large dramatic whorls on a single thick trunk suggest actinophylla. Misidentification will not ruin propagation, but it calibrates how long you wait before deciding a cutting has failed.
When to Propagate Your Umbrella Plant
Timing separates fast rooting from a stem that sits unchanged for months. Schefflera can technically survive a cutting taken any month of the year, but active growth season - spring through early summer - produces roots in weeks rather than months. During this window the parent pushes new leaves, vascular flow is strong, and ambient warmth near 70–75°F (21–24°C) keeps cellular division active in the cutting. Fall and winter cuttings often stall, which invites rot when the grower keeps adding moisture to a stem that is not ready to respond.
Light length matters as much as the calendar. Even in a heated apartment, shorter winter days reduce photosynthetic output from the leaves your cutting still has. If you must propagate off-season - because a stem broke during a move or a pet knocked a branch loose - supplement with a grow light on a 12–14 hour cycle and accept slower progress. Dormancy is not failure; overwatering on Schefflera through dormancy is.
Ideal Season and Temperature Range
Late spring to early summer is the sweet spot for Schefflera stem cuttings in most temperate climates. By May or June, day length is increasing, room temperatures have stabilized above 65°F, and the parent shows fresh lighter-green growth at stem tips. That new growth is ideal cutting material: firm enough to hold structure, young enough to root readily, not so soft that it collapses under a humidity dome.
Early spring works if your plant is already actively growing under supplemental light or in a warm room. Late summer is acceptable but watch for autumn slowdown - a cutting started in August may root just as the parent enters reduced growth, making aftercare trickier. Avoid taking cuttings during heat stress above 90°F or cold snaps below 60°F; both extremes suppress rooting and increase wilt.
Evaluating the Parent Plant First
Before you cut, inspect the parent plant, not just the stem you want. A Schefflera recovering from root rot on Schefflera, severe underwatering on Schefflera, or a repot from the previous week should not donate propagation material until it stabilizes - the cutting inherits the same stress chemistry and often fails faster than the parent. Check leaf undersides for spider mites, mealybugs, and scale; propagating from an infested stem spreads pests to your propagation station and every neighboring plant.
The ideal donor shows firm stems, evenly colored leaflets without widespread yellowing, and new growth at multiple points. If you are pruning to control height, take cuttings from the sections you remove rather than making extra cuts solely for propagation - fewer wounds mean less stress on the parent. Water the parent one to two days before taking cuttings so stems are hydrated but soil is not soggy.
Do not propagate as a first response to leaf drop. Schefflera sheds leaves when light, water, or temperature swing out of range, and cutting the plant before fixing those conditions removes photosynthetic surface without solving the underlying problem. Stabilize care first, then propagate from healthy new growth once the plant stops dropping. If you share rooted plants with pet owners, note that Schefflera is toxic to cats and dogs when chewed.
How to Take Schefflera Stem Cuttings
Taking the cutting is a five-minute job that determines everything downstream. Gather sharp bypass pruners or scissors, rubbing alcohol for sterilizing blades, your rooting container, and pre-moistened mix or a clean jar before you cut - a severed stem left on the counter while you hunt for a pot loses moisture fast. Sterilize blades between plants if you are taking cuttings from different specimens.
Work on a stem section 4–6 inches (10–15 cm) long with two to three leaf nodes visible after you remove lower foliage. Cooperative Extension recommends cutting at least 4 to 6 inches of stem just below a leaf node for schefflera propagation. Top cuttings - the growing tip with the newest leaves - root reliably and produce an attractive upright young plant quickly. Mid-stem sections work equally well and are what you get when shortening a leggy branch. Avoid the oldest, fully woody bottom sections unless no alternative exists; they root, but slowly.
Picking the Right Stem Section
Choose stems that are green to light brown, flexible when bent slightly, and free of dark spots, corky lesions, or insect damage. The best material sits two to four nodes below the active growing tip - old enough to be firm, young enough to still be metabolically active. Pass over stems with shriveled leaflets, sticky honeydew residue, or visible mite webbing even if the rest of the plant looks fine.
If you are propagating a variegated cultivar, select stems where the variegation pattern is stable and representative of the parent. Highly reverted all-green shoots on a variegated plant will produce all-green offspring, which may or may not be what you want. For multi-stem dwarf schefflera pots, you can take two or three cuttings from different stems in one session without harming the overall shape, especially if you are pruning for bushiness anyway.
Take multiple cuttings even if you only need one plant. Schefflera propagation is not guaranteed on the first attempt, and having backups costs nothing beyond a few extra pots.
Cutting Below the Node and Stripping Leaves
Make a single decisive cut ¼ inch below the lowest node you intend to bury, angled at 45 degrees away from the node face. Crushing the stem with dull scissors compresses vascular tissue and slows water movement - the cutting wilts before roots form. If the stem is thick, bypass pruners give a cleaner slice than household scissors.
Strip leaf petioles and leaflets from the lower one-third to one-half of the cutting, exposing at least one bare node for burial and keeping one or two whorls of leaves at the top. Any leaf that touches soil or water will rot; err on the side of removing more rather than less. If the top leaves are very large relative to the stem, trim each leaflet by half with clean scissors to reduce transpiration surface. This optional step helps water-rooted cuttings and very small stems avoid wilting during the first week. Do not remove all foliage - the cutting still needs photosynthesis to fuel root initiation.
Optional: dip the cut end in rooting hormone powder or gel containing indole-3-butyric acid (IBA) before planting. Shake off excess powder so clumps do not sit against the stem and hold moisture against the wound. Hormone is not required for Schefflera, but it can shorten rooting time by several days on slower cultivars and thick-stemmed actinophylla cuttings.
Rooting Schefflera Cuttings in Soil
Soil propagation is the most reliable method for Schefflera stem cuttings because roots that form in mix adapt directly to pot life without the transplant shock that water-rooted cuttings sometimes suffer. The goal is a moist, airy medium that holds humidity around the node zone while draining fast enough that the stem never sits in stagnant water. Think damp sponge, not wet towel.
After preparing your cutting, insert the bare node 1–2 inches deep into pre-moistened mix, firming gently around the stem so it stands upright without wobbling. If the top leaves are heavy, a small stake or the edge of the humidity dome can provide support. Do not compact the mix heavily - air pockets around the node zone reduce rot risk.
Building a Well-Draining Propagation Mix
A proven propagation mix for Schefflera combines one part peat moss or coco coir, one part perlite, and one part standard potting soil. The peat or coir retains moisture; the perlite provides drainage and oxygen; the potting soil adds structure and trace nutrients. Straight 50/50 peat and perlite also works and dries more evenly, which helps growers who tend to overwater.
Use a small pot with drainage holes - a 3–4 inch nursery pot is ideal for a single cutting. Oversized pots hold excess moisture around a rootless stem and encourage rot before roots reach the perimeter. Moisten the mix before planting until it feels like a wrung-out sponge: dark, cohesive when squeezed, but not dripping.
Humidity Dome and Daily Care Routine
Schefflera cuttings lose water through leaves faster than they absorb it through an absent root system. A humidity dome - a clear plastic bag slipped over the pot and secured with a rubber band, or a propagation box with a vented lid - reduces transpiration stress while roots form. Vent the dome daily for five to ten minutes to exchange stale air and prevent mold on soil surface and leaf surfaces. After two weeks of visible root resistance on a gentle tug, begin opening the dome progressively over another week before removing it entirely.
Place the setup in bright indirect light. Missouri Botanical Garden recommends bright light at east, west, or southern windows in curtain-filtered sun for indoor schefflera. An east-facing window or a few feet back from a south or west window works well. Direct sun through plastic magnifies heat and cooks cuttings; leggy stretching toward a dim corner signals insufficient light without the warmth needed for rooting. Target 70–75°F ambient temperature; a heat mat set to the low 70s can accelerate rooting if your room runs cool, but monitor moisture more closely because warmth increases evaporation.
Keep the mix consistently lightly moist - never waterlogged, never bone dry. Clemson HGIC warns that root rot results from overly frequent watering or soil that does not drain quickly - the same risk applies to cuttings in soggy mix. Check every two to three days by touching the surface: if the top half-inch feels dry, water lightly with room-temperature water until a few drops exit the drainage holes. A cutting that wilts despite moist mix may have rot at the buried node; one that shrivels with dry mix needs more frequent light watering, not deeper soaking.
Rooting timeline in soil: most healthy arboricola cuttings show resistance on a gentle tug test in three to four weeks under warm bright conditions. Actinophylla and variegated forms may take four to six weeks. New leaf buds opening at the top are the best confirmation that the vascular connection is working end to end.
Water Propagation for Schefflera Cuttings
Water propagation is popular because you can watch roots form, and it works for Schefflera when executed cleanly. The trade-off is that water roots are structurally different from soil roots - finer, more fragile, and adapted to an oxygen-rich aquatic environment - so transplanting requires a careful acclimation period to avoid shock.
Use a clear glass jar or propagation station so you can monitor water level and root health without disturbing the cutting. Room-temperature filtered or dechlorinated tap water is fine; change it every five to seven days to limit bacterial growth that turns water cloudy and softens stem tissue.
Setting Up a Clean Water Jar
Place the prepared cutting in the jar so the lowest bare node sits submerged while all remaining leaves stay above the water line. Even a single leaflet touching water will rot and contaminate the jar within days. If the cutting will not stay upright, a narrow-neck bottle or a piece of mesh across the jar mouth can support the stem without crushing it.
Position the jar in the same bright indirect light you would use for soil propagation - not a dark shelf and not a sunny windowsill where algae blooms and water heats up. Roots typically appear from the submerged node in two to four weeks, appearing as white or pale tan nubs that lengthen and branch over subsequent weeks. Wait until roots reach 2–3 inches long before transplanting; shorter roots tear easily in soil and may not anchor the plant.
Do not add fertilizer to the water during rooting. If the water smells sour or the stem base turns mushy, discard the cutting, sterilize the jar, and start fresh with new material rather than trying to salvage rotting tissue.
Transplanting Water Roots Without Shock
Transplanting is where many water propagations fail. Water roots break easily and dry out in seconds when exposed to air, so prepare the pot and mix before you lift the cutting from the jar. Fill a small pot with the same propagation mix described above, pre-moisten it, and create a hole deep enough to accommodate the roots without folding them upward.
Slide the cutting out gently, keeping roots submerged in a small bowl of water until the moment you plant if needed. Bury the roots and lowest node 1–2 inches deep, firm mix around the stem, and water lightly to settle soil against the roots without creating a mud bath. Cover with a humidity dome for at least one week - the cutting still has water-adapted roots that cannot yet handle dry air - and vent daily as you would for a fresh soil cutting.
Some leaf drop during the first two weeks after transplant is normal as the plant converts water roots to soil roots. Keep conditions stable: bright indirect light, lightly moist mix, no fertilizer until you see new growth at the tip.
Caring for Newly Rooted Schefflera
Once your Schefflera cutting resists a gentle tug and pushes new leaf whorls, it has graduated from propagation to normal houseplant care - with a lighter touch for the first month. Remove the humidity dome gradually if you have not already: open it partially for three days, then fully for three more days, then remove. Abrupt exposure to dry room air can crisp tender new leaves on a plant whose root system is still small relative to its foliage.
Water on the same top-two-inches dry rhythm you would use for a mature Schefflera, but check more frequently because the root mass is tiny and the small pot dries fast. When new roots reach the pot walls - usually visible through a clear cup or detectable when roots emerge from drainage holes - transplant into a one-size-larger pot with standard well-draining houseplant mix. A 4-inch rooted cutting moves to a 5–6 inch pot, not a 10-inch planter; excess soil holds moisture the young root ball cannot use.
Hold fertilizer until the plant has been in its final small pot for at least four to six weeks and is producing steady new growth. A quarter-strength balanced liquid fertilizer once monthly during spring and summer is sufficient for young Schefflera. Overfeeding a newly rooted plant pushes soft leggy growth on an immature root system and salts can accumulate quickly in small pots.
If you rooted multiple cuttings, you can grow them as separate plants or plant two or three together in one pot for a fuller bush - a common nursery technique for dwarf schefflera. Bright indirect light remains the long-term goal.
Fixing Common Schefflera Cutting Problems
Not every cutting roots, and diagnosing failure early saves you weeks of waiting on a dead stem. The most common problem is rot at the buried node, showing as a blackened, mushy stem base while the medium smells sour. Cause: too much moisture, poor drainage, leaves buried below soil, or a cutting taken from a stressed parent. Prevention: use an airy mix, vent the humidity dome daily, and discard rotting cuttings rather than hoping they recover - bacteria spreads to neighboring pots.
Shriveling and wilting with dry mix points to underwatering during the rootless phase; the cutting loses water through leaves faster than the stem can replace it. Increase humidity dome coverage and water lightly more often, but do not soak a stem that has no roots to absorb excess. Shriveling with wet mix suggests rot may already be starting at the node even if the exterior still looks green - unpot and inspect the buried section.
No roots after six to eight weeks in warm bright conditions usually means the cutting lacked viable nodes, was taken during dormancy, or ran too cold. Check that at least one node was buried, confirm room temperature stays above 65°F, and consider a heat mat. If the stem still looks green and firm, patience may be all that is needed - Schefflera is slow, not dead. If the stem is rigid, brown, and brittle with no leaf bud activity, start over with fresh material from active growth.
Black tip on the cut end without spread toward the node is often normal callus tissue darkening; black spreading upward with soft texture is rot. Pests transferred from the parent appear as stippling, webbing, or cottony deposits - treat with insecticidal soap before the infestation spreads to other plants in your propagation area.
Rooting Hormone and Helpful Extras
Rooting hormone containing IBA is optional for Schefflera stem cuttings but useful when you want to shorten the rooting window or propagate thick-stemmed actinophylla sections that root slowly on their own. Powder forms adhere well to a freshly cut stem when you dip the moist cut end, tap off excess, and plant immediately. Gel forms coat evenly and work well for water propagation when applied sparingly to the submerged node zone.
Hormone is not a substitute for correct technique. A hormone-dipped cutting in waterlogged soil without node exposure will still rot. It also will not rescue a cutting taken from a diseased parent or during winter dormancy. Think of it as a modest accelerator, not insurance.
Other optional boosts include heat mats for cool rooms and grow lights for short winter days. Soil usually produces a plant ready for normal care sooner than water because it skips the transplant conversion phase; water wins when you want to monitor progress visually. Neither method guarantees success on a single cutting - take several.
Conclusion
Schefflera propagation from stem cuttings rewards a methodical approach more than specialized equipment. Identify two or three healthy nodes on a green stem, cut cleanly below the lowest node, strip lower leaves, and root in moist airy soil or clean water under bright indirect light with a humidity tent vented daily. Late spring through early summer gives the fastest results, but stable warmth and light matter more than the calendar date alone. Expect three to six weeks for roots, confirm success with a gentle tug and new leaf whorls, then acclimate gradually to normal watering and light before feeding or upsizing the pot.
Take multiple cuttings, keep tools sterile, and do not propagate from a stressed or pest-ridden parent. When a stem turns mushy, discard it and adjust moisture rather than waiting indefinitely. When roots hold and new growth opens, you have a genetically matched umbrella tree ready for the same bright indirect light and well-draining mix that kept the parent healthy - plus the satisfaction of having multiplied a plant that many guides dismiss as slow or tricky when the real variable was always node placement and humidity discipline.
When to use this page vs other Schefflera guides
- Schefflera overview - Start here for whole-plant context before deep-diving this topic.
- Schefflera problems hub - Jump to symptom-specific fix guides when this care topic does not resolve the issue.