How to Prune Echeveria: When, Where, and What to Cut
How to Prune Echeveria: When, Where, and What to Cut
How to Prune Echeveria: When, Where, and What to Cut
First, tilt the pot and inspect the stem base. Remove only lower leaves that are fully papery and detach with gentle sideways pressure - never force a leaf that resists. That single cleanup step prevents moisture-trapping debris and mealybug habitat without opening wounds on tissue the plant still needs. Once the base is clear, decide whether you also need structural work: beheading a stretched rosette or cutting a flower stalk.
Echeveria (Echeveria spp.) grows as a Crassulaceae rosette succulent - a tight cluster of fleshy leaves on a short stem, not a branching shrub. Unlike pothos or basil, you cannot pinch a tip and expect bushier regrowth from the same stem. Each pruning job on echeveria solves a specific problem: debris cleanup, etiolation reset, or bloom management. Scissors alone cannot shrink a stretched stem or restore compact form without beheading.
What Pruning Means for an Echeveria Rosette
On echeveria, pruning covers three distinct jobs:
- Cleanup - removing papery, dry lower leaves the plant has finished reabsorbing
- Structural reset - beheading an etiolated (stretched) rosette and rerooting the compact top
- Bloom management - cutting flower stalks early or after flowering
All three use different cut placement and timing. Cleanup is routine maintenance any healthy rosette benefits from. Beheading is a propagation technique triggered when low light has permanently elongated the stem. Flower stalk cuts are optional - echeveria is polycarpic and survives blooming, unlike monocarpic agaves.
Pruning does not make a single rosette bushier the way tip-pinching works on herbs. Fuller displays come from offsets (pups), stem pups after beheading, or clustering several plants - not from trimming living rosette leaves.
When to Prune Echeveria
Best Season for Structural Cuts
Late spring through early fall is the safest window for cuts on living stem tissue - beheading, snipping partially attached leaves, or trimming soft stem sections. During active growth, wounds callous within days and new roots or pups form faster. The RHS cacti and succulents growing guide recommends Echeveria repotting guide and propagation in spring, when succulents resume growth after winter rest.
Indoor growers follow room conditions, not outdoor calendars. A plant under strong grow lights in a warm room can handle a beheading in late winter if new center leaves are actively opening. If the rosette has been dormant and pale for months, wait until light and warmth improve before structural cuts.
Dead leaf removal is safe year-round when leaves detach freely - the plant has already sealed the attachment point.
When Urgent Removal Cannot Wait
Some pruning ignores the seasonal calendar:
- Mushy, black lower leaves - remove immediately with sterile scissors; rot spreads through wet tissue fast
- Pest-infested debris at the crown - clear mealybug shelter and fungus gnat breeding material as soon as you find it
- Broken or crushed rosette tissue from falls or pet damage - clean removal before infection sets in
Flower stalk timing is flexible: cut early to save energy or late after blooms fade. Do not leave a brittle dead stalk wedged in the crown - it traps debris like old leaves do.
What to Check Before You Cut
Walk the plant in order:
- Stem base - papery brown leaves, blackening, or white cottony mealybug clusters?
- Rosette center - firm, upright new leaves confirm the growing point is alive
- Stem length - bare stalk with compact top only? That signals etiolation, not normal aging alone
- Flower stalk - emerging, blooming, or dried?
- Soil moisture - wet mix after a recent soak means hold off on beheading until conditions dry
If the base is mushy or the center is soft, diagnose watering and root health before beheading. Cutting a leggy rosette with active root rot on Echeveria wastes the propagation attempt.
Tools and Sterilization
Match the tool to the tissue:
- Fine-tip scissors or snips - individual mushy leaves, flower stalks near the crown
- Sharp pruning shears or a clean knife - beheading thick stems
- Tweezers or a soft brush - lifting debris from tight rosettes without levering healthy leaves
Sterilize every blade with 70% isopropyl alcohol before use and between plants. Succulent tissue does not compartmentalize wounds like woody plants - a dirty blade can introduce rot directly into the meristem. Work in bright light so you can see the crown clearly.
Removing Dead Lower Leaves Step by Step
Dead lower leaf removal is the most frequent echeveria task and the gentlest. Healthy rosettes reabsorb oldest leaves from the bottom up - leaves thin, turn translucent, then papery and dry before detaching. A bare lower stem with a full rosette on top is normal on mature plants and is often called a tree form.
Tilt the pot to expose the stem base. Work from the bottom up. Completely dry leaves should release with a sideways wiggle or gentle twist at a natural abscission point the plant has already sealed.
The Pull-When-Ready Rule
The pull-when-ready rule is the core technique. A leaf that comes away with light finger pressure is finished and safe to remove. A leaf that resists - even if yellow or thin - is still transferring stored water and nutrients toward the center. Forcing it tears living tissue and leaves an unsealed wound exposed to moisture and crown rot.
Stubborn partially dried leaves can wait another week or two. Check again during your regular watering round. For a clearly dead leaf that will not detach - often one that went mushy rather than papery - cut flush at the base with sterile fine-tip scissors instead of tugging.
Cleaning Around the Crown
Tight rosette varieties trap litter between overlapping leaves. Use tweezers or a soft brush to lift debris without prying healthy tissue. The goal is airflow at the stem base, not a bare stalk on a young plant - some lower leaf coverage on a short stem is normal and protective.
Brush fallen debris off the soil surface. Wet old leaves on potting mix decompose into fungus gnat habitat. If you find mealybugs, dab them with an alcohol-soaked cotton swab before returning the plant to its spot. Plump healthy leaves that fall during cleaning can be laid on dry soil for leaf propagation.
Beheading Stretched Rosettes
Etiolation - pale, widely spaced growth from insufficient light - is permanent on existing stem tissue. A leggy echeveria will not compact its bare stalk by moving to a brighter window. The elongated internodes do not shrink. Beheading - cutting the compact rosette top, callousing the cut end, and rerooting it - is the standard fix.
Behead when the rosette sits atop a bare stem several inches tall, leaves are spaced far apart and pale, and improved light has not produced tight new growth on the stretched section. Minor stretching on a young plant sometimes corrects with brighter placement before the stem hardens. Once internodes have visibly elongated, beheading is the practical path.
Iowa State Extension describes beheading as cutting the entire rosette with an inch or two of stem attached, callousing it, and rooting it like a stem cutting - with multiple side rosettes often developing on the stalk left behind.
Where to Make the Cut
Find the transition between the compact rosette and the stretched stem below. Cut one to two inches below the lowest healthy rosette leaves, leaving a short stem segment on the head for anchoring and rooting.
Cut straight across with a sharp sterilized blade. Inspect the cross-section immediately - tissue should look firm and pale green or white. Hollow, dark, or waterlogged centers mean cut lower until you reach solid tissue. Strip soft lower leaves from the beheaded rosette by wiggling them off; each plump leaf is a potential propagation starter.
Callousing and Replanting
Callousing is non-negotiable. A freshly cut rosette must not enter soil while the wound is wet. Place the head in dry shade with good airflow - many growers rest it atop an empty pot rim so the cut stem hangs in open air. Iowa State Extension notes that callousing the cut end before planting dramatically reduces rot compared with planting fresh cuts.
Allow three to five days for the surface to dry and harden; thick stems in humid rooms may need a full week. Once calloused, nestle the stem into dry, well-draining succulent soil without burying the lowermost leaves. Wait another five to seven days before the first light watering, then resume soak-and-dry only when the soil is fully dry and the plant resists a gentle tug.
Lower leaves on the beheaded rosette may wrinkle while roots form - that is normal water draw from stored leaf tissue. Avoid misting or overhead watering until roots establish.
What Happens to the Stem You Leave Behind
Do not discard the original pot with its headless stalk. Given warmth and bright light, the remaining stem often produces stem pups - new rosettes from leaf axils or the cut surface. Iowa State Extension notes that after several months, small rosettes on the stalk can be cut and rooted individually or left to form a clustered display.
Strip loose dried leaves from the stump but leave the top cut open to air - do not seal wounds with wax. Water sparingly, only when soil is dry, until new growth appears. Once pups root, separate them with a clean cut or let them cluster for a fuller pot.
The beheaded rosette, leaf propagations from stripped leaves, and stem pups together can turn one leggy plant into a small collection - experienced growers treat etiolation as a propagation opportunity, not a failure.
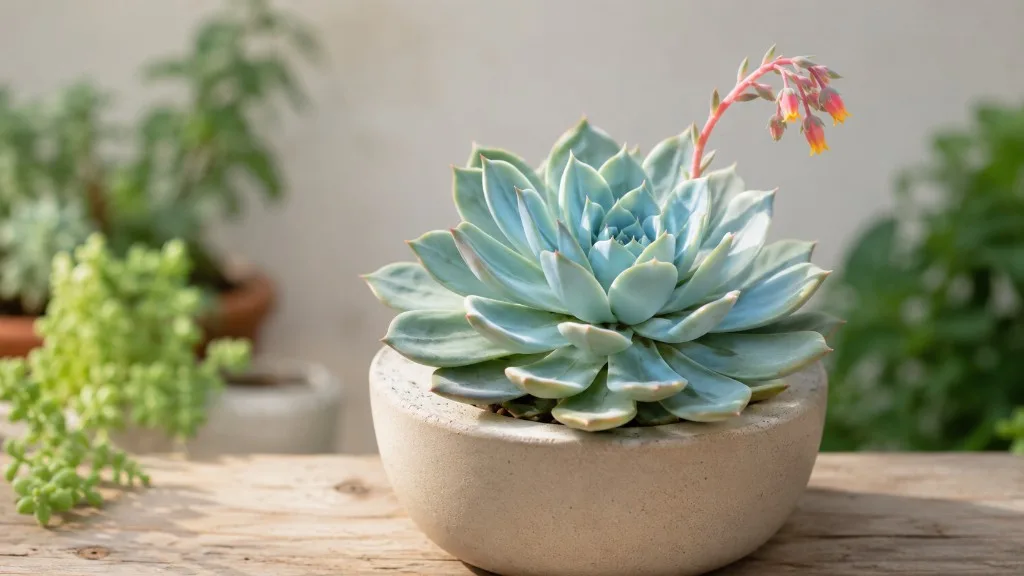
Cutting Echeveria Flower Stalks
Echeveria is polycarpic - it does not die after flowering like monocarpic agaves. Bloom stalks emerge from between rosette leaves, often leaning toward the brightest light, and can stretch the plant asymmetrically for weeks while buds develop.
The RHS describes summer stalks of small bell-shaped flowers on many species. Whether you remove them depends on plant size and your goals, not survival.
Remove Early vs Enjoy the Bloom
Early removal - snipping the stalk as soon as it appears, before buds fully develop - conserves the most energy for leaf and root growth. Choose this for small rosettes, recently stressed plants, or cultivars that look visibly depleted after heavy blooming. Cut close to the base with clean scissors without nicking surrounding leaves.
Late removal - letting healthy established plants bloom, then cutting after flowers fade and the stalk dries - suits vigorous specimens you want to enjoy. Dried stalks often snap out with a gentle pull. If the stalk is green but flowers are spent, cut at the base with sterile shears.
Neither approach harms the plant when executed cleanly. Collect seed by leaving the stalk until pods dry, then remove the remainder. For most indoor growers: early cuts on small plants, late cuts on vigorous ones.
How Much You Can Safely Remove
Echeveria tolerates light, purposeful cuts far better than aggressive hacking:
- Dead leaves - remove all that detach freely; no upper limit on papery debris
- Beheading - one rosette top per session; do not stack multiple structural cuts on a stressed plant
- Flower stalks - one stalk at a time; multiple stalks on a cluster can all be cut in one session if tools stay clean
- Living rosette leaves - avoid cosmetic trimming of healthy outer leaves; each leaf is water storage the plant cannot replace quickly
Never remove every lower leaf on a young plant to bare the stem cosmetically - exposed stem tissue dehydrates faster and the crown loses protection.
Aftercare and Recovery Timeline
Hold fertilizer for two to three weeks after cuts involving living stem tissue. Fresh wounds need dry surfaces and consistent bright light, not a nutrient push.
Light during recovery should be bright and indirect, then gradually increased to what your species tolerates - typically several hours of direct sun or equivalent grow-light output indoors. A freshly beheaded rosette in harsh direct sun scorches while it lacks roots. An etiolated plant needs a permanently brighter location after recovery, or stretching repeats within a season.
Watering follows soak-and-dry with extra caution. Beheaded rosettes stay nearly dry until roots form. Stumps with pups need light watering only. Dead leaf cleanup alone does not change your normal rhythm.
Expect stem pups or new shoots within two to four weeks during active season. A beheaded rosette usually roots and stabilizes within four to six weeks when calloused properly. Full compact appearance may take six to eight weeks. Winter or dormant-season cuts can take considerably longer.
Common Pruning Mistakes
Pulling leaves before they are ready opens crown wounds that contact damp soil - the fastest route to crown rot. If a leaf resists, wait.
Planting before callousing kills beheaded rosettes via stem rot before roots form. The dry waiting period is mandatory.
Dull or dirty tools crush soft stems and introduce pathogens. Sterilize and sharpen every session.
Beheading without fixing light produces a compact rosette that stretches again within weeks. Pruning resets form; brighter light solves the cause.
Ripping flower stalks instead of clean snips tears adjacent leaves and creates infection entry points.
Beheading during active root rot or deep dormancy stacks stress. Fix watering and root health first, or wait for growth to resume.
Conclusion
Echeveria pruning breaks into three jobs with different rules. Remove dead lower leaves only when they pull away freely - start every session with that inspection. Behead stretched rosettes when the stem will not recover on its own, callous the cutting, and let the stump produce pups. Cut flower stalks early on small plants or late on vigorous ones, always with sterile sharp tools.
None of these tasks require heavy shearing. Match the cut to the actual problem, improve light and drainage so the problem does not return, and your echeveria collection stays compact, colorful, and rot-resistant for years.
When to use this page vs other Echeveria guides
- Echeveria overview - Start here for whole-plant context before deep-diving this topic.
- Echeveria problems hub - Jump to symptom-specific fix guides when this care topic does not resolve the issue.
- Leggy Growth on Echeveria - Escalate here when pruning adjustments are not enough.
- Slow Growth on Echeveria - Escalate here when pruning adjustments are not enough.
- Brown Tips on Echeveria - Escalate here when pruning adjustments are not enough.