Echeveria Repotting: When, How, and Mistakes to Avoid
Echeveria Repotting: When, How, and Mistakes to Avoid
Echeveria Repotting: When, How, and Mistakes to Avoid
An oversized glazed pot is how many healthy Echeveria rosettes die - not from neglect, but from kindness. You move a compact plant into a deep bowl “so it has room to grow,” refresh the mix with regular potting soil, water once to settle it in, and three weeks later the lowest leaves turn glassy while the crown softens where new leaves should open. Echeveria species in the Crassulaceae family evolved on rocky, semi-arid slopes in Mexico and Central America with shallow lateral roots that spread wide, not deep. Indoors, repotting is root-zone maintenance: reset drainage, match pot volume to root mass, and inspect what you cannot see until something fails.
This page is the repotting hub for the Echeveria cluster. For day-to-day moisture rhythm before you disturb roots, read the Echeveria watering guide. For mix ratios and refresh intervals, use the soil guide rather than repeating recipes here. Offset division overlaps with the propagation guide; light acclimation after repot ties to the light guide. New to the genus? Start with Echeveria care overview.
When Echeveria Actually Needs Repotting (Not Just a Calendar Date)
The useful question is not “has it been two years?” but whether the root zone still functions: does water drain within about an hour after a thorough soak, does mix stay airy around roots, and can new leaves open at full size without the plant sitting wet for days? When the answer is no, repot. Iowa State Extension notes that even slow-growing succulents benefit from fresh well-drained soil in a correctly sized container, and that repotting is an ideal time to propagate offsets.
Routine Refresh Every 2 to 3 Years
Most healthy indoor Echeveria need attention every two to three years, though slow growers in bright, stable conditions may stretch longer. Routine repotting is for plants that look fine above soil but have degraded mix, mild root circling, or a cluster of offsets competing for the same soil volume. The RHS houseplant succulent guide recommends repotting when compost looks worn out or the plant has outgrown its pot - for Echeveria that often means refresh before dramatic root-bound symptoms.
You do not always need a larger pot. If roots still fit comfortably, return the plant to the same shallow container after loosening the outer root layer and replacing most of the mix. Top-dressing - scraping away the top inch of tired mix and replacing it with gritty material - can bridge one season if the plant is not root-bound, but it does not fix a dense root mass at the pot bottom or pups exhausting shared soil. When in doubt, slide the root ball out for a thirty-second inspection rather than guessing from leaf appearance alone.
| Scenario | Pot action | Mix | Watering after | Typical recovery |
|---|---|---|---|---|
| Routine refresh (healthy roots) | Same size or +1 size | Replace 60–80% | See aftercare | 1–2 weeks mild stress |
| One-size-up growth repot | +2–5 cm diameter | All fresh gritty | See aftercare | 2–4 weeks to new center leaf |
| Emergency rot trim | Same or smaller | All fresh; discard old | See aftercare | 4–8 weeks; watch crown |
| Offset-only division | Individual shallow pots | Fresh per pup | See aftercare | Pups lag mother ~1 week |
Emergency Signs That Cannot Wait
Emergency repotting means the root zone is actively limiting health. Repot in the next viable growth window - or immediately for rot - if you see two or more of these together:
- Roots emerging from drainage holes or circling tightly at the soil surface
- Water racing through in seconds while the root-ball center stays dry
- Mix that smells sour or stays wet for days despite careful watering
- Stalled center growth during active season despite adequate light
- Offsets crowding so leaves rest on the pot rim and crown airflow is poor
- Soft, translucent lower leaves that do not firm after the mix has been dry a week
- Visible brown or mushy roots when you lift the plant slightly
One root through a single hole on an otherwise firm rosette can wait until spring. Water channeling plus stalled growth plus sour smell is a different story - inspect, trim rot to firm tissue, and repot into appropriate shallow volume, not simply a bigger wet reservoir.
Best Season and Timing for Spring Repotting
Spring is the best season to repot Echeveria in most temperate homes. As daylight lengthens and room temperatures sit in the roughly 18–29°C (65–84°F) comfort band Echeveria prefers, the plant enters active growth and rebuilds feeder roots quickly. Late March through May is the main window; early summer works as backup. The RHS advises repotting during active growth in spring and avoiding pots so large that excess compost stays wet and causes rot.
Fall can work in warm indoor environments but is second choice - slower root repair before lower light arrives. Reserve winter repotting for emergencies: severe root rot on Echeveria, impossible watering on a root-bound plant, or failing container structure. If you must repot in winter, keep bright stable light, hold fertilizer until spring, and expect slower recovery.
Let soil dry completely before removal. Dry mix releases the root ball cleanly and reduces fine-root tearing. Avoid stacking stresses - do not repot the same day you moved the plant, treated pests heavily, or divided many offsets. A newly purchased Echeveria in soggy nursery mix or with sour-smelling soil is an exception; address failing media promptly rather than waiting a full season (see overview first-month guidance).
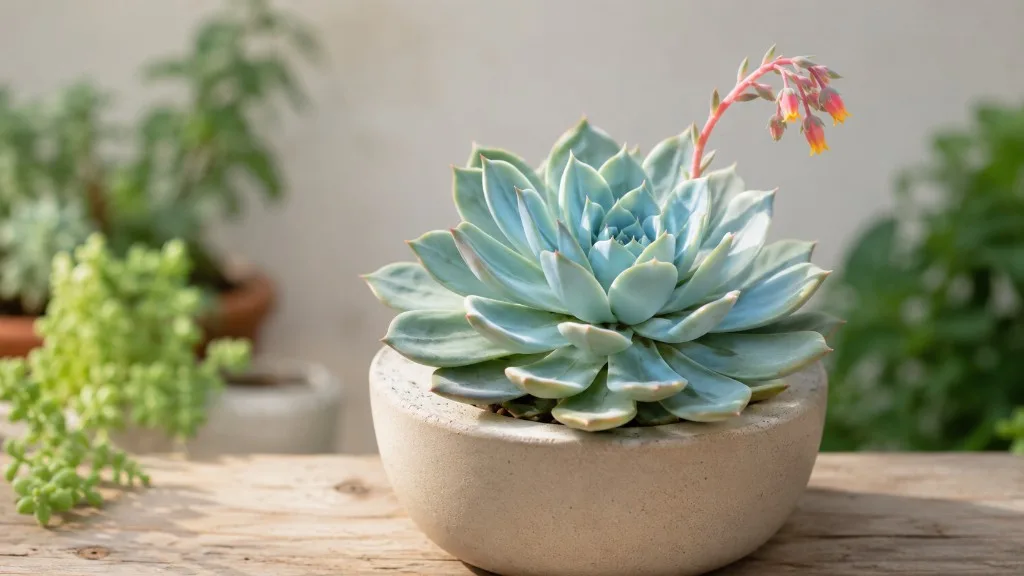
Choosing Shallow, Wide Pots with Proper Drainage
Pot choice is where repot jobs succeed or fail. Echeveria roots spread shallowly and laterally; a deep container keeps wet mix below roots that never colonize it. A shallow, wide pot - often called a bulb pan or azalea-style pot - matches root architecture, improves crown airflow, and limits the wet soil reservoir. The RHS Echeveria guide recommends peat-free cactus compost in a pot with plenty of drainage holes.
The One-Pot-Size-Up Rule
Move up only one pot size - roughly 2–5 cm (1–2 inches) wider in diameter than the current inner diameter. Iowa State Extension recommends a container just big enough for the root system with a drainage hole, avoiding oversized pots that take longer to dry. Slow Echeveria root colonization amplifies oversize risk: surface looks dry while the center stays soggy, and growers water again because leaves wrinkle.
Worked example: An Echeveria ‘Lola’ in a 10 cm terracotta pot with healthy white roots but exhausted mix underwent a refresh-only repot into 12 cm terracotta in mid-April - one size up, same depth class. Roots were teased lightly, not bare-rooted; the plant sat dry in bright east light for six days before the first light soak. A firm new center leaf appeared at week three, while two lowest outer leaves dried and dropped (normal reallocation). That timeline is typical for spring repots when pot volume and mix drainage match the root mass.
Sizing a cluster still attached: measure combined root mass after any separation - not leaf spread alone. Two small rosettes need two appropriately sized shallow pots more often than one oversized bowl holding weeks of wet mix around tiny root systems.
Terracotta, Ceramic, and Depth Considerations
Drainage holes are non-negotiable for long-term indoor culture. Iowa State Extension states that a gravel “drainage layer” does not replace a drainage hole and often keeps soil too wet - the same perched-water problem that makes bottom gravel layers risky in succulent pots.
Terracotta breathes through porous walls and helps mix dry predictably - the default for most growers. Glazed ceramic with one drainage hole works if you monitor moisture at root depth, especially in humid bathrooms where plastic retains water longer. Cachepots without holes are display-only: grow in a draining inner pot and empty runoff every time. Depth should track root ball height; extra depth below roots is wasted wet volume.
Soil at Repot Time
Do not repot Echeveria into regular peat-heavy potting soil. Use fast-draining gritty mix that dries at root depth within about one to two weeks in summer on a bright windowsill - the full ratio breakdown, pumice vs perlite tradeoffs, and refresh schedule live on the Echeveria soil guide. At repot time you need fresh mix, not reused material from rot-affected plants.
The RHS emphasizes open, well-drained compost and never leaving succulents in waterlogged conditions. Your repot check: squeeze a damp handful - it should crumble when you open your palm, not form a tight wet ball. Discard old mix from sour-smelling or rotted plants; wash the pot with hot soapy water before reuse. Do not saturate new mix before planting - you will water after the post-repot dry-back period described in aftercare.
Tools and Supplies Before You Start
Gather supplies before disturbing roots. Rosette leaves lose turgor quickly when roots are exposed near heating vents or air-conditioning outlets.
You will need:
- New shallow pot one size larger, or same size for refresh-only
- Fresh gritty mix per the soil guide
- Clean scissors or pruners for dead or mushy roots
- Chopstick or pencil for settling mix without compacting
- Newspaper or tray for mess control
- Optional: sharp knife for offset separation; small pots for pups
- Optional: cinnamon or sulfur dust on large offset cuts (not required for small clean twists)
Sterilize cutting tools with rubbing alcohol when trimming rot or dividing offsets. Have a watering can ready, but follow the aftercare dry-back rule before the first drink.
Step-by-Step: How to Repot Echeveria
Repotting is methodical, not forceful. The stem crown and fine feeder roots suffer if you yank, bare-root aggressively, or bury the rosette.
Dry Removal, Root Inspection, and Planting Depth
With completely dry soil, tip the pot and slide the root ball out - run a knife around the rim if needed. Never pull by leaves; they detach easily and wounds invite rot. Inspect in good light: healthy roots are firm and white to pale tan. Trim mushy sections to solid tissue with sterilized scissors. Tease circling outer roots lightly outward; do not bare-root unless rot demands it - keep a soil buffer around healthy roots.
Add a thin layer of fresh mix to the pot bottom so the rosette sits at the same depth as before. The leaf base where the stem meets soil should remain at or slightly above the line - burying the crown invites rot where new leaves emerge. On farina-coated cultivars such as E. ‘Perle von Nürnberg’, handle by the pot rim or lower stem only; fingerprints on the powdery leaf coating are permanent and do not affect health, only appearance.
Settling the Mix Without Compaction
Center the plant and fill sides with gritty mix, working it in gently with a chopstick to remove large air voids without packing soil into a brick. The RHS growing guide advises loose, well-drained compost that lets air reach roots. Leave about 1 cm (½ inch) headspace below the rim. The rosette should feel stable without wobbling.
Do not water immediately. Place the plant in bright light with acclimated direct sun, or slightly softer light for a few days if it came from a shaded nursery bench. Proceed to aftercare for the first-watering timeline.
Separating Offsets During Repotting
Spring repotting is the best time to separate offsets because active growth helps mother and pups recover. Offsets form at the mother base and share roots until you split them. Leave tiny pups attached if they are below one-third the mother rosette size or lack root initials - they survive better on the mother until the next cycle.
For mature offsets, twist gently when the pup releases cleanly, or cut with a sterile knife close to the mother stem without damaging her crown. Iowa State Extension recommends allowing cut ends to dry and callus before potting - typically 24 to 72 hours on dry newspaper in bright indirect light. Lay callused offsets in shallow pots with the same gritty mix as the mother. Full offset workflow and leaf-cutting alternatives are on the propagation guide.
Prefer a clustered look? Repot the whole group into one modest shallow pot with all mix refreshed - still one size up for the combined root mass, not leaf bulk alone.
Aftercare: Watering, Light, and Fertilizer After Repotting
Aftercare wins or loses the job. For the first two to three weeks, avoid harsh environmental swings.
Wait five to seven days before the first light watering so damaged roots can callus - the single full statement of this rule for this guide. After that pause, water lightly until a small amount drains, empty the saucer, and return to soak-and-dry rhythm per the watering guide: thorough drink when mix is dry at root depth, then complete dry-down. The RHS Echeveria page recommends watering when compost approaches dryness, not on a calendar.
Keep bright light with several hours of direct sun if already acclimated; avoid blasting hot afternoon sun through a south window the plant has never seen. Re-acclimate gradually if moving to stronger light post-repot.
Hold fertilizer at least four to six weeks, or until a new center leaf forms. Fresh gritty mix carries limited nutrient reserve; early feeding can burn tender roots. Resume at quarter to half strength once spring growth is obvious. Do not mist repotted rosettes - wet leaf surfaces do not help root establishment and can spot farina-coated varieties.
Recovery Timeline and What Normal Stress Looks Like
Mild transplant stress usually clears in one to two weeks: a few lower leaves may wrinkle, soften slightly, or dry up as the plant reallocates stored water to root repair. Full root re-establishment takes four to six weeks in spring and summer, longer after fall or winter repots. New growth at the rosette center at normal size and color is the clearest success signal - outer damaged leaves will not plump back.
Abnormal stress: continued heavy softening after two weeks despite dry soil and good light; multiple translucent mushy leaves climbing from the base; sour-smelling wet mix with collapsing rosette. Those patterns point to rot, oversize pot, or watering too early - diagnose rather than wait. Separated offsets may trail the mother by a week or two while callused cuts root out.
Common Echeveria Repotting Mistakes
Jumping to a much larger pot - excess wet mix, stalled growth, soft lower leaves. One shallow size up every time.
Regular potting soil without grit - see soil guide for amendment ratios.
Watering immediately after repotting - see aftercare dry-back rule.
Aggressive bare-rooting - strips feeder roots and extends recovery weeks.
Winter repot without cause - low light slows repair; emergencies only.
Immediate fertilizer - burns tender roots in fresh mix.
Burying the stem crown - rot where new leaves emerge.
Separating offsets too small - wait for one-third size and callus cuts.
Deep narrow pots - wet layer below shallow roots that never dries evenly.
Bottom gravel “drainage layer” - can perch water above a saturated lower zone per extension guidance.
Troubleshooting Problems After Repotting
Soft lower leaves - one or two bottom leaves for a few days can be normal; upward-spreading translucency with wet mix suggests overwatering on Echeveria or rot.
Leaf drop - one or two dried lowers is natural; rapid loss of multiple plump leaves with sour mix means inspect roots and pot size.
Rosette closing or shrinking - may follow an overly long dry period after root damage, or bare-rooting stress. One light soak when mix is dry at depth, then observe ten days.
No new growth for weeks in spring - verify light, mix drainage, and that you did not water or fertilize too early.
Mealybugs at the crown - disturbance exposes hidden pests. Treat with isopropyl alcohol on a cotton swab at leaf bases; keep crown dry; isolate until clear.
Offset rotting after separation - usually planted before callusing or watered too soon. Re-callus 48–72 hours and replant in dry mix; follow aftercare dry-back.
Plant loose in pot - add mix gently around sides; if pot is oversized, step down one size with fresh dry mix rather than repeated watering to “settle.”
When to use this page vs other Echeveria guides
- Echeveria overview - Start here for whole-plant context before deep-diving this topic.
- Echeveria problems hub - Jump to symptom-specific fix guides when this care topic does not resolve the issue.
- Root Rot on Echeveria - Escalate here when repotting adjustments are not enough.
Related Echeveria guides
- Echeveria overview
- Echeveria watering
- Echeveria light
- Echeveria soil
- Echeveria propagation
- Echeveria fertilizer
- Root Rot on Echeveria
- Echeveria problems
Conclusion
Echeveria repotting succeeds when pot volume matches shallow lateral roots, not leaf showiness. Repot on root-zone signals every two to three years, favor spring, move up one shallow size, refresh gritty mix from the soil guide, protect the crown, and callus offsets before planting. State the dry-back rule once in aftercare, then trust your eyes on new center growth - not outer leaves - as the recovery signal.