How to Propagate Basil: Cuttings, Seeds, and Aftercare
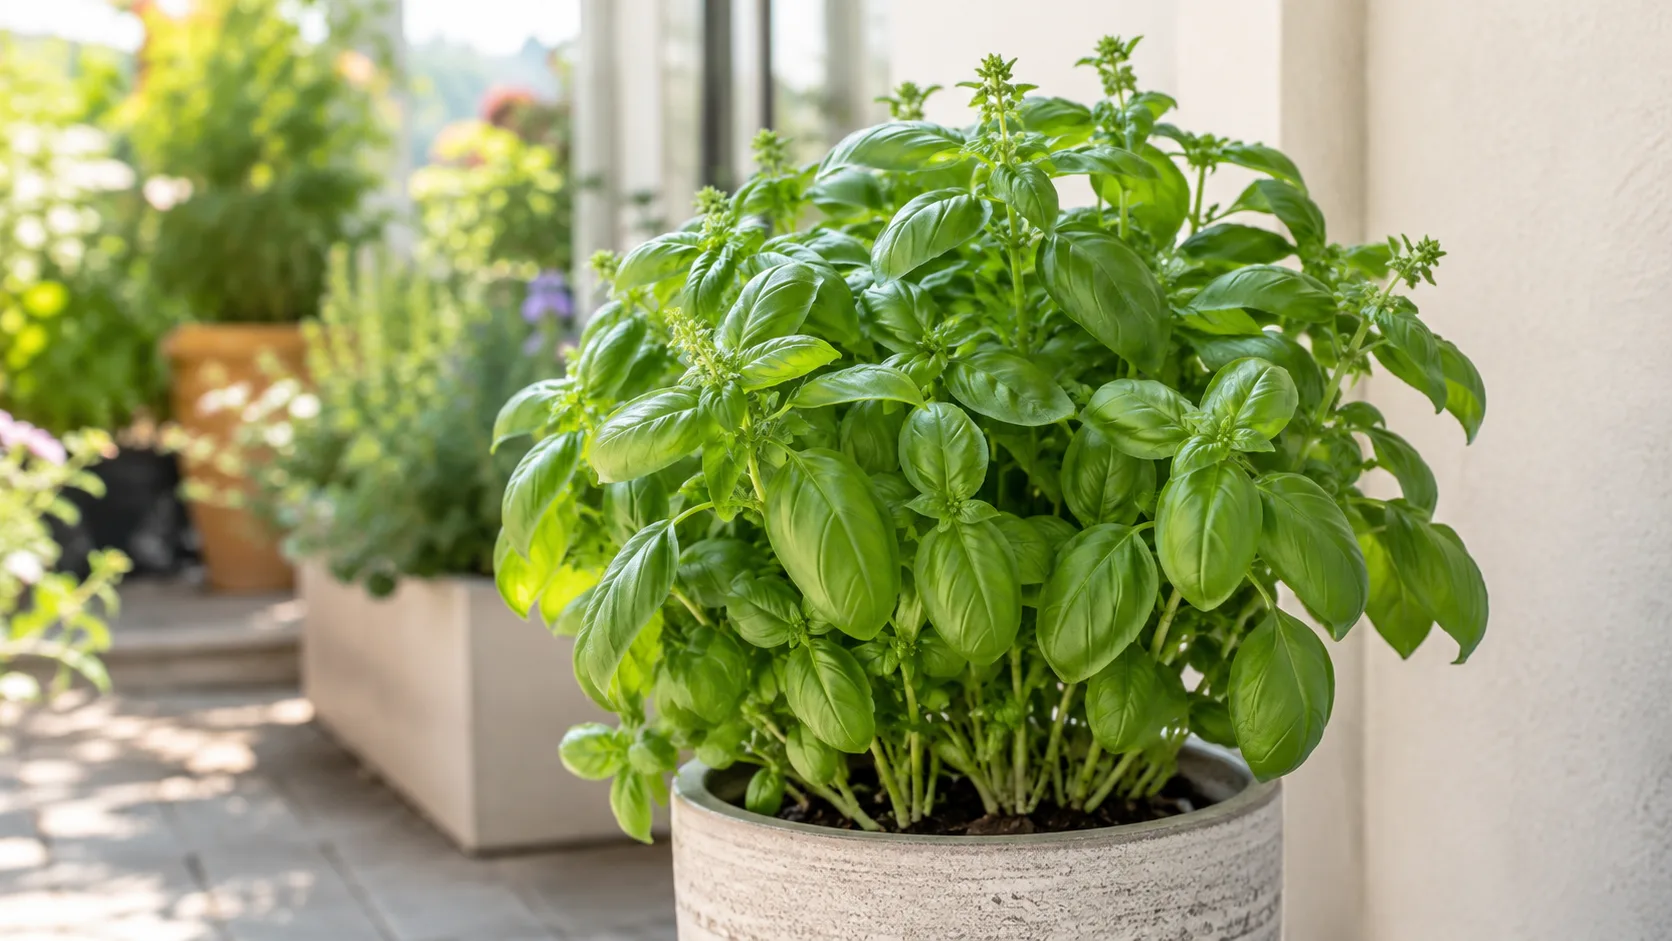
How to Propagate Basil: Cuttings, Seeds, and Aftercare
How to Propagate Basil: Cuttings, Seeds, and Aftercare
Basil propagation is one of the fastest confidence-builders in home gardening because the plant cooperates. A single healthy stem placed in a glass of water on a bright counter often produces white roots within a week. A tray of seeds kept warm and moist can fill a windowsill with seedlings in two weeks. The catch is not whether basil can be propagated - it almost always can - but whether you choose the method that matches your goal, your timeline, and the quality of the plant material in front of you.
This guide covers stem cuttings in water, direct soil rooting, and seed starting for sweet basil (Ocimum basilicum), plus the aftercare that turns a rooted cutting or young seedling into a harvest-ready plant. You will learn how to identify a usable node, what temperature and light actually do during rooting, how to move cuttings from water to soil without killing them, and when seeds make more sense than clones.
Why Basil Propagation Works So Well at Home
What makes Ocimum basilicum easy to clone
Basil belongs to the Lamiaceae family - the mint family - and like many of its relatives, it roots readily from soft, green stem tissue. Ocimum basilicum is a herbaceous annual native to tropical and subtropical Asia. It evolved to grow fast, branch from stem nodes, and recover quickly after damage. That biology is exactly what makes basil propagation forgiving for beginners.
The critical structure is the node - the joint on the stem where leaves attach and where dormant root initials wait for moisture and oxygen. Cut a stem that includes at least one node submerged in water or buried in moist mix, and adventitious roots emerge from that point. Cut above a node on the parent plant and the remaining stem usually pushes two new shoots from the leaf axils below the cut, which is why regular harvesting and propagation go hand in hand.
Basil cuttings root faster than most kitchen herbs because the stems stay soft and water-conducting for much of the growing season. Penn State Extension notes that cuttings are easily rooted in water. Woody, bolted stems root slowly or not at all. As long as you work with green, actively growing tissue, success rates stay high even without rooting hormone, humidity domes, or specialized equipment.
Cuttings versus seeds: which method fits your goal
Use this decision framework before you start:
- Stem cuttings when you want a clone of a specific plant - a Genovese basil with perfect flavor, a purple cultivar, or a grocery bunch that rooted faster than expected. Cuttings give you a genetically identical copy in roughly 7 to 21 days from cut to potted plant.
- Seeds when you want many plants cheaply, when you are starting a new bed or container row, or when the parent plant is old, woody, or already flowering heavily. Seeds take longer to reach harvest size but scale easily.
Cuttings win on speed and certainty. Seeds win on volume and cultivar choice from catalog listings. Most home cooks propagate by cuttings because one purchased plant or one supermarket bunch can become six jars of rooted starts on a windowsill. Market gardeners and spring planners often start seeds indoors six to eight weeks before outdoor planting to get a head start on the season, which University of Minnesota Extension recommends for slower-germinating basil varieties.
Neither method requires a greenhouse. A clean glass, a warm windowsill, and a small pot of well-drained mix are enough.
Best Timing, Light, and Temperature for Rooting
Basil is cold-sensitive and warmth-driven. It roots and germinates fastest when daytime temperatures sit between 70 and 85°F (21 to 29°C) and when nights stay above 50°F (10°C). Utah State University Extension notes that basil seeds germinate best at soil temperatures of 75 to 85°F and that transplants should go out only after frost danger has passed.
For cuttings, the best window is whenever the parent plant is pushing soft, non-flowering growth - typically spring through early autumn indoors, or year-round if you grow under lights. Avoid taking cuttings from a plant that was just shipped, recently repotted into soggy mix, or sitting in a cold draft below 60°F. Stressed tissue rots before it roots.
For seeds, start indoors four to six weeks before your last frost date if you plan to move plants outside, or sow directly in containers you will keep indoors. Outdoor direct sowing works once soil temperature reaches at least 70°F (21°C) and stays moist. Purdue Extension reports emergence in 8 to 14 days under favorable conditions.
Light matters as much as warmth. Basil needs 6 to 8 hours of bright light daily to fuel the photosynthesis that powers rooting. A bright east-facing windowsill or a spot a few feet from a south-facing window works well for cuttings. Avoid intense afternoon sun on a water jar - it heats the water, encourages algae, and can cook tender leaves. For seedlings, a simple grow light held 6 to 12 inches above the tray prevents leggy, weak starts that collapse after transplant.
What You Need Before You Start
You do not need a propagation station. For cuttings, gather sharp scissors or snips, a clean clear glass or jar, room-temperature water, and eventually a small pot with drainage holes and well-drained potting mix. For seeds, you need seed-starting mix or a light potting blend, seed trays or small pots, a spray bottle or gentle watering can, and optionally a seedling heat mat set around 75°F (24°C) to stabilize germination.
Sterilize blades with soap and water or a quick wipe of 70% isopropyl alcohol if you are cutting from a plant with past pest issues. A ragged crush-cut bruises stem tissue and invites rot. Make one clean slice.
Choose containers with drainage holes for anything going into soil. Basil seedlings and fresh cuttings die quickly in waterlogged mix. A standard well-draining potting blend amended with 20% perlite or coarse sand matches what mature basil prefers: moisture without stagnation, pH roughly 6.0 to 7.5 per extension guidance.
Rooting hormone is optional for basil. Soft-stemmed herbs root readily without it. If you root directly in soil and want a slight speed boost, a light dip in IBA rooting powder on the cut end before planting can help, but tap off excess - too much burns tender stems.
Label your cuttings and seed trays if you are running multiple cultivars. Sweet basil, Thai basil, and purple varieties look identical at the rooting stage.
How to Propagate Basil Stem Cuttings in Water
Water propagation is the most popular basil propagation method because it is visible, simple, and reliable. You can watch white root tips appear day by day, which tells you exactly when the cutting is ready for soil.
Choosing and cutting a healthy stem
Select a stem 4 to 6 inches (10 to 15 cm) long from a healthy parent plant. The stem should be green and firm, not woody or brown at the base. Avoid stems with a developing flower spike - once basil shifts toward flowering, stems toughen and root more slowly.
Locate a node - the point where leaves meet the stem. You will see a slight ridge or a pair of tiny leaf buds. Make your cut just below a node, about ¼ inch (6 mm) beneath it. That node is where roots will form.
Remove all leaves from the lower two-thirds of the stem so nothing sits below the waterline. Leave one or two sets of leaves at the top for photosynthesis. Submerged leaves rot within days and foul the water. If the top leaves are very large, you can trim them halfway to reduce water loss while roots form.
Place the stem in a clean glass with 2 to 3 inches of room-temperature water. The cut end and at least one node must stay submerged. Multiple cuttings can share one jar if leaves are not crowded - spacing helps each cutting get light.
Water changes, light, and when roots are ready
Set the jar in bright, indirect light - a kitchen counter near a window is ideal. Change the water every two to three days to maintain oxygen and limit bacterial growth. Stagnant water turns cloudy, smells sour, and causes stem rot before roots appear.
First white root tips usually show in 5 to 10 days under warm, bright conditions. By 7 to 14 days, most healthy cuttings have a visible root cluster. Allow roots to reach 1 to 2 inches (2.5 to 5 cm) long before potting. Shorter roots snap during transplant; roots left in water much beyond 2 inches become brittle and break easily when handled.
Basil cuttings may wilt slightly for the first day after cutting - that is normal. If a cutting collapses completely and does not recover after 48 hours in fresh water, discard it and take a new one from fresher growth.
How to Root Basil Cuttings Directly in Soil
Soil rooting skips the water stage and produces roots adapted to the medium where the plant will live. The trade-off is you cannot see progress, so patience matters.
Fill a small pot - 3 to 4 inches (8 to 10 cm) is enough - with pre-moistened seed-starting mix or potting blend with extra perlite. Insert the prepared cutting so the lowest node is buried and the remaining leaves sit above the surface. Firm the mix gently around the stem.
Place the pot in bright, indirect light at 70 to 80°F. Keep the mix consistently moist but not soggy - think wrung-out sponge, not mud. A clear plastic bag propped over the pot can raise humidity and reduce wilting, but vent it daily if condensation builds heavily.
Roots typically form in 10 to 14 days, sometimes faster with bottom heat. Test after two weeks with a very gentle tug - slight resistance means roots are developing. Do not yank. New top growth is an even better sign.
Soil-rooted cuttings transition to normal care more smoothly than water-rooted ones because they never had to switch environments. For growers who tend to leave cuttings in water too long, soil rooting avoids brittle-root breakage.
How to Grow Basil from Seed
Seed propagation is the standard way to fill a garden bed, a long balcony planter, or a set of matching pots. One packet yields dozens of plants for the cost of a single nursery transplant.
Sowing depth, warmth, and germination timeline
Use a lightweight, sterile seed-starting mix - peat or coco coir blended with vermiculite or perlite. Heavy garden soil compacts and causes damping off, the fungal collapse of seedlings at the soil line.
Sow basil seeds ⅛ to ¼ inch (3 to 6 mm) deep and cover lightly. University of Minnesota Extension recommends sowing evenly, covering with about ¼ inch of soil, and keeping the mix moist and weed-free. USU Extension advises ⅛ inch depth for direct outdoor sowing.
Basil seeds need warm soil to germinate reliably. Target 70 to 80°F (21 to 27°C); a heat mat at 75°F is one of the highest-return tools for indoor seed starting. At optimal temperature, germination often occurs in 5 to 7 days according to Minnesota Extension, though cooler soil can stretch emergence to 10 to 14 days as USU reports.
Water with a spray bottle or a gentle stream so seeds are not displaced. The mix should stay evenly moist from sowing through emergence - dry surface spells delayed or uneven germination.
Basil seedlings are recognizable by their two broad cotyledons - seed leaves shaped like capital Ds facing each other - before true leaves appear.
Thinning, transplanting, and hardening off seedlings
Once seedlings develop two to three pairs of true leaves, thin or transplant so plants stand 6 to 12 inches (15 to 30 cm) apart, depending on whether you are growing in a bed or a pot. Crowded basil competes for light and airflow, which leads to leggy stems and fungal issues.
If you started seeds in trays, move each seedling into its own 3- to 4-inch pot before roots circle and stall. Handle seedlings by a leaf, not the delicate stem.
Plants destined for outdoor beds need hardening off - gradual exposure to outdoor sun, wind, and temperature swings over 7 to 10 days. Move trays outside for an hour in shade, then increase time and light daily. Plant into the garden only when night temperatures stay consistently above 50°F and frost danger has passed, which aligns with guidance from multiple extension services.
Indoor-only growers can skip hardening off but should still acclimate seedlings to their final windowsill or grow-light position over a few days to prevent leaf scorch.
Propagating Basil from a Store-Bought Bunch
Supermarket and farmers-market basil bunches are often the fastest basil propagation material available because the stems were cut recently and are fully hydrated. Many home cooks accidentally root grocery basil by storing stems in water on the counter like cut flowers - and discover new white roots a week later.
To propagate intentionally, remove rubber bands or twist ties immediately. They constrict stems and block water uptake. Rinse the base, then trim ½ inch (1 cm) off each stem end with clean scissors - a fresh cut opens water-conducting tissue.
Strip lower leaves and place stems in clean water as you would with garden cuttings. Grocery stems sometimes carry more bacteria from transport, so change water every one to two days at first. Expect roots in 7 to 14 days.
One limitation: you rarely know the cultivar, and store basil is sometimes grown hydroponically or treated in ways that affect flavor after replanting. For culinary consistency, propagate from a known plant you already grow. For free plants and experimentation, grocery bunches work well.
Not every stem in a bundle will root. Take six stems, expect four or five successes, and discard any that turn slimy or black at the base.
Pinching, Bolting, and Sourcing Better Cuttings
The quality of your cutting material determines rooting speed more than any gadget. Pinch or harvest the parent plant regularly to keep it producing soft, branching growth. A basil plant allowed to flower and bolt shifts hormones toward seed production; stems become woody, leaves shrink, and essential-oil profile changes - off flavors develop and leaf production slows, as USU Extension notes under heat and water stress.
If your only available stems have flower buds, pinch the buds off and use the green section below. Rooting may take longer, but it can still work.
Take cuttings from the top third of healthy plants in the morning when stems are fully turgid. Avoid cuttings immediately after the parent has wilted from drought - rehydrate the parent first, then cut the next day.
When harvesting and propagating at once, cut just above a node on the parent so two new shoots emerge below your cut. That turns one propagation session into both new plants and a bushier parent.
Potting Up Rooted Cuttings Without Shock
Moving a water-rooted cutting into soil is the most fragile step in basil propagation. Water roots are structurally different from soil roots - they are adapted to an oxygen-rich aquatic environment. When they contact soil, the plant rebuilds root tissue, and you may see temporary wilting for 3 to 7 days even when you do everything right.
Pot up when roots are 1 to 2 inches long - not before, not long after. Prepare a small pot with moist, well-drained mix. Create a hole, lower the cutting in, and gently spread roots without crushing them. Bury the stem to the same depth it sat in water - the lowest node should be covered.
Water thoroughly once, then keep the mix lightly and consistently moist for the first week. Place the pot in Basil light guide, not full blazing sun. Direct sun on a rootless-in-soil cutting accelerates wilting.
Some growers pot into a small seed-starting cup first for a week before moving to a larger container, which limits the soil volume the fragile roots must explore. Either approach works if moisture stays steady.
Do not let rooted cuttings sit out of water while you prepare pots - exposed root hairs dry in minutes and may not recover. Have the pot ready before you lift the cutting from the jar.
Aftercare for New Basil Plants
Water, light, and feeding in weeks one through four
Whether your new plant came from a cutting or a seedling, the first month is about stable conditions, not aggressive pushing.
Water when the top 2 to 3 cm of mix approaches dry. Freshly rooted cuttings have a smaller root system than mature plants, so the pot dries more slowly than you expect - check with your finger rather than watering on a calendar. Soggy mix after potting is the fastest way to lose a newly rooted basil.
Light should be bright. Mature basil wants full sun - 6 or more hours of direct light daily for best flavor and compact growth. Newly potted cuttings benefit from a few days of indirect light, then gradual move to stronger light. Seedlings under grow lights should stay 6 to 12 inches from the fixture and run 14 to 16 hours daily.
Fertilizer can wait. Hold feeding until the plant shows active new growth - usually two to three weeks after potting a cutting or when seedlings have three to four true leaves. Then apply a dilute balanced liquid fertilizer at quarter to half strength every three to four weeks for container plants, following the lighter rates Minnesota Extension suggests for indoor herbs.
Pinch the top once the plant has four to six sets of leaves to encourage branching. Each pinch redirects energy into side shoots and gives you more harvest points.
Most basil from cuttings reaches a first meaningful harvest in 3 to 4 weeks after potting under warm, bright conditions - roughly matching the fast growth habit that makes basil a kitchen-garden staple.
Why Basil Propagation Fails and How to Prevent It
Rot at the stem base is the most common cutting failure. Causes include submerged leaves, unchanged stagnant water, a cold windowsill below 60°F, or cutting from woody bolted stems. Fix: fresh cut below a green node, clean jar, water changes every two to three days, warmer spot.
Wilting after potting usually means transition shock or dry mix - not necessarily death. Keep soil lightly moist, provide indirect light, and wait a week. If the stem stays firm and green, new roots are likely forming.
No roots after two weeks often traces to insufficient light, water too cold, or a stem with no viable node submerged. Confirm at least one node sits in water or buried in mix.
Seedlings collapsing at the soil line signal damping off from overwatering on Basil, poor airflow, or non-sterile mix. Reduce watering, increase airflow, and restart with fresh mix if needed.
Leggy, pale seedlings mean too little light. Move closer to a grow light or a brighter window.
Black or slimy stems mean bacterial infection. Discard affected cuttings, wash the jar, and start with new material from healthier growth.
Prevention beats rescue: clean tools, warm bright conditions, and green non-flowering stems solve most problems before they start.
Conclusion
Basil propagation rewards growers who match method to goal and respect the plant’s need for warmth, light, and clean moisture. For a quick clone of a plant you already love, stem cuttings in water are hard to beat - roots in 7 to 14 days, pot up at 1 to 2 inches, and harvest in a few weeks. For volume and variety, seeds sown ⅛ to ¼ inch deep at 70 to 80°F fill trays reliably in 5 to 14 days. Soil rooting and grocery-bunch propagation fit neatly between those poles.
The through-line is node biology: roots form where the stem meets leaf tissue, not from leaves alone. Keep cuttings warm and bright, change water often, pot up before roots become brittle, and pinch young plants to stay bushy. Once you have rooted one jar of basil on a windowsill, the process feels less like a project and more like a habit - and that is how a single pot becomes a steady supply of fresh leaves for the kitchen.
When to use this page vs other Basil guides
- Basil overview - Start here for whole-plant context before deep-diving this topic.
- Basil problems hub - Jump to symptom-specific fix guides when this care topic does not resolve the issue.