Best Soil for Baby Rubber Plant: Mix & Drainage
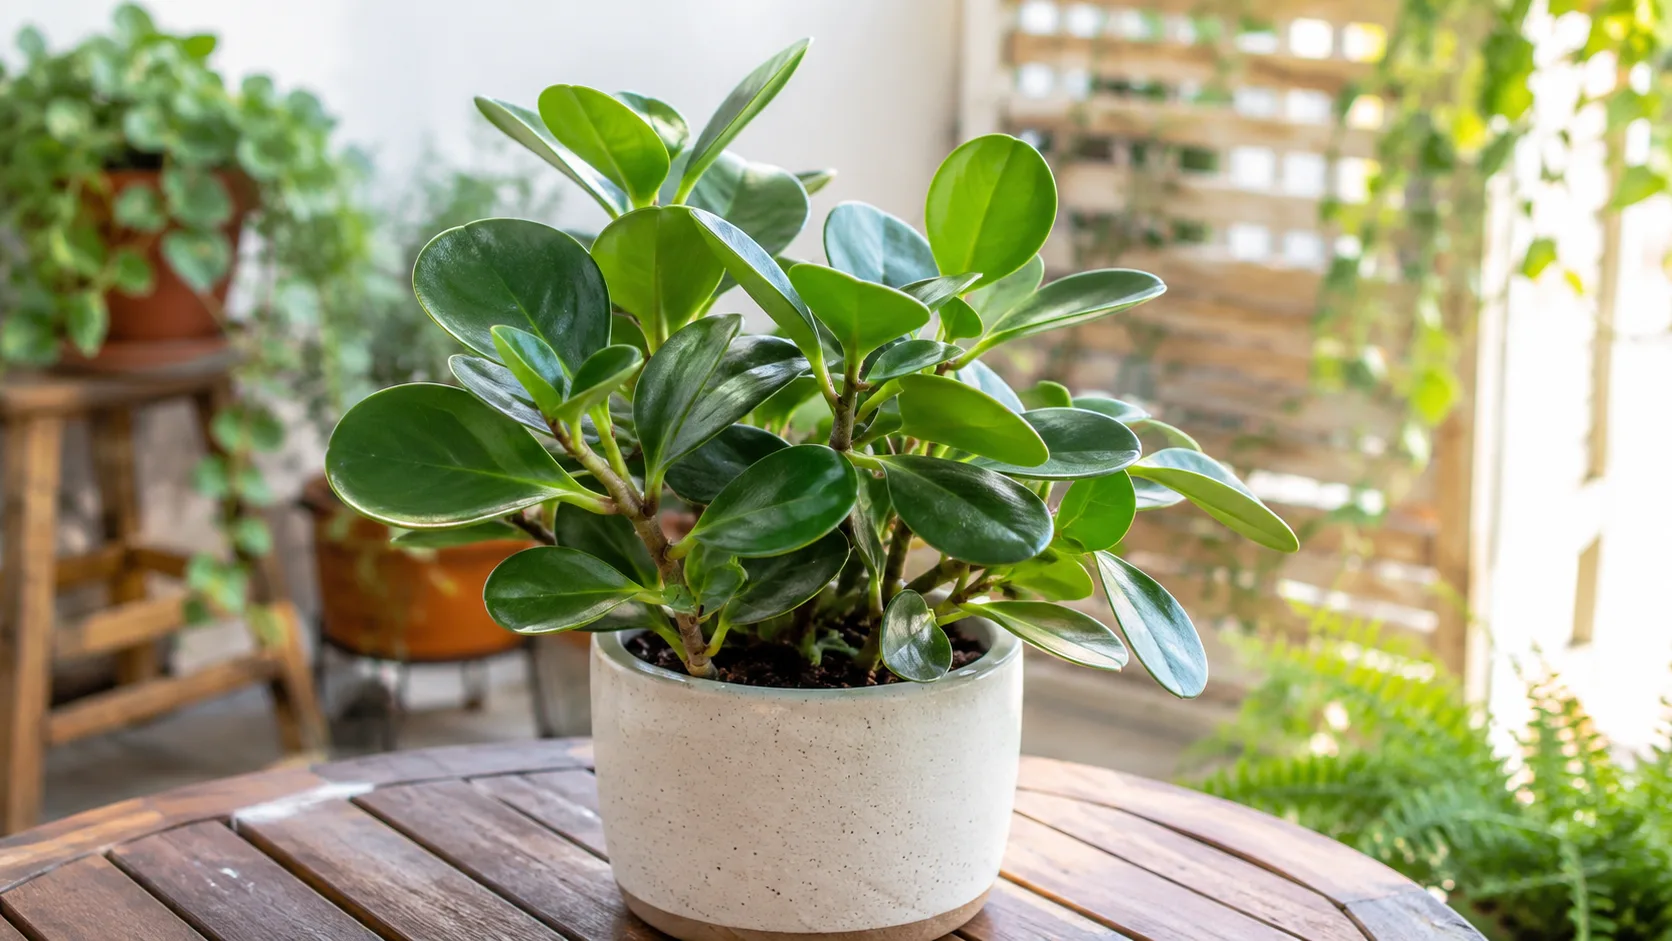
Best Soil for Baby Rubber Plant: Mix & Drainage
Best Soil for Baby Rubber Plant: Mix & Drainage
Baby rubber plant soil is not a minor detail you can leave to whatever bag happens to be in the garage. For Peperomia obtusifolia, the mix sitting around the roots decides how much oxygen reaches them, how long moisture lingers after you water, and whether a slightly heavy hand with the watering can turns into full-blown root rot on Baby Rubber Plant. The plant stores water in its thick, glossy leaves, which makes it more forgiving of a missed drink than a pot that stays wet for a week. That leaf storage is a clue: the roots want a loose, airy medium that dries on a predictable schedule, not a dense sponge that holds water like a bog.
Despite the common name, baby rubber plant is not a rubber tree (Ficus elastica). It belongs to Piperaceae (the pepper family), and grows as a compact tropical perennial native to warm forests in South America, with populations also found in Florida, Mexico, and parts of the Caribbean. In those habitats it often colonizes decomposing leaf litter and tree bark-substrates that drain fast and breathe well. Your indoor pot should echo that logic even if it cannot replicate a rainforest floor.
Why Soil Matters More Than Watering for Peperomia obtusifolia
Most baby rubber plant care guides lead with watering, and watering does matter. But experienced growers know that overwatering on Baby Rubber Plant is usually a soil problem dressed up as a watering problem. If the mix drains slowly, stays compacted, or holds moisture in the lower half of the pot while the surface looks dry, you can follow a careful schedule and still suffocate the roots. The Spruce notes that while baby rubber plants like moist conditions, these epiphytic species dislike wet feet and need a well-draining medium to avoid root rot. (The Spruce)
Think of soil as the plant’s plumbing and ventilation system combined. Every time you water, water displaces air in the pore spaces. In a good mix, that water moves through, exits the drainage hole, and fresh air refills the gaps within hours to a couple of days depending on your room. In a poor mix, water sits, oxygen gets pushed out, and fine roots die back before the leaves show obvious distress. By the time lower leaves yellow or stems feel soft, the damage is often already underway at the root zone.
The Root Zone Your Baby Rubber Plant Actually Wants
Peperomia obtusifolia carries a shallow, fine, thready root system adapted to loose forest debris and bark-not deep, heavy garden loam. Those roots spread horizontally more than they dive downward, which is why a wide, shallow pot often suits the plant better than a tall, narrow one that traps moisture at the bottom. The roots need macro-pores: larger air pockets created by chunky materials like orchid bark and coarse perlite or pumice. Without those pores, even a mix that felt light when new will collapse over time as organic matter decomposes.
The leaves tell part of the story. Their succulent thickness helps the plant ride out short dry spells, but it cannot compensate for chronic anaerobic conditions underground. A healthy baby rubber plant in the right soil feels firm at the leaf base, produces steady if slow new growth, and recovers quickly when you miss a watering by a few days. A plant in the wrong soil often looks vaguely “thirsty” while the pot is still heavy-classic sign that roots are compromised and cannot take up water properly.
What Makes Baby Rubber Plant Soil Different from Regular Potting Mix
All-purpose potting soil is engineered for a wide range of houseplants, outdoor containers, and seasonal bedding plants. It typically contains composted bark fines, peat or coir, wetting agents, and sometimes slow-release fertilizer. That recipe works for many plants with more robust root systems, but it is often too moisture-retentive and too fine-textured for Peperomia obtusifolia in a small indoor pot. Plant America recommends that roughly half of a baby rubber plant soil mix should consist of perlite or pumice to ensure good drainage, because the species is very sensitive to overwatering when the medium stays wet. (Plant America)
The difference is not about “specialty soil” marketing. It is about dry-down speed and air-filled porosity. A suitable baby rubber plant mix should reach a state where the root zone is moist but not saturated, then move toward partial dryness within a reasonable window-often several days in an average home-before you water again. Standard unamended potting compost in a plastic pot under moderate light may stay damp too long, especially in winter when evaporation drops.
Epiphytic Roots and Shallow Growth Habits
Peperomia obtusifolia is often described as a facultative epiphyte: it grows on the forest floor and on tree surfaces, wherever loose, organic debris accumulates. Both habitats share two traits-rapid drainage after rain and abundant oxygen around the roots. That ecology explains why the species lacks the deep anchoring roots you would expect from a large floor plant. Baby Rubber Plant repotting guide into a huge container “to give it room to grow” backfires because the unused soil volume holds water the roots never reach, creating a permanent wet zone.
Ohio Tropics emphasizes that Peperomia species have fairly shallow, small root systems and should never be over-potted, because oversized containers take too long to dry and cause root problems. (Ohio Tropics) The practical takeaway is simple: match the pot to the roots, and match the soil to the pot size and your watering habits. A slightly root-bound baby rubber plant in fast soil is usually healthier than a small plant drowning in a large decorative planter.
Best Soil Mix Recipe for Peperomia obtusifolia
The best baby rubber plant soil balances three jobs: hold enough moisture that fine roots do not desiccate between waterings, drain excess water immediately, and resist compaction for at least one to two years. A widely tested starting formula is 50% organic base, 30% coarse perlite or pumice, and 20% fine orchid bark. That ratio produces a chunky, well-aerated mix with enough structure to keep macro-pores open while still retaining a reasonable moisture buffer in the organic fraction.
You do not need laboratory precision. Measuring by volume with a scoop or cup is fine. Mix ingredients dry in a bucket or tray until the bark and perlite are evenly distributed, then moisten slightly before potting if you want to reduce dust. The finished mix should look visibly chunky-if you cannot clearly see white perlite and bark shards throughout, you probably have not added enough drainage material.
The 50-30-20 Coco Coir, Perlite, and Orchid Bark Formula
Here is the baseline recipe most Peperomia obtusifolia growers settle on after experimentation:
- 50% coco coir or quality peat-free potting compost - provides moisture retention and a stable organic framework
- 30% coarse perlite or horticultural pumice - creates air space and accelerates drainage
- 20% fine to medium orchid bark - adds chunk structure and slows compaction
Coco coir is often preferred over peat moss today because it rewets more easily after a full dry-down and sits closer to a neutral pH, while peat can become hydrophobic when it dries completely. For a plant you water on a 7–14 day cycle in summer, easy rewetting matters. Orchid bark mimics the fallen timber and leaf litter the species encounters in nature, giving roots anchor points and keeping channels open for airflow.
If you want a slightly simpler two-part blend that still performs well, Ohio Tropics recommends 2 parts all-purpose potting mix to 1 part ¼-inch pumice for Peperomia species. (Ohio Tropics) That is less chunky than the 50-30-20 formula but still a major upgrade over straight bagged potting soil, especially if you tend to water conservatively and grow in terracotta.
Alternative Mixes When You Do Not Have Every Ingredient
Not every home has orchid bark on hand, and that is fine. Substitutions work if you preserve the underlying principle: increase pore space and shorten wet time.
- No orchid bark: Increase perlite or pumice to 40% and reduce the organic base to 60%. You lose some long-term structural chunk, so plan to refresh the mix a bit sooner.
- Only potting soil and perlite: Use a 50/50 blend as a minimum starting point. This is the floor, not the ceiling-if the pot still feels heavy after five days, push perlite higher.
- Cactus or succulent mix on hand: Blend it 50/50 with regular potting mix, or use it straight only if it does not dry out in under 48 hours in your conditions. Pure cactus mix can be too fast-draining for some indoor setups and may cause chronic drought stress.
- Peat-based mix: Use 40% peat-based potting soil, 30% perlite, 20% orchid bark, 10% coarse sand-but watch acidity if you are repotting frequently. Peat-heavy mixes compact faster than coir-based ones.
A small handful of activated charcoal mixed into a batch is optional. It is not mandatory for healthy growth, but some growers add it to reduce odor in moist organic mixes and to absorb minor impurities from tap water. Skip charcoal before you have the basic ratios right; it does not fix a dense mix.
Choosing and Understanding Each Soil Ingredient
Each component in a baby rubber plant soil recipe should have a clear job. When you understand the job, you can adjust the recipe for your home instead of copying a ratio that works in someone else’s climate-controlled grow room.
Coco Coir vs Peat Moss for Baby Rubber Plants
Coco coir is a byproduct of coconut processing. It holds moisture well, has a near-neutral pH around 6.0–6.8, and rewets reliably after drying. Peat moss is lighter and traditional in houseplant mixes, but it acidifies over time and can repel water if allowed to go bone-dry. Peperomia obtusifolia tolerates a range from slightly acidic to neutral-generally pH 6.0 to 7.0-so either material works if the rest of the mix drains well.
Choose coir if you want a peat-free setup, if your tap water is alkaline and you prefer a neutral base, or if you sometimes let the pot dry fully between trips. Choose peat if you already have a proven peat-based Peperomia mix and the plant is thriving-there is no virtue in fixing what is not broken. In both cases, never use raw peat or coir alone; they need perlite and bark to create the pore structure Baby Rubber Plant overview requires.
Perlite vs Pumice for Drainage
Perlite is expanded volcanic glass-light, white, and cheap. It increases drainage and aeration effectively but can float to the surface over time with repeated top watering. Pumice is heavier, more stable in the mix, and less prone to floating, which is why experienced growers like the Bonsai Jack–style horticultural pumice often recommended for Peperomia. (Ohio Tropics)
Functionally, both beat having no mineral amendment at all. If you water from the top and notice perlite accumulating at the surface, stir the top inch lightly at repotting time or switch part of the perlite fraction to pumice. Avoid fine sand as a primary drainage substitute; in small indoor pots it can settle into a dense layer that behaves like concrete at the root zone.
pH, Minerals, and Long-Term Mix Health
Peperomia obtusifolia is not a heavy feeder, and it is not hyper-sensitive about pH the way some ericaceous plants are. A target range of 6.0 to 7.0 supports normal nutrient uptake in a typical indoor setting. Most coir-based and peat-based mixes land in or near that range without adjustment. If you are building from scratch and using a high-peat formula, a light application of dolomite lime is sometimes used in commercial blends to stabilize acidity-but hobbyists rarely need to micromanage pH unless the plant shows chronic nutrient issues despite good care.
What matters more day to day is mineral salt buildup from tap water and fertilizer. Over months, a white crust on the soil surface can indicate excess salts. If you see crusting, leaf tip burn on older leaves, or slowed growth despite correct watering and light, flush the pot by running water through the mix for several minutes and letting it drain fully. If the crust returns quickly or the mix has been in the same pot for more than two years, refresh the substrate at repotting rather than chasing symptoms with more fertilizer.
Organic components decompose. Orchid bark softens, perlite settles, and the airy structure that protected roots gradually collapses. That is why substrate age is as important as substrate recipe. A mix that was perfect 30 months ago may be quietly suffocating roots today even if your watering habits have not changed.
Drainage Speed: How to Test Whether Your Mix Is Working
Recipe ratios are a starting point, not a verdict. Your room’s light, temperature, humidity, pot material, and plant size all change how fast a given mix dries. The growers who rarely lose Peperomia to rot are not the ones with the most expensive bagged soil-they are the ones who observe dry-down speed and adjust.
After watering thoroughly until water exits the drainage hole, note how the pot feels and how the surface looks over the next days. In an average indoor setup with Baby Rubber Plant light guide, the top inch should approach dryness within roughly a week in summer-faster in very bright or warm rooms, slower in winter. If the top is still visibly damp after ten days in active growth season, the mix or pot is too wet for this species.
The One-Minute Drainage Check After Watering
Right after a full watering, watch the pot for sixty seconds. Water should begin draining almost immediately and continue in a steady stream-not a thin trickle, not pooling on the surface for minutes. Press a finger into the top inch once excess water has drained: it should feel moist but not muddy. Lift the pot if you can; a well-watered pot in an appropriate-size container has noticeable weight but should not feel like a waterlogged brick days later.
Insert a dry wooden chopstick or skewer into the drainage hole and leave it for ten minutes after watering. When you pull it out, moisture on the lower portion is normal; sopping wet slime or a sour smell is not. Combine that with the leaf test: firm, upright leaves on a plant whose top inch is approaching dry means your soil system is probably working. Soft, drooping leaves on a heavy pot mean investigate roots and mix before you water again.
Pot Size, Pot Material, and Drainage Holes
Soil cannot rescue a pot with no exit for water. A drainage hole is non-negotiable for long-term baby rubber plant care. Cachepots are fine for display if the grow pot inside has holes and you empty the outer vessel after watering. Gravel at the bottom of a solid pot is not a substitute for a hole; it creates a perched water table that can keep the root zone wetter, not drier.
Pot size should track the shallow root ball, not the leaf spread. When repotting, move up only one size-for example, from a 4-inch to a 6-inch diameter pot. Ohio Tropics’ rule of one pot size up exists because jumping to a much larger container surrounds a small root system with wet, unused soil. (Ohio Tropics) Plant America likewise recommends a container only one size larger when repotting Peperomia obtusifolia. (Plant America) The Spruce and the Royal Horticultural Society both echo this rule: choose a pot only slightly larger than the current container when repotting peperomias.
Terracotta or unglazed clay wicks moisture through the walls and adds root-zone aeration, which is why many growers prefer it over plastic for Peperomia. Plastic is not wrong-it dries more slowly, which can be an advantage if you are in a very dry apartment and tend to underwater. Match material to your habits: chronic overwaterers benefit from terracotta and fast mix; chronic underwaterers may do better with plastic and slightly more coir in the blend.
When to Repot Baby Rubber Plant
Baby rubber plants are not frequent repotters. The Spruce notes they do not have an extensive root system and usually need repotting only once every few years-when roots emerge from drainage holes, growth stalls despite good care, or the soil lifts and pulls away from the pot sides. (The Spruce) For most healthy plants, a 2–3 year refresh cycle is reasonable even if the plant is not wildly root-bound, because bark decomposition and compaction matter as much as root crowding. The RHS similarly advises that most peperomias are slow-growing and can usually stay in their original container for two or three years.
Spring and early summer are the best windows, when increasing light and warmth support recovery. Avoid repotting in late fall or winter unless the current mix is clearly failing-sour smell, chronic wetness, or active root rot-because slow-season recovery is harder. If the plant is otherwise healthy and the mix still drains well, there is no prize for repotting early.
Signs that repotting is due include roots circling the bottom, water running straight down the sides without wetting the root ball (hydrophobic or shrunken mix), white salt crust that returns after flushing, and new growth that is smaller or paler than earlier leaves despite stable light and feeding.
Step-by-Step Repotting Without Stressing the Plant
Repotting is surgery, not decoration. Move calmly and keep the root ball intact as much as possible.
- Water lightly a day before if the mix is extremely dry, so roots are flexible-not wet and fragile.
- Choose the new pot one size up with a drainage hole. Terracotta is ideal if you overwater; plastic is fine if you underwater.
- Mix fresh soil using the 50-30-20 formula or the 2:1 potting mix-to-pumice blend. Moisten slightly so dust does not fly.
- Slide the plant out by tipping the pot and supporting the stems. Do not yank from the base. If stuck, squeeze a flexible nursery pot or run a knife around the edge.
- Inspect roots in good light. Trim only mushy, brown, or foul-smelling roots with clean scissors. Healthy Peperomia roots are fine and pale, not thick and woody.
- Add mix to the new pot so the plant sits at the same depth as before. Burying the stem deeper invites rot at the crown.
- Fill around the sides, tapping gently to settle without compacting. Leave a half-inch below the rim for watering.
- Water once until drainage runs clear, then place in bright indirect light-not direct sun right after repotting.
- Hold fertilizer for four to six weeks while roots settle. Resume normal watering when the top inch approaches dry.
Expect minor transplant sulking: one or two older leaves may yellow. If multiple leaves collapse while the pot stays heavy, pause watering and confirm the new mix is not too dense and the pot is not oversized.
Common Soil Mistakes That Cause Root Rot
The most common mistake is using unamended all-purpose potting soil in a large decorative pot with no drainage strategy. It looks fine on day one. Six months later the lower half of the pot stays wet, roots decline, and the grower assumes they “watered too much” when the real issue is unused wet volume and fine texture.
Overpotting is the second classic error. A cute 10-inch planter for a 6-inch nursery plant is a root-rot machine unless you are extremely disciplined with water and using very chunky mix. Bottom gravel layers, solid cachepots that hold runoff, and watering on a calendar without checking moisture compound the risk.
Another mistake is repotting into orchid bark mix alone. Pure bark drains extremely fast-often drying within a day or two indoors-which can stress Peperomia obtusifolia with chronic drought despite your best intentions. Bark belongs as a structural fraction, not the entire substrate.
Finally, do not repot a healthy plant the day it arrives home. Nursery mix is not always ideal, but the plant is acclimating to your light and humidity. Unless you see active root rot or pests, let it settle two to four weeks, observe dry-down speed, then repot if needed.
Troubleshooting Slow Growth and Yellow Leaves After a Soil Change
If you recently repotted into a new mix and growth stalled, diagnose in this order: pot size, moisture, light, then roots. An oversized pot with fresh but insufficiently chunky mix is the leading cause of post-repot decline. A pot that dries in two days may mean the mix is too coarse for your Baby Rubber Plant watering guide-add more coir or potting compost on the next refresh.
Yellow lower leaves often mean older leaf senescence if the plant is otherwise firm and pushing new growth. Yellowing spread up the stem on a heavy pot points to root stress. Check the drainage hole for healthy white root tips; dark mush confirms rot and requires trimming and a full mix replacement with drier conditions afterward.
Variegated cultivars such as ‘Variegata’ or ‘Marble’ grow more slowly and can be less forgiving of dense, wet soil. They benefit from slightly higher perlite or pumice fractions and more frequent mix refresh-sometimes every 12–18 months rather than three years-because they have less photosynthetic tissue to fuel recovery from root setbacks.
When in doubt, improve airflow and light modestly before adding fertilizer. A plant in bad soil cannot feed its way back to health. Fix the root environment first, then feed lightly during active growth if new leaves look pale despite correct care.
Conclusion
The right baby rubber plant soil is a chunky, fast-draining blend built around roughly 50% organic base, 30% perlite or pumice, and 20% orchid bark, adjusted until the pot dries on a rhythm that matches your home. Peperomia obtusifolia rewards growers who respect its shallow, epiphytic roots with small pots, real drainage holes, and mix that breathes-not growers who chase a magic watering day on the calendar.
Test drainage after every repot, move up only one pot size, refresh the substrate every two to three years, and treat slow dry-down or sour smells as early warnings rather than background noise. Clemson HGIC advises planting peperomias in a well-drained houseplant or cactus potting mix, and the RHS recommends an acidic, free-draining mix of two parts peat-free ericaceous compost, one part perlite, and one part medium orchid bark for peperomias. Get the soil system right and baby rubber plant care becomes straightforward: firm leaves, steady slow growth, and far fewer emergencies at the root zone.
When to use this page vs other Baby Rubber Plant guides
- Baby Rubber Plant overview - Start here for whole-plant context before deep-diving this topic.
- Baby Rubber Plant problems hub - Jump to symptom-specific fix guides when this care topic does not resolve the issue.
- Root Rot on Baby Rubber Plant - Escalate here when soil adjustments are not enough.
- Mold on Soil on Baby Rubber Plant - Escalate here when soil adjustments are not enough.