Fall Lawn Overseeding: Timing, Seed, and Aftercare
Fall lawn overseeding works when seed fits your grass, reaches soil, and stays moist. Learn timing, preparation, watering, fertilizer, and first-mow steps.

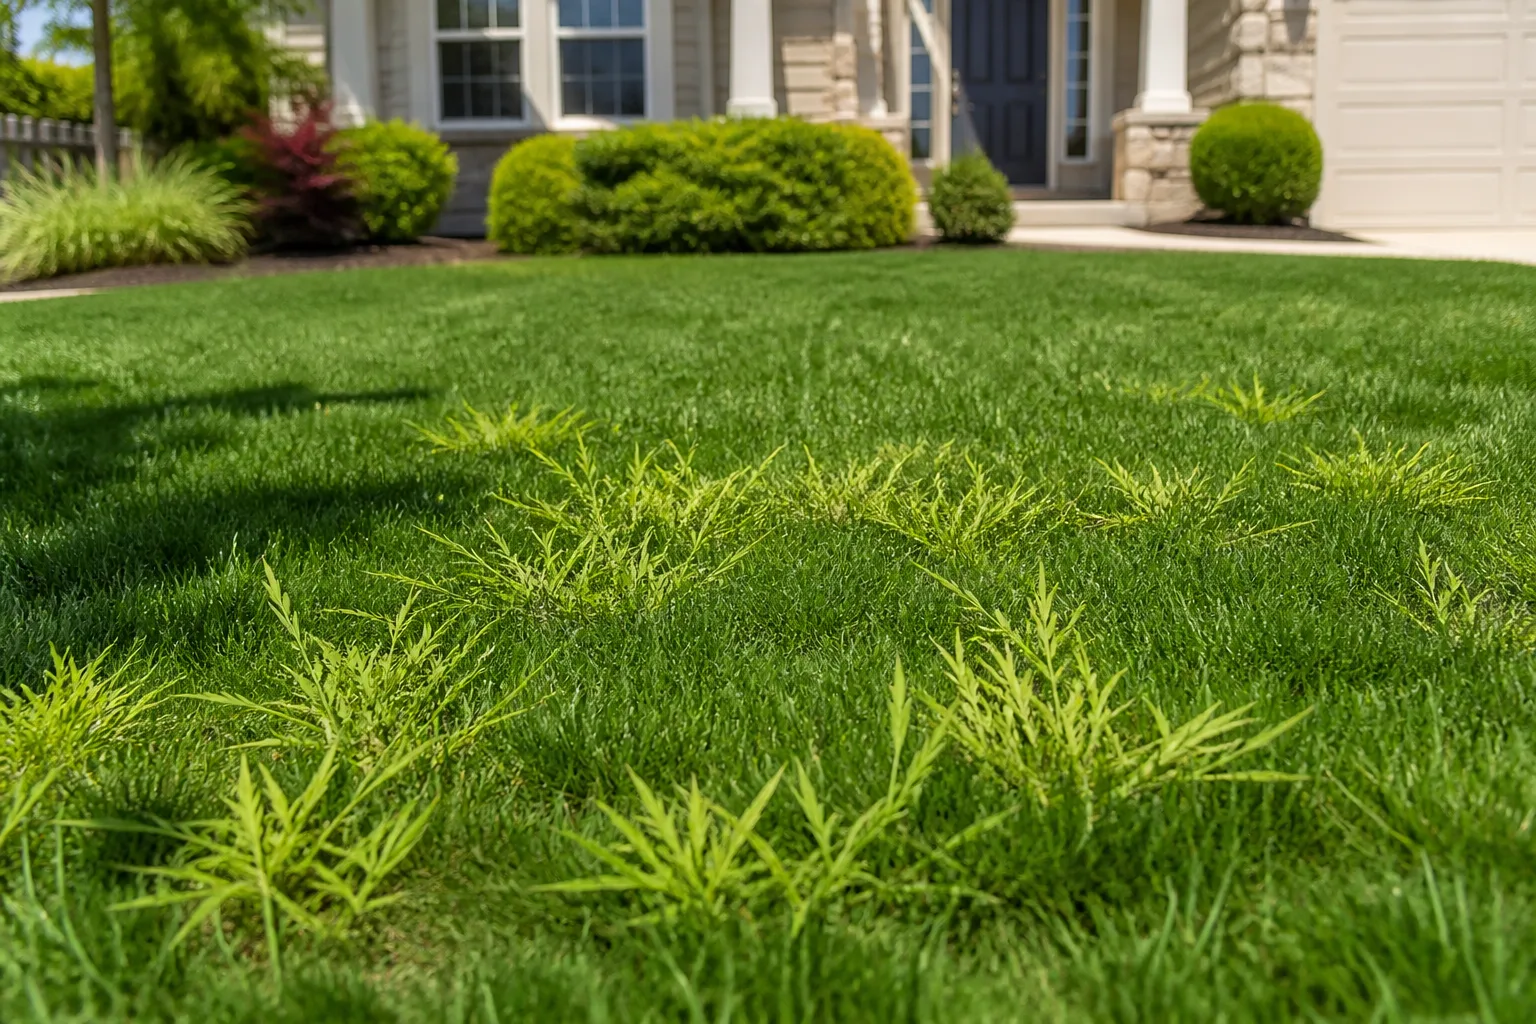
A thin lawn can look like a seed problem when the real cause is shade, compacted soil, poor drainage, drought, or mowing too low. Before buying a bag, decide whether the existing grass is healthy enough to thicken, identify what is holding it back, and check that the seed can establish before winter. That sequence matters more than a universal calendar date.
Fall overseeding adds seed to living turf to fill a sparse stand. It works best when the new grass matches the climate and site, reaches exposed soil, and receives steady moisture while it germinates. It is not a cure for every brown patch: seed cannot outcompete a dense layer of weeds, survive under deep shade, or correct waterlogged soil on its own.
Should you overseed or renovate?
Overseeding is a repair for a lawn that still has desirable grass but has become thin. The existing turf helps stabilize soil and gives seedlings a chance to fill small openings. If most of the lawn is bare, dominated by weeds, or made up of an unsuitable grass, simply broadcasting seed over it may produce a weak mix rather than a durable lawn.
Look across the entire area, not only at the worst patch. If the lawn has a reasonable base of the grass you want and the gaps are scattered, overseeding may be efficient; when desirable turf is sparse across most of the site, consider a renovation plan that removes or suppresses the old cover and prepares a more complete seedbed. The exact threshold depends on the amount of living grass, weed pressure, budget, and whether you can keep the area watered.
Thin lawn versus bare lawn
A thin lawn has living grass blades and crowns spaced far enough apart for sunlight to reach the soil. Seed can help fill those openings if the existing turf is not so dense that it blocks every seed from making contact. A truly bare spot needs more direct preparation because seed lying on crusted soil, thatch, or dead leaves may never reach moist earth.
A useful visual test is to kneel and part the grass in several places. If you can see soil between living plants, overseeding may fit; if you mostly see weeds, bare dirt, or dead material, identify what needs removal or repair first.
Better Homes & Gardens similarly recommends diagnosing the cause of thin turf before adding seed, since otherwise the fix can be temporary. Its Better Homes & Gardens tips for overseeding also use the proportion of desirable grass as a practical decision aid, not a guarantee that every lawn above a certain threshold will recover.
Diagnose why turf is thinning first
Match the pattern to the likely cause. Grass that thins along a worn path points toward traffic; a weak patch below a dense tree may be short on light and water; areas that stay soggy after rain suggest drainage or grading trouble. A lawn that looks sparse everywhere may have been mowed too short, starved of light, or repeatedly stressed by heat and drought.
Correct the cause before seeding, or at least choose a species that tolerates the site better. Redirect foot traffic, adjust mowing height, improve drainage where practical, and use a soil test to check pH and nutrient needs before applying lime or fertilizer.
Virginia Cooperative Extension advises treating renovation as a chance to ask why the turf failed—whether because of mowing, moisture, soil, drainage, compaction, or a grass type that does not fit the site. If the problem is persistent disease, insects, or standing water, diagnose that condition first rather than paying to reseed the same failure.
Choose the right fall window for your grass
Fall offers a useful balance for many cool-season lawns: soil is still warm enough for germination while cooler air reduces stress on young grass. But “fall” covers a long span, and the workable window depends on species, latitude, elevation, weather, and how quickly the seedling roots can establish. Start planning early enough to prepare the soil and water reliably; do not wait for the calendar to announce that it is time.
Virginia Tech describes late summer through mid-fall as a favorable establishment period for cool-season turf in its region. Kansas State’s Johnson County guidance places bluegrass and tall fescue seeding in the Kansas City area in early to mid-September.
Those are local recommendations, not dates to copy across the country. Use your state or county extension’s recommended window for the grass you are planting, then watch actual weather and soil moisture.
Cool-season lawns: seed while roots still have time
Tall fescue, Kentucky bluegrass, fine fescues, and perennial ryegrass are cool-season turfgrasses commonly used across northern and transition regions. For these lawns, the useful fall window is generally late summer into early or mid-fall, but the right end date changes with local climate and the species in the bag. Seedlings need enough mild growing weather to emerge and develop roots before sustained cold stops growth.
Think in terms of establishment runway rather than chasing the latest possible sowing date. A fast-germinating grass may show green sooner than a slower species in a blend, but visible blades do not mean roots are ready for winter.
Georgia Extension, for example, advises September through October for tall fescue in its Piedmont region and cautions that later planting raises cold-injury risk; the calendar is tied to local conditions, not a universal planting rule. If your region’s recommended window is closing, compare the risk of a late attempt with a planned spring repair or a locally recommended dormant-seeding approach.
Warm-season lawns: fall is usually a different job
Bermudagrass, zoysiagrass, St. Augustinegrass, and centipedegrass are warm-season grasses. They are generally repaired or seeded while actively growing in warmer conditions, often in spring or early summer depending on species and region, rather than by ordinary fall overseeding. A cool-season seed blend scattered into a warm-season lawn in fall may create competition without improving the permanent turf.
There is one common exception: some homeowners overseed dormant warm-season grass with ryegrass for temporary winter color. That is a separate management choice, not the same repair strategy used to thicken a cool-season lawn.
Virginia Tech notes that winter ryegrass can compete with the warm-season turf for light, water, and nutrients as the permanent grass returns in spring, and pre-emergent weed control becomes more complicated. If you want winter color, confirm the practice and timing with local turf guidance and follow seed and herbicide labels; if your goal is to repair the permanent lawn, wait for the active-growth window suited to that grass.
Match grass seed to the site and existing lawn
Start with the grass that already grows well in the yard, then choose a compatible species or blend for the problem area. A sunny, high-traffic front lawn and a shaded, dry strip beneath trees have different needs. Seed labels marketed for sun, shade, drought, or wear can help narrow the options, but compare the species and named cultivars with regional recommendations instead of relying only on the front-of-bag promise.
Check the seed label for the grass species, cultivar information when listed, germination percentage, purity, weed seed, and inert material. Avoid buying a blend that introduces a grass with a different texture, color, growth habit, or maintenance requirement unless you intend to change the lawn. Regional Extension recommendations are especially useful for identifying cultivars suited to local disease and heat pressures; the best seed is not automatically the most expensive bag or the mix with the most species.
Do not use a temporary overseeding grass as a permanent repair without understanding its behavior. Annual ryegrass, for example, can establish quickly and is often used for winter color, but it may need more mowing and can compete with permanent warm-season turf during spring transition. For an ordinary cool-season lawn repair, choose a product intended for that region and purpose, and use the bag’s overseeding rate rather than the higher rate intended for bare soil.
Prepare lawn for seed-to-soil contact
Grass seed needs contact with moist soil to absorb water and anchor roots. Throwing seed onto a thick canopy, leaves, or a spongy thatch layer can leave much of it exposed, where it dries, washes away, or becomes food for birds. A small patch may need only a thorough rake; a whole lawn with compaction or heavy thatch may need equipment.
Before you start, mow and clear debris, then choose the least disruptive preparation that solves the actual problem. Do not aerate just because the word appears in every overseeding checklist: core aeration helps compacted soil, while slit seeding or vertical mowing can create more uniform openings for seed. A wet, poorly drained lawn is not improved by driving heavy equipment over it, and aggressive dethatching can damage healthy turf if the thatch layer is not excessive.
Mow, clear debris, and handle thatch
Mow the existing grass somewhat shorter than its normal maintenance height so the seed can reach the soil, but do not scalp it. The correct height depends on the species and current condition; removing too much green tissue at once can stress the lawn just as it is being asked to recover. Bag or rake heavy clippings, then remove leaves, sticks, and loose dead material from the surface.
Thatch is the dense layer of partly decomposed stems and roots between the green canopy and soil. A thin layer is normal; a thick, spongy mat can block seed and water.
Rake lightly for a small area, or use a vertical mower when substantial thatch needs removal and the grass can recover from the work. Virginia Tech distinguishes vertical mowing, which manages thatch, from core aeration, which relieves compaction; one tool does not solve both problems.
Aerate for compaction; slit-seed for contact
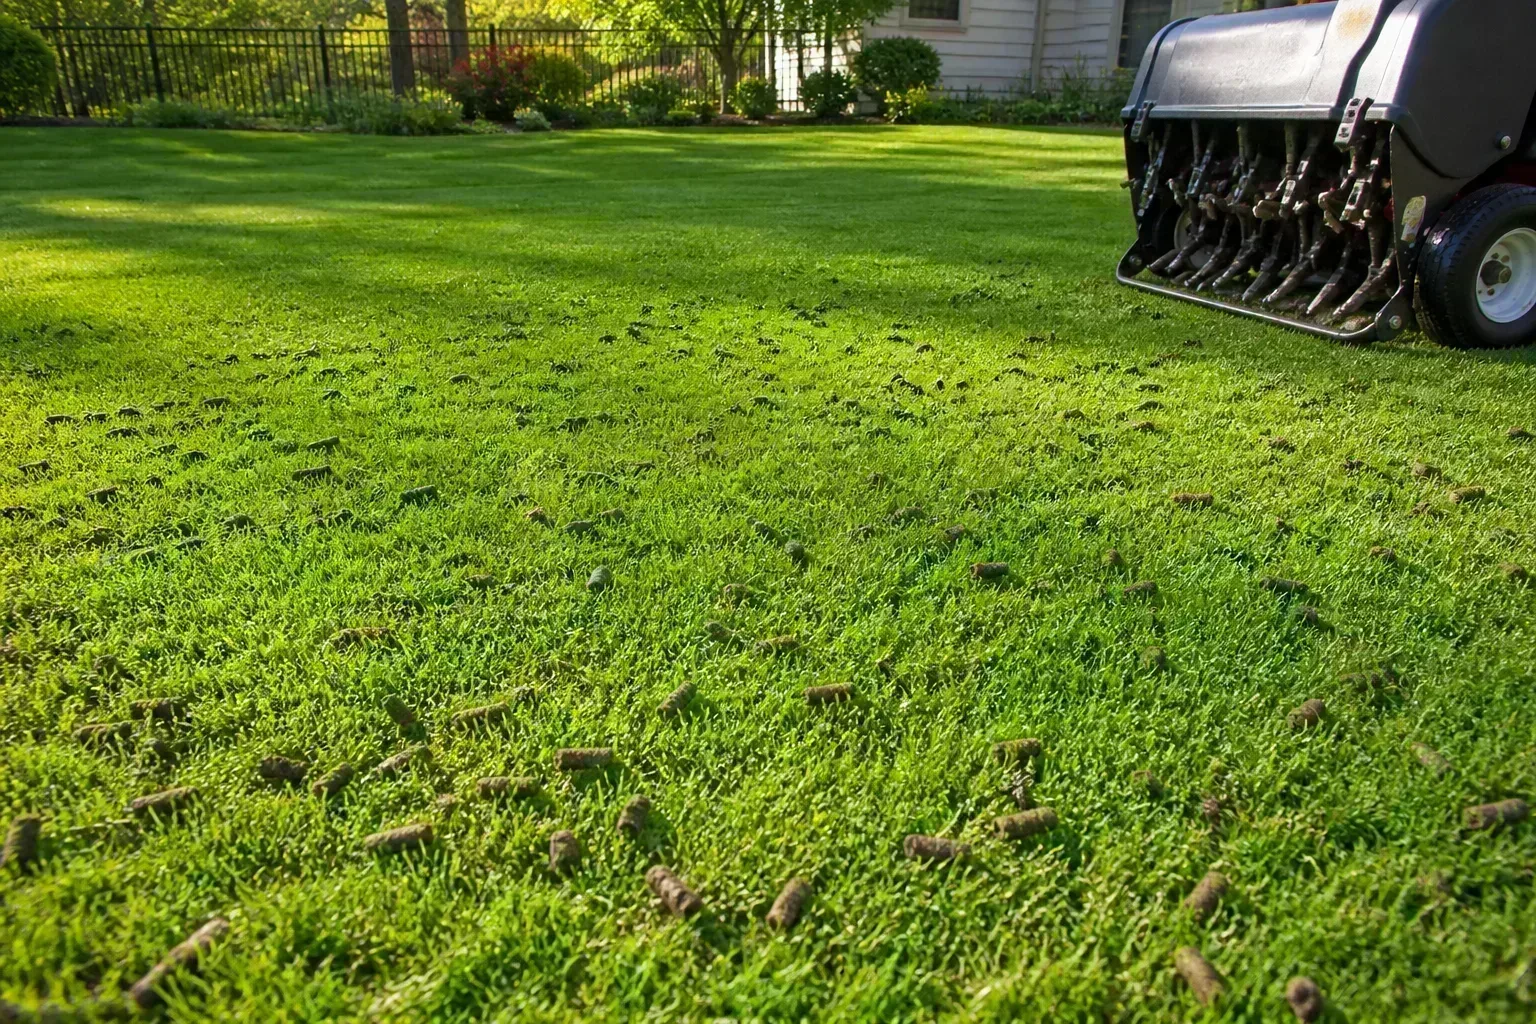
Use a core aerator when soil is compacted, such as where foot traffic is heavy or water tends to run off instead of soaking in. The machine removes plugs, opening channels that improve air and water movement; seed may fall into some openings, but the result can be less even than a dedicated slit seeder. If the lawn is not compacted and the main goal is consistent seed placement, a slit seeder or vertical seeder makes shallow grooves and drops seed into them.
For small bare areas, loosen the surface with a rake until you can see small patches of soil without uprooting the surviving grass. For larger areas, make passes in two directions with the chosen equipment and follow its instructions.
Kansas State Extension emphasizes that seed-to-soil contact is critical and notes that verticutting can provide a more uniform seedbed than core aeration alone. The practical rule is simple: choose aeration for compaction, choose a seeding tool for consistent contact, and avoid unnecessary disturbance.
Measure and spread the right amount of seed
Measure the actual lawn area so you can apply the product’s labeled overseeding rate rather than guessing. A rate for a brand-new lawn on bare soil may be higher than the rate for seed added to living turf, and different grass species need different amounts. More seed is not insurance: crowded seedlings compete for light and moisture, and excessive density can make establishment less uniform.
Calibrate the spreader according to its manual and the seed label. Divide the total amount into two equal portions, spread one pass in one direction, then spread the other portion across the lawn at a right angle.
This crosshatch pattern helps reduce skips caused by turns, narrow passes, or uneven walking speed. For small patches, distribute seed by hand in several light passes instead of dropping a heavy pile in the middle.
Rake lightly or roll the surface if the tool and seed label call for it; the goal is shallow contact, not burying the seed deeply. Some seed can be visible at the surface, but most should sit against soil rather than on top of leaf litter. A thin, even layer of clean straw or screened compost may help exposed seedbeds retain moisture and resist erosion, especially on slopes, but it should not form a dense blanket that blocks light.

Water to keep the seed zone damp, not flooded
Before sowing, moisten very dry soil so the seed does not land on dust. After seeding, use a gentle sprinkler pattern that wets the upper seed zone without moving seed downhill or creating puddles. The surface should stay consistently damp during germination, but “keep it moist” does not mean keep the whole lawn saturated or run the sprinkler for a fixed number of minutes regardless of rain, wind, shade, and soil texture.
Check the ground instead of trusting a timer. Walk the area after a cycle: if the surface has puddles, runoff, or channels, shorten the cycle and let water soak in; if the top layer is drying before the next check, use another brief cycle.
A rain gauge or shallow straight-sided containers placed around the lawn can show whether a sprinkler reaches corners and slopes evenly. Adjust for the weather, and skip irrigation when rain has already kept the seedbed moist.
Water is especially important in the first days after sowing because an exposed seed can dry quickly before it sprouts. As germination begins, maintain moisture where the slower grass in a blend is still emerging; do not stop watering simply because the first ryegrass blades are visible.
The same light, frequent approach is recommended in extension and horticulture guidance, with irrigation reduced gradually as seedlings root. For a more detailed schedule, see the existing guide to watering new grass seed.

Coordinate fertilizer and weed control
Fertilizer is not a substitute for proper seed contact or a suitable planting window. If you have a soil test, use it to guide lime, phosphorus, and other amendments; do not apply nutrients simply because the lawn looks thin.
Virginia Tech stresses soil-test-based phosphorus management because excess phosphorus can contribute to water-quality problems. State rules may also limit phosphorus use on established lawns.
A starter fertilizer may be appropriate at seeding when the product label and local recommendations support it. Read the label for rate, timing, and whether it can be applied with seed, then avoid overlapping multiple products that contain the same nutrient. If the soil test shows an adequate nutrient supply, extra fertilizer can add cost and runoff risk without addressing the real constraint.
Check herbicide timing before you seed. Many pre-emergent products are designed to stop seeds from germinating and can interfere with the grass you are trying to establish; the label will state reseeding restrictions and the required interval.
Do not guess that a product is safe just because it is marketed for lawns. If weeds are already present, identify them and choose a control method compatible with new seedlings, or postpone seeding until the treatment interval has passed.
Protect seedlings through the first mow
Keep people, pets, and equipment off the seeded area as much as possible while the roots are shallow. Foot traffic can move seed, bend seedlings, or compact the damp soil; a temporary route around the lawn can protect the areas you just prepared. If leaves fall before the grass is established, remove thick layers gently or mulch them finely only when the pieces are sparse enough for light and air to reach the seedlings.
Do not mow by the calendar alone. Wait until seedlings are firmly rooted and tall enough that you can remove no more than one-third of the leaf blade in a single cut.
Use a sharp blade on dry, firm turf, and avoid turning sharply or driving over soft ground. Virginia Tech recommends the one-third rule and mowing once the turf reaches its appropriate cutting height; the target height varies by grass species and season.
Avoid heavy fertilizer or herbicide applications while seedlings are tender unless the label and local guidance specifically allow them. After establishment, return to the mowing height and seasonal care recommended for the grass you planted. A newly dense stand is not finished simply because the lawn has turned green; roots need time to occupy the soil and withstand winter and spring conditions.
Shift from frequent moisture to deeper watering
Once most seedlings have emerged and begun rooting, gradually lengthen the interval between watering and apply enough to wet deeper soil. The transition should follow plant development and how quickly your soil dries, not a preset date. Sandy soil, sunny slopes, windy weather, and a late warm spell may dry quickly, while shaded clay or rainy weather may need far less irrigation.
A simple check is to inspect moisture just below the surface near a seedling. If the soil is still damp, wait; if it is dry and seedlings begin to curl or lose color, water gently before they wilt severely.
Avoid keeping the surface constantly soggy, which limits oxygen and can favor disease. As the roots extend, deeper and less frequent applications encourage them to explore a larger volume of soil, while mature established turf can be managed on its normal weather-responsive schedule.

Troubleshoot uneven or failed germination
Uneven growth usually has a pattern that helps identify the cause. Stripes or clean gaps can indicate spreader overlap or missed passes; seed exposed on the surface points to poor contact, wind, or runoff; spots that dry first may sit on a slope or sandy soil. If seedlings appear and then disappear, review watering, washout, traffic, leaf cover, and any recent herbicide use before purchasing more seed.
Give the slowest species in the mix its labeled germination period before deciding that the whole project failed. A mixture may green up in stages, and cool soil can slow emergence.
If nothing appears after the expected window, test a few conditions: is there still seed on the surface, is the soil damp below it, did a heavy rain move it, and does the site receive enough light for the selected grass? Recheck the seed label and the spreader setting as well.
Repeated failure in the same place points toward an unresolved site problem. If a shaded strip cannot support turf, consider a shade-tolerant groundcover or landscape bed instead of reseeding every fall.
If water stands there, fix the drainage; if the soil is compacted, address traffic and aeration when the turf is actively growing. When a lawn needs a broader repair plan, the related fall overseeding decision guide can help determine whether a small overseed or larger renovation makes sense.
Conclusion: let the lawn set the schedule
Fall lawn overseeding is most dependable when the grass type, site, seed, and weather agree. First confirm that a living stand is worth thickening, then diagnose thin spots, choose a locally adapted seed, prepare a surface that exposes soil, spread at the labeled rate, and keep the seed zone evenly moist. The work is not complete until seedlings are rooted enough to withstand mowing and the season’s weather.
Use a regional extension recommendation to set the timing, then let conditions decide whether to proceed. Cool-season turf can often benefit from late-summer or fall repair; warm-season lawns usually need a different schedule, and winter-color ryegrass carries trade-offs. If the ideal window has passed or the site still has a problem, waiting and correcting the cause is often a better investment than broadcasting more seed.
Sources: Virginia Cooperative Extension: Fall Lawn Care Kansas State University Extension: Lawn Seeding in the Fall University of Georgia Cooperative Extension: Establishing Tall Fescue in Your Lawn Better Homes & Gardens: 7 Must-Know Tips for Overseeding Your Lawn Bob Vila: How to Overseed a Lawn