Syngonium Propagation: Stem Cuttings at Nodes
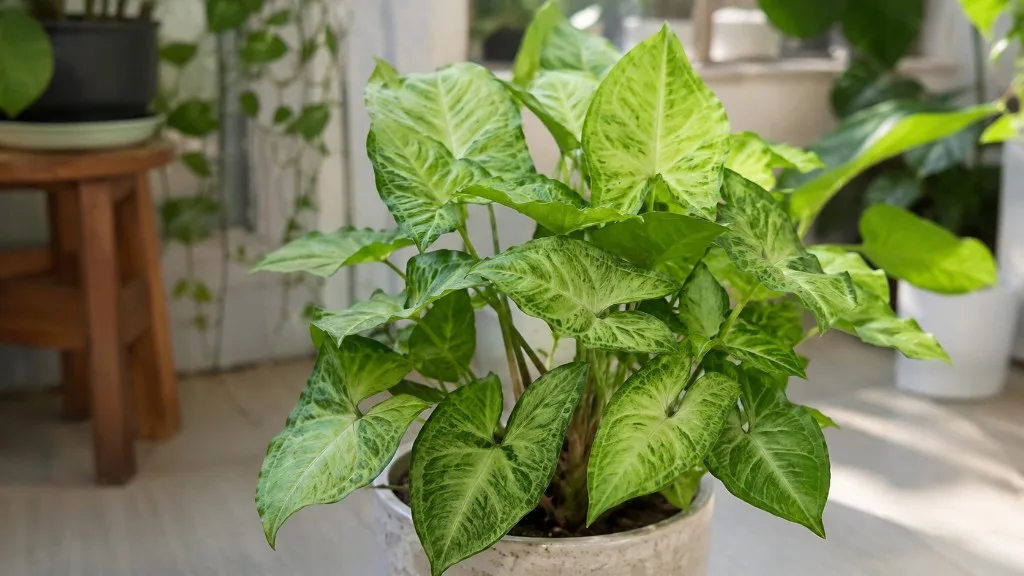
Syngonium Propagation: Stem Cuttings at Nodes
Syngonium Propagation: Stem Cuttings at Nodes
Syngonium propagation from stem cuttings at nodes is one of the most reliable multiplication methods in indoor plant care because the plant is built for it. Syngonium podophyllum - the species behind most arrowhead plants, nephthytis, and goosefoot vines sold as houseplants - is a climbing aroid that produces adventitious roots at every node along its stem. In the wild, those nodes anchor the vine to tree bark as it ascends through humid Central American forests. At home, the same biology means a short stem section with one healthy node can restart as a full plant once you place that node in water, moist moss, or airy potting mix. You are not forcing an unnatural process; you are triggering a restart the plant already knows how to execute.
The single rule that separates success from a jar of rotting leaves is node inclusion. A pretty arrow-shaped leaf detached from its stem cannot become a new plant because it lacks the meristematic tissue where roots and shoots emerge. The node - the knobby junction where the petiole meets the vine - is the only part that matters for rooting. Everything else in this guide flows from that fact: where to cut, what to submerge, how long to wait, and when to pot. Whether you are trimming a leggy Pink Allusion, sharing a White Butterfly with a friend, or saving a variegated Syngonium albo section before it reverts, nodal stem cuttings give you the highest success rate with the simplest toolkit.
Why Syngonium Root So Easily From Node Cuttings
Syngonium belongs to Araceae, the aroid family shared by pothos, philodendrons, and monsteras. Aroids propagate vegetatively with unusual efficiency because their stems carry dormant root initials at nodes - small zones of cells capable of producing adventitious roots when moisture and oxygen reach them. The University of Florida IFAS Extension notes that commercial syngonium production relies heavily on nodal cuttings, tip cuttings, and air layers because single-node sections root quickly under warm, humid, shaded conditions. That commercial reality mirrors what works on a kitchen windowsill: a clean cut below a node, bright indirect light, and fresh water or lightly moist substrate.
Unlike succulents that need a callus period before contact with moisture, syngonium cuttings tolerate immediate placement in water or damp mix because their stem tissue is adapted to humid forest air. The trade-off is rot sensitivity - wet, stagnant, airless conditions still kill tissue - but the baseline rooting response is fast when the node is viable and the parent plant was healthy. The International Aroid Society documents S. podophyllum as a climbing vine with adventitious roots along nodes in its native Central American forest habitat, which explains why cuttings with existing aerial nubs often root days faster than sections taken from smooth internodal stem alone.
What a Node Is on an Arrowhead Vine
A node on syngonium is the raised point on the stem where a leaf petiole attaches and where roots can emerge. Visually, it looks like a slight swelling or ring around the vine - sometimes with a tiny brown or white aerial root nub already visible. The flat internode between two nodes is smooth cylindrical stem; cutting only internode tissue without including a node produces a stick that may stay green briefly but will not develop roots or new growth. If you trace a leaf stalk down to where it meets the main vine, you have found the node. That junction is the growth point.
A leaf without its node will not propagate syngonium - this is the most common failure in arrowhead plant propagation forums and it is entirely preventable once you understand the anatomy. NC State Extension lists stem cuttings among recommended propagation strategies for Syngonium, confirming that the node-bearing stem section - not the detached leaf blade alone - is required. The petiole alone is not enough; the node tissue at its base must travel with the cutting. For variegated cultivars like Syngonium albo, the node section should also include enough green tissue to photosynthesize, because all-white segments lack chlorophyll and often stall before rooting.
How Aerial Roots Change Your Odds
Aerial roots are the small roots syngonium produces along nodes while still attached to the parent plant. They appear as pale bumps or thin white threads hugging the stem. When you take a cutting that already carries aerial roots and submerge or bury that node, those roots continue elongating rather than starting from zero. Cuttings with visible aerial roots frequently show new white root tips within a few days in water, whereas smooth nodes may take one to two weeks before the first root emerges.
You do not need aerial roots for success - any healthy node can root - but prioritizing sections where nubs are already present is a practical way to speed propagation and reduce the window for rot. Mature, climbing syngonium vines often develop more pronounced aerial roots than compact juvenile plants, which is one reason a leggy vine is excellent propagation material even if it looks untidy on the shelf. When selecting cuttings, gently inspect the stem in good light and favor nodes with the most developed root initials.
When to Propagate Syngonium
Timing influences rooting speed more than it determines absolute success. Syngonium can root year-round indoors, but active growth season - roughly late spring through summer in temperate climates, or whenever your plant is visibly pushing new leaves - delivers faster results because the parent plant and cutting both have higher metabolic activity. UF IFAS recommends air temperatures between 75°F and 95°F (24°C and 35°C) for commercial rooting, with root-zone warmth around 70°F to 75°F (21°C to 24°C) when bottom heat is available. Most homes sit near the lower end of that range, which is adequate but explains why winter cuttings feel sluggish.
Avoid taking cuttings when the parent is under stress. A syngonium recovering from root rot on Syngonium, battling spider mites, or adjusting after shipping has fewer resources to share with severed tissue. Propagation works best as a planned extension of healthy growth - during a routine prune, when Syngonium repotting guide reveals vigorous roots, or when you want to fill out a sparse pot - not as an emergency rescue for a dying plant. If you must salvage material from a troubled parent, take only the healthiest stems and quarantine the cuttings away from your main collection until you confirm they are pest-free and rooting cleanly.
Best Season for Node Cuttings
Spring and early summer are the sweet spot for syngonium propagation in most homes. Day length increases, ambient warmth rises, and the parent plant shifts from maintenance mode into active leaf production. Cuttings taken during this window often root in one to two weeks in water at room temperature. Fall propagation can work if your home stays warm and bright, but rooting may stretch to three or four weeks. Winter propagation is possible under grow lights and consistent warmth, yet cool windowsills and short days slow meristematic activity enough that patience becomes the limiting factor rather than technique.
If you live in a frost-free climate or keep syngonium in a heated greenhouse, seasonal constraints matter less than the plant’s visible growth state. The practical test is simple: is the parent producing firm new leaves on a regular rhythm? If yes, the plant is ready to share stem sections. If growth has paused and older leaves are yellowing from cold or low light, stabilize conditions first and propagate when fresh tips reappear.
Signs Your Parent Plant Is Ready
A syngonium ready for propagation shows firm stems, evenly colored leaves, and active apical growth at the vine tips. The soil should dry on a predictable schedule rather than staying wet for days, which indicates a functioning root system. Check the undersides of leaves for pests before cutting - mealybugs, thrips, and scale hitchhike easily on cuttings and infest propagation jars. If you see sticky residue, stippling, or cottony clusters, treat the parent first rather than spreading the problem to new containers.
Leggy vines with long internodes between nodes are ideal propagation donors even though they look sparse. Each elongated section contains multiple nodes you can divide into single-node cuttings, producing several new plants from one trim session. Compact bushy syngonium can also be propagated from tip cuttings or mid-stem sections, but you may need to search more carefully for nodes hidden beneath overlapping foliage. Either growth habit works; the readiness signal is health, not shape.
Tools and Setup Before You Cut
Gather your tools before you touch the parent plant so cuttings spend minimal time exposed to dry air. You need sharp, clean scissors or pruning shears, a clear jar or glass for water propagation, or small pots filled with moist medium if rooting directly in substrate. Wipe blades with 70% isopropyl alcohol or flame-sterilize them between cuts when taking multiple sections from one vine - this reduces bacterial transfer that can brown cut ends and accelerate rot. Avoid dull tools that crush stem tissue; a ragged wound heals slowly and invites infection.
For water propagation, choose a container narrow enough that cuttings stay upright without submerging leaves. Tall bud vases and spice jars work well. Use room-temperature filtered or dechlorinated water if your tap water is heavily treated, because syngonium is sensitive to fluoride and chlorine that can brown leaf tips over time. For soil or moss propagation, prepare a well-draining aroid mix - peat or coco coir blended with perlite and orchid bark - or loosely packed sphagnum moss pre-moistened until evenly damp but not dripping. Label containers if you are propagating multiple cultivars; juvenile syngonium leaves look similar across varieties before distinctive coloration develops.
Set up a bright location with indirect light before you cut. A north-facing window, an east window with morning sun, or a few feet back from a south or west window provides enough energy for rooting without scorching tender cuttings. Avoid dark corners and direct midday sun on fresh cuts. If your home runs dry, a clear plastic bag or humidity dome over soil-rooted cuttings helps, but water-propagated syngonium usually roots fine at typical indoor humidity between 40% and 60%.
How to Take Syngonium Stem Cuttings at Nodes
Taking syngonium stem cuttings is a sequence of deliberate choices about length, node count, and leaf retention. Start by unwinding or exposing the vine so each node is visible. Decide whether you want maximum plant count from single-node sections or faster visual impact from multi-node cuttings with several leaves attached. Both approaches work; single-node cuttings stretch one vine into many small starters, while two-node cuttings produce a slightly fuller new plant sooner because more leaf surface supports photosynthesis during rooting.
Work from the base of the vine upward or from the tip downward - direction does not matter botanically, but cutting from the bottom of a leggy stem first lets you shorten the parent gradually while collecting material. Remove any diseased or yellowed leaves before cutting so they do not decay in your propagation setup. Keep a small bowl of water nearby if you are preparing many cuttings at once; a brief dip prevents cut ends from drying while you finish the batch, though syngonium tolerates short air exposure better than many plants.
Single-Node vs Multi-Node Cuttings
Single-node cuttings include one node, its associated leaf, and a short stem segment above and below the node - typically two to four inches total. This method maximizes the number of plants from one vine and is the standard commercial approach described in UF IFAS guidelines for nodal propagation. Each cutting becomes an independent starter that will eventually push a new vine from the node after rooting. The downside is that a lone leaf in a jar looks sparse until new growth appears, which can take several weeks after roots form.
Multi-node cuttings span two or three nodes on a four-to-six-inch section, usually with one or two leaves retained at the top and lower leaves removed to prevent submerged or buried foliage from rotting. This format roots slightly faster in some cases because multiple nodes can produce roots simultaneously, and the remaining leaves drive more photosynthesis. The trade-off is fewer total plants per vine length. For home propagation where you want a bushy starter pot quickly, a two-node cutting with one leaf is an excellent compromise. For filling out a propagation shelf or sharing many gifts, single-node sections are more efficient.
Making a Clean Cut Below the Node
Position your blade one-quarter to one-half inch below the node you want to root, not directly through the node tissue itself. Cutting too far below wastes stem that could have been another cutting; cutting through the node damages the meristem where roots emerge. A 45-degree angle cut increases surface area slightly and helps some growers track orientation, though syngonium roots reliably from straight cuts as well. The essential requirement is that the node on the cutting side of the blade remains intact on the piece you will propagate.
After cutting, remove any leaves that would sit below the water line or bury in soil. Leaves submerged in water rot within days, fouling the container and inviting stem decay. For a typical single-node cutting, the one leaf attached to the node stays above the rim while the node sits submerged. If the petiole is long and the leaf dips into water, trim the petiole or use a taller jar - do not let the blade touch the node when trimming petioles. Repeat the cut for each section, sterilizing tools between plants if you are working with multiple species to prevent cross-contamination.
Water Propagation for Syngonium Cuttings
Water propagation is the most popular syngonium propagation method because it lets you monitor root development without disturbing the cutting. Fill a clean jar with two to three inches of fresh water and place the cutting so the node is fully submerged while leaves and upper stem remain in air. Only the node needs contact with water - submerging extra stem above the node does not speed rooting and increases rot risk. Set the jar in bright indirect light and wait. Change the water weekly, or sooner if it clouds or smells stale.
Root emergence typically begins within seven to fourteen days when temperatures stay above 68°F (20°C) and the cutting was healthy. Existing aerial roots may extend visible white tips within three to five days. Avoid placing jars on cold windowsills at night; root initials stall when water temperature drops repeatedly. If algae forms on the glass, scrub the container during water changes and move the jar slightly farther from intense light. Algae is cosmetic but signals that light is hitting the water too directly.
Submerging the Node Correctly
The most common water-propagation error is floating the stem without submerging the node. Roots emerge from node tissue, not from leaf petioles or internodes above the node. Verify underwater placement by looking from the side of the jar - you should see the knobby node below the waterline. If the cutting keeps slipping, use a narrow-neck vessel or wrap the upper stem lightly in plastic wrap across the jar opening to hold it in place without compressing tissue.
Keep only one to three cuttings per jar unless it is large enough that leaves are not crowded against each other. Crowding reduces airflow and promotes fungal growth on wet leaf surfaces. If a leaf yellows during propagation, remove it gently - one leaf is enough to sustain the cutting while roots form. Multiple yellowing leaves usually mean the cutting was weak before severing or the water has gone anaerobic. Replace water immediately and evaluate whether the parent plant was healthy enough to donate the section.
When Roots Are Ready for Soil
Transfer syngonium cuttings from water to soil when roots reach one to two inches (2.5 to 5 cm) long with several branch points. Shorter roots can survive transplant, but they are fragile and prone to breaking during potting. Longer water roots - three inches or more - also transplant well but do not require waiting; the one-to-two-inch threshold balances stability with avoiding unnecessary delay in soil. Roots should be white or cream colored and firm, not brown, mushy, or slimy.
You can keep syngonium in water for several months if you maintain fresh water and provide diluted liquid fertilizer at one-quarter strength every four weeks during active growth. Indefinite water culture works for some aroids, but syngonium eventually grows better in soil where roots access a broader nutrient profile and oxygen rhythm. Most growers pot within two to four weeks of visible rooting to transition the plant into normal syngonium care routines.
Soil and Moss Propagation Methods
Soil propagation skips the water stage and places cuttings directly into moist substrate, which eliminates transplant shock for roots that never adapted to aquatic life. Insert the cutting so the node sits just below the soil or moss surface - roughly half an inch to one inch deep - with the leaf above the medium. Firm the mix lightly around the stem without compacting it, then water gently until excess drains from the bottom. Covering the pot with a clear plastic bag with small vents creates a humid microclimate that reduces wilting while roots form.
Rooting in soil takes roughly the same calendar time as water - one to three weeks under warm, bright conditions - but you cannot see progress without gently tugging or unpotting. Test readiness with a very gentle resistance check: hold the base of the stem and apply slight upward pressure. Firm resistance suggests roots have anchored. Aggressive pulling breaks fresh roots, so err on the side of patience. Keep the medium lightly moist, never soggy, because wet anaerobic soil rots nodes faster than stagnant water in a clear jar where you can notice problems early.
Sphagnum Moss for Faster Rooting
Sphagnum moss propagation sits between water and soil methods and is favored for valuable variegated syngonium cultivars. Loosely pack pre-moistened long-fiber sphagnum in a small cup or propagation box, nestle the node against the moss, and enclose the setup in a humidity dome or bag. Moss holds moisture while maintaining more air around the node than dense potting mix, which often produces robust root systems. Open the enclosure briefly every few days to exchange air and prevent mold.
Perlite-only or perlite mixed with a small amount of coco coir is another airy option that works similarly to moss. Bottom heat from a propagation mat set to around 75°F (24°C) accelerates root formation in moss and soil setups, mirroring commercial nursery conditions. Rooting hormone containing indole-3-butyric acid is optional for syngonium - nodes root readily without it - but a light dip on difficult winter cuttings or all-green sections from variegated plants can nudge borderline material toward success.
Transplanting Water-Rooted Cuttings
Moving syngonium from water to soil is a transition, not an instant swap. Prepare a small pot - three to four inches for single cuttings - with well-draining aroid potting mix. Create a hole deep enough to bury the node and water roots without crowding them into a ball. Lower the cutting in, backfill gently, and water thoroughly until runoff exits the drainage holes. The first week after transplant is when cuttings are most vulnerable to wilting because water roots must adapt to lower oxygen availability in soil.
Keep the mix consistently moist but not waterlogged for two to three weeks after potting. This means watering when the top half-inch feels dry rather than letting the pot go fully dry or staying constantly wet. Maintain bright indirect light and avoid fertilizer until you see new leaf growth, which confirms the root system is functioning in soil. It is normal for an older leaf to yellow slightly during transition; remove it if it browns. Multiple leaves yellowing simultaneously suggest overwatering on Syngonium, underwatering on Syngonium, or a cutting that was potted before roots were ready.
You can pot several single-node cuttings together in one container to create a fuller bushy plant from the start - a technique commercial growers use and home propagators often overlook. Space three to five rooted cuttings evenly in a six-inch pot, bury each node, and water in. The combined leaf mass stabilizes humidity around individual plants and produces a lush display faster than solitary cuttings. Pinch growing tips after the first round of new leaves if you want branching rather than single long vines.
Aftercare for Newly Rooted Syngonium
New syngonium plants need steadier, simpler care than established specimens while their root systems expand. Bright indirect light supports photosynthesis without stressing tender tissue. Water when the top inch of mix dries, using the same finger-test discipline you apply to mature plants. Hold off on fertilizer for four to six weeks after potting; fresh roots absorb nutrients efficiently from a quality potting mix without supplemental feeding, and early fertilizer can burn delicate root tips.
Humidity between 40% and 60% suits syngonium without requiring special equipment in most homes. If leaves curl or brown at edges in dry winter air, group the new plant with others or run a humidifier nearby rather than misting, which offers temporary relief and can spread fungal spores on crowded shelves. Temperature comfort aligns with typical indoor ranges of 60°F to 80°F (16°C to 27°C); avoid placing fresh transplants against cold glass or heat vents that swing conditions hourly.
Watch for new vine growth emerging from the soil near the buried node - that is the definitive success signal, more reliable than root length alone. Once two or three new leaves unfurl, transition to standard syngonium care: slightly less frequent watering as roots occupy more pot volume, optional balanced liquid fertilizer at half strength every four weeks during active growth, and a moss pole or trellis if you want climbing mature foliage rather than compact juvenile arrow shapes. Quarantine new propagations for two weeks before placing them beside your main collection to confirm they carry no hidden pests.
Common Propagation Mistakes With Nodes
Most syngonium propagation failures trace back to a short list of avoidable errors. Taking leaf cuttings without nodes tops the list - the leaf may root in rare cases but will never produce a vine. Submerging leaves in water follows closely; decaying foliage pollutes the jar and spreads bacteria to the stem. Using stale, cloudy water deprives roots of oxygen and encourages anaerobic rot that turns nodes black and mushy. Change water weekly and rinse the container.
Propagating from stressed or pest-infested parents produces weak cuttings that stall or die regardless of setup quality. Inspect and stabilize the donor plant first. Transplanting too early - before roots reach an inch long - breaks fragile water roots during potting and leaves the cutting without enough anchor to absorb moisture from soil. Overwatering after transplant mimics the rot conditions that killed the cutting in water propagation; moist means evenly damp, not saturated.
Cutting below the node instead of including it on the propagated piece is a subtle error beginners make when trimming aggressively. Always double-check that the node sits on the cutting side of your blade mark. For variegated syngonium, taking all-white sections without green chlorophyll produces cuttings that cannot photosynthesize enough to sustain rooting - include at least one node with green tissue or a half-moon variegated leaf. Finally, ignoring seasonal slowdown leads to premature discarding of cuttings that would root in warmer months; if a winter cutting looks unchanged after three weeks but the node is firm and green, patience and bottom heat often rescue the attempt.
Conclusion
Syngonium propagation from stem cuttings at nodes succeeds because you are working with the plant’s native climbing biology, not against it. Locate the node where the petiole meets the vine, cut cleanly just below it, submerge that node in fresh water or moist airy substrate, and give the cutting bright indirect light while roots develop over one to three weeks. Transfer water-rooted cuttings when roots reach one to two inches, keep soil evenly moist during acclimation, and wait for new vine growth before resuming normal feeding. Single-node cuttings multiply one vine into many plants; multi-node sections produce fuller starters faster - choose based on your goal.
The difference between a thriving new arrowhead plant and a rotting jar almost always comes down to node placement, water freshness, and parent plant health. Avoid leaf-only cuttings, do not propagate from stressed donors, and treat pest checks as part of the workflow rather than an afterthought. Once you have rooted a few syngonium cuttings successfully, the process becomes repeatable: prune, cut at nodes, root, pot, and share. That rhythm is why syngonium remains one of the best teaching plants for propagation - the nodes do the hard work when you put them in the right environment.
When to use this page vs other Syngonium guides
- Syngonium overview - Start here for whole-plant context before deep-diving this topic.
- Syngonium problems hub - Jump to symptom-specific fix guides when this care topic does not resolve the issue.
Related Syngonium guides
- Syngonium overview
- Syngonium watering
- Syngonium light
- Syngonium soil
- Syngonium fertilizer
- Syngonium repotting
- Syngonium problems
Where to go next
Use this page as the hub for Syngonium care. Follow the linked watering, light, and soil guides for day-to-day rhythm, and open problem pages when a specific symptom appears.