Rubber Plant Propagation: Cuttings & Sap Safety
Rubber Plant Propagation: Cuttings & Sap Safety
Rubber Plant Propagation: Cuttings & Sap Safety
Why Rubber Plant Propagation Starts with Understanding Latex Sap
Rubber plant propagation looks simple on social media - snip a stem, drop it in a jar, wait for roots - but Ficus elastica plays by different rules than pothos or coleus. Every cut on a rubber plant triggers an immediate bleed of milky white latex sap, and that sap is not a cosmetic nuisance. It is a wound-sealing defense that can block rooting, irritate skin and eyes, stain floors and fabric on contact, and pose real risks for people with latex sensitivity and for households with pets. If you treat propagation as a quick trim without planning for the sap first, you are far more likely to end up with a rotting cutting, a sticky mess, and a parent plant dropping leaves from shock.
The good news is that rubber plants propagate reliably when you match method to biology. Stem cuttings in moist, airy soil work well if you rinse the sap off the cut surface before planting. Air layering - rooting a stem while it is still attached to the parent - delivers an even higher success rate for tall, leggy plants you want to shorten without gambling on a detached cutting. Both methods share one non-negotiable rule: handle latex deliberately from the first cut to the last wipe-down. The sections below walk through that workflow in order so you can propagate with less rot, fewer failed jars, and no surprises on your countertop.
What Ficus Elastica Latex Is and Why It Flows
Ficus elastica belongs to the family Moraceae, the fig family, and like many ficus species it stores latex - a milky fluid rich in proteins, enzymes, and rubbery compounds - in specialized cells called laticifers that run through stems and leaves. Historically, this latex was tapped and processed into natural rubber, which is why the common name “rubber plant” or “rubber tree” stuck even for potted houseplants. When you puncture bark, sever a leaf petiole, or slice through a stem node, those cells rupture and latex pours out under pressure.
Within minutes, exposed latex begins to coagulate into a flexible film over the wound. That film is excellent defense against dehydration and pathogens in the wild, but it is terrible news for propagation. A fresh latex coating on the base of a cutting acts like a physical seal that limits water uptake, reduces oxygen exchange at the wound surface, and creates a sticky substrate where fungi can establish. Gardeners Path and multiple propagation specialists note that cuttings planted without removing this seal often sit unchanged for weeks while the parent plant heals its own cuts faster than the detached stem roots. Rinsing the cut end under running water for 10 to 15 seconds, blotting dry, and allowing a brief air-dry before applying rooting hormone or soil contact removes that barrier and is one of the highest-leverage steps in the entire process.
Latex also flows from every leaf node when you strip lower leaves, not only from the basal cut. That is why propagation sessions get messy fast: one six-inch cutting might produce sap from three separate wounds. Plan to manage all of them, not just the bottom of the stem.
Skin, Eye, Allergy, and Pet Safety You Should Take Seriously
Rubber plant latex is not harmless houseplant juice. Contact can cause skin dryness, itching, redness, or allergic contact dermatitis, especially with repeated exposure or broken skin. People with latex allergy face additional risk because proteins in Ficus elastica latex can cross-react with natural rubber latex used in gloves, balloons, and medical products. If you know you react to latex, wear nitrile or vinyl gloves - not latex gloves - and avoid getting sap near your face. Eye contact is particularly dangerous; flush with clean water immediately if sap splashes near the eyes and seek medical advice if irritation persists.
The sap is also toxic to cats and dogs if ingested, according to the ASPCA. Ingestion can cause oral irritation, drooling, vomiting, and reduced appetite. Propagate in a closed room pets cannot access, wipe sap from floors before animals walk through it, and wash hands thoroughly after the session even if you wore gloves. Keep cuttings and pruned leaves out of reach until you discard them. Children should not handle fresh cuts or sap-coated stems without supervision.
Finally, treat staining as a safety issue too. Latex bonds quickly to wood, tile grout, upholstery, and clothing. Lay down a plastic sheet or old towel, keep a damp rag within reach to dab parent-plant wounds, and change out of good clothes. The propagation itself may take twenty minutes; removing dried sap from a rug takes considerably longer.
Before You Cut: Tools, Timing, and Parent Plant Selection
Propagation succeeds or fails before the blade touches bark. Sharp, clean tools reduce crushing injury and disease transfer. A healthy parent plant supplies energy-rich tissue that can survive the weeks between cutting and rooting. And timing aligned with active growth gives you warmer soil, stronger light, and faster cambium activity - all of which shorten the vulnerable window when a cutting can rot instead of root.
Best Season for Rubber Plant Cuttings
The best window for rubber plant propagation is late spring through early summer, when the plant is pushing new leaves and stems in response to longer days and stable indoor warmth. Clemson Cooperative Extension recommends propagating by stem cuttings or air layering during the active growing season, when roots form more quickly than in dormant months. You can propagate in fall or winter if your home stays 65–85°F (18–29°C) with Rubber Plant light guide, but expect slower rooting - often six to ten weeks instead of three to six - and a higher rot risk if short days keep the propagation mix wet too long.
Avoid taking cuttings immediately after Rubber Plant repotting guide, shipping, pest treatment, or a major environmental move. Ficus species react to change with leaf drop even when care is correct; adding propagation stress on top of recovery stress produces weak cuttings and a bald parent plant. Give the plant two to three weeks of stable care - consistent light, a predictable Rubber Plant watering guide, no drafty relocations - before you cut.
Choosing a Stem That Can Actually Root
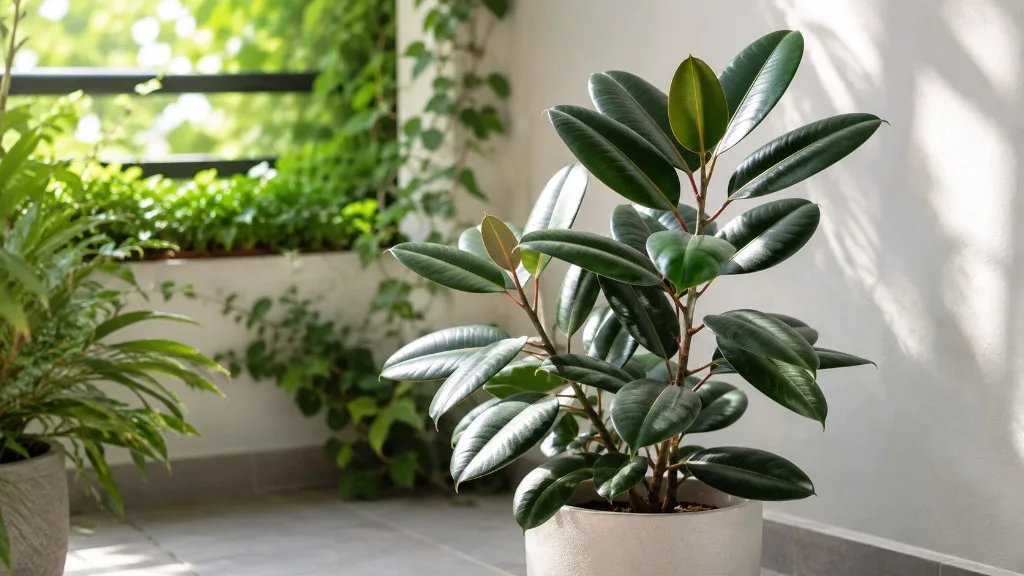
Select a healthy, actively growing stem with firm green tissue, not woody brown bark far from the tip. The ideal cutting is 6 to 8 inches (15 to 20 cm) long with two or three mature leaves at the top and at least one visible node below the lowest remaining leaf. Nodes are the slightly swollen rings on the stem where leaves attach; roots initiate from nodal tissue and from the basal wound, not from random middle sections with no nodes.
Avoid stems that are yellowing, shriveled, pest-damaged, or partially cold-scorched. Avoid the temptation to propagate your way out of a sick plant - a cutting taken from declining tissue usually declines faster in a humid bag. If you are pruning a leggy rubber plant for shape, choose the most vigorous shoot for propagation and compost the weak side branches. Variegated cultivars such as ‘Tineke’ and ‘Ruby’ propagate the same way as ‘Burgundy’ or plain green forms, but variegated cuttings sometimes root slightly slower because they carry less chlorophyll per leaf; give them the same sap rinse and humidity but extra patience.
How to Handle Latex Sap During Every Cut
Think of sap management as a parallel workflow running beside the propagation steps. Every time steel meets stem, latex flows - and every flow needs a response within seconds, not after you finish potting.
The Rinse-and-Blot Method Most Guides Skip
The single most important sap technique for stem cuttings is the rinse-and-blot sequence on the basal wound:
- Make your cut just below a node with sterilized pruners or a sharp knife.
- Immediately hold the cut end under cool running tap water for 10 to 15 seconds, rotating slightly so water washes all surfaces.
- Blot dry with a paper towel - do not rub aggressively and reopen the wound.
- Allow 30 to 60 seconds of air-dry so surface moisture evaporates.
- Dip the lower 1 to 2 inches (2.5 to 5 cm) in rooting hormone if you are using it, tap off excess powder, and plant.
Perform this rinse before removing lower leaves when possible so you handle the cutting less while the base is fresh. When you strip lower leaves and sap flows from those wounds too, dab them with a damp cloth; they do not need the full rinse unless you accidentally re-cut the node.
If you already planted an unwashed cutting and it has sat five to six weeks without resistance when you tug gently, attempt a rescue recut: unpot the cutting, slice 5 mm off the base to expose clean tissue, rinse under water for 15 seconds, blot, reapply hormone, and replant in fresh mix. Prevention is easier than rescue, but the recut often salvages cuttings that failed because of a latex seal rather than inherent weakness.
For parent-plant wounds - the stub left after you remove a cutting - press a damp cloth against the cut for a minute until oozing slows. Some growers dab cinnamon powder or rooting hormone on the parent wound; the priority is stopping sap from running down the trunk and marking your floor. The parent may drop a leaf or two after a hard prune; that is normal if light and watering stay stable afterward.
Protecting Surfaces, Pets, and Yourself
Before cutting, assemble a sap kit alongside your propagation supplies: nitrile or vinyl gloves, eye protection if you tend to work at face height, several damp rags, paper towels, a plastic tray or garbage bag under the pot, and a sealed bag for discarded leaves. Work near a sink so rinsing the cutting base is one step, not a trip across the house with a dripping stem.
Ventilate the room if sap smell bothers you - some people notice a faint latex odor during heavy pruning. When finished, disinfect pruner blades with rubbing alcohol, wipe any sap spatters from pots and shelves, and wash forearms even if you wore gloves. Store the parent plant and new cutting away from pets for at least 24 hours while wounds dry and any floor residue is gone.
Step-by-Step Stem Cutting Propagation in Soil
Stem cuttings in soil are the fastest method to learn and the one most gardeners use when they want a second pot without advanced technique. Iowa State University Extension lists Ficus elastica among houseplants that propagate reliably from cuttings and air layering, with soil producing roots adapted to the medium the plant will live in long term. Follow the steps below in order; skipping the sap rinse or over-wetting the bag are the two most common self-inflicted failures.
Preparing the Cutting After the Sap Rinse
After you collect a 6 to 8 inch stem tip and rinse the base:
- Remove the lowest one or two leaves, exposing one or two nodes near the base. Sap will ooze from each petiole scar; dab with a damp cloth.
- If the cutting still has more than three leaves, consider halving the remaining leaves horizontally with clean scissors. Large rubber plant leaves transpire heavily; until roots form, the stem cannot replace that water loss. Halving leaves reduces wilt without removing all photosynthetic surface - a practical compromise many commercial growers use.
- Optional but helpful: dip the basal 1 to 2 inches in IBA rooting hormone powder (indole-3-butyric acid). Iowa State University Extension notes that rooting hormones promote root formation but should be applied at label strength - a light coat beats a thick crust that can inhibit development.
- Do not let the rinsed cutting sit out for hours before planting. Work efficiently once the base is prepared.
Seal the cut end of the parent stem with a damp cloth as described above. You are done disturbing the mother plant for now.
Rooting Medium, Humidity Dome, and Light Placement
Fill a 4 to 6 inch (10 to 15 cm) pot with drainage holes using a light, sterile propagation mix. A reliable blend is equal parts perlite and coco coir or perlite and peat moss; Gardeners Path suggests a mix of potting soil, sand, and peat moistened before planting. The goal is moist but airy - water should drain in seconds, not pool on the surface.
Insert the cutting 1 to 2 inches (2.5 to 5 cm) deep, deep enough that at least one node sits below the surface. Firm the mix lightly so the stem stands upright. Water until excess drains from the bottom, then discard the saucer water.
Cover the pot with a clear plastic bag or place it inside a propagation dome to raise humidity around the leaves. Use stakes or chopsticks to keep plastic from resting on foliage - wet plastic touching leaves invites ** fungal spotting**. Place the setup in bright indirect light at 70–78°F (21–26°C) if possible; avoid direct sun that can cook the bag. Vent the bag for two minutes daily to exchange stale air and prevent mold. Keep the mix lightly moist, not soggy - check with a finger near the stem base every few days.
Resist the urge to pull the cutting weekly. Instead, test for roots after three weeks by giving a gentle upward tug. Firm resistance suggests anchoring roots. New leaf buds or a slight firming of the stem are positive signs even before a tug test confirms roots.
Why Water Propagation Usually Fails for Rubber Plants
Social media favors water propagation because roots visible in a glass jar make satisfying progress photos. For Ficus elastica, water is usually the wrong tool - latex seals the cut end, water roots adapt poorly to soil, and cuttings often rot before they root. Clemson HGIC recommends stem or tip cuttings and air layering as the reliable propagation methods for Rubber Plant overview.
The biology backs that up. Water roots are structurally different from soil roots - thinner, adapted to low oxygen in liquid - and they often rot or collapse when planted in mix because they cannot absorb efficiently in a drier, higher-oxygen environment. Latex compounding the problem: sap still seals the cut end in water unless you rinse aggressively, and the stagnant wet base becomes an ideal entry point for bacteria. If you must experiment, rinse the sap, change water every few days, and move to soil the moment roots reach 1 inch (2.5 cm) - but expect lower success than soil from the start.
For most readers, the better path is soil propagation with a humidity bag or air layering if the plant is tall and you want guaranteed roots before severing.
Air Layering as a Higher-Success Alternative
When a rubber plant has grown too tall for its spot or you want near-certain rooting before cutting, air layering is the professional-grade option. Iowa State Extension lists Ficus elastica among houseplants that air layer reliably. Roots form on a stem still attached to the parent, so the cutting draws water and sugars from the main plant until it has its own root system - eliminating the wilt-prone gap that kills detached cuttings.
Basic air-layering workflow for rubber plants:
- Choose a pencil-thick stem 12 to 18 inches below the tip. Remove two to four leaves around the target zone - sap will flow; keep rags ready.
- Make a ring cut (girdle): two parallel cuts 1 to 1.5 inches (2.5 to 4 cm) apart through bark to the woody core, connect with a vertical cut, and peel away the bark ring. Scrape remaining cambium until the exposed wood is smooth - any cambium left can bridge the gap and prevent rooting.
- Press a tissue to the wound and wait 10 to 15 minutes for latex to firm before applying hormone.
- Dust IBA powder lightly on the exposed wood.
- Wrap moist, squeezed-out sphagnum moss around the wound in a ball, cover with clear plastic, and seal top and bottom with twist ties or grafting tape so moisture stays in and sap stays out.
- When roots fill the moss - typically 4 to 8 weeks - cut below the root ball, rinse sap from the new base briefly, and pot without removing the moss.
Air layering produces a larger starter plant with less shock than a leaf-heavy water cutting. The trade-off is time and materials. For a single backup plant, stem cuttings are enough. For rescuing a 6-foot leggy specimen, air layering is often the only method worth the effort.
Rooting Timeline and What Success Looks Like
Realistic expectations prevent premature abandonment. Under good conditions - spring timing, sap-rinsed base, bright indirect light, vented humidity, warm room - rubber plant stem cuttings often begin anchoring in three to six weeks. Slower cases stretch to eight to ten weeks, especially in winter or with variegated cultivars. Air-layered stems typically show roots in four to eight weeks according to extension and nursery sources.
Success markers include gentle tug resistance, new bronze or green leaf buds emerging from nodes, and a stem that feels firmer than the floppy first week. Failure markers appear earlier: blackening at the base, sour-smelling mix, mushy stem tissue, or leaves that yellow and drop while the bag stays constantly wet. Healthy cuttings may lose one older leaf to stress; losing all leaves with a wet stem base usually means rot has won.
First new top growth on a rooted cutting can take one to three months after anchoring - rubber plants are moderate growers, not pothos. Patience after rooting is part of the method.
Aftercare for Newly Rooted Rubber Plants
When roots are established, harden off gradually. Remove the humidity bag for increasing periods over 7 to 10 days so leaves adapt to normal room humidity. Do not fertilize for the first four to six weeks after potting; fresh roots burn easily on concentrated salts. Water when the top 1 to 2 inches (2.5 to 5 cm) of mix feel dry, the same rhythm you would use for a mature rubber plant.
Repot into a slightly larger container - often 6 to 8 inches (15 to 20 cm) - with well-draining houseplant mix when roots circle the propagation pot or push from drainage holes. Handle the young plant gently; the new root system is fragile. Place it in bright indirect light and avoid moving it weekly. Ficus elastica drops leaves when light or watering swings; a newly rooted cutting is especially sensitive.
If the parent plant looks sparse after you removed a cutting, give it consistent bright indirect light and wait. Side buds often break below the cut within a few weeks, producing a bushier silhouette - one reason propagation pairs well with shape correction on leggy plants.
Common Propagation Failures and How to Fix Them
Most failed rubber plant cuttings trace back to a short list of correctable mistakes:
- Latex seal on the cut base - cutting never roots, stem looks unchanged for weeks. Fix: rescue recut, rinse, replant in fresh mix.
- Mix too wet with no airflow - mushy base, sour smell, mold on bag interior. Fix: repot into drier fresh mix, vent daily, reduce watering.
- Cutting too large with too many full leaves - wilts despite wet soil because transpiration exceeds water uptake. Fix: halve leaves or remove one more leaf, rebag with stakes so plastic does not touch foliage.
- Too little light - slow rooting, leggy new growth, elevated rot risk. Fix: move to brighter indirect light, not direct hot sun.
- Parent plant was already stressed - cutting yellows fast regardless of setup. Fix: stabilize parent, take new material later from healthy growth.
- Skipped glove and surface prep - sap in eyes or on pet paws; secondary problem overshadows propagation. Fix: stop, clean surfaces, seek medical or veterinary help if symptoms appear.
Rotting cuttings rarely recover if the stem is soft halfway up. Compost them, sterilize tools, and start fresh rather than nursing black tissue for months.
When Not to Propagate Your Rubber Plant
Propagation is a backup and multiplication tool, not a cure for poor conditions. Do not propagate as a first response to active spider mites, mealybugs, scale, root rot on Rubber Plant, or severe underwatering on Rubber Plant damage. Fix or discard affected tissue first; only propagate from clean, firm stems with no pest residue on leaf undersides.
Skip propagation if your home cannot offer bright indirect light and stable warmth for at least two months. A cutting in a dim, cold room will fail quietly while consuming your attention. Similarly, if you are about to travel for weeks and cannot maintain moisture checks, wait until you return.
Finally, respect the parent plant’s limits. Removing more than one-third of live foliage at once stresses Ficus elastica and triggers leaf drop that can last weeks. One or two cuttings per session from a medium-sized plant is reasonable; turning a sparse plant into sticks because you want five new pots usually leaves you with zero attractive plants.
Conclusion
Rubber plant propagation from stem cuttings is straightforward once you respect the latex. The milky sap that makes Ficus elastica famous as a rubber source is the same sap that seals wounds, irritates skin, stains surfaces, and blocks roots if you ignore it. Wear nitrile or vinyl gloves, rinse every basal cut under running water for 10 to 15 seconds, blot dry, and plant in a moist, airy mix under a vented humidity cover in bright indirect warmth. Expect roots in three to eight weeks, new top growth somewhat later, and a parent plant that may drop a leaf but usually branches below the cut.
When cuttings fail twice or your plant is too tall to gamble on, switch to air layering - higher success, less wilt, and roots you can see through the moss before you commit the final cut. Skip water jars for this species; the combination of latex sealing and water-root transplant shock makes them look easy and perform poorly. Handle sap first, match timing to active growth, and choose healthy stems. Do that, and rubber plant propagation becomes a reliable way to turn one glossy tree into two - without sticky regrets on your floor.
When to use this page vs other Rubber Plant guides
- Rubber Plant overview - Start here for whole-plant context before deep-diving this topic.
- Rubber Plant problems hub - Jump to symptom-specific fix guides when this care topic does not resolve the issue.