How to Propagate Phalaenopsis Orchid: Keiki & Division
How to Propagate Phalaenopsis Orchid: Keiki & Division
How to Propagate Phalaenopsis Orchid: Keiki & Division
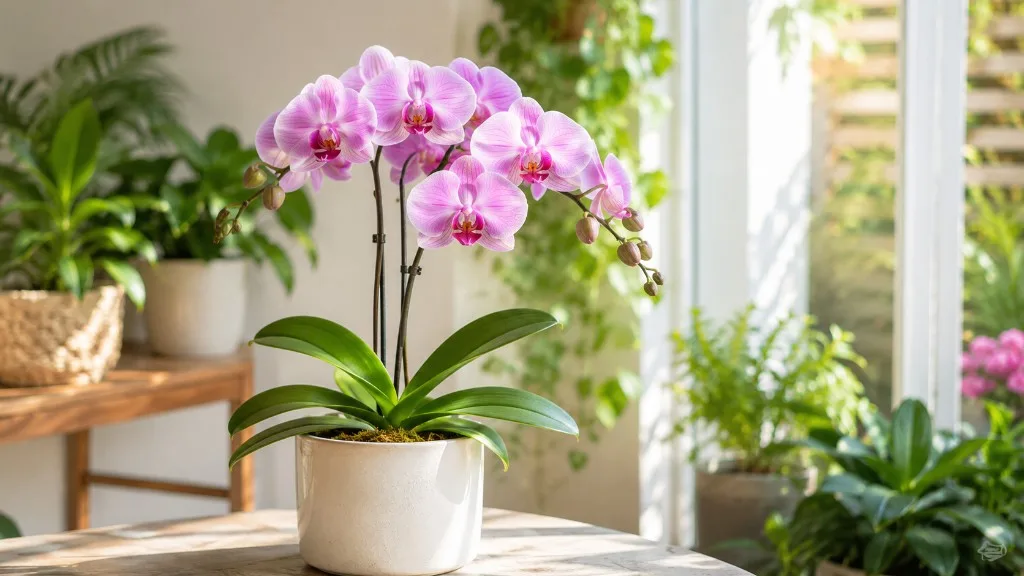
Phalaenopsis propagation at home means waiting for a keiki - a vegetative clone that sprouts from a node on the flower spike or, less often, from the main stem - or dividing a mature multi-lead plant at repotting. It does not mean rooting leaf cuttings in water the way you might with a pothos. Phalaenopsis spp. are monopodial orchids that grow upward from a single crown; they lack the pseudobulb divisions that work for Cattleya or the cane cuttings that work for some Dendrobium. The payoff for patience is a genetic duplicate of your moth orchid - same flower color, same pattern - without buying a second plant.
Propagation is multiplication, not rescue. A stressed parent may push a keiki as a survival strategy, but detaching babies from a rotting plant rarely fixes the parent and sometimes loses both. Stabilize roots, light, and watering first, then treat keiki development as a bonus on a healthy spike. This guide walks through method choice, timing, visual identification, detachment, optional keiki paste, basal keikis, division limits, aftercare, and the mistakes that send new plantlets straight to root rot.
Reviewed for Phalaenopsis keiki and division accuracy against American Orchid Society and RHS guidance. Author: sai-ananth · Reviewer: LeafyPixels Review Board.
Why Keikis, Not Water Cuttings
Houseplant propagation videos train you to drop stem segments in jars of water. That workflow fails on moth orchids. UC ANR orchid propagation guidance notes that most orchids will not grow from cuttings except for a few Dendrobium species; Phalaenopsis reproduces vegetatively through offshoots (keikis) or, for overgrown specimens, careful division - not through floating leaves or spike sections in water.
A keiki is a complete miniature plant: leaves, aerial roots, and eventually its own crown. It shares the parent’s DNA because it grew from a dormant bud on the inflorescence or stem. Water rooting a severed Phalaenopsis leaf or bare spike node lacks the meristem tissue and energy reserves that keiki formation provides. Attempting it wastes months and often invites mold.
Seed propagation and flask culture exist commercially but are not realistic home projects - they require sterile lab conditions and years to bloom. For indoor growers, natural keiki, keiki paste on a node, or division of a multi-lead plant are the practical options. Everything else is either a different orchid genus or a greenhouse technique.
Choose Your Propagation Method
Most readers need one decision: wait for a spontaneous keiki, encourage one with paste, or divide at the next repot. Single-stem grocery-store Phalaenopsis almost always follow the keiki path. Division applies only when the plant has developed two or more separate lead crowns with their own root systems - common on older specimens, not on a young single-stem hybrid.
Keiki vs Division at a Glance
| Method | Best for | Timeline | Skill level |
|---|---|---|---|
| Natural spike keiki | Cloning a favorite bloom on a healthy plant | 2–6 months from first bump to detach-ready | Beginner |
| Keiki paste on spike node | Encouraging a plantlet when no keiki appeared | 1–4 months after application; node may still choose flowers | Intermediate |
| Basal keiki on main stem | Rare vegetative sprouts near the base | Variable; often months | Intermediate |
| Division at repotting | Multi-lead mature plants only | Done during spring repotting | Advanced |
The American Orchid Society describes vegetative propagation of Phalaenopsis primarily through keikis and division rather than seed for home growers. Pick the row that matches your plant’s structure before buying paste or sharpening shears.
Stabilize the Parent First
A keiki on a declining parent is a warning sign as often as a gift. Crown rot, chronic overwatering on Phalaenopsis Orchid, and heat stress can all trigger vegetative buds because the plant is attempting to pass on its genes before the main crown fails. If leaves are yellowing widely, roots are mushy, or the pot smells sour, stop thinking about propagation and read the watering and root rot guides first.
Healthy propagation starts with firm leaves, silvery-green roots that plump after watering, and a spike that finished blooming without collapsing. The parent should sit in bright indirect light per the light guide, in an airy bark or moss mix, on a schedule that lets roots dry between drinks. Only when the mother plant looks stable for several weeks should you plan detachment.
When Stress Triggers Keikis
Keikis can appear after bloom when hormones shift along the spike, but prolonged high temperatures during the final phase of spike growth also favor vegetative buds over flower branches on Phalaenopsis - a pattern noted in orchid cultivation references on keiki formation. A plant left in a hot windowsill may sprout plantlets while a cool room-grown neighbor only branches for more flowers. Stress from root loss, ethylene from ripening fruit nearby, or aging genetics on declining lower leaves can produce basal sprouts as well.
Do not assume every keiki means the parent is doomed. Many healthy plants produce one keiki per cycle with no other symptoms. Use the whole-plant check: roots, crown firmness, and new leaf growth matter more than the keiki alone.
Best Time to Propagate
Detach keikis during active growth - typically late spring through early summer indoors when temperatures sit in the 65–84°F (18–29°C) comfort range and days are lengthening. Warmth and moderate light help new roots stitch into fresh mix faster than a dark winter windowsill.
You can leave a keiki on the spike through the parent’s bloom period if flowers are still open; mist aerial roots lightly so they do not desiccate. Detach only after the keiki meets the root and leaf thresholds below - rushing before roots exist is the most common failure. Division, when eligible, belongs at repotting in spring when new root tips are emerging, not mid-winter or while a spike is in full flower.
Avoid stacking propagation with other shocks: do not detach, repot the parent, move both plants to a new room, and start fertilizing the same week. Change one variable at a time.
Tools and Safety
Gather supplies before you cut:
- Single-edge razor or sterilized pruning snips
- Ground cinnamon or commercial fungicide for cut surfaces (optional grower practice)
- Small clear pot with drainage holes - 2–3 inches wide for most keikis
- Fresh orchid bark or sphagnum, pre-moistened lightly
- Labels with parent name and detach date
- Rubbing alcohol or flame for tool sterilization
Phalaenopsis is listed as non-toxic to cats and dogs by the ASPCA, but sap and bark dust can still irritate skin; wash hands after handling. Work on a clean counter, not over carpet where dropped plant tissue invites mold.
Natural Keiki on a Flower Spike
After blooms fade, nodes along the spike can wake as either flower branches or keikis. Your job for the next several weeks is observation, not surgery. Mark the spike with a soft tie where the bump appears and photograph it weekly - a habit that makes the comparison below easier when you wonder whether roots are long enough yet.
Propagation log - Phalaenopsis hybrid ‘White Confidence’ (indoor east window, bark mix):
| Date | Observation |
|---|---|
| 12 Mar 2026 | Spike cut to second node after bloom; small green bump at node 3 |
| 26 Mar 2026 | Bump has two tiny leaves; white aerial nubs visible - no roots yet |
| 9 Apr 2026 | Aerial roots ~½ inch; secondary spike forming at node 5 on same stem |
| 3 May 2026 | Keiki leaves span 1½ inches; longest root 1¼ inch - still wait |
| 14 Jun 2026 | Three leaves, two roots 2+ inches; detached and potted |
That five-entry log on a named hybrid illustrates realistic pacing: ten weeks from first bump to detach-ready, not the two-week timeline social media sometimes implies.
Tell a Keiki From a Secondary Spike
| Week | Keiki on node | Secondary flower branch |
|---|---|---|
| 1–2 | Flattened triangular leaf bud; no pointed tip | Narrow pointed bud shaped like original bloom tip |
| 3–4 | Miniature leaves unfold; roots may appear as white threads | Elongated stem segment with tiny bracts; no roots |
| 5+ | Looks like a baby moth orchid on the spike | Branch lengthens toward new flower clusters |
If you see roots, you are almost certainly looking at a keiki. Flower branches never produce aerial roots from the node. When both appear on one spike - as on the logged plant - treat each node independently.
Root-Length Threshold Before Detach
Authorities phrase the minimum slightly differently, which is why growers should use root function, not a ruler alone:
- UC ANR: pot keikis when they develop leaves and roots 2–3 inches long
- RHS Phalaenopsis guidance: roots about 3–5 cm before separating
- AOS culture sheet: 1–2 inches of root as a minimum for confidence
Practical rule: at least two roots that stiffen when you gently tug, plus two or three small leaves, and a crown that does not wobble. If roots are only hair-thin nubs, wait another two to three weeks. Premature keikis can be saved in a humid sphagnum tent, but recovery is uncertain and slower than patience on the parent spike.
Eight Steps to Detach and Pot
- Sterilize tools and confirm the keiki meets the thresholds above.
- Decide cut position: slice the spike above and below the keiki attachment, leaving a short stub on the baby, or cut between the keiki and the parent stem while retaining a fraction of spike tissue as a handle - both methods appear in Washington State extension library guidance on Phalaenopsis propagation.
- Dust cuts on parent and keiki with cinnamon if you use it; let surfaces air-dry five minutes.
- Choose a small clear pot so you can monitor root color without pulling the plant.
- Seat the keiki with roots spread in moist bark or moss; crown at or just above medium level - never buried.
- Stake lightly if the plantlet wobbles; a toothpick and soft tie prevent crown rocking.
- Water lightly once, then withhold until roots show bright green after a week in stable humidity.
- Label with parent cultivar and date; place in bright indirect light matching the parent’s spot.
On the parent spike, you can trim the remaining stem above the next healthy node or follow spike pruning preferences for rebloom versus removal.
Keiki Paste (Optional)
Keiki paste contains cytokinin - a plant hormone that can push a dormant inflorescence node toward vegetative growth instead of flowers. It does not guarantee a keiki; some nodes still produce branches, and paste applied too low on the stem may do nothing.
RHS growing guidance describes applying paste to a node after blooms finish: gently peel the triangular bract covering the node, spread a pea-sized amount, and wait several weeks in warm, humid conditions. Use paste only on healthy spikes, never on rotting tissue. One application per node is enough; stacking hormone increases mess without improving odds.
Paste is optional. Natural keikis on happy plants are common enough that many growers never buy the product. Treat it as an experiment on a spare node, not insurance on a dying plant.
Basal Keikis on the Main Stem
Occasionally a plantlet emerges from the base of the main stem or from an old leaf axil, not from the flower spike. These basal keikis share the same genetics and the same detach rules: wait for functional roots, then separate with a sterile cut that minimizes wound size on the parent trunk.
Basal keikis sometimes appear when lower leaves yellow and the plant re-roots higher on the stem - a lifecycle stage described in grower literature on topping mature Phalaenopsis. You may leave a basal keiki attached to the parent in a slightly larger pot if both fit without crowding; separation is optional when space and airflow remain good. If you cut, seal the parent wound and reduce watering until the cut calluses.
Division at Repotting
Division is not splitting a single upright stem in half. It applies when a Phalaenopsis has grown into a multi-lead specimen - two or more crowns each with leaves and roots - usually after years of maturation. At repotting, you tease the root mass apart so each division retains at least three to four healthy leaves and a viable root ball, then pot divisions separately in fresh bark.
Single-stem grocery-store plants are ineligible. Forcing a knife through one crown kills the plant. If your orchid is still one vertical stem with one growing tip, ignore division advice and focus on keikis. The AOS repotting culture guidance emphasizes repotting when roots outgrow the pot, not routine splitting.
When division is appropriate, work during active growth, never while flowering, and pot each piece in a container only slightly larger than its root mass. Hold fertilizer for four to six weeks until new root tips appear.
Environment for New Keikis
Freshly potted keikis need stability more than luxury. Target the same environmental band as mature moth orchids:
- Light: bright indirect - an east window or shaded south exposure; avoid direct midday sun on tender leaves
- Temperature: 65–84°F (18–29°C) days; slightly cooler nights are acceptable
- Humidity: 50–70% if possible; a humidity tray helps but does not replace airflow
- Airflow: gentle fan circulation reduces leaf spot and mold in humid setups
Clear pots earn their space here: roots should turn silvery between waterings and green after watering, the same signal described in the watering guide. Keikis photosynthesize through roots when light reaches them - burying roots in an opaque crowded pot slows establishment.
Aftercare for Potted Keikis
The first month is boring on purpose. Water lightly when roots silver, run water through bark until a few drops drain, and stop. No fertilizer until you see new root tips or a fresh leaf expanding - typically four to six weeks in warm conditions. Misting leaves is optional; wet crowns are not.
Expect the keiki to pause while it anchors. A slight leaf wrinkle in week two often resolves once roots grip the medium. Do not repot again for at least a year unless mix breaks down or roots rot.
Parent and keiki can sit side by side while both recover from the cut. Monitor the parent for infection at the spike stub; brown slime climbing the stem means isolate and trim back to firm tissue immediately.
Troubleshooting
Keiki yellows after detach - Usually premature separation or rot from a buried crown. Unpot, trim mush, repot in barely moist sphagnum with crown exposed, and keep humidity high but leaves dry.
Roots shrivel on the spike before detach - Raise humidity slightly; mist roots mornings only. If the parent is dehydrated, fix watering before the keiki starves.
Node produced flowers instead of keiki after paste - Normal hormonal lottery; try another node on the next cycle or wait for a natural keiki.
Parent crown softens after division or cut - Crown rot emergency; stop water, improve airflow, consult root rot recovery. The keiki may survive even if the parent does not.
Mold on paste or spike - Remove paste, dust with cinnamon, improve airflow; do not reapply until tissue is clean and dry.
Keiki identical bloom - Yes. Vegetative clones flower like the parent, though bloom timing depends on maturity - often one to three years from detach for a small keiki.
When Not to Propagate
Skip propagation when the parent has active crown rot, widespread pest infestation, or fewer than two firm roots of its own. Do not divide a single-stem plant. Do not apply keiki paste to a spike that is browning from the tip down. Do not detach a keiki with no roots because you need the pot for something else - disposal or donation of the whole plant is kinder than sending a rootless plantlet to slow death.
Seed sowing and flask buying belong to specialists. Home growers multiplying favorites should stay with keikis and eligible division only.
Conclusion
Phalaenopsis propagation rewards patience and punishes hurry. Identify keikis by leaves and roots, not by hope; detach only when roots measure in inches, not millimeters; stabilize the parent before you celebrate a baby on the spike. Use paste or basal keiki techniques when your plant offers the opportunity, and reserve division for true multi-lead specimens at spring repotting. Pair this page with the overview hub, soil, and pruning guides so aftercare stays consistent after the cut - three rules: healthy parent first, root-ready keiki second, boring aftercare third.
When to use this page vs other Phalaenopsis Orchid guides
- Phalaenopsis Orchid overview - Start here for whole-plant context before deep-diving this topic.
- Phalaenopsis Orchid problems hub - Jump to symptom-specific fix guides when this care topic does not resolve the issue.