Ficus Burgundy Propagation: Stem Cuttings & Air Layering
Ficus Burgundy Propagation: Stem Cuttings & Air Layering
Ficus Burgundy Propagation: Stem Cuttings & Air Layering
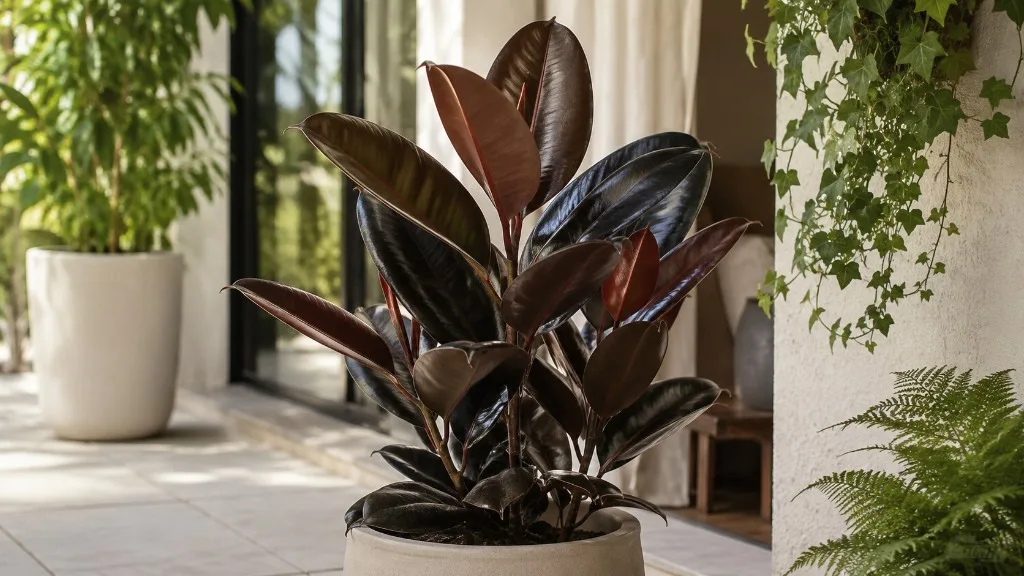
Ficus Burgundy propagation is one of the more reliable woody houseplant projects once you understand what the plant can and cannot regenerate from. Ficus elastica ‘Burgundy’ - the darkest rubber plant cultivar, with deep glossy near-black-green leaves - roots from stem cuttings that include at least one node or through air layering on branches still attached to the parent. A leaf blade pulled off without stem tissue cannot restart as a full plant, no matter how long it sits in a jar. That distinction saves months of frustration and is the foundation every other technique builds on.
The two practical home routes are node-bearing stem cuttings rooted in water or moist, airy soil, and air layering for thick, woody, or leggy stems where detached cuttings struggle. Iowa State University Extension lists air layering and stem cuttings as effective rubber plant propagation methods, with spring and early summer as the strongest window because active growth accelerates root formation. Ficus Burgundy follows the same biology as other Ficus elastica cultivars - the burgundy leaf color is a clone preserved through vegetative propagation, not something you can reliably reproduce from seed. If you want another plant that matches the parent’s deep foliage, you need stem tissue with nodes or a rooted air layer, not a decorative leaf in water.
Why Ficus Burgundy Propagation Starts With Stems, Not Leaves
Social posts and short videos sometimes show a rubber plant leaf rooting in water, which creates a persistent myth that any leaf will eventually become a plant. Clemson Extension recommends propagating rubber plants by stem or tip cuttings or air layering - methods that require stem tissue with nodes, not a detached leaf blade alone. The leaf is a photosynthetic organ severed from the vascular system that feeds it. It can stay green for months and even push adventitious roots from the petiole base, but it lacks the meristematic tissue at a node where both roots and shoots originate.
For Ficus Burgundy, successful propagation always means working with stem sections - even very short ones - that carry at least one node. A node is the joint where a leaf attaches to the stem, often visible as a slight ring, scar, or bump along the cane. The axillary bud tucked at that joint holds the genetic instructions for the next shoot. The smooth tissue between two nodes - the internode - transports water and sugars but cannot sprout on its own. This is why rubber plant propagation advice that treats leaves like pothos leaves fails so consistently in real homes.
If someone hands you a fallen Burgundy leaf with no stem attached, enjoy it as a temporary curiosity or compost it. Do not expect a new rubber plant. If a leaf breaks off with a sliver of stem that includes a node, that is technically a tiny stem cutting, not a leaf cutting - and it may root, though very short cuttings are harder to stabilize than a standard 10–15 cm (4–6 inch) tip section with one or two leaves at the top.
How Ficus Burgundy Stem and Air Layering Propagation Works
Stem propagation asks wounded tissue to do two jobs simultaneously: limit water loss through the leaves while building a new root system from nodes near the cut. A Ficus Burgundy cutting without roots still transpires moisture from its glossy leaf surfaces. If it loses water faster than the stem can replace through uptake, it wilts, rots at the base, or stalls indefinitely. Your setup must close that gap: enough leaf area for modest photosynthesis, enough humidity or water contact at the node zone, and enough oxygen that bacteria do not consume the cutting before roots appear.
Adventitious roots emerge from cells at or near nodes - the same regions where leaves attach. Submerging or burying at least one node in water or moist medium gives root initials a place to form. The upper leaves continue limited gas exchange, supporting the stem while roots develop. Air layering works differently but follows the same node logic: instead of severing the stem first, you wound the bark around a node zone while the branch remains attached to the parent. The intact vascular connection above the wound keeps the section hydrated while roots form in moist sphagnum moss wrapped around the girdled area. Only after roots are established do you cut below the moss ball and pot the new plant.
Nodes, Axillary Buds, and Why Leaf-Only Cuttings Fail
Learning to spot a node before you cut is the highest-return skill in Ficus Burgundy propagation. On a rubber plant stem, look where each leaf petiole meets the cane. You may see a slight swelling, a pale scar from a dropped lower leaf, or a visible ring in the bark on older wood. That scar is often still viable if the surrounding stem is firm and green to light brown. The axillary bud sits at or just above that junction - dormant until hormones and conditions trigger it. Roots and the future shoot both depend on that tissue being present and alive.
A leaf-only cutting - blade and petiole with no stem segment containing a node - cannot activate that bud because the bud was left on the parent plant or discarded with the severed petiole. Iowa State Extension notes that rubber tree propagation requires stem tissue with nodes for air layering or cuttings to form a viable new plant.
For a standard propagation cutting, aim for one to two nodes on the portion that will be submerged or buried, with one to two healthy leaves at the tip. More leaves increase transpiration before roots exist. Strip everything on the lower half that would sit underwater or underground. If you are unsure whether a bump is a node, choose a fresher stem with obvious leaf attachment points rather than guessing on bare woody cane.
Choosing Between Stem Cuttings and Air Layering
Stem cuttings win when you have young, flexible growth no thicker than a pencil, when you are pruning a bushy plant and want to use the trimmings, or when you need a fast, visible project with minimal supplies. A fresh tip cutting with green tissue, a sound node, and clean water or airy perlite mix can root in four to six weeks under warm, bright conditions. The method is portable - one jar on a windowsill - and you can run multiple cuttings at once as insurance.
Air layering wins when the stem is thick and woody, when the plant is leggy with bare lower trunk and healthy foliage at the top, when previous stem cuttings on the same material failed, or when you want the highest-confidence outcome on a specimen you value. Iowa State Extension recommends air layering for woody Ficus species including rubber tree, because the cutting roots while still receiving water and sugars through the intact stem above the wound.
Thin Flexible Stems Versus Thick Woody Stems
Use the pencil test as a quick decision rule. If the stem bends easily between your fingers and the bark is green or light tan, stem cuttings in water or soil are appropriate first choices. If the stem is rigid, noticeably wider than a pencil, or has developed woody bark over bare internodes, shift to air layering unless you are willing to accept lower odds and longer timelines with cuttings. Thick rubber plant stems contain more lignin and less active cambium near the cut surface, which slows callus formation and increases rot risk in standing water.
Leggy Ficus Burgundy specimens - common when lower leaves drop after a move or from low light - are prime air-layering candidates. You can shorten the plant by rooting the leafy top while encouraging new shoots from the remaining trunk. A stem cutting taken from the same woody zone often sits in a jar for weeks without progress, then rots when the wet latex contaminates the water. Air layering avoids that failure mode by keeping the tissue alive through the parent plant until roots are visible in the moss.
The Best Time to Propagate Ficus Burgundy
Propagation speed depends less on the calendar than on whether the parent plant is actively growing. Ficus Burgundy follows a tropical growth rhythm: a strong push from mid-spring through summer, slower but workable growth in early fall, and near dormancy through winter in most temperate homes. Clemson Extension recommends propagating during active growth in spring because vigorous new growth accelerates root formation. Propagation outside that window can still succeed but typically takes longer.
The practical home rule: propagate when the plant has been producing firm new leaves for several weeks and indoor temperatures hold steady between 65 and 82°F (18 to 28°C) - the comfort range Ficus Burgundy prefers in mature care. Avoid propagation during stress windows. A plant that just arrived from a nursery, dropped leaves after a move, or is recovering from root rot on Ficus Burgundy does not have the carbohydrate reserves to fuel both healing and rooting. Wait until new growth looks stable before you cut. Skip propagation during active pest outbreaks - mealybugs and scale travel on cuttings, and fresh wounds on stressed plants invite infection.
If you must propagate in winter, add a seedling heat mat set around 75°F (24°C) under propagation pots and accept a slower timeline. Cool windowsills that drop at night are a common reason cuttings sit unchanged for two months. Plant readiness beats the date on the calendar.
Tools, Safety, and Milky Latex Sap Handling
Almost every failed Ficus Burgundy propagation traces back to one of three problems: a dull blade that crushed the stem, wet latex going directly into soggy soil or standing water, or a jar left in direct sun. The right setup is unglamorous but effective. You need sharp bypass pruners or a knife, nitrile or gardening gloves, paper towels for sap, clean water or fresh propagation medium, small pots with drainage holes, optional clear plastic for a humidity dome, sphagnum moss and plastic wrap for air layering, and a bright spot with no direct sun.
Latex sap safety is non-optional. Ficus Burgundy bleeds milky white latex from every cut. The sap irritates skin and eyes and is toxic to cats and dogs if ingested, per ASPCA toxic plant listings for Ficus species. Wear gloves when cutting, propagating, or handling fresh wounds. Keep sap away from eyes and broken skin. Wash tools and hands after the session. If a pet chews a freshly cut stem, contact your veterinarian or the ASPCA Animal Poison Control Center. Propagation trimmings belong in the compost bin, not within pet reach.
Sterilize blades with 70 percent isopropyl alcohol before cutting and between plants if pests or rot have been an issue. A crushed stem wound invites rot before roots form. Use small containers - 10 cm (4-inch) nursery pots for soil cuttings, a clear wide-mouth jar for water cuttings - so you can monitor progress without disturbing the cutting. Bright, indirect light two to three feet from an east- or north-facing window, or set back from a filtered south window, is the baseline. Direct sun heats water in a jar to lethal temperatures and desiccates leaves on a cutting with no roots to replace lost moisture.
Preparing Ficus Burgundy Stem Cuttings Step by Step
Preparation is where propagation succeeds or fails before the cutting meets water or soil. Work on a clean surface, assemble containers first, and decide whether each cutting goes to water, soil, or stays on the parent for air layering before you cut - fresh wounds should not sit on the counter while you hunt for supplies.
Step 1: Select and cut. Choose a healthy stem 10 to 20 cm (4 to 8 inches) long with at least one obvious node in the lower third. Using sharp, sterilized pruners, make a clean cut just below a node at a slight angle if you prefer; the angle matters less than a single clean slice. Avoid sawing or tearing.
Step 2: Manage the sap. Immediately blot the cut end with a paper towel - latex flows steadily for several minutes. Rinse the cut end briefly under lukewarm water if sap is heavy, then blot dry. Let the cut end dry one to two hours at room temperature until the latex forms a dry scab before submerging in water or inserting in wet soil. Skipping this step is one of the most common causes of cloudy water and basal rot.
Step 3: Strip lower leaves. Remove all leaves from the lower half - the portion that will be submerged or buried. Any leaf sitting in water rots within days and fouls the jar. Any leaf pressed into wet soil without airflow mildews.
Step 4: Rooting hormone (optional). Dust the dried lower inch in rooting hormone powder or gel if you have it. Hormone is optional on young green cuttings but useful on semi-woody tissue and air-layer wounds. Do not over-apply.
Step 5: Insert immediately after drying. Place the cutting in water or pre-moistened medium within minutes of the scab forming. Delay increases dehydration and contamination risk.
Take two or three cuttings rather than one if the parent can spare the material. Redundancy costs little except an extra jar.
Method 1: Rooting Ficus Burgundy Stem Cuttings in Water
Water propagation is the most visible method and the one beginners reach for first. It works on Ficus Burgundy when the cutting is young enough, the node is submerged, and the sap has been allowed to dry before the stem enters water. Clemson Extension lists stem or tip cuttings among standard rubber plant propagation methods - treat water as a legitimate option on green tip cuttings, not as the default for every stem type.
Place the cutting in a clean jar of room-temperature water so at least one node is submerged while all leaves stay above the waterline. Only the node zone and lower stem should be underwater. Set the jar in bright, indirect light at 70 to 80°F (21 to 27°C) if possible.
Water Setup and Sap Management
Choose a container you can keep clean. Change the water completely every five to seven days, rinsing the jar and lightly rinsing the stem each time. Stagnant water is the enemy. If the water turns cloudy within 48 hours, change it immediately and check the stem tip for mushiness - that often means the sap was not dry enough before submersion or the cutting was too woody for water.
Healthy progress looks like a dry callus at the cut end followed by small white or cream-colored root initials emerging from the node zone. Timeline: four to six weeks for most water cuttings in warm, bright conditions. Cool or dim rooms stretch that schedule. Roots are ready for soil when they reach 5 to 7 cm (2 to 3 inches) and appear firm and white, not gelatinous or brown. Do not wait until roots circle the entire jar - long aquatic roots are fragile and make the soil transition harder.
When potting water-rooted cuttings, use a small pot with drainage and moist but not soggy well-draining mix. Pre-moisten the mix, lower the roots gently, and firm soil around the stem. Keep humidity slightly elevated for the first two weeks with a loose plastic bag dome. Expect one to two old leaves to drop - normal Ficus adjustment, not automatic failure.
Method 2: Rooting Ficus Burgundy Stem Cuttings in Soil
Soil propagation - more accurately, a soilless propagation medium - skips the water-to-soil transition and often produces tougher roots adapted to pot culture. Iowa State Extension recommends potting air-layered and cutting-propagated rubber plants in well-drained potting soil. The trade-off is less visibility: you cannot watch roots form without disturbing the cutting.
Mix, Humidity Dome, and the Tug Test
Use a well-draining propagation mix: roughly equal parts peat-based potting soil and perlite, or standard potting mix with 20 to 30 percent perlite - the same drainage principle Ficus Burgundy needs in mature care. The mix should hold moisture like a wrung-out sponge, never saturated mud. A 10 cm (4-inch) pot with a drainage hole is the right size.
After cutting and drying the sap, optionally dust the lower inch with rooting hormone. Insert the cutting so the lowest node sits 2 to 5 cm (1 to 2 inches) below the soil surface, with remaining stem and leaves above the mix. Firm gently without compacting. Water lightly until a few drops exit the drainage hole, then let the top 2 to 3 cm approach dryness before watering again.
Create a humidity dome with a clear plastic bag supported by stakes so plastic does not touch leaves. This reduces transpiration while roots form. Vent daily for a few minutes to prevent mold. Set the pot on a heat mat at 75°F (24°C) if ambient temperatures run cool. Expect roots in four to eight weeks.
The tug test helps assess progress without destructive digging: after week four, give the stem a very gentle upward tug. Resistance suggests roots have anchored. No resistance does not always mean failure - keep waiting if the stem is firm and leaves are not collapsing. Repeated aggressive tugging breaks delicate root initials. New leaf growth is the clearest success signal.
When roots are confirmed, move to a small individual pot with well-draining houseplant mix. Hold fertilizer until new top growth is obvious - usually four to six weeks after rooting.
Method 3: Air Layering Ficus Burgundy
Air layering is the most reliable method for Ficus Burgundy when the stem is thick, woody, or high on a leggy plant you want to shorten. The branch roots while still attached to the parent, continuing to receive water and sugars through intact vascular tissue above the wound. Iowa State Extension describes air layering as especially helpful for stiff-stemmed rubber plants, noting that one vigorously growing plant can often support two or three air layers at once on different stems - though only one layer per stem.
Choose air layering when the stem fails the pencil-flex test, when you want to rescue a leggy specimen without discarding the leafy top, or when stem cuttings on similar material have rotted before rooting.
Ring Cut, Moss Wrap, and Separating the Rooted Stem
Select a healthy branch at least pencil-thick, ideally 30 to 45 cm (12 to 18 inches) below the leafy tip. Wearing gloves, make two parallel cuts completely around the stem, 2 to 3 cm (1 inch) apart, penetrating through the bark to the woody center. Connect the cuts with a vertical slice and remove the ring of bark and cambium. Scrape the exposed woody surface lightly to ensure no green cambial tissue remains. This ring cut interrupts downward carbohydrate flow and triggers root formation at the wound.
Dust the exposed area with rooting hormone powder. Soak sphagnum moss in water, squeeze out excess, and wrap a generous ball around the wound. Cover the moss with clear plastic wrap, securing it above and below the moss ball with twist ties or string. No moss should protrude from the ends. The package should be snug but not crushing the stem.
Monitor weekly. If the moss feels dry and lightens in color, peel back the top tie, add a little water, and reseal. Roots typically appear in four to ten weeks, visible as white threads through the moss. Thick woody branches trend toward the longer end; younger semi-woody branches often root in four to six weeks. Once the moss ball is packed with firm roots at least 5 to 7 cm (2 to 3 inches) long, cut the stem just below the root mass with sterilized pruners. Remove the plastic, keep the moss intact around the roots, and pot in well-draining mix. Water thoroughly and place in bright, indirect light.
The mother plant below the cut often pushes new shoots from nodes near the wound within a few weeks during active growth - one of air layering’s hidden benefits. You gain a rooted clone and a potentially bushier parent.
Building the Right Rooting Environment
Roots respond to warmth, light, oxygen, and stable moisture more than to secret additives. A Ficus Burgundy cutting on a bright kitchen counter at 21°C (70°F) usually outperforms a darker shelf with rooting powder but cold nights.
Place cuttings and air layers in bright, indirect light. An east window, a few feet back from a south window behind sheer curtain, or a moderate grow light works well. Direct sun through glass overheats water jars and scorches unrooted leaves. Too little light slows rooting and produces leggy pale growth fragile at transplant.
Keep temperatures above 18°C (65°F) and ideally near 21 to 27°C (70 to 80°F) for fastest results. Bottom heat mats help in cool rooms if they do not overheat water jars - measure water temperature, not just air.
Humidity matters most for soil-rooted cuttings without domes and for plants in very dry air-conditioned rooms. Water propagation supplies stem moisture directly, but leaves still appreciate ambient humidity above extremely dry levels. A dome, grouping jars together, or keeping cuttings away from heating vents reduces edge wilting. Ficus Burgundy tolerates average household humidity of 40 to 60 percent once established, but fresh cuttings benefit from slightly more stable air during the first two to three weeks.
Aftercare for Newly Rooted Ficus Burgundy Plants
A newly rooted Ficus Burgundy needs steadier conditions than an established plant, but not coddling. Keep the pot in bright, indirect light and water when the top 2 to 3 cm of mix dries - roughly the same rhythm as a mature Burgundy rubber plant, but err slightly drier rather than wetter while roots expand. Do not fertilize for the first four to six weeks; fresh roots are sensitive to salt burn.
Resist Ficus Burgundy repotting guide into a large container. A 10 cm (4-inch) pot is appropriate for a young rooted cutting for several months. Upsizing too early leaves excess wet soil around a small root system and invites rot. When new growth is vigorous and roots circle the pot edge, step up one pot size only.
Ficus Burgundy reacts to change before it reacts to bad care. Expect one to three old leaves to yellow and drop after propagation - normal adjustment, not failure. Repeated leaf drop over several weeks means light, drafts, or watering are still unstable. Fix one variable at a time. Dust accumulates noticeably on dark Burgundy leaves; wipe gently with a damp cloth once the plant is settled - clean leaves photosynthesize more efficiently, which matters while the root system is still small.
After a tip cutting, the mother plant often pushes new shoots from buds just below the cut within a few weeks during active growth. A strategic prune can make a sparse plant bushier. If the remaining stem is bare wood, buds may still break along the cane - give it four to six weeks in bright light before assuming the worst.
Common Ficus Burgundy Propagation Problems
Most failures trace to undried sap, submerged leaves, cold, or oversaturated mix - not to Ficus Burgundy being impossible to propagate. Diagnose from the stem and leaf, not from impatience alone.
Black mushy stem base in water means rot. Discard the soft portion, recut to healthy tissue if enough stem remains above a node, clean the jar, let the new cut dry fully, and restart. If rot repeats on woody material, switch to air layering or soil with extra perlite.
Cloudy water within 48 hours usually indicates wet latex contamination or a cutting too woody for water. Dry the sap longer, change to soil propagation, or try air layering on the parent stem.
Wilting with firm stem often indicates low humidity or excessive leaf surface for the root system. Trim large leaves halfway, use a humidity dome for soil cuttings, or move away from dry heat vents. Mild wilt can recover once roots form.
No roots after many weeks in a cold or dim location suggests environment, not plant incompatibility. Move to warmer, brighter conditions before declaring failure. Woody lower stems are slower than fresh green tips - take new material from the growing tip instead.
Roots form in water but the plant collapses after potting points to overwatering on Ficus Burgundy in an oversized pot or moving into dry, dense soil too abruptly. Repot into a smaller container with pre-moistened airy mix and water lightly until new growth appears.
When rot and wilting coincide, the cutting is usually past saving. Start over with cleaner material from a healthier section rather than nursing a slimy stem for weeks.
When Not to Propagate Ficus Burgundy
Propagation is a backup plan, not a cure for bad conditions. Do not propagate as a first response to every problem. If pests, root rot, or severe dehydration are active, stabilize the parent plant first or take only clean unaffected material from the healthiest growth tip. A plant shedding leaves from a recent move needs two to four weeks of stable Ficus Burgundy light guide before you add the stress of cutting.
Skip propagation when the only available tissue is mushy, blackened, or pest-coated. Skip it when you are about to repot, fertilize heavily, and propagate in the same week - Ficus Burgundy handles one change at a time far better than three stacked shocks. If the plant is thriving and you have no legginess or desire for another specimen, there is no horticultural requirement to propagate at all.
Conclusion
Propagating Ficus Burgundy comes down to respecting woody Moraceae biology: use stem cuttings with at least one node, not leaf blades alone, and choose air layering when stems are thick or leggy. Take 10 to 20 cm (4 to 8 inch) tip sections from healthy active growth, dry the milky latex before rooting, and place nodes in clean water or moist perlite-heavy mix in warm bright indirect light. Water gives visibility; soil gives a head start on long-term potting conditions; air layering gives the highest confidence on mature wood.
Whether you are trimming a bushy plant, cloning a favorite dark-leaf specimen, or rescuing a leggy rubber tree, the logic stays the same - viable nodes, clean tools, sap management, moisture without stagnation, and patience through a four-to-ten-week rooting window depending on method and stem type. Master that chain and Ficus Burgundy propagation becomes a reliable skill, not a lottery you hope to win once.
When to use this page vs other Ficus Burgundy guides
- Ficus Burgundy overview - Start here for whole-plant context before deep-diving this topic.
- Ficus Burgundy problems hub - Jump to symptom-specific fix guides when this care topic does not resolve the issue.