Chrysanthemum Repotting: When, How, and Mistakes to Avoid
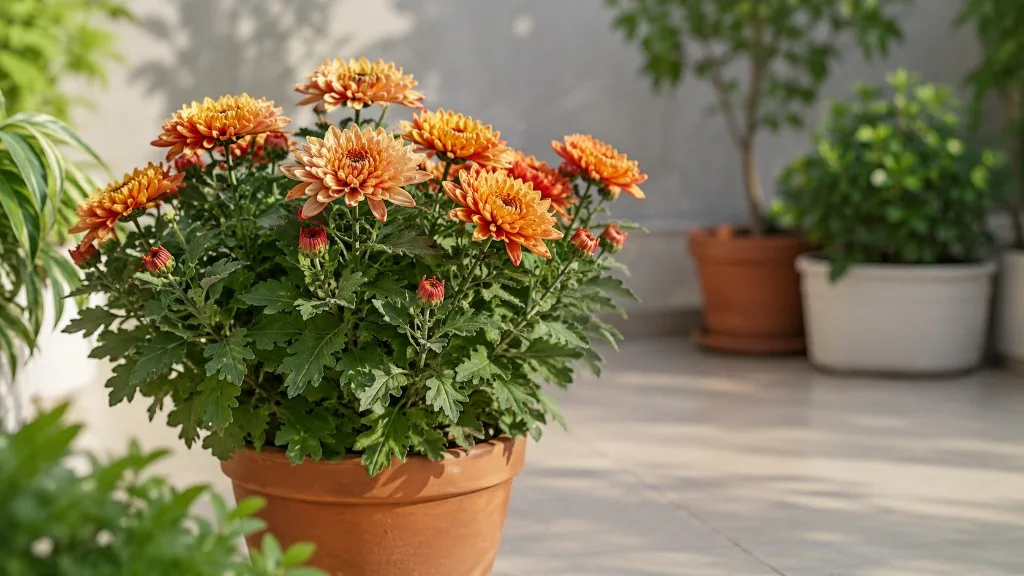
Chrysanthemum Repotting: When, How, and Mistakes to Avoid
Chrysanthemum Repotting: When, How, and Mistakes to Avoid
A chrysanthemum that has outgrown its pot does not always look dramatic at first. The foliage may still be green, the blooms may still open, and the plant may even seem fine for a week or two after you bring it home from the garden center. Then the Chrysanthemum watering guide shifts. The pot dries out in hours instead of days. Lower leaves yellow despite your best effort. New shoots stay small, and the flowers that do appear look smaller than they should. That pattern almost always traces back to the root zone - and repotting is the fix, but only if you do it at the right time, in the right-size container, with the right soil.
Chrysanthemum repotting is not complicated, but mums are less forgiving of bad timing and oversized pots than many common houseplants. They have relatively shallow but fast-growing root systems, they push hard toward autumn bloom, and they recover fastest when you work with their natural growth cycle rather than against it. This guide covers everything you need to decide whether your mum actually needs a new pot, when to do the job, how to execute it without unnecessary root damage, and which mistakes stall recovery or cost you next season’s flowers.
Why Chrysanthemums Outgrow Their Pot Faster Than You Expect
Most chrysanthemums sold in commerce are Chrysanthemum x morifolium - the hybrid group behind garden mums, hardy mums, and the florist pots that flood stores every autumn. NC State Extension describes these plants as herbaceous perennials with a rapid growth rate and a dense, mounding habit that typically reaches one to three feet tall and wide in the garden. In a container, that same vigor compresses into a smaller space, which means roots fill a pot faster than you might expect from a plant that looks modest on the shelf.
Mums also dislike being root-bound more acutely than many other container plants. When roots circle tightly inside a pot, they have less access to fresh soil, less room for fine root hairs to develop, and less buffer against drying out or staying too wet. A congested root ball forces you to water more often because there is less soil volume to hold moisture, yet the plant still wilts between waterings because the roots cannot absorb efficiently. Bloom quality drops, stems may grow shorter, and the plant becomes more vulnerable to aphids, powdery mildew, and other stress-related problems - exactly the scenario NC State Extension lists among common chrysanthemum issues.
What Happens When Roots Run Out of Room
When a chrysanthemum becomes root-bound, several visible and invisible changes occur at once. On the surface, you may notice water running straight through the pot without soaking in - a sign that the root mat has become so dense that moisture channels along the sides instead of penetrating the center. The plant may wilt quickly after watering, then recover, then wilt again within a day or two. Lower leaves turn yellow and drop even though you have not changed your care routine. New spring shoots, if you are growing the plant as a perennial, stay stunted or fail to branch well.
Below the soil line, circling roots thicken and lose the fine, white feeder roots that actually absorb water and nutrients. Old potting mix breaks down into a compacted, water-repellent mass that holds little air. Salt buildup from repeated fertilizing becomes concentrated because there is no fresh soil to dilute it. At that point, refreshing the top inch of mix is not enough - the plant needs a full repot with teased-out roots and new, airy soil.
Garden Mums vs Florist Mums: Two Different Repotting Stories
Not every chrysanthemum in a pot follows the same long-term repotting schedule, and recognizing which type you have saves frustration. Garden mums or hardy mums are bred for outdoor permanence in suitable climates - generally USDA Zones 5 through 9 for many cultivars, though Missouri Botanical Garden notes that hardiness varies by cultivar and that even hardy types benefit from winter mulch in colder zones. These plants can live for years with annual or biennial repotting and spring division when clumps grow too large.
Florist mums or pot mums - the heavily budded plants sold in full bloom at grocery stores and nurseries in September and October - are a different case. Growers treat them with plant growth regulators to keep them short and compact for display. They are often root-bound before you buy them. Many gardeners treat these as seasonal color and compost them after bloom. If you want to keep one, repotting is possible, but timing matters enormously: repotting a plant in full flower forces it to choose between supporting blooms and rebuilding roots, and blooms usually win at the expense of long-term health. For fall-purchased florist mums you plan to overwinter, the better approach is often to enjoy the display, shear spent flowers, and repot in early spring when new growth emerges - or transplant into the garden if your zone supports it.
When to Repot Chrysanthemum: Signs Your Plant Is Telling You
You do not need a calendar reminder to repot a chrysanthemum. The plant tells you when the root zone is failing, and two or more of these signs appearing together mean you should plan a repot at the next safe window - not necessarily today if the plant is mid-bloom or deep in winter dormancy.
The clearest sign is visible roots: white or tan roots emerging from the drainage hole, or a root mat so dense that you see more root than soil when you slide the plant partway out of the pot. Water behavior changes are equally telling. If water pools on the surface and runs down the inside wall of the pot instead of soaking in, the root ball is likely hydrophobic and congested. If the pot dries out within hours of a thorough watering, the soil volume is too small for the root mass.
Growth and bloom quality provide slower but reliable signals. Stunted new shoots in spring, fewer flower stems than the previous year, and noticeably smaller blooms all suggest the plant has exhausted its container resources. Top-heaviness - when the plant wobbles or tips easily because the root ball is too small for the upper growth - is another practical indicator. Finally, if the potting mix smells sour, looks gray and compacted, or grows green algae on the surface, the soil structure has broken down and repotting with fresh mix is overdue regardless of whether roots have escaped yet.
Root-Bound Soil, Water Runoff, and the Stalled-Growth Test
A simple diagnostic you can do in under two minutes: water the plant thoroughly, wait thirty minutes, then lift the pot. If it feels light again despite recent watering, the root mass is dominating the container. Next, gently tilt the plant and inspect the drainage hole. Roots peeking out confirm congestion. If the plant still looks healthy, slide it partially out of the pot - roots circling the outer edge in a solid wall, with little loose soil visible, mean you are past due for a repot.
The stalled-growth test applies mainly to perennial mums in spring. After your last frost date, healthy chrysanthemums should produce new shoots within weeks. If light, water, and temperature are adequate but new growth is thin, pale, or absent while the root ball feels hard as a brick, the container - not your general care - is the bottleneck.
Best Time of Year to Repot Chrysanthemums
The best time to repot chrysanthemums is early spring, as new growth begins and before flower initiation ramps up for autumn bloom. In mild climates (USDA Zones 8–10), that window often opens in late February through mid-March, when new shoots reach one to two inches tall. In colder zones where winters are harsh, wait until one to two weeks before your average last frost date, or until you see consistent new basal growth - whichever comes second. Penn State Extension aligns on spring as the primary transplant window because rising temperatures and lengthening days support rapid root regeneration.
Midwinter through early spring is also acceptable in frost-free regions, where mums may begin pushing growth during mild spells. The logic is the same: repot when the plant is waking up, not when it is shutting down or peaking in bloom.
Avoid repotting during active flowering, typically late summer through fall for autumn-blooming cultivars. Flower development demands significant energy, and repotting during this phase diverts resources away from root repair. A mum repotted in September while covered in buds may survive, but it often drops blooms, recovers slowly, and enters winter weaker than it would have otherwise.
Deep winter repotting is similarly risky except in emergencies such as severe root rot on Chrysanthemum or a pot cracked by freeze. Dormant plants heal slowly in short-day, cool conditions, and disturbing the root zone can trigger weak, etiolated growth vulnerable to late frost. Late fall repotting after bloom finishes sits in a gray zone: acceptable in warm winter zones if you need to move the plant into a larger container before overwintering outdoors, but generally inferior to waiting for spring unless the root-bound condition is urgent.
How Often Should You Repot a Chrysanthemum?
Most chrysanthemums benefit from repotting every 12 to 24 months, though young, fast-growing plants in small nursery pots may need an upgrade within the first year. Mature specimens that have reached a stable size in an appropriately large container - generally no more than 12 inches in diameter for garden mums - can go two to three years between full repots if you top-dress annually by replacing the top two inches of depleted mix each spring.
The frequency depends on how you grow the plant. A florist mum kept indoors through winter in a six-inch pot will likely need repotting the following spring. A hardy garden mum planted in a twelve-inch container on a patio may not need a larger pot for several seasons but still needs fresh soil periodically because peat-based mixes decompose and compact over time. Listen to the plant rather than the calendar: if none of the root-bound signs appear and spring growth is vigorous, you can top-dress instead of upsizing. If two or more signs appear together, schedule a full repot regardless of when you last did one.
Choosing the Right Pot Size and Material
Pot selection is where many repotting jobs succeed or fail before you even touch the roots. Chrysanthemums need drainage holes - non-negotiable for long-term container health. A decorative cachepot without holes is fine only if the plant remains in a separate grow pot that drains freely and you never let the outer pot fill with standing water.
Size matters more than material, but material affects how fast the mix dries. Terracotta breathes and dries evenly, which suits gardeners who tend to overwater. Plastic retains moisture longer, which helps in hot, dry climates or for gardeners who underwater. Glazed ceramic behaves similarly to plastic but is heavier and more stable for top-heavy mature mums.
The One-Pot-Size Rule and Why Bigger Is Not Better
Increase pot diameter by only one to two inches (roughly 2.5 to 5 cm) at each repot. A mum in a six-inch pot moves to an eight-inch pot - not a ten- or twelve-inch pot unless the root ball genuinely fills a ten-inch container and the plant is a mature, multi-season garden specimen. The math explains why: a ten-inch pot holds nearly three times the soil volume of a six-inch pot. Excess soil stays cool and damp around a small root system that cannot use that moisture, creating ideal conditions for crown rot and root rot - especially in spring when temperatures are moderate and evaporation is slow.
Depth matters less than width for mums because their root systems are relatively shallow. Choose a pot that is at most one to two inches deeper than the current one, with a wide stable base that prevents tipping. The crown - the point where stems meet roots - should sit at the same depth it occupied before repotting, level with or just below the rim, never buried deeply. Burying the crown is one of the fastest ways to kill a chrysanthemum after an otherwise careful repot.
The Best Soil Mix for Repotting Chrysanthemums
Chrysanthemums want rich, well-draining soil with good organic matter and a slightly acidic to neutral pH. NC State Extension and standard horticultural references place the ideal range around pH 6.0 to 8.0 with high organic matter and good drainage. The mix should hold moisture without staying waterlogged, retain enough nutrients to support rapid spring growth, and stay open and airy so roots can breathe.
A reliable all-purpose repotting blend for container mums:
- 50% quality peat- or coco-based potting mix
- 30% compost or well-rotted organic matter
- 20% perlite, pumice, or coarse horticultural sand for drainage
If you prefer a simpler approach, a commercial all-purpose potting mix amended with 20 to 30 percent perlite works well for most home growers. Avoid straight garden soil in containers - it compacts, drains poorly, and may introduce pathogens. Avoid heavy, peat-only mixes with no amendment; they suffocate roots within a season.
For perennial garden mums you plan to keep multiple years, incorporating compost adds long-term fertility and supports the soil biology that keeps mix structure open. A handful of slow-release balanced fertilizer mixed into the lower third of the fresh soil is acceptable at repotting time, but skip liquid or heavy synthetic feeding until the plant has re-established - more on that in the post-repot section.
Tools and Materials You Need Before You Start
Gather everything before you unpot the plant. Mid-repot scrambling increases root exposure time and stress.
You will need:
- A new pot one to two inches wider, with drainage holes, cleaned if reused
- Fresh soil mix prepared and slightly moistened - not wet
- A hand trowel or hori-hori knife
- Clean, sharp scissors or pruning shears for trimming dead roots
- A chopstick or pencil for settling soil around the root ball
- A watering can with a narrow rose or spout for gentle first watering
- Newspaper or a tarp to contain mess
- Optional: gloves (recommended - chrysanthemums contain compounds that can irritate skin; see safety note below)
Safety note: The ASPCA lists chrysanthemums as toxic to cats, dogs, and horses. The plant contains pyrethrins and sesquiterpene lactones that can cause vomiting, diarrhea, hypersalivation, incoordination, and dermatitis on contact in sensitive individuals - including humans with plant allergies. Wear gloves when handling roots and discarded foliage, keep pruned material away from pets, and wash hands after repotting. If a pet ingests any part of the plant, contact your veterinarian or the ASPCA Animal Poison Control Center.
How to Repot Chrysanthemum: Step-by-Step
Repotting a chrysanthemum is straightforward when you prepare the plant, work gently, and resist the urge to upsize dramatically. Set aside thirty to forty-five minutes for a single plant.
Step 1 - Water the day before. Moist root balls hold together during handling. Dry roots snap and fine hairs tear off. Water thoroughly, let the pot drain, and repot the next day when the mix is evenly moist but not dripping.
Step 2 - Prepare the new pot. Cover the drainage hole with a piece of mesh or a coffee filter if you worry about soil loss, then add enough fresh mix to the bottom so the crown will sit at the correct height - usually one to two inches below the rim.
Step 3 - Remove the plant. Tip the pot on its side and slide the mum out, supporting the base with your hand. If it resists, squeeze flexible plastic pots or run a knife around the inside edge of rigid pots. Never yank by the stems.
Step 4 - Inspect and trim roots. Look for white, firm roots (healthy) versus brown, mushy, or foul-smelling roots (rot). Trim dead material with clean scissors. If the root ball is densely circling, proceed to the loosening step below.
Step 5 - Position and backfill. Center the plant in the new pot at the same depth as before. Fill around the sides with fresh mix, tamping lightly with your fingers or a chopstick to eliminate large air pockets without compacting the soil.
Step 6 - Water lightly. Give enough water to settle the mix, not a full soak that saturates a root system in shock. Empty the saucer after thirty minutes.
Step 7 - Place in recovery conditions. Bright, indirect light for three to five days, protected from harsh afternoon sun and cold drafts. Resume normal care gradually as new growth appears.
Unpotting, Root Inspection, and Gentle Loosening
The most important technical step is how much you disturb the root ball. Chrysanthemums do not need bare-rooting - stripping all old soil away destroys fine feeder roots and extends recovery by weeks. Instead, keep most of the existing root ball intact and tease only the outer circling roots: use your fingers to loosen the bottom third and outer edge, pulling circling roots outward so they grow into fresh mix rather than continuing the spiral.
If the root mat is extremely dense - common on store-bought fall mums - you may score the bottom lightly with a clean knife in three or four vertical cuts, each about half an inch deep, to encourage new root tips without dismantling the ball. Remove any roots that are clearly dead or slimy. Healthy roots feel firm and snap crisply when bent; rotten roots feel mushy and often smell sour.
Dividing Overgrown Chrysanthemum Clumps During Repotting
Perennial garden mums that have grown for two or more seasons often develop multiple crown shoots connected by a shared root mass. Spring repotting is the ideal time to divide these clumps, which rejuvenates the plant, gives you free new plants, and prevents the hollow-center problem that old mum clumps develop when outer shoots thrive and the middle dies out.
To divide, remove the plant from its pot and wash or brush away enough soil to see natural separation points between crown clusters. Each division needs its own set of roots and several healthy shoots. Pull or cut apart with a clean knife - never tear blindly through the crown. Replant each division in its own appropriately sized pot using fresh mix, following the same depth and watering rules as a standard repot. Divisions may look wilted for several days; keep them in Chrysanthemum light guide and maintain even moisture without saturating the mix.
Skip division on fall florist mums you are trying to salvage for one season - they rarely have the multi-crown structure that makes division worthwhile, and the stress combined with post-bloom recovery is usually not worth the effort.
Post-Repot Care: Watering, Light, and Fertilizer Timing
The first two to three weeks after repotting define whether your chrysanthemum rebounds quickly or limps through the season. Treat this as a recovery phase, not business as usual.
Watering: Keep the mix evenly moist but not soggy. Check daily for the first week by inserting a finger an inch into the soil. Water when the top inch feels dry, using enough volume to moisten the new soil around the roots without flooding the pot. Avoid letting the plant wilt severely or sit in a saucer of runoff.
Light: Bright, indirect light protects recovering roots from the extra evaporation demand of full sun. After one to two weeks, when you see new growth or the plant stops wilting daily, gradually acclimate to the normal light level - for most mums, that means full sun outdoors or the brightest window available indoors.
Fertilizer: Do not fertilize for at least three to four weeks after repotting. Fresh cuts on roots combined with concentrated fertilizer salts cause burn and slow establishment. Once new shoots are actively growing and the plant has been in its pot for a month, resume a balanced liquid feed at half strength, or rely on slow-release granules if you incorporated them at repotting time. Clemson HGIC pinching and feeding schedules for garden mums assume established plants - wait until yours qualifies before pushing aggressive nutrition.
Temperature: Mums prefer moderate temperatures during recovery, roughly 10°C to 22°C (50°F to 72°F). Avoid placing a freshly repotted plant directly under a heating vent or on a cold windowsill at night.
Common Chrysanthemum Repotting Mistakes (and How to Fix Them)
Mistake 1 - Jumping two or more pot sizes. The fix is prevention: always go one size up. If you already overpotted, water sparingly, ensure maximum drainage and airflow, and consider repotting again into the correct size during the next spring window if the plant shows chronic wilting or crown softness.
Mistake 2 - Repotting during peak bloom. If you already did this, shear remaining flowers to redirect energy to roots, keep the plant in bright indirect light, and avoid fertilizer for a month. Accept that this season’s display may be compromised in exchange for long-term health.
Mistake 3 - Bare-rooting or aggressively washing roots. If recovery is slow after excessive root disturbance, maintain stable moisture and shade, and wait. Mums often rebound if crown tissue is intact, but recovery may take six weeks instead of three.
Mistake 4 - Burying the crown. If stems are soft at soil level after repotting, gently excavate until the crown is at the correct depth. If rot has started, trim affected tissue, dust cuts with cinnamon or sulfur if you have it, and repot into fresh, slightly drier mix.
Mistake 5 - Fertilizing immediately. Flush the soil with plain water if you fertilized too soon and see leaf tip burn or sudden wilt. Hold all feeding for four weeks and let roots heal.
Mistake 6 - Using a pot without drainage. Drill holes or repot into a proper container. No amount of gravel at the bottom compensates for a sealed base - water still pools at the root zone.
Indoor vs Outdoor Repotting: What Changes
The repotting technique is identical indoors and outdoors, but the aftercare environment differs. Outdoor mums in spring benefit from natural rainfall and ambient humidity, which often speeds root establishment, but they face night temperature swings and pest pressure from aphids and slugs. Protect freshly repotted outdoor mums from late frost with row cover or move them to a sheltered porch until nights stabilize above freezing.
Indoor mums face the opposite challenge: dry air, limited light, and the temptation to overwater in a cool room where evaporation is slow. Place indoor repotted mums in the brightest available spot, use a fan for gentle airflow if humidity is high, and resist repotting indoor fall mums until you can give them adequate light through spring - a dark winter repot followed by a dim windowsill is a common failure pattern.
For fall mums kept indoors temporarily before outdoor planting, treat extended indoor display as display-only and schedule the real repot for spring. University of Illinois Extension recommends overwintering potted mums indoors after hard frost in a cool, dark location, then bringing pots outdoors when spring warmth returns - not forcing a container upgrade while the plant is under low-light stress.
Recovery Timeline and When to Worry
Transplant shock on chrysanthemums is normal and usually mild. Expect some wilting or leaf droop for one to two weeks, especially if you repotted during active growth or teased a dense root ball. The plant should stabilize - not wilting daily, not dropping large numbers of leaves - within fourteen days.
Full root re-establishment typically takes four to six weeks in spring conditions. New shoots, firm stems, and fresh green leaves at the crown are the best recovery signals. Old damaged leaves will not revert to perfect color; focus on new growth instead.
When to worry: Sustained wilting beyond three weeks, spreading yellowing that starts at the crown rather than older lower leaves, a sour smell from the soil, or stems turning black and mushy at the base indicate rot or a pot still too large and wet. At that point, unpot, inspect roots, trim all rotten tissue, and repot into a smaller container with fresh, well-draining mix - even if it is not spring. Emergency root-rot repots beat leaving the plant in dying soil.
Conclusion
Chrysanthemum repotting comes down to three decisions: timing, pot size, and how much you disturb the roots. Repot in early spring as new growth emerges, move up only one to two inches in pot diameter, use a rich but well-draining mix with perlite or compost, and keep the crown at the same depth it sat before. Tease circling roots gently rather than bare-rooting, hold off on fertilizer for at least a month, and give the plant bright indirect light while it settles.
Garden mums kept as perennials reward this routine with fuller bloom and healthier foliage year after year. Fall florist mums are a shorter chapter - enjoy the display, plan the repot for spring, and do not expect a six-inch grocery-store pot to sustain a showy plant indefinitely without fresh soil and space. Watch for root-bound signals rather than calendar dates, and treat post-repot recovery as a distinct phase with lighter watering and no feeding rush. Get those pieces right and your mums will tell you the rest through new shoots in spring and stronger stems heading into autumn bloom.
When to use this page vs other Chrysanthemum guides
- Chrysanthemum overview - Start here for whole-plant context before deep-diving this topic.
- Chrysanthemum problems hub - Jump to symptom-specific fix guides when this care topic does not resolve the issue.
- Root Rot on Chrysanthemum - Escalate here when repotting adjustments are not enough.