Begonia Maculata Repotting: When and How
Begonia Maculata Repotting: When and How
Begonia Maculata Repotting: When and How
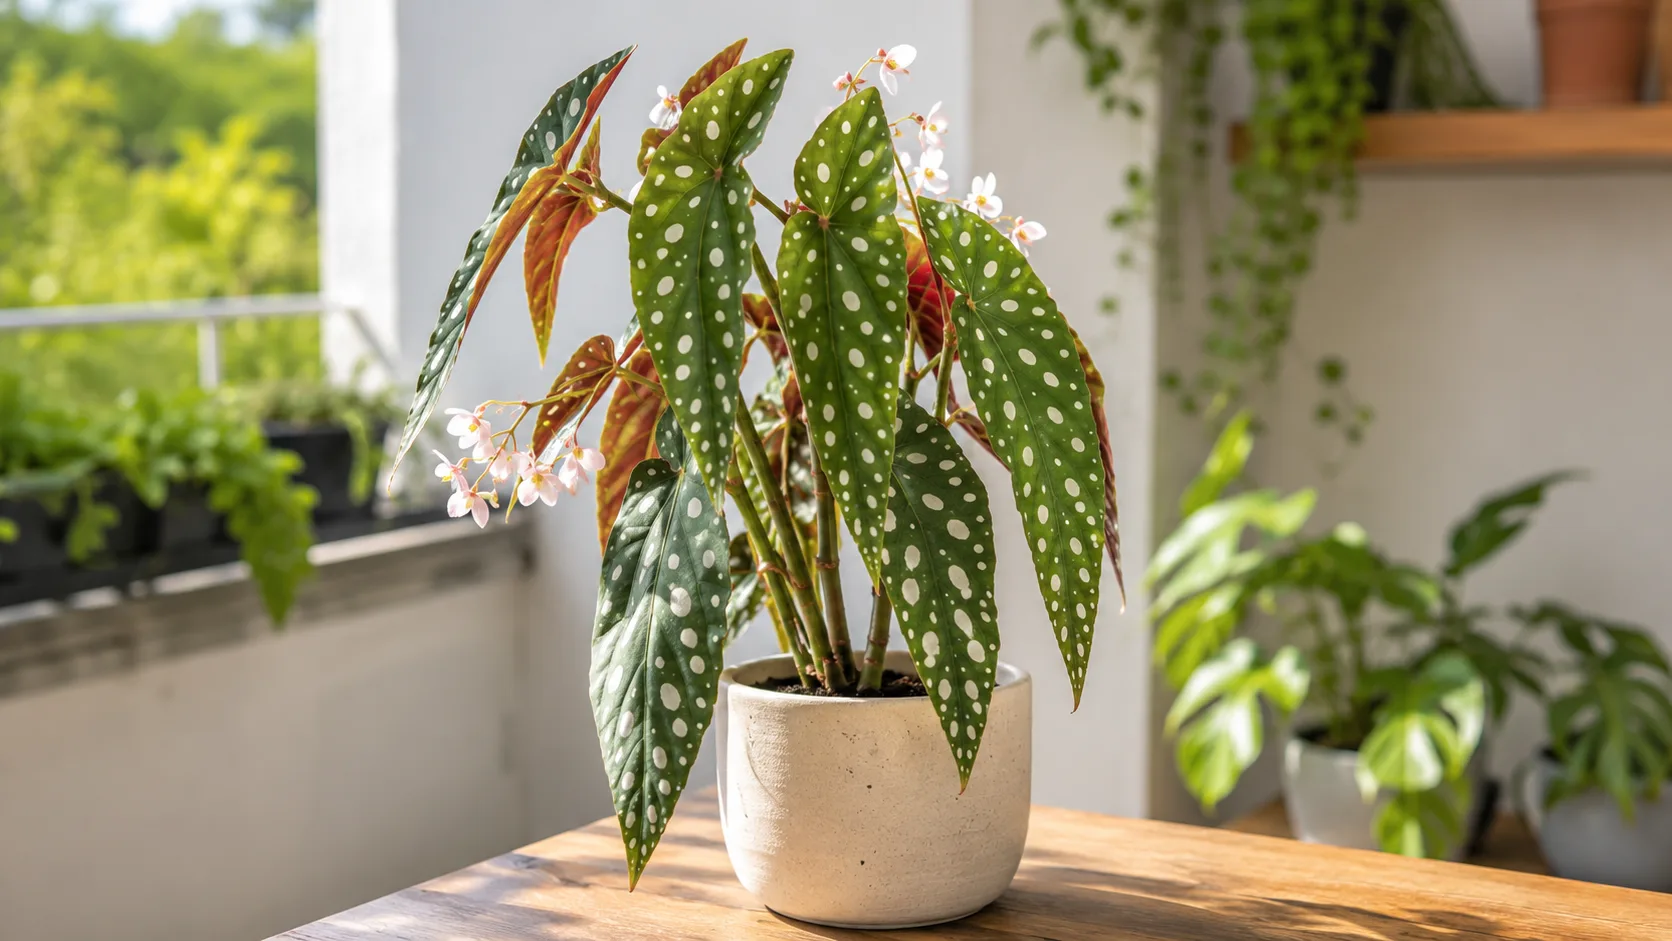
Begonia Maculata repotting is less about giving a dramatic upgrade every year and more about keeping the root zone airy, fresh, and matched to a cane begonia that naturally wants to stay slightly snug. The polka dot begonia - also called angel wing or spotted begonia - grows upright on bamboo-like stems that can reach 60–150 cm indoors, which means a bad repot does not just slow growth for a week. It can destabilize a tall plant, invite root rot on Begonia Maculata in unused wet soil, or trigger leaf drop that takes a full growing season to recover from. The goal is simple: refresh degraded mix, solve real root problems, and move up only when the root ball has earned the extra space.
This is a cane begonia (Begonia maculata), native to the humid forests of Southeast Brazil. In nature it grows in filtered light with fast-draining forest floor conditions. Indoor repotting should recreate that balance - moisture available when needed, oxygen around the roots at all times - not a bigger pot filled with dense, water-holding soil. Most failures come from treating it like a thirsty tropical foliage plant that wants maximum root room. It usually does not.
What Repotting Means for Begonia Maculata
Repotting means lifting the plant, inspecting the roots, replacing exhausted or compromised potting mix, and placing the plant back at the correct depth in a container suited to its current root mass. For Begonia Maculata, that process often includes refreshing soil in a same-size pot rather than automatically upsizing. Cane begonias frequently perform well when mildly root-bound because a compact root ball dries more predictably and uses the soil volume it actually occupies.
A full repot also gives you a rare look at what watering problems have been hiding. Roots tell the truth faster than leaves. White, firm roots with pale growing tips mean the plant has been coping. Brown, mushy roots with a sour smell mean the mix has been too wet too often, regardless of what the foliage looked like last week. Repotting is therefore both maintenance and diagnosis. You are resetting the environment the stems and leaves depend on, not just moving the plant to a prettier container.
Because Begonia Maculata carries soluble calcium oxalates, wear gloves if you have sensitive skin and keep cut stems away from pets. (ASPCA - Begonia toxic to dogs and cats) That toxicity does not change how you repot, but it is a reason to handle broken cane pieces carefully and wash hands after working with sap.
When to Repot Begonia Maculata
Most healthy Begonia Maculata plants need attention on a 1–2 year cycle, but calendar repotting is weaker than plant-led repotting. A begonia in Begonia Maculata light guide, warm stable temperatures, and a well-draining mix may happily go two years with only a top-dress. Another plant in a dense mix that stays wet may need rescue repotting in months. Watch the root zone and the way water moves through the pot before you watch the calendar.
Two categories matter: routine refresh when the plant is generally healthy but the soil is aging, and emergency repot when roots, moisture, or stability are already failing. Mixing them up leads to unnecessary disturbance or, worse, delayed intervention while rot spreads.
Routine Soil Refresh Every 1 to 2 Years
Routine repotting is for a plant that still looks decent above soil level but has been in the same mix long enough that structure is breaking down. Peat-heavy indoor mixes compress over time. Perlite settles. Bark decomposes. The result is a pot that either dries in odd layers or stays damp at the center even when the surface looks dry. Begonia Maculata is sensitive to that inconsistency because its roots need steady access to air.
Schedule a routine refresh in spring if the plant has been in the same container for 12–24 months, even when you do not see roots escaping drainage holes yet. BBC Gardeners’ World recommends repotting in spring into a slightly larger pot with perlite-amended compost. Lift the plant, remove old mix gently from the outer root zone, trim only dead material, and replant with fresh airy mix. Upsize only if the root ball is clearly larger than it was at the last repot. Many growers discover the current pot still fits fine; only the soil needed replacing.
Routine refresh is also the right moment to address a top-heavy cane begonia that wobbles in its pot. Sometimes the issue is not root volume but a narrow base supporting tall stems. In that case, choose a pot only slightly wider but heavier or lower-centered, and add a stake at repot time rather than jumping several sizes up.
Emergency Signs That Cannot Wait
Emergency repotting means the root environment is already hurting the plant. Do not wait for spring if you see multiple strong signals at once.
Repot soon - even in less-than-ideal season - when:
- Roots circle densely at the bottom or push through drainage holes while growth has stalled
- Water runs straight through the pot without moistening the root ball, often because mix has become hydrophobic or root-bound channels formed
- Soil smells sour or swampy even a day or two after careful watering
- Stems soften at the base, leaves yellow widely, and the mix stays wet in moderate light
- The plant dries out unusually fast every day despite a large soil volume, suggesting the root ball is mostly roots and little functioning mix
- Salt crust or algae on the soil surface indicates chronic moisture imbalance and depleted structure
If only one mild sign appears, investigate before repotting. A single yellow leaf after a cold draft is not a repot trigger. Three or more root-zone symptoms together usually are.
Best Season to Repot Polka Dot Begonia
The best time to repot Begonia Maculata is spring through early summer, when lengthening days and warmer room temperatures push new cane growth and leaf buds. RHS cane begonia guidance recommends repotting during summer when plants are in active growth. Active growth gives the plant the energy to repair fine root hairs and re-anchor itself. Houseplant growers often choose late March to June in the Northern Hemisphere, but the real signal is new shoots forming, not the date on the calendar.
Early fall can work as a second window if the plant is healthy and your indoor conditions remain warm and bright. Avoid repotting in late fall and winter unless you are performing an emergency rescue. Short days and cooler ambient temperatures slow cane begonias even indoors. A disturbed root system in that slowdown period sits in wet mix longer, which raises rot risk and extends transplant shock from days into weeks.
If you must winter-repot because of root rot, keep expectations modest. Trim damaged roots aggressively, downsize if needed, use very airy mix, and place the plant in the brightest stable spot you have without direct sun. Skip fertilizer for at least a month and water lightly only when the upper mix is just dry. Recovery may not show until spring regardless of how carefully you work.
Flowering is not a hard stop, but it is a stress add-on. Begonia Maculata often blooms on mature canes in spring and summer. Repotting during heavy bloom may cause flowers to drop. If the plant is not in crisis, waiting until bloom finishes is gentler. If soil is sour or roots are rotting, repot anyway and accept flower loss.
Choosing the Right Pot Size and Container
Pot choice is where Begonia Maculata repotting succeeds or quietly fails. These plants tolerate - and sometimes prefer - being slightly root-bound. What they do not tolerate is a large volume of wet, unused soil surrounding a modest root ball. The pot should match the roots you actually have, not the height of the stems or the size you hope the plant becomes this year.
The One-Pot-Size-Up Rule
When upsizing is truly needed, move up only one pot size: roughly 1–2 inches (2–5 cm) wider in diameter than the current container. That conservative step leaves enough room for new roots without creating a waterlogged outer ring the plant cannot reach for months. If your begonia is in a 6-inch pot and the root ball fills most of it, a 7- or 8-inch pot is appropriate. A 10-inch pot is not.
Height matters too. Cane begonias root relatively shallow compared to their vertical stems. A pot that is too deep holds a column of mix the lower roots never fully colonize. That lower layer can remain damp while the top dries, producing a plant that looks underwatering on Begonia Maculata and overwatered at the same time. Choose a pot whose depth is roughly similar to its width for most indoor specimens.
If you removed significant rotten roots during rescue repotting, downsize to match the remaining healthy root mass. Planting a reduced root system in the old large pot repeats the same moisture mismatch that encouraged rot.
Drainage, Depth, and Pot Material
Drainage holes are non-negotiable. A decorative pot without holes is a cachepot only. Grow in a nursery pot or drilled container that drains freely, then slip it into decor if you want. Begonia Maculata does not forgive standing water at the root line.
Terracotta and unglazed clay breathe well and pull moisture from the soil walls, which helps prevent soggy centers for growers who tend to water generously. They also dry faster, so you may need to water slightly more often in hot bright conditions. Plastic retains moisture longer and weighs less, which helps top-heavy cane begonias stay manageable. Neither material is automatically better; match it to your watering habits and room humidity.
A heavier pot can be worth more than a larger pot for tall Begonia Maculata. Long angel-wing stems act like sails. Light plastic containers tip easily after repotting when roots have not yet re-anchored. If wobbling is an issue, choose a sturdy base and add a slim stake at repot time, tying loosely below a node without crushing the cane.
Best Soil Mix for Begonia Maculata Repotting
The best repotting mix for Begonia Maculata is light, porous, and fast-draining while still holding a little moisture near fine roots. Pure bagged houseplant soil is often too dense on its own. Straight peat or straight coco holds water without enough air. Garden soil compacts and invites pests indoors. Aim for a blend that dries evenly from top to bottom within a reasonable window after watering.
Target pH 6.0–7.0, slightly acidic to neutral, which suits most peat- or coco-based indoor blends. NC State Extension lists acid (<6.0) to neutral (6.0–8.0) soil pH for cane begonias. The more important daily metric is drainage speed: after a thorough watering, excess water should exit within minutes and the mix should not stay waterlogged at the center three days later in normal indoor light.
Practical DIY Mix Recipes
Three dependable home recipes cover most situations:
Standard indoor blend: 2 parts quality peat- or coco-based potting mix + 1 part perlite + 1 part orchid bark. This is the default for balanced drainage and moisture retention in average humidity homes.
Fast-drain rescue blend: 1 part potting mix + 1 part perlite + 1 part orchid bark + a small handful of coarse sand or pumice per quart of mix. Use after root rot trimming or if you chronically overwater.
Moisture-retentive bright-window blend: 3 parts potting mix + 1 part perlite + 1 part coco coir chips. For growers in very dry air who still have excellent light and careful watering habits.
Pre-moisten mix before use until it is evenly damp, not dripping. Dry dusty mix can pull moisture from stressed roots after repotting. Wet mud-like mix excludes air from the start. The right feel is cool, slightly springy, and crumbly.
Do not rely on a layer of pebbles at the bottom of the pot to fix poor mix. Drainage comes from airy material throughout the root zone and a hole in the base, not from a false reservoir that can still saturate the soil above it.
Preparing Your Plant and Workspace
Good repotting starts before the plant leaves its pot. Water lightly the day before if the mix is bone dry so the root ball flexes without shattering. If the plant is already too wet from overwatering on Begonia Maculata, do not add more water; let the surface dry slightly while you prepare a drier replacement mix and clean tools.
Clear a stable workspace with room for the old pot, new pot, mix bowl, and the plant laid on its side without bending canes sharply. Angel-wing leaves are showy but brittle at the petiole. Support the stem when tipping the plant out. Have sterilized scissors or pruning shears, a chopstick or pencil for settling mix, fresh mix, and a stake with soft ties if the plant is tall.
Remove spent flowers and obviously dead leaves before repotting so you can see the base clearly. Do not strip healthy foliage just to reduce transpiration unless you are performing a major root rescue and the root loss cannot support the existing leaf mass.
Wash reused pots with hot soapy water and rinse well. Algae, salt crust, and old root fragments carry problems into fresh mix. New pots still benefit from a quick rinse to remove dust.
Step-by-Step Repotting Process
Work slowly. Begonia Maculata recovers faster from careful handling than from a fast bare-root overhaul. The sequence below assumes a routine or mild upsize repot; rescue repotting adds root trimming and possible downsizing steps noted inline.
Removing the Plant and Inspecting Roots
- Slide the plant out by tipping the pot and supporting the base with your hand. Squeeze flexible nursery pots gently. Run a knife around the rim of rigid pots if needed.
- Examine the root ball color and texture. Healthy roots are white to tan and firm. Mushy brown roots with a sour smell must be trimmed back to clean tissue.
- Tease outer circling roots lightly with fingers. Remove loose old mix from the sides and bottom without bare-rooting the entire ball. Keep the central root mass intact.
- Trim only dead or rotten material. Do not prune healthy roots aggressively for convenience. Each cut delays water uptake.
- Check cane bases where stems meet soil. Soft dark tissue here may indicate stem rot extending above the root zone. Trim to firm green or tan stem if rot is localized and rerooting is still viable.
If rot is extensive through most of the root ball and lower stems, propagation from healthy cane cuttings may be safer than saving the original base. Repotting cannot fix a plant with no functional roots or firm stem tissue.
Setting Depth and Settling Fresh Mix
- Place a mound of fresh damp mix in the bottom of the new pot so the prior soil line will sit 1–2 cm below the rim.
- Position the plant so the crown and stem bases sit at the same depth they were before. Burying canes deeper encourages rot at buried nodes.
- Fill around the sides in small additions, tapping the pot gently or using a chopstick to settle mix without compacting it into concrete.
- Leave a small watering gap below the rim so water does not overflow instantly and wash mix away.
- Stake if needed immediately, before roots swell and fix the plant in place. Tie loosely in a figure-eight pattern using soft plant tie or cut fabric.
Water lightly once to settle the mix, just enough that a little drains from the holes. Do not soak a freshly repotted begonia the way you would a established summer outdoor container. The disturbed roots need oxygen more than a flood.
Aftercare: Water, Light, and Humidity
The first 2–3 weeks after repotting are an adjustment period, not a growth peak. Place Begonia Maculata in bright indirect light - the same quality it thrived in before, or slightly gentler if the plant lost significant roots or leaves. Avoid direct sun on recovering foliage; it accelerates wilting when root uptake is temporarily reduced.
Water when the top 2–3 cm of mix feels just dry, then water modestly until a little drains out. Empty the saucer. The old schedule may no longer apply because fresh mix dries differently. Check with your finger, not the previous calendar.
Humidity near 50–70% helps reduce leaf edge stress while roots reestablish. Use a humidifier, pebble tray, or grouping with other plants if your air is dry. Avoid misting leaves directly as a humidity shortcut; wet foliage in lower airflow can encourage powdery mildew, especially on begonias.
Hold fertilizer for at least 3–4 weeks, longer if the plant still looks stressed at four weeks. Fresh mix usually contains some starter nutrition, and feeding before roots are active can burn tender tissue. When you resume, use a diluted balanced houseplant fertilizer at half strength.
Keep temperatures roughly 65–80°F (18–27°C) and avoid cold drafts from windows or air conditioning while the plant is stabilizing. Begonia Maculata is not frost-hardy indoors or out in temperate climates; stable warmth matters more than a perfect humidity number.
Common Repotting Mistakes to Avoid
Most repotting failures are predictable. They come from oversized pots, dense soil, rough handling, or impatient feeding - not from mysterious begonia temperament.
Jumping multiple pot sizes is the number one mistake. More soil holds more water around fewer roots. The plant looks fine for two weeks, then yellows from root decline. One size up only.
Using heavy unamended potting mix collapses and suffocates roots within months. Always add perlite and bark or an equivalent aerator.
Repotting into dry mix then flooding shocks roots. Pre-moisten mix and water lightly after.
Fertilizing immediately because you want fast recovery. Recovery speed is limited by root growth, not nitrogen.
Repotting every time leaves droop when the real issue is cold, low light, or overwatering in the existing pot. Fix the care mismatch first.
Burying cane stems to stabilize a tall plant creates buried-node rot. Use stakes instead.
Ignoring drainage holes for aesthetics turns repotting into a countdown to rot.
Overpotting and Damaging Cane Stems
Overpotting and stem damage often happen together on large specimens. A grower chooses a much bigger decorative pot for visual balance with tall angel-wing leaves, then forces the small root ball into the center and packs wet mix around it. The stems look dramatic. The roots sit in a cold, soggy doughnut of soil.
Stem damage happens when the plant is yanked by the cane instead of supported at the base, or when it is left lying on a table with heavy stems bent upward. Kinked canes do not always snap immediately; they may wilt partially and fail to move water to leaves above the injury.
The fix is prevention: right-size pot, support stems during handling, stake after repot, and water as if the plant has fewer roots than it did - because it effectively does until new white tips appear.
Recovery Timeline and Signs of Success
Mild transplant shock on Begonia Maculata - a few dropped leaves, slight wilting, or a brief pause in new growth - commonly lasts 1–2 weeks when repotting was timed well and the root damage was minimal. That reaction is adjustment, not necessarily failure.
Full root reestablishment usually takes 4–6 weeks in warm bright conditions. You know the plant is winning when:
- New leaves emerge at cane tips with normal size and silver spotting
- Existing firm leaves stop wilting between waterings
- White root tips appear when you gently lift the plant later or see them near drainage holes
- The pot weight increases gradually as roots colonize fresh mix
- Begonia Maculata watering guide stabilizes instead of swinging between bone dry and constantly wet
Call it a problem if widespread yellowing, stem softening, or heavy leaf drop continues beyond 2–3 weeks, or if the mix stays wet in moderate light while leaves collapse. Unpot again, inspect roots, trim rot, downsize, and refresh with faster-draining mix.
Old damaged leaves will not magically green up. Judge recovery by new growth, not by rehabilitating every blemished older leaf.
Conclusion
Begonia Maculata repotting works best when you treat it as root-zone maintenance for a cane begonia that likes to stay slightly snug, not as an annual upgrade to the biggest pot you can find. Repot on a 1–2 year rhythm or when roots, drainage, or soil breakdown demand it. Time major work for spring to early summer, move up only 1–2 inches in pot width, and use an airy mix of potting soil amended with perlite and orchid bark. Handle stems gently, keep the crown at the same depth, water lightly while roots recover, and wait at least a month before fertilizing.
Most leaf drop after a careful spring repot is temporary. Persistent decline means the pot, mix, or root trim needs another look. When you match container size to actual roots, prioritize drainage over convenience, and read recovery through new cane growth, polka dot begonia repotting becomes a low-drama routine that keeps the plant stable, upright, and worth the space it takes in your home.
When to use this page vs other Begonia Maculata guides
- Begonia Maculata overview - Start here for whole-plant context before deep-diving this topic.
- Begonia Maculata problems hub - Jump to symptom-specific fix guides when this care topic does not resolve the issue.
- Root Rot on Begonia Maculata - Escalate here when repotting adjustments are not enough.