Tulsi Repotting: When, How & Mistakes to Avoid
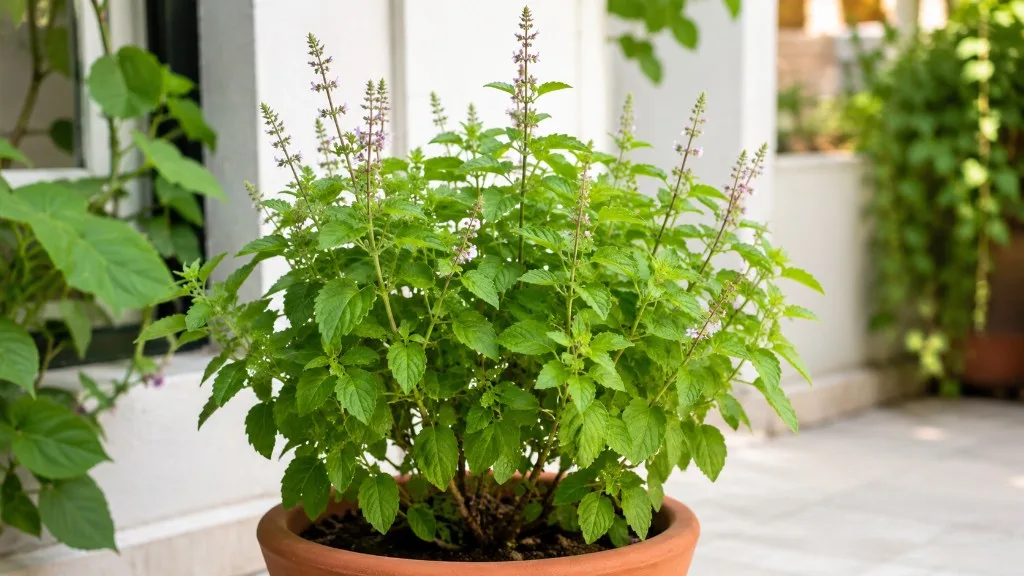
Tulsi Repotting: When, How & Mistakes to Avoid
Tulsi Repotting: When, How & Mistakes to Avoid
A tulsi plant that wilts minutes after you water, dries out twice as fast as it did last month, or stops producing the aromatic leaves you grow it for is not always suffering from bad light or inconsistent feeding. Often the real problem sits below the soil line: a fibrous root mat pressed against the pot wall, a substrate that no longer drains, or a container so large that the lower half stays wet long after the surface feels dry. Repotting is the reset that fixes those root-zone problems - but only if you treat tulsi as the fast-growing warm-season herb it is, not as a slow foliage houseplant that tolerates a random calendar upgrade whenever you find a prettier pot.
Tulsi - also called holy basil - is Ocimum tenuiflorum, a member of the Lamiaceae (mint) family native to tropical and subtropical South and Southeast Asia. The North Carolina Extension Gardener Plant Toolbox describes it as an aromatic annual or short-lived perennial subshrub with rapid growth, erect multi-stemmed habit, and a preference for Tulsi light guide, high organic matter loam, and good drainage. That biology changes every repotting decision: pot size, soil texture, seasonal timing, and how aggressively you disturb the root ball. Tulsi develops a dense, shallow, fibrous root system that spreads outward and fills a container quickly - which is why a fast grower in active warmth may need annual repotting, while a plant in cooler or dimmer conditions might go two seasons between moves.
If symptoms persist, see the Leggy Growth on Tulsi guide.
Why Tulsi Repotting Works Differently Than Slow Houseplants
Most slow houseplants let you ignore the pot for years. Tulsi does not. Grown for leaf production, it can reach 1 to 2 feet in a single warm season, and its roots match that speed. Holy basil in a small starter pot can become root-bound within weeks, drying out constantly and pushing toward flowering before you get a useful harvest.
That growth rate drives four practical rules. First, treat spring and the warm growing season as the default window. Second, move up only one pot size - about 2 to 5 cm (1 to 2 inches) wider - because excess soil holds moisture roots cannot use yet. Third, use well-draining loam enriched with compost, not dense peat-only mix. Fourth, expect annual repotting or a same-size refresh for vigorous plants in warm homes and sunny balconies - not the every-three-years schedule that suits slow growers.
Repotting also refreshes decomposed soil. Organic matter breaks down over 12 months in a warm pot, drainage slows, and fibrous roots lose air pockets. A fresh pot lets you inspect for hidden rot or salt crust before damage spreads.
How Often to Repot Tulsi
The practical answer: every 1 to 2 years for most home growers, and potentially every year for fast-growing specimens in warm, bright conditions. India-focused tulsi guides often recommend annual repotting in February or March with a pot 2 to 3 cm larger and fresh mix - a schedule that matches how quickly tulsi fills containers on balconies and sunny terraces in South Asia. In temperate homes where tulsi slows through short winter days, every two years may suffice if the plant still drains well and pushes steady new growth each warm season.
Tulsi does not need repotting on a fixed calendar date if the root zone is healthy. The goal is to refresh degraded soil, correct a failing root zone, or provide modest new room when roots circle the pot - not to give unlimited space “just because it is spring.” A seedling you started last week does not need a full repot; it needs a gradual pot-up as true leaves develop. A store-bought tulsi in its first two weeks at home does not need disturbance yet - let it acclimate to your light and Tulsi watering guide first.
If the mix is one season old but the plant looks vigorous, a same-size refresh - same pot, fresh substrate, light root tease - is often more useful than upsizing. Fast growers that are harvested heavily may benefit from annual refresh even when roots are not yet escaping drainage holes, because depleted soil shows up as pale new leaves and weak aroma before roots peek out the bottom.
Seven Signs Your Tulsi Needs a New Pot
Roots, soil, and the plant’s top growth will tell you when the calendar is wrong. Watch for these seven signals.
- Roots visible at drainage holes or circling the root ball. A few white tips peeking out are a warning. A dense mat wrapping the entire root ball means the plant has run out of usable soil volume.
- Water running straight through without wetting the root zone. This usually means the mix has broken down or pulled away from the pot walls, so water channels down the sides while the center stays dry.
- Soil drying out unusually fast. A pot that needed water every four to seven days indoors now demands it every one to two days. That often indicates more root than soil.
- Wilting shortly after thorough watering. When roots are so crowded they cannot absorb moisture efficiently, the plant collapses even though you watered - a classic root-bound signal on fast herbs.
- Stalled leaf production despite good light and feeding. When a healthy-looking tulsi refuses to push harvestable new leaves through an entire warm season, exhausted or compacted soil and restricted roots are prime suspects.
- Sour, musty, or swampy-smelling substrate. Anaerobic breakdown in the pot means the root zone is losing oxygen even if the leaves still look acceptable.
- Salt crust or algae on the soil surface with slowed growth. Mineral buildup and algae often accompany old, compacted mix that no longer supports vigorous fibrous roots.
Any one of these signs justifies a repot or same-size refresh. Two or more, and the plant is overdue. Do not wait for every leaf to yellow before you act - tulsi drops quality quickly once the root zone is compromised, and a leggy, flowering plant is harder to bring back to leaf production than a slightly crowded one repotted on time.
Best Time of Year to Repot Tulsi
Timing matters because tulsi roots most actively when warmth and daylight are rising, not when the plant is coasting through short, cool days. Repot when the plant can grow new roots into fresh mix, and recovery takes days to a few weeks. Repot when it cannot, and the same disturbance can cost you a month of harvest or push the plant toward premature flowering.
Why spring and the warm season are ideal
Spring and early summer are the default repotting window for tulsi indoors and on balconies. Multiple sources - including India-focused growing guides and general holy basil container references - converge on this period because the plant is already pushing new stems and leaves, root tips are active, and the root system has energy to recover from transplant shock. The practical sweet spot is when nighttime temperatures stay consistently above 50°F (10°C) and you see fresh growth at stem tips. For North India, February and March are widely cited as the best months; for temperate homes, repot when your indoor tulsi resumes steady growth after winter slowdown - often late March through June, depending on your room temperature and light.
Morning or late-afternoon repotting reduces immediate stress on a heat-loving herb. After the move, keep the plant in bright light but out of harsh midday sun for several days while roots settle. Tulsi’s comfort zone runs roughly 20 to 35°C (68 to 95°F); repotting inside that range gives the fastest recovery.
When winter repotting is unavoidable
Two situations override the calendar. The first is active root rot - soft, mushy, foul-smelling roots, wilting leaves, and saturated soil that will not dry. Waiting for spring will cost the plant. Repot immediately into fresh, lightly moist mix, trim all compromised tissue, and accept slower recovery in cool conditions. The second is a catastrophically failing root zone - a pot that will not drain, soil that has turned to mud, or a container that cracked and exposed roots. In both cases, repot now, provide stable warmth if possible, and water lightly.
Routine winter repotting for convenience alone is a mistake. Tulsi in cool, dim conditions is not building roots aggressively; disturbed roots sit in wet fresh mix without the growth rate needed to colonize it quickly. If you must repot off-season, choose a same-size refresh rather than a larger pot, skip fertilizer for at least a month, and keep the plant as warm and bright as your home allows without scorching leaves.
Choosing the Right Pot - Size, Material, and Drainage
The new pot does not need to be decorative. It needs to be one size larger in diameter, equipped with a drainage hole, and made of a material that matches your watering habits and climate.
The one-size-up rule for fast-growing herbs
Move up one pot size at a time - approximately 2 to 5 cm (1 to 2 inches) wider in diameter than the current container. If tulsi is in a 15 cm (6 inch) pot, the next step is roughly 17 to 20 cm (7 to 8 inches), not a 30 cm (12 inch) bowl “so you never have to repot again.” Oversized pots are the single most common reason tulsi rots after repotting. A large volume of fresh, moist soil surrounds a small root system. The mix stays wet in the center while the surface dries, creating anaerobic conditions fibrous herbs cannot tolerate.
For seedlings, pot up in smaller increments - from a 7 cm seed tray cell to a 10 cm pot, then to a 15 cm final container once the plant has several sets of true leaves and a visible root ball. For established plants, a mature productive tulsi often performs well in a 25 to 30 cm (10 to 12 inch) pot with good drainage; that is frequently the practical ceiling for a single specimen unless you are growing a multi-stemmed clump for display rather than intensive leaf harvest.
Terracotta dries evenly and suits growers who tend to overwater; plastic holds moisture longer and suits hot balconies where pots dry in hours. Glazed ceramic works if it has a drainage hole and you monitor weight rather than watering on autopilot. Whatever material you choose, a drainage hole is non-negotiable - holy basil wilts from drought but rots quickly from waterlogging, especially in cool weather when evaporation slows.
Best Soil Mix for Tulsi Repotting
The best repotting mix for tulsi is fertile, well-draining, and loam-based - rich enough to support fast leaf production, open enough to keep fibrous roots breathing. Heavy garden clay, dense peat-only blends, and standard indoor potting mix used straight from the bag are usually too compacted or too moisture-retentive for a sun-loving herb in a warm pot.
Loam-perlite-compost blend for home growers
A proven home blend aligned with tulsi’s needs: garden loam or quality potting compost as the base, coarse sand or perlite at roughly 20%, and well-rotted compost or vermicompost for fertility. NC State Extension lists holy basil soil texture as High Organic Matter Loam (Silt) Sand with Good Drainage. Target pH 6.0 to 8.0; tulsi tolerates a wide pH range and rarely needs hobbyist pH adjustment if the mix is fresh and compost-based. The mix should feel crumbly, not muddy, and drain within a minute or two of watering. Do not reuse old soil or add a gravel layer at the pot bottom - both create drainage problems rather than solving them.
Preparing Your Tulsi 24 Hours Before the Move
A smooth repot starts before the plant leaves its pot. Water lightly the day before if the mix is bone dry, because dry fibrous roots snap more easily than slightly moist ones. Do not soak the plant immediately before repotting unless you are rescuing hydrophobic, salt-crusted soil - soggy root balls fall apart and make handling harder.
Choose a clean, stable workspace with good light. Tulsi stems are somewhat brittle when large; work over a tray or newspaper so you can see fallen leaves, root pieces, and old mix clearly. Gather tools first: new pot, pre-moistened mix, clean scissors, chopstick, and room-temperature water. Have the new pot partially filled with a shallow layer of fresh mix before you unpot - tulsi roots dry quickly when left bare-root in air-conditioned rooms.
If you harvest regularly, take a moderate harvest the day before rather than leaving the plant heavy with old woody stems that will sap energy during recovery. Remove flower buds if present - once tulsi commits to flowering, leaf production declines, and repot stress on a blooming plant extends recovery.
Step-by-Step: How to Repot Tulsi
Follow these steps in order. The goal is minimal root disturbance, correct planting depth, and a stable plant that does not wobble in its new home.
Step 1: Slip the plant out of its current pot. Tip the container on its side and gently coax the root ball free. If it resists, squeeze a flexible plastic pot or run a chopstick around the inside edge. Never yank the plant by its stems - tulsi breaks easily at the base, and damaged crowns recover slowly.
Step 2: Inspect the roots. Healthy roots are white to tan and firm. Trim any black, mushy, or foul-smelling sections with clean scissors. If you find extensive rot, treat this as a rescue repot: cut back to healthy tissue, reduce top growth proportionally, and accept that recovery will take longer.
Step 3: Loosen old soil gently. Shake or brush away spent mix from the sides and bottom of the root ball. Do not bare-root the plant completely unless rot forces you to. Keep some original soil around the fine roots to reduce shock. Tease out only circling roots at the bottom and edges with your fingers or a chopstick.
Step 4: Position the plant at the correct depth. Place tulsi in the new pot so the root crown sits at the same depth it occupied before - do not bury stems deeper than they were growing. The fibrous roots spread just below the surface; burying the crown invites stem rot in wet mix.
Step 5: Add fresh mix around the roots. Spoon mix around the sides and beneath the root ball. Use a chopstick to settle soil into gaps without compacting. Leave about 2 to 3 cm (1 inch) of space below the rim for watering.
Step 6: Firm lightly, not heavily. A gentle tap on the bench settles the pot; thumb pressure across the surface compacts air pockets fibrous roots need. The plant should stand upright without wobbling.
Step 7: Water lightly. Give a moderate amount of room-temperature water around the root zone, not a flood. The goal is to moisten new mix around the roots without saturating the entire pot on day one. Let excess water drain fully and empty the saucer.
Step 8: Place in bright light with protection from harsh sun. Keep the repotted plant in full sun to bright indirect light, but shield it from scorching midday sun for three to seven days while roots re-establish. On a hot balcony, temporary light shade prevents wilting on the first warm afternoon.
Step 9: Hold off on fertilizer. Do not feed for at least four weeks, and preferably six. Fresh compost-based mix already carries nutrients, and the root system needs time to heal. Fertilizing too early burns tender new root tips on a plant already managing transplant stress.
Repotting Seedlings vs Established Tulsi Plants
Seedlings and mature plants follow different rules. A tulsi seedling with two to three sets of true leaves is ready to move out of a seed tray or small cup into a 10 to 15 cm (4 to 6 inch) pot with the same well-draining mix. Wait until night temperatures exceed 50°F (10°C) if you are moving seedlings outdoors or to an unheated balcony - cold soil on warm tops kills small roots faster than it hurts established plants.
Handle seedlings by the root ball and lower stem, not by cotyledons or first true leaves. Disturb roots minimally; a seedling’s entire root system may fit in a tablespoon of soil. Water gently after pot-up and keep humidity slightly higher for a few days - a clear humidity dome or grouped pots on a tray helps - but do not leave seedlings in sealed bags where mold develops.
Established tulsi repotting assumes a woody lower stem, multiple branches, and a root ball that may need teasing. These plants recover faster in warm season but also lose more transpiration surface; prune back the longest leggy stems by one third if the plant is top-heavy relative to the root ball after division or heavy root trim. If you are growing tulsi as a perennial clump in frost-free regions, you can divide crowded multi-stemmed plants during the same spring repot, ensuring each division has roots and several healthy stems.
Aftercare for the First Four to Six Weeks
The repot is not finished when the plant is in its new pot. Aftercare determines whether your tulsi pushes aromatic new leaves within two weeks or sulks until the next warm spell. Treat the first month as a recovery period, not a return to normal care on day three.
Keep the plant in full sun to bright indirect light at 20 to 35°C (68 to 95°F) with 40 to 60 percent humidity if possible. Expect mild transplant shock - slight wilting or a brief pause in growth - for one to two weeks. New leaves at stem tips are the clearest recovery signal. Do not fertilize for four to six weeks, and do not repot again if the plant looks sad - double disturbance is worse than patience.
Pinch new tips lightly once growth resumes to encourage bushiness, but avoid heavy harvest until you see stable new leaves for at least two weeks. Remove flower buds as they appear if your goal is leaf production; flowering after repot is a stress response as well as a natural life-cycle shift.
Watering rhythm after the transplant
Watering after repotting is a light-touch rhythm, not your old schedule applied blindly. Check the top 2.5 cm (1 inch) of mix with your finger. Water when that layer feels dry, using room-temperature water applied gently around the root zone. The first few waterings should be moderate - enough to moisten new mix around the roots, not enough to leave the pot heavy and sodden for days.
Fresh mix may dry at a different rate than the old soil, so let the top inch and pot weight guide you rather than habit. Tulsi prefers consistent moisture without waterlogging; the repot window is when growers most often overcorrect with heavy watering “to help it settle.” After four to six weeks of active new growth, return to your normal watering rhythm and resume fertilizer at half strength before moving to full feeding.
Common Repotting Mistakes to Avoid
Most tulsi repotting failures trace back to a short list of repeatable errors. Avoid these and your odds of a smooth recovery rise sharply.
- Choosing a pot that is too large. Excess soil stays wet. Use one size up only.
- Repotting in winter without cause. Off-season transplants stall unless rot or pot failure forces your hand.
- Bare-rooting a healthy plant. Stripping all soil damages fine root hairs and extends shock. Keep some original mix around the roots.
- Using dense, unamended potting soil or heavy clay. Suffocates fibrous roots. Use loam, compost, and perlite or sand.
- Fertilizing too soon. Wait at least four weeks. Fresh mix plus fertilizer on disturbed roots causes burn.
- Waterlogging the fresh pot. A heavy first soak invites rot. Water lightly and let drain.
- Repotting during heavy flowering. Flowering diverts energy; bud removal and repot on the same day doubles stress.
- Ignoring drainage holes. A decorative pot without drainage is a standing-water container. Use a functional inner pot or drill a hole.
- Burying the crown deeper than before. Stem rot follows wet mix against woody tissue.
- Placing the plant in scorching midday sun immediately after repotting. Bright light with brief shade protection prevents wilting on day one.
Confirm pet safety with a current authoritative source such as the ASPCA basil listing before placing tulsi within reach of cats or dogs.
Troubleshooting Slow Recovery After Repotting
If your tulsi still looks unhappy three weeks after repotting, work through this diagnostic list before you change anything else.
Wilting with wet soil points to rot, overwatering, or an oversized pot - inspect roots and trim soft tissue, then reduce watering and improve light and airflow. Wilting with dry soil may mean underwatering or hydrophobic mix that channels water down the sides; water slowly in passes until the root ball absorbs moisture. Yellowing lower leaves without new growth often signals overwatering in a pot too large, or repotting too deep - check depth and pot size first. No new growth after six weeks in warm season usually means insufficient light, a pot that is too large, or cool night temperatures below the plant’s active range. Treat any pests without repotting again.
If you followed one-size-up and warm-season rules, slow recovery is often patience. Tulsi rebounds faster than woody houseplants but slower than a lettuce seedling - give stable conditions another two to three weeks before changing light, pot, or soil again. When recovery fails entirely, taking stem cuttings from the healthiest remaining growth and rooting them in fresh mix is a reliable backup that sidesteps a compromised root ball.
How Repotting Connects to Pruning, Harvest, and Flowering
Repotting does not happen in isolation on a plant you grow for leaves, tea, and kitchen use. It sits on the same calendar as pinching, harvest, and flower-bud removal. The best sequence for a productive tulsi plant: repot in spring, let it settle for two to three weeks, then resume regular pinching every two to three weeks to keep the plant bushy. Heavy harvest immediately before or after repotting strips resources the roots need for recovery.
Once tulsi flowers and sets seed, leaf production declines - repotting a plant already shifting toward reproduction rarely restores juvenile vigor. If your tulsi is woody, leggy, and blooming despite pinching, a spring repot plus hard prune may help, but sometimes starting fresh from cuttings in new mix yields a better harvest plant than rescuing an exhausted specimen. Repotting refreshes the soil that supports rapid regrowth after each harvest; depleted mix is why older tulsi pots produce thin, less aromatic leaves even when watering and light look correct.
In Indian balcony culture, tulsi often occupies a dedicated sunny spot year-round in frost-free zones. Annual February–March repotting there aligns with the strongest growth pulse before summer heat. In temperate homes where tulsi slows indoors in winter, sync repot with the first sustained warm spell you see new growth - not with a calendar date that ignores your room conditions.
Conclusion
Tulsi repotting is not a generic “bigger pot, fresh soil” job. It is a warm-season, root-aware transplant for a fast-growing fibrous herb: repot every 1 to 2 years - often annually for vigorous plants - when roots circle, soil fails, or growth stalls, in spring and the warm growing season, into a pot only one size larger (2 to 5 cm wider) with a drainage hole, using a well-draining loam mix with compost and perlite or sand. Keep the crown at the same depth, tease circling roots without bare-rooting, water lightly, hold off on fertilizer for four to six weeks, and protect from harsh midday sun for the first week while roots re-establish.
Done right, a tulsi repot is a quiet annual or biennial refresh that keeps leaf production strong and the root zone airy through another harvest season. Done wrong - too big a pot, too wet too soon, too cold a season - it is the moment a productive holy basil plant first meets the rot and shock conditions that turn a fast grower into a leggy, flowering specimen you wish you had repotted one size up, one warm month earlier. The plant will tell you when it needs the move. Your job is to answer with a modest pot, fresh open mix, and the patience to let it recover on herb time - fast when warmth supports it, slow when the season does not.
When to use this page vs other Tulsi guides
- Tulsi overview - Start here for whole-plant context before deep-diving this topic.
- Tulsi problems hub - Jump to symptom-specific fix guides when this care topic does not resolve the issue.