Syngonium Pink Propagation: Stem Cuttings Guide
Syngonium Pink Propagation: Stem Cuttings Guide
Syngonium Pink Propagation: Stem Cuttings Guide
What Syngonium Pink Is and Why Node Cuttings Work
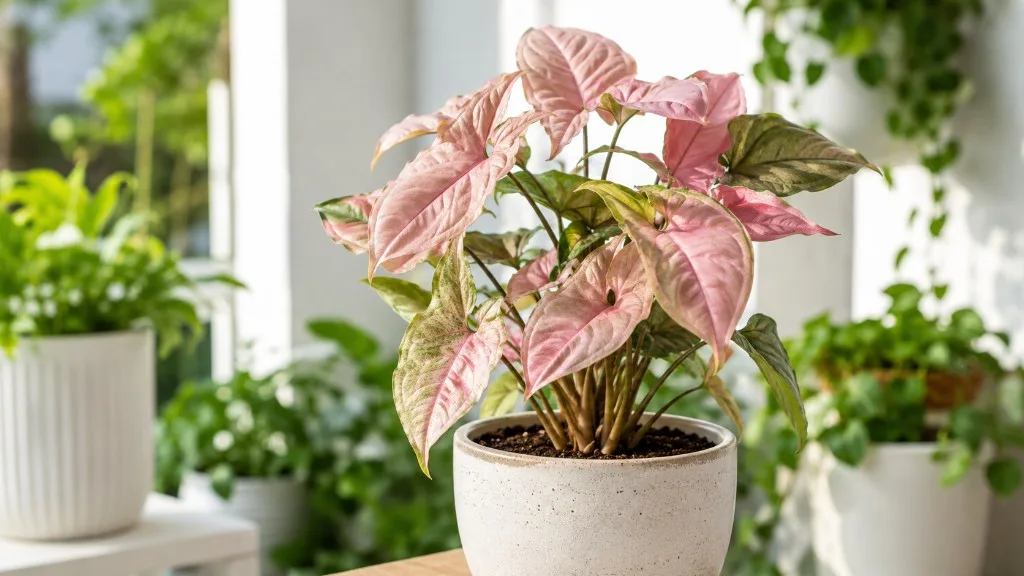
Syngonium Pink is the trade name most shops use for pink-toned cultivars of Syngonium podophyllum, the arrowhead vine native to tropical forests from Mexico through Central America into parts of South America. Missouri Botanical Garden and other botanical references describe S. podophyllum as a climbing or scrambling aroid whose juvenile leaves are often arrow-shaped and whose mature leaves can become lobed and more complex as the plant climbs. Pink selections - whether labeled ‘Pink’, ‘Pink Perfection’, or sold beside the paler Neon Robusta - are chosen for blush, salmon, or rosy new growth rather than for a different propagation biology. Genetically they are still Syngonium podophyllum, and they propagate the same way: vegetatively, from stem cuttings that include at least one node.
A node is the slightly swollen ring on a stem where a leaf attaches and where the plant keeps dormant meristem tissue capable of producing both roots and a new shoot. On Syngonium, those roots are adventitious - they form from stem tissue rather than from a pre-existing root system - which is why a bare node submerged in water or buried in moist mix can sprout white roots within days under warm, bright conditions, as UF/IFAS EP244 describes for single-node stem sections placed under mist. The section of stem between two nodes is the internode; it stores some energy but cannot restart a plant on its own. That distinction is the entire reason node cuttings work and leaf-only cuttings fail. If you pin a single pink leaf in water with no node attached, you may see roots from the petiole base in rare cases, but you will not get a vine that continues growing. For reliable Syngonium Pink propagation, you need stem with nodes.
Pink cultivars add one practical wrinkle worth stating upfront: color is light-dependent. New leaves on a propagated cutting may look greener or paler than the parent if your home is dimmer than the nursery bench where the mother plant was grown. That is not propagation failure; it is the same variability sellers warn about when comparing Pink Syngonium to Neon Robusta. Judge success by firm new growth and active nodes, not by whether the first rooted leaf matches a photo online.
If symptoms persist, see the Leggy Growth on Syngonium Pink guide.
How Stem Cuttings Compare to Other Propagation Options
For Syngonium Pink at home, stem cuttings at nodes are the default method because the plant naturally vines and produces long internodes studded with nodes you can segment. Division of a multi-stem pot is possible during Syngonium Pink repotting guide if several rooted crowns have formed, but many pink cultivars are sold as a single trailing or upright stem in a small pot, which leaves little to divide until the plant has been grown on for a season. Seed propagation is irrelevant for named cultivars - seedlings will not reproduce the parent’s pink selection reliably - and tissue culture is a nursery technique, not a windowsill workflow.
Within stem cuttings, you choose where the node contacts moisture: water, potting mix, or sphagnum moss as a middle ground. Water propagation offers visibility; you see roots form and catch rot early. Direct soil propagation skips the water-to-soil transition that sometimes snaps fragile roots. Sphagnum holds even moisture around the node without the anaerobic risk of a sealed water column if you tend to forget water changes. All three routes depend on the same non-negotiable: at least one node must stay consistently moist and warm enough for cell division.
Air layering - rooting a node while it is still attached to the parent - works on Syngonium but is slower to set up and rarely necessary when cuttings root easily. The decision framework most home growers use is simple: if you want the fastest feedback loop and enjoy watching roots, use water; if you want one less transplant step and your mix drains well, use soil; if you overwater soil but forget to change water, use lightly damp sphagnum in a clear box. Stem cuttings at nodes beat every other home method on speed, yield, and beginner success rate for Pink Syngonium.
Reading Nodes on a Pink Arrowhead Vine
Before you cut, spend a minute tracing the stem with your finger. On a healthy Syngonium Pink vine, nodes appear as slight ridges or bumps just above where each leaf petiole meets the stem. You may also see a tiny brown nub or aerial root initial at some nodes, especially on mature vines - that is a good sign the node is active. The internode between nodes is smoother and narrower; cutting only internode tissue produces a stick that cannot root.
Each node typically carries one leaf (sometimes a small sheath or cataphyll at the growing tip). For propagation, you want a section that includes one to two nodes and enough stem length to anchor the cutting in a jar or pot without submerging the foliage. A common workable size is 10–15 cm (4–6 inches) total length with two nodes: one node goes into water or soil while the upper node keeps a leaf or two in the air for photosynthesis. Single-node cuttings can succeed - hobbyists routinely root them - but they have less backup tissue if the submerged node rots.
On leggy Pink Syngonium, nodes may be spaced far apart because the plant stretched in low light. That is still usable material; you simply get a longer cutting with the same node count. After rooting, you can pinch the tip to encourage bushier growth. If you cannot find an obvious bump, look where leaves attach: the node is always at that junction, never midway along a bare internode. Marking the node with a loose tie or chalk before cutting prevents the common error of trimming too high and accidentally leaving the node on the parent while shipping a useless internode to the propagation jar.
When to Propagate Syngonium Pink
Timing is not superstition; it is stored energy. Syngonium podophyllum roots fastest when the parent is in active growth - usually spring through early autumn in temperate homes, whenever the plant is pushing firm new leaves and the pot dries on a predictable rhythm. NC State Extension lists stem cutting as a recommended propagation strategy for Syngonium Pink overview.
The best signal on your Pink Syngonium is new leaf unfurling within the last two to four weeks, with petioles standing firm and color looking normal for your light level. Avoid taking cuttings immediately after purchase, after repotting, or while the plant is yellowing from overwatering. A stressed parent donates stressed cuttings; weak tissue rots before it roots. Winter propagation can work if you supply steady warmth (21–27°C / 70–80°F) and Syngonium Pink light guide, but expect timelines to stretch toward the lower end of the range and accept a higher rot rate if the room drops below 18°C at night.
If you are pruning anyway to control a vining Pink Syngonium, treat those trimmings as propagation material the same day rather than letting them wilt on the counter. Fresh cuts root faster than desiccated ones. Match propagation to the plant’s rhythm, not the calendar alone - a plant under grow lights in February may root as quickly as one in June near a bright east window.
Tools, Safety, and Workspace Setup
Gather tools before you cut so stem tissue is not drying while you hunt for scissors. You need sharp bypass pruners or snips, 70% isopropyl alcohol or a flame pass for sterilization, a clear jar or small pot, and whichever medium you chose. Optional but useful: a heat mat under a propagation tray if your room is cool, and gloves because Syngonium sap can irritate skin.
Pet and human safety belongs in setup, not as an afterthought. The ASPCA lists arrowhead plant (Syngonium podophyllum) as toxic to cats and dogs due to insoluble calcium oxalate crystals that cause oral irritation if chewed. Propagation means fresh cuts and sap exposure. Work on a stable surface away from pets, wipe sap promptly, wash hands after handling, and do not compost trimmings where curious animals can reach them. Gloves help if you are sensitive; they are not mandatory for everyone but are cheap insurance when taking multiple cuttings.
Sterilize blades between plants if you propagate more than one Syngonium. Fungal and bacterial spores ride on dirty snips into fresh wounds. Label jars if you run water and soil trials side by side - pink cultivars look alike once detached. Finally, pre-fill jars with room-temperature water (filtered or dechlorinated if your tap is heavily treated) or pre-moisten soil to a wrung-sponge level so cuttings go straight from blade to environment without a lag.
Choosing a Stem Worth Cutting
The best cutting comes from healthy, non-flowering vine growth on a stable parent. Pass over stems with yellow leaves, brown spots, crispy tips, or visible pests - mealybugs and thrips hide at nodes and transfer silently to new jars. Choose a segment with firm green stem, at least one plump node, and preferably a leaf that looks representative of current growth rather than an old faded one at the base.
Length matters for energy but is not an excuse to strip the parent bare. A 10–15 cm (4–6 inch) piece with two nodes is the sweet spot for water propagation: one node submerged, one leaf above the rim. If the plant is small, a single-node cutting with a short leaf is acceptable; just monitor more closely for rot. Avoid the soft growing tip alone unless it includes a developed node below it - the very apex sometimes roots slowly because energy is going into new leaf expansion.
On leggy Pink Syngonium, take cuttings from the longest stems to reclaim shape; those often root fastest because internodes were stretched in bright enough light to keep tissue firm. If the vine is compact and bushy, select an outer stem so the parent keeps an attractive silhouette. You are not limited to one cutting per session; each node-bearing segment can become its own plant, which is how a single pot becomes a shareable batch for friends - provided each piece meets the node rule.
How to Take a Node Stem Cutting Step by Step
Work methodically; rushed cuts are how nodes get left behind on the parent.
Step one - locate the node you want as the primary rooting point. Plan to cut 3–5 mm below that node so the node itself is not damaged but sits at the base of the cutting.
Step two - sterilize your blade and make a clean angled cut just beneath the node. Angled cuts increase surface area slightly and help the base sit off the jar bottom; they are not magic, but they are standard practice in cutting propagation.
Step three - decide segment length. Include at least one node above your base node if possible so the cutting retains a leaf for photosynthesis. On a two-node cutting, the lower node roots; the upper node supports leaves.
Step four - strip lower leaves that would sit below the waterline or soil surface. Any leaf submerged in water will rot within days and foul the whole jar. Keep one or two small leaves above the medium for energy production; if leaves are huge, you may halve them with clean scissors to reduce transpiration while roots are absent.
Step five - place immediately into water, moist sphagnum, or pre-moistened mix. Do not let the cutting sit out for hours in dry air unless ambient humidity is very high.
Step six - position so at least one node is in contact with moisture and leaves are out of the water. For soil, bury the node 1–2 cm deep without packing mix tightly against the stem.
That sequence sounds elementary, yet most failed Syngonium Pink propagations trace to skipping step four or cutting above the node by mistake. When in doubt, cut lower and verify the bump is on the cutting side of the blade mark.
Water Propagation: Submerging the Node Correctly
Water propagation is the most popular Syngonium Pink propagation method because roots are visible and the setup is forgiving in bright kitchens. Use a clear glass so you can monitor water level and root color without disturbing the cutting. Fill with 2–5 cm of water depending on jar height; the goal is to submerge at least one node fully while keeping all leaves above the surface.
Place the jar in bright indirect light - an east window or several feet back from south glass. Direct sun heats water and grows algae; dim corners slow rooting enough that cuttings rot before they root. Change the water every five to seven days, or sooner if it clouds or smells. Fresh water replenishes oxygen at the node surface; stale water is the main reason Syngonium cuttings turn mushy despite “doing everything right.”
You do not need dark bottles or opaque vessels; transparency helps you catch problems early. If roots appear but stay translucent and slim, give more time; white, firm roots are ready for soil transition. Some growers add hydrogen peroxide at dilute hobby doses to combat bacteria; this is optional and not required if you change water weekly. Avoid letting the cutting rest on the jar bottom if that bends the node; a small piece of mesh or a narrow-neck bottle that cradles the stem above the water can help.
Multiple cuttings can share one jar if nodes are submerged and leaves have air space; do not overcrowd to the point leaves stay wet. In warm active growth, first root bumps often show in 7–14 days; full usable root systems typically need another week or two.
Soil and Sphagnum Propagation at the Node
Direct soil rooting suits growers who prefer one container from start to finish. Fill a small pot (7–10 cm) with well-draining potting mix - standard houseplant blend amended with perlite or orchid bark to roughly one-third of the volume works well. Syngonium is an aroid, not a desert plant, but its roots still need air; dense, peat-heavy mix that stays saturated will rot nodes before they root.
Pre-moisten mix to evenly damp, not dripping. Insert the cutting so the lowest node sits 1–2 cm below the surface and the stem is supported upright with a loose stake if needed. Do not water again immediately if mix was pre-moistened; wait until the top centimeter dries slightly, then water lightly around the edge. The mistake is treating a rootless cutting like an established plant and soaking the pot daily.
Sphagnum moss propagation sits between water and soil. Lightly damp long-fiber sphagnum wrapped around the node in a clear cup or propagation box maintains humidity without submerging leaves. Vent the box every few days to exchange air. Roots grow into moss fibers; pot up carefully when you transplant because tearing moss off fine roots causes setbacks. Sphagnum is especially useful in dry homes where open water jars evaporate too fast and soil dries unevenly.
Soil and sphagnum hide roots until you tug gently - wait three to four weeks before testing resistance. New leaf growth at the tip is often the first above-ground sign of success even before you feel a firm tug.
Rooting Hormone for Syngonium Pink Cuttings
Rooting hormone containing indole-3-butyric acid (IBA) can nudge slow cuttings but is not required for Syngonium podophyllum, which roots readily at nodes under normal indoor conditions. If you use powder hormone, dip the moistened base node lightly, tap off excess, and insert into mix; liquid forms follow label dilution. Hormone helps most when temperatures are cool, light is marginal, or you propagate single-node cuttings with little leaf area.
Skip hormone in water jars unless products are labeled for hydro use; powder clumps in water. Over-application can burn tender stem tissue. Think of hormone as insurance on a borderline cutting, not a substitute for node contact, clean water, or bright indirect light. Many experienced Syngonium growers never use it and still achieve high success rates in spring.
Light, Temperature, and Humidity While Roots Form
Rooting is a metabolic process; environment drives speed more than brand of jar.
Light: Bright indirect light is the target - roughly what a healthy Pink Syngonium already receives. Too little light slows rooting and encourages rot because the cutting cannot photosynthesize enough to fuel cell division. Too much direct sun heats water and scorches leaves.
Temperature: 21–27°C (70–80°F) at the node produces the fastest adventitious roots. Below 18°C (65°F), expect timelines to double or triple. A seedling heat mat under propagation trays helps cool rooms; do not cook cuttings above 30°C.
Humidity: Average indoor 40–60% is usually fine because leaves remain above water. Very dry air (<30%) may cause leaf wilt on small cuttings; a clear bag loosely tenting the pot (not sealed tight against leaves) raises humidity for soil propagations. Avoid misting leaves constantly; wet foliage in stagnant air invites fungal spots.
Consistency beats extremes. A cutting that sits in the same bright kitchen for three weeks outperforms one moved daily between rooms chasing the perfect spot.
Realistic Rooting Timelines for Pink Syngonium
Online claims of “roots in two days” oversell what most homes achieve. Honest ranges:
In water, during active growth at warm temperatures, first root initials often appear in 7–14 days. A root system 2–5 cm long suitable for soil transfer commonly takes 14–28 days total. Cool, dim conditions stretch that to four to six weeks without implying failure.
In soil or sphagnum, roots are invisible, but tip growth or resistance on a gentle tug often appears in three to five weeks. Soil sometimes lags water by a few days because oxygen at the node differs, but transplant shock is lower.
Single-node cuttings may root on the late side of those ranges; two-node cuttings with a healthy leaf usually land on the early side. Pink cultivar name does not change biology - ‘Pink Perfection’ and generic Pink Syngonium follow the same clock if conditions match.
If nothing happens by six weeks in warm bright conditions, re-examine node placement, water freshness, or stem health before discarding. Firm green stem with no mush still has potential; mushy base needs trimming and restart.
Moving Water-Rooted Cuttings into Potting Mix
Transfer is the step where beginners lose roots. Wait until roots are white, firm, and at least 2–5 cm long - not a single translucent whisker. Prepare a small pot with drainage and the same airy mix described for direct soil rooting. Pre-moisten mix thoroughly.
Remove the cutting from water and plant immediately; long air exposure dries fine roots. Set the node at the previous waterline depth - roots spread below, stem above. Water once to settle mix, then let the top 1–2 cm dry slightly before the next drink. Keep bright indirect light and high-ish humidity the first two weeks: a loose clear bag or propagation box with vents cracked prevents leaf crisp while roots adapt to lower oxygen in mix.
Do not fertilize until new growth hardens - usually four to six weeks after potting. Early fertilizer on fragile roots causes tip burn. Some leaf drop after transfer is normal; the node should stay firm. If the whole cutting collapses, rot entered during transfer - usually from oversaturated mix or a jar left too long without water change before roots were robust.
Aftercare for Newly Rooted Syngonium Pink Plants
A rooted cutting is not a mature vine; treat the first month after confirmed roots as stabilization. Water when the top inch of mix approaches dry, similar to parent Syngonium Pink care but with slightly more forgiveness - err a touch dry rather than wet. Light stays bright indirect; acclimate slowly if you move to a brighter shelf.
Fertilizer can wait until the plant pushes a second leaf after rooting, then use quarter-strength balanced liquid feed monthly in active growth. Skip feed in winter slowdown. Repot only when roots circle the pot - often two to four months after potting up from water - stepping one pot size at a time.
Pinch or prune the tip when you want bushier pink growth instead of a single long runner. Color on new leaves reflects your light; steady bright indirect keeps blush stronger than low light, which greens foliage. Quarantine new propagations two weeks if the parent ever had pests.
Troubleshooting Failed Node Cuttings
Most failures are mechanical, not mysterious.
Mushy stem base in water: node was not submerged, leaves rotted under waterline, or water was not changed. Trim back to firm green stem, ensure a node remains, restart in fresh water with no submerged foliage.
Cutting shrivels with no roots: air too dry, light too low, or cutting too small. Increase humidity tent, brighten indirect light, or take a two-node section next time.
Roots formed but plant dies in soil: mix stayed wet, pot too large, or roots were too short at transfer. Use smaller pot, drain better, wait for longer roots before moving.
No roots after six weeks but stem firm: often cool temperature or inactive node. Move warmer, confirm node is under water/soil, consider light rooting hormone on retry.
Pink color fades: usually light, not rooting issue - adjust placement after plant stabilizes.
Discard only when tissue is soft, brown, or smells sour through the node - firm green stem deserves patience.
Common Mistakes That Kill Syngonium Propagations
Cutting without a node is the classic dead end; verify the bump is on the cutting.
Submerged leaves in water rot and bacterial load spikes within days.
Stale water depletes oxygen; weekly changes are minimum hygiene.
Dark, cold corners slow metabolism until rot wins the race.
Oversized pots surround tiny root systems with wet mix that never dries evenly.
Propagating sick parents imports pests and weakness.
Skipping tool sterilization spreads infection between houseplants.
Impatience at transfer snaps 5 mm roots into soil that dries too fast.
Each mistake has a cheap fix on the next attempt; Syngonium Pink is one of the more forgiving aroids once the node stays moist, warm, and in clean water or airy mix.
When Not to Propagate Syngonium Pink
Propagation is a poor first response to active root rot, severe pest infestation, or shipping shock. Stabilize the parent - refresh mix if sour, treat pests, let new growth appear - then take cuttings from clean tissue only. Do not propagate midwinter in a cold room unless you commit to bottom heat and supplemental light for the full rooting window.
Do not propagate as a pet safety workaround - every cutting is still toxic. Keep propagated pots out of reach the same as mature plants. If the plant is too small to donate a two-node section without harming itself, grow the parent on for a few months first.
A Pre-Propagation Checklist
Run this list the day before you cut:
Confirm the parent shows active growth - firm new leaf within the last month, no widespread yellowing, no sticky residue on stems. Sterilize snips and prepare jar or pot with pre-moistened medium or fresh water. Identify two candidate nodes on a healthy vine and mark cut points. Clear a pet-free workspace and set gloves if you use them. Plan to place cuttings in bright indirect light at 21–27°C without moving them daily. Schedule weekly water changes if using jars. Accept that not every cutting roots - take an extra segment if you need a guaranteed survivor.
With that done, the actual cut-and-place work takes under ten minutes; the rest is waiting while nodes do what tropical aroids evolved to do.
Conclusion
Syngonium Pink propagation from stem cuttings at nodes is reliable home practice because Syngonium podophyllum is built to root adventitiously wherever a moist node meets warmth and light. Identify the bump where leaf meets stem, cut just below it, keep at least one node submerged or buried, strip underwater leaves, and hold bright indirect light with fresh water or evenly damp airy mix. Expect roots in one to four weeks during active growth, pot water-rooted cuttings when roots are white and 2–5 cm long, and treat young plants gently for the first month. Handle sap with respect, keep cuttings away from pets, and judge success by firm new growth - pink tone will follow once light and stability match what this arrowhead vine prefers.
When to use this page vs other Syngonium Pink guides
- Syngonium Pink overview - Start here for whole-plant context before deep-diving this topic.
- Syngonium Pink problems hub - Jump to symptom-specific fix guides when this care topic does not resolve the issue.