Scindapsus Pictus Pruning: When, How, and Mistakes to Avoid
Scindapsus Pictus Pruning: When, How, and Mistakes to Avoid
Scindapsus Pictus Pruning: When, How, and Mistakes to Avoid
First, remove only dead, yellow, or clearly damaged leaves and stems with clean sharp scissors - cut back into firm green tissue just above a healthy node. Scindapsus pictus stores energy in its trailing vines and heals more slowly than true pothos, so a sanitation pass shows you what is actually alive before you shorten anything for shape.
Quick Answer
Prune Scindapsus pictus (satin pothos, silver pothos) for shape and length control in late spring through early summer, when new leaves are actively unfurling. Make each shaping cut 5–10 mm (about ¼ inch) above a visible node - the swollen joint where a leaf attaches and an aerial root may emerge. Limit routine shaping to no more than one-third of total healthy foliage per session. Remove mushy, pest-damaged, or fully dead stems any time. This trailing aroid branches from nodes, not bare internode tissue, and grows at a moderate indoor pace - recovery takes longer than on fast-growing Epipremnum pothos, so timing and cut placement matter more than aggressive trimming.
What Pruning Does for Scindapsus Pictus
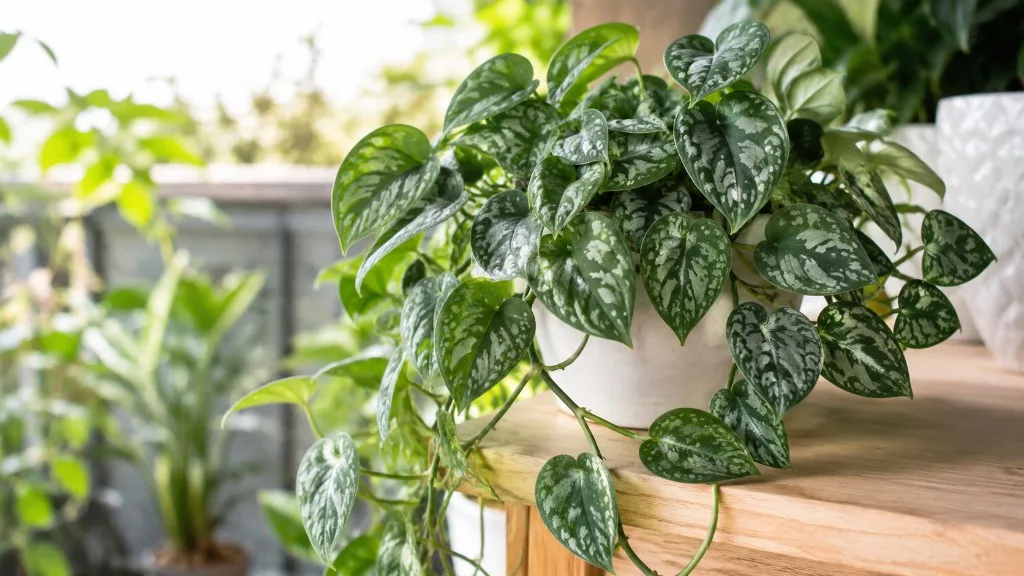
Scindapsus pictus is a trailing aroid in the Araceae family - not a true pothos (Epipremnum). It climbs and cascades from the tropical forest understory of Southeast Asia and typically trails 60–120 cm (2–4 feet) indoors within the first year or two, with mature vines reaching 3 m (10 feet) when conditions are generous. Cultivars like ‘Exotica’ (large silvery leaves) and ‘Argyraeus’ / ‘Silvery Ann’ (smaller speckled foliage) respond similarly to cuts, though leaf size changes how sparse the plant looks immediately after a trim.
Without intervention, each vine follows apical dominance - the growing tip suppresses side buds lower on the stem. In dim indoor light, internodes stretch and lower leaves age out, leaving long bare whips with foliage clustered at the tips. Pruning serves four practical jobs:
- Redirects growth by removing the dominant tip and waking buds at nodes below
- Removes failing tissue before pests or rot travel along soft stems
- Shortens leggy runners that no longer fit the display space
- Supplies propagation material - node-bearing cuttings root in water or moist mix per NC State Extension guidance on stem cuttings
Pruning does not fix chronic under-lighting. If new growth keeps showing long internodes after a trim, improve placement to medium or Scindapsus Pictus light guide before expecting a compact basket.
What to Check Before You Cut
Rotate the pot or unhook the hanging basket so you can see every vine in good light. Note yellow or brown leaves, mushy stem sections, long bare internodes, crossing vines that rub, and pest signs (webbing, sticky residue, cottony clusters). Check whether the plant was recently repotted, moved to a new window, or waterlogged - widespread yellowing with wet mix means stabilize care before structural cuts.
Nodes, Internodes, and Aerial Roots
Nodes are the swollen joints where leaves attach and where aerial roots can emerge. Each node is a branching point: remove the dominant tip above a node and the plant can produce a side shoot or new vine segment from buds at that joint. Internodes are the bare stem sections between nodes - on a well-lit plant these stay relatively short; on a leggy plant they stretch dramatically. Aerial roots along the stem are normal - leave them unless dried or in the way of your cut. Scindapsus pictus does not fill in bare internode tissue the way bushy herbs do; new leaves emerge from nodes only.
When to Prune Scindapsus Pictus
Timing splits into urgent cleanup and planned shaping. Dead, yellowed, brown, mushy, or pest-ridden tissue can be removed whenever you see it - decaying material holds moisture against healthy stem. Structural shaping, length reduction, and propagation harvests belong in the active growing season: late spring through early summer (roughly April through June in the Northern Hemisphere), when new leaves are unfurling and wounds heal faster.
Avoid heavy reshaping in fall and winter on most indoor specimens. Growth slows, light drops, and cuts may sit visually unchanged for months. Light tip pinching during slower months is fine; removing a third of the trailing mass in December on a dim-room plant is a common reason growers report stalled recovery.
Shaping Season vs. Emergency Cleanup
Year-round cleanup includes snipping individual yellow leaves once mostly discolored, removing a stem tip killed by draft or breakage, and cutting clearly diseased or pest-infested tissue. These low-risk cuts barely change the plant’s energy budget. Spring and early-summer shaping includes shortening multiple trailing vines, removing severely leggy sections discovered after a dim winter, harvesting propagation cuttings, and removing up to one-third of healthy foliage as part of a reshaping plan. Save that work for when growing tips are firm and new leaves are actively appearing.
The First Cut to Make
Start every session with dead and declining tissue before touching healthy vines. A yellow leaf here or there is normal senescence - snip or gently remove it once it is mostly yellow. Trace damaged vines backward toward the soil until you reach firm green stem, then cut just above the next healthy node below the damage. Only after failing tissue is gone should you shorten the longest leggy vine or harvest cuttings for shape.
Where and How to Cut
The most important technique rule: cut just above a node, never below it and never halfway between nodes on bare internode tissue. Below-node cuts remove the branching tissue that would produce new shoots. Mid-internode cuts leave a stub that dies back unsightly and rarely branches as hoped. Aim for 5–10 mm above the node - close enough that no long dead stub remains, far enough that you do not crush the node with your tool.
When shortening a long vine, choose a node where the remaining stem still looks balanced for the trailing habit you want. Step back after every two or three major removals and assess the silhouette. Hanging baskets look best with varied vine lengths that create depth rather than a blunt haircut where every vine ends at the same line.
Shortening Leggy and Bare-Stem Vines
Leggy complaints almost always trace to insufficient light, and that distinction changes your long-term plan. Leggy vines show normal leaf shape and silvery pattern but with unusually long internodes - the plant is reaching for light but still producing foliage. Bare-stem vines carry leaves only at the far tip while the lower portion stays naked for 30 cm or more.
For stretched but still leafy vines, shorten just above a lower node, then move the plant to brighter indirect light and acclimate over one to two weeks. For bare-stem vines, cut back to the lowest node with a healthy leaf, or remove the entire vine at the soil line if the bare section dominates. Treat legginess as a lighting diagnosis first and a scissors task second - trimming without brighter placement guarantees repeat stretching.
How Much You Can Safely Remove
Scindapsus pictus tolerates light pruning very well and moderate pruning reasonably well when timing and health align. It does not tolerate removing most of its photosynthesizing leaf area in one session, especially outside active growth or when roots are already stressed. The practical ceiling most experienced growers follow is no more than one-third of total healthy foliage per session.
If your specimen is wildly overgrown - trails to the floor, mostly bare-stemmed, or hopelessly tangled - stage the work across two or three spring sessions spaced three to four weeks apart. Session one removes dead tissue, obvious bare whips, and the worst crossing vines. Session two shortens remaining healthy vines for balance. Session three, if needed, harvests final propagation material and fine-tunes length. Removing too much at once on an overwatered plant is particularly risky because saturated mix plus a sudden reduction in leaf area can stall recovery for months.
Tools, Gloves, and Sanitation
Stems are thin and semi-succulent - sharp bypass pruning shears, floral snips, or clean household scissors handle most indoor cuts. Bypass blades slice rather than crush. Keep 70% isopropyl alcohol nearby and wipe blades before you start, between plants, and between cuts on diseased tissue.
Wear nitrile gloves when handling cut stems. The ASPCA lists Scindapsus pictus as toxic to cats and dogs due to insoluble calcium oxalate crystals in all plant parts; sap can irritate sensitive skin. Keep trimmings away from pets and children, and wash hands after pruning. You do not need wound sealants or cinnamon on aroid cuts - clean open wounds heal naturally within a day or two in normal indoor humidity.
Step-by-Step Pruning Routine
A reliable session follows the same order every time:
- Inspect the entire plant and note dead tissue, bare whips, pest signs, and vines to shorten
- Sterilize shears with alcohol and put on gloves
- Remove dead and damaged leaves and stems first, cutting back to firm tissue just above healthy nodes
- Remove severely bare or leggy vines at a node where healthy foliage remains, or at the soil line if unsalvageable
- Shape healthy vines by shortening selected tips just above lower nodes, stepping back after every few cuts
- Set aside healthy cuttings with at least one node and one or two leaves for propagation or pot-thickening
- Adjust light gradually over seven to ten days if legginess motivated the session
- Hold fertilizer for two to three weeks while wounds heal
Unhook hanging baskets to eye level when possible so node placement is accurate, and support trailing vines while cutting so falling weight does not tear uncut tissue.
Using Pruned Cuttings
Healthy trimmings are propagation material - you are not throwing away viable plant tissue unless you choose to. Select cuttings from firm, green stems with at least one node (two is better) and at least one healthy leaf. Make each segment 10–15 cm (4–6 inches) long. Remove the leaf closest to the cut end if it would sit underwater or buried in mix.
Water propagation: submerge the bottom node in a clear jar, change water every few days, and transplant once roots reach 2–5 cm (1–2 inches) - usually two to four weeks in spring and summer. NC State Extension notes that most houseplants root easily in water, but transplant promptly once roots form to prevent rot. Soil propagation: insert the cut end 2–3 cm (1 inch) into barely moist aroid mix. To thicken the parent pot, root cuttings separately, then plant them around the base once established - one full basket is often several cuttings growing together.
Aftercare and Recovery Timeline
Hold fertilizer for two to three weeks so the plant is not pushed into tender growth before wounds heal. Keep bright indirect light steady - do not jump from a dim room to direct sun the same week you cut, but do not leave the plant in the spot that caused legginess. Water slightly less if you removed substantial foliage, checking moisture with your finger rather than a calendar. Avoid Scindapsus Pictus repotting guide in the same month as a heavy prune unless rescue conditions demand it.
During active spring and summer growth, Scindapsus pictus typically shows new shoots or leaves from nodes within two to four weeks after a well-placed cut on a healthy plant. Full visual refill of a thinned crown takes six to ten weeks depending on light, temperature, and how much you removed - slightly longer than fast-growing true pothos. Out-of-season pruning in late fall or winter may show little visible response until March or April when light and warmth return. Watch cut points for blackening or mushiness over the first ten days; if a node turns mushy below your cut, remove another segment back to firm tissue and let the plant dry slightly longer between waterings.
Mistakes to Avoid
The mistakes that cause the most grief are predictable:
- Cutting too much at once on a stressed or slow-growing plant
- Cutting in the wrong place - mid-internode or below the node
- Pruning with dull or dirty tools that crush tissue and spread disease
- Heavy winter reshaping on an underlit specimen
- Pruning without fixing light - bare whips return within weeks in a dim corner
- Overwatering after a major trim or fertilizing before wounds heal
- Pruning right after repotting when the root system is still settling
- Discarding healthy cuttings instead of rooting them for pot-thickening
Do not compost pest-infested trimmings near garden beds.
When Not to Prune
Postpone structural shaping when the plant shows widespread yellowing with wet mix, wilting despite moist soil, active heavy pest pressure, or recent repotting within four to six weeks. In those cases, correct the underlying condition first and limit yourself to removing clearly dead tissue until the plant firms up. Also skip major reshaping if you cannot provide medium to bright indirect light for recovery - scissors alone will not keep a satin pothos compact in a dark corner.
Conclusion
Scindapsus pictus pruning works best when you match cuts to this trailing aroid’s moderate growth habit rather than a generic houseplant calendar. Remove damaged tissue anytime; save structural shaping and propagation harvests for late spring through early summer. Cut just above nodes, take no more than one-third of healthy foliage per session, and root healthy trimmings rather than discarding them. Fix bright indirect light when bare internodes keep returning, hold fertilizer briefly, and keep watering aligned with the reduced canopy. Done with clean tools, gloves for sap safety, and honest assessment, pruning leaves you with a tidier silvery display - and often a handful of cuttings ready to root.
When to use this page vs other Scindapsus Pictus guides
- Scindapsus Pictus overview - Start here for whole-plant context before deep-diving this topic.
- Scindapsus Pictus problems hub - Jump to symptom-specific fix guides when this care topic does not resolve the issue.
- Leggy Growth on Scindapsus Pictus - Escalate here when pruning adjustments are not enough.
- Brown Tips on Scindapsus Pictus - Escalate here when pruning adjustments are not enough.