Scindapsus Pictus Propagation: Stem Cuttings
Scindapsus Pictus Propagation: Stem Cuttings
Scindapsus Pictus Propagation: Stem Cuttings
Scindapsus pictus propagation is one of the most approachable projects in indoor plant care - as long as you respect one non-negotiable rule: every viable cutting needs a node. Scindapsus pictus, sold everywhere as satin pothos or silver satin pothos, is not a true pothos at all. It belongs to the Araceae family alongside Epipremnum and philodendrons, but it shares their fundamental propagation biology: roots emerge from nodes, the slightly swollen rings on the stem where leaves attach. Take a leaf with no node and you have decoration. Take a stem segment with one or more nodes and you have the start of a new plant.
That distinction matters because satin pothos grows more slowly than golden pothos and its silvery, heart-shaped leaves tempt people to treat it like an indestructible vine. It is forgiving, but propagation still depends on clean cuts, Scindapsus Pictus light guide, stable warmth, and moisture discipline. This guide walks through the full workflow - choosing material, taking stem cuttings, rooting in water, sphagnum moss, or soil, transplanting at the right moment, and reading the early signs that tell you whether a cutting is thriving or quietly rotting.
If symptoms persist, see the Brown Tips on Scindapsus Pictus guide.
Why Stem Cuttings Work So Well on Scindapsus Pictus
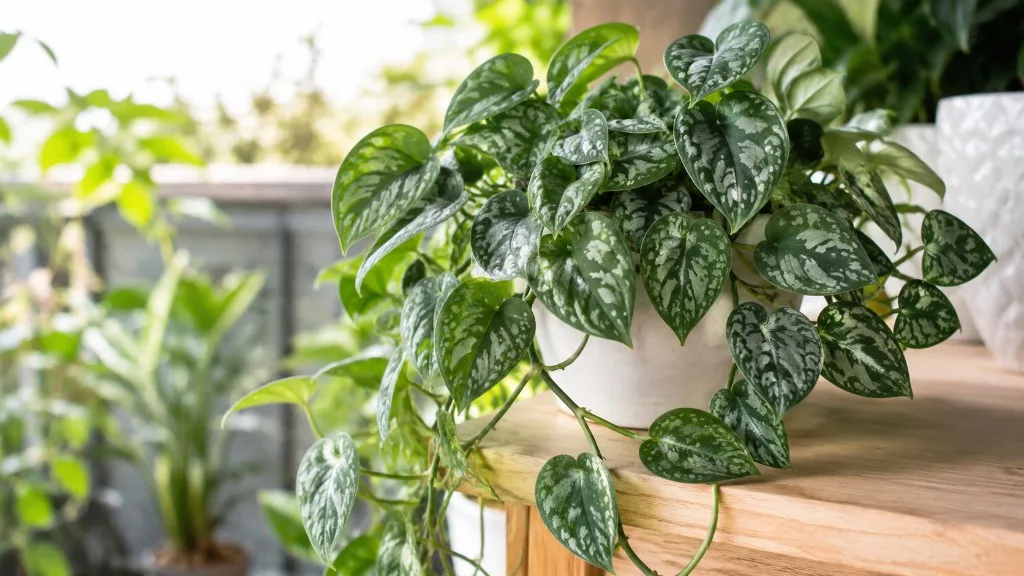
In the tropical understory of Southeast Asia - Bangladesh, Borneo, Java, Malaysia, the Philippines, Sulawesi, Sumatra, and Thailand - Scindapsus pictus climbs tree trunks and drapes across branches, anchoring wherever stem tissue contacts moist bark and filtered light. Home propagation mimics that restart: a severed vine segment with living nodes can produce adventitious roots and resume upward or trailing growth once warmth and humidity align. Unlike seed starting, which is slow and unpredictable for most houseplant cultivars, stem cuttings clone the parent genetically. Silver variegation patterns on cultivars like ‘Argyraeus’, ‘Exotica’, and ‘Silvery Ann’ carry over intact, which is why cuttings are the standard way to share plants or fill out a sparse hanging basket.
Compared with division - which applies to clumping plants but not a single trailing vine - or leaf propagation - which fails without meristematic tissue - stem cuttings match how this aroid actually grows. You need minimal equipment: sharp sterilized scissors, a jar or small pot, and a bright windowsill out of direct sun. The plant’s moderate growth rate means you will wait longer for roots than you would with Epipremnum aureum, but the success rate is high when the cutting is healthy and the node is submerged or buried correctly.
How Nodes and Aerial Roots Drive Rooting
A node is the anatomical engine of Scindapsus pictus propagation. It is the small bump or ring on the stem where a leaf petiole meets the vine - and where latent root initials sit ready to activate. Cut below a node, submerge or cover that node in moist medium, and roots typically emerge within weeks in active growth. Some mature vines also develop aerial root nubs - tiny brown or pale bumps along the stem between nodes. Those nubs are not required, but they often root faster in sphagnum moss because the tissue is already primed for anchoring.
A cutting with no node cannot become a full plant. A single leaf floating in water may stay green for weeks and even sprout water roots from the petiole base, but without node tissue it will never produce new vine growth. This is the most common propagation failure among beginners who confuse “something rooted” with “something that will grow.” Always verify that at least one node is included on every cutting, and that the node - not just the leaf stem - contacts water or moist medium.
What a Good Cutting Looks Like
The best Scindapsus pictus stem cuttings combine one to three healthy leaves with at least one firm node, ideally two for insurance. Leaves should be silvery-green, unblemished, and free of sticky residue or webbing that signals pests. Avoid the oldest, thinnest sections at the very tip of a bare vine unless you have no choice; those segments often lack the stored energy to push roots quickly. A cutting 10–15 cm (4–6 inches) long with one node and one or two leaves is the sweet spot for water jars. Longer cuttings - 30–40 cm (12–16 inches) with multiple nodes - work when you want a dramatic trailing start in one pot, but they take longer to stabilize and are harder to keep upright in small containers.
If your parent plant is leggy with long bare internodes between leaves, propagation doubles as pruning: take several node-bearing sections from the same vine and root them together in one pot for a fuller display. Sterilize blades with rubbing alcohol or a flame between cuts when working through a long vine to limit bacterial transfer.
When to Propagate Satin Pothos
Timing shapes speed more than success. Scindapsus pictus can root year-round indoors, but active growth - when the parent pushes firm new leaves and internodes shorten - produces roots in a fraction of the time required during a dim, cool winter.
Best Season and Timing Signals
Spring through early autumn is the practical window for fastest Scindapsus pictus propagation. Longer daylight, warmer room temperatures in the 18–29°C (65–85°F) comfort range, and steady new leaf production on the parent all signal that meristematic tissue is metabolically active. If your plant is putting out fresh silvery leaves every few weeks and the pot dries on a predictable rhythm, it is a good donor.
You do not need a calendar date - you need plant condition. Propagate after the parent has acclimated to your home for at least a few weeks, not immediately after shipping or Scindapsus Pictus repotting guide when energy is diverted to root recovery. Morning is a fine time to cut; what matters more is that the parent was watered within the last week and is not drought-stressed or sitting in soggy mix.
When to Wait Instead of Cutting
Do not propagate Scindapsus pictus as a rescue mission for a failing plant. If the parent shows widespread yellow leaves, sour-smelling soil, active mealybugs, or spider mite webbing, stabilize care first - or take cuttings only from sections clearly free of pests and rot. Propagation spreads weakness as easily as vigor. Similarly, avoid heavy cutting during the coldest, dimmest months unless you can supplement with a grow light and keep room temperature consistently above 18°C (65°F); cuttings may sit unchanged for eight weeks without dying, which frustrates beginners who assume failure.
If you recently fertilized heavily or repotted, wait two to three weeks so the plant settles. A stressed donor produces thin cuttings that rot before rooting. Patience on the front end saves jars of cloudy water and pots of collapsed leaves later.
Tools and Setup Before You Cut
Gather supplies before you touch the parent vine so cuttings move from stem to medium within minutes. Sharp bypass pruners or scissors make clean cuts that heal fast; dull blades crush stem tissue and invite rot. 70% isopropyl alcohol or a brief flame sterilizes blades between cuts on the same plant and between plants if you propagate multiple species in one session.
For water propagation, use a clear glass jar or vase tall enough that leaves rest above the rim without bending. Clear sides let you monitor root color and water clarity - early warnings that something is wrong. For moss propagation, keep long-fiber sphagnum moss, chunky perlite, a small cup, and optionally a clear propagation box or loose plastic bag for humidity. For soil rooting, prepare a well-draining mix - standard indoor potting compost amended with perlite at roughly 1:1, similar to what mature Scindapsus pictus prefers - in a small pot with drainage holes.
Set up a bright indirect light station before cutting. An east-facing window or a few feet back from a south- or west-facing pane works well. Direct midday sun scorches cuttings and heats water jars enough to accelerate bacterial growth. Keep cuttings away from cold drafts, heating vents, and air-conditioning blasts that desiccate leaves while roots are still absent.
One safety note: Scindapsus pictus contains calcium oxalate crystals and is listed as toxic to cats and dogs by the ASPCA. Wear gloves if you have sensitive skin, wash hands after handling cut stems, and keep propagation jars out of pet reach. The sap is an irritant, not a propagation hazard, but it matters in households with curious animals.
How to Take Scindapsus Pictus Stem Cuttings
Taking cuttings is simple in theory and precise in practice. The quality of the first cut determines everything that follows - root speed, leaf retention, and resistance to rot.
Where to Cut on the Vine
Identify a healthy section of vine with visible nodes. Make your cut 3–6 mm (about 1/8 inch) below a node, not through the node itself and not two centimeters below it where the internode tissue is less responsive. Each resulting segment should include at least one node and preferably one to two leaves above that node. If you are segmenting a long vine into multiple cuttings, work from the growing tip backward, cutting between nodes so every piece retains its own growth point.
For vines with aerial root nubs, you can center the cutting so the nub sits inside moss or just above the waterline; those nubs often produce roots within 10–16 days in warm moss. You do not need to remove aerial roots before propagating - they are an asset. Do remove any leaf that would sit below the water surface or below the soil line, because submerged foliage decays and fouls the medium within days.
Preparing Cuttings for Rooting
Strip the lowest leaf on each cutting so the node is exposed. If two nodes will sit in water or soil, remove the leaves attached to both lower nodes as well, leaving one or two decorative leaves at the top for photosynthesis. Scindapsus pictus does not require a callus period the way succulent cuttings do; aroid stems root from fresh cuts placed directly into water or moist medium. An optional 10–30 minute air dry after cutting can reduce initial bacterial load in very humid rooms, but extended drying shrivels thin stems - do not wait hours.
If using rooting hormone (indole-3-butyric acid powder or gel), dip the cut end and node zone lightly before planting in soil or moss. Hormone is optional for Scindapsus pictus - healthy node cuttings root reliably without it - but it can nudge slow winter cuttings or single-node pieces with minimal leaf area.
Water Propagation Step by Step
Water propagation is the most popular Scindapsus pictus propagation method because it is visible, reversible, and forgiving while you learn node placement. Follow these steps for the highest success rate:
- Take a node-bearing cutting as described above.
- Fill a clear jar with room-temperature water - tap water left to sit overnight is fine in most municipalities; distilled is unnecessary unless your tap is extremely hard or chlorinated beyond typical levels.
- Place the cutting so at least one node is fully submerged while all remaining leaves stay above the waterline.
- Position the jar in bright indirect light.
- Change the water every 3–7 days, or sooner if it clouds or smells.
- Wait until roots are 5–8 cm (2–3 inches) long with side branching before potting.
- Transplant into well-draining mix and acclimate to normal watering over two to three weeks.
Do not fill the jar to the rim if you are rooting a long cutting with multiple nodes - submerge only the lowest one or two nodes. Roots forming all the way up a submerged stem look impressive in photos but create a tangled transplant and increase rot risk.
Jar Setup and Water Changes
Use a jar narrow enough that the cutting rests stably without clipping leaves. If leaves droop into the water, prop them up with a strip of tape across the jar mouth or switch to a taller vessel. Water level maintenance matters as much as freshness: emerging root tips that dry out for even a few hours can stall permanently. Top up with fresh water between full changes if evaporation drops the level below the node.
Cloudy water is a warning, not normal patina. It usually means bacterial bloom fed by decaying leaf debris or a weakened cutting. Replace with clean water, rinse the stem gently, and remove any soft or translucent tissue at the base. If cloudiness returns within 48 hours, trim back to firm green stem and restart. Adding charcoal to the jar is optional and not required for success; clean water and bright light solve most problems.
How Long Water Rooting Takes
In warm, bright active growth, expect visible root nubs in 7–14 days and usable roots in 2–4 weeks. Scindapsus pictus roots more slowly than golden pothos - plan for 3–6 weeks as a normal range rather than panicking at day 18 with no action. Cool rooms below 18°C (65°F) or north-facing winter light can stretch the timeline to 6–8 weeks without indicating death. A healthy cutting holds firm green leaves and a stiff stem even when roots are invisible; mushy stem base, blackened node, or sour odor means restart with cleaner material.
Resist potting when roots are only 1–2 cm (half an inch) long. They look ready because you can see them, but fine water roots tear easily in gritty mix and cannot yet anchor the plant against wilting. Wait for several centimeters of length and at least a few side branches. Many experienced growers leave cuttings in water longer - two to three months - to develop a robust root mass that handles transplant better; that is optional, not mandatory, if you acclimate carefully after an earlier potting.
Sphagnum Moss Propagation
Sphagnum moss propagation is the method many serious aroid growers prefer for Scindapsus pictus because roots that form in moss are structurally stronger and acclimate to soil with less transplant shock than water roots. Moss holds moisture against the node while maintaining air pockets - closer to how epiphytic stems root against bark in nature.
Soak long-fiber sphagnum moss in water for five minutes, then wring firmly until damp but not dripping. Mix in chunky perlite at roughly one part perlite to three parts moss for airflow. Nest the cutting so the node is fully surrounded by moss, with leaves above the moss line. Place the cup inside a clear propagation box or cover loosely with a plastic bag - high humidity, not airtight suffocation. Ventilate briefly every 5–7 days while checking that moss feels like a wrung-out sponge.
Roots typically appear in 2–4 weeks, sometimes faster when aerial root nubs are present. When white roots penetrate the moss surface and reach 3–5 cm (1–2 inches), pot the cutting moss and all into pre-moistened well-draining mix. Disturbing moss-root systems as little as possible reduces setback. If leaves wilt under the humidity dome, open the cover for a few hours daily until roots establish; slight wilt during rooting is common and usually resolves once the root mass supports transpiration.
Moss demands more attention than water - it can dry unevenly or stay too wet if packed tightly - but the payoff is a cutting that pushes new vine growth within 1–2 weeks after potting rather than sulking through a long water-to-soil transition.
Rooting Cuttings Directly in Soil
Soil propagation skips the intermediate jar entirely. Insert prepared cuttings into lightly moist, well-draining potting mix so the node sits 2–3 cm (about 1 inch) below the surface and leaves remain above. Water thoroughly once, then let the top centimeter dry slightly before watering again - the rhythm is moist, not wet. Enclose the pot in a clear plastic bag or humidity dome with a few ventilation holes, or group several cuttings in a propagation box.
Because you cannot see roots forming, patience is harder. Expect 3–6 weeks before a gentle resistance tug suggests anchoring - but avoid repeated tugging that breaks fragile new roots. New leaf unfurling or a firm stem that no longer wilts by afternoon are better success signals than daily excavation. Soil propagation eliminates water-to-soil shock but increases rot risk if the mix stays saturated; use a small pot, bright indirect light, and a perlite-heavy blend.
Planting three to five cuttings in one 10–12 cm (4–5 inch) pot creates a fuller satin pothos faster than rooting singles separately. Space nodes evenly around the pot rim so future vines trail symmetrically. This is the same strategy nurseries use for bushy starter pots.
Transplanting Rooted Cuttings into Potting Mix
Whether roots formed in water or moss, transplant timing and mix choice determine how smoothly the cutting becomes an independent plant. Pot when roots are 5–8 cm (2–3 inches) with side branching - long enough to survive contact with soil particles without snapping off.
Use the same well-draining indoor mix mature Scindapsus pictus prefers: quality potting compost blended with perlite for drainage, optionally with a small proportion of orchid bark or coco coir for chunkiness. Pre-moisten mix before planting so dry soil pulls moisture from tender roots. Create a hole with a dibber or pencil, lower the cutting so roots spread downward without cramming, and firm mix gently around the stem - do not bury leaves.
Water thoroughly once after potting, then shift to the parent plant’s normal rhythm: allow the top half of the mix to approach dry before the next drink. Do not fertilize for four to six weeks; new roots are sensitive to salt burn. If the cutting wilts after potting from water, increase humidity with a loose bag over the plant for 3–5 days, keep bright indirect light, and resist overwatering - wilting with wet soil means rot risk, not thirst.
Water-rooted cuttings often show transplant shock - yellowing lower leaf, stalled growth for 1–3 weeks - even when roots looked robust in the jar. Moss-rooted cuttings typically rebound faster. Minimize shock by waiting for longer roots, potting into moist rather than dry mix, and maintaining stable warmth above 20°C (68°F) during the first fortnight.
Aftercare for New Propagations
Newly potted Scindapsus pictus is not a mature trailing specimen - it is a seedling-equivalent with a limited root system supporting one or two leaves. Treat the first four to eight weeks after confirmed rooting as stabilization, not display perfection.
Keep bright indirect light consistent; acclimate gradually to slightly brighter exposure only after new growth hardens. Temperature stability in the 18–29°C (65–85°F) range supports continued root expansion. Humidity near 40–60% matches typical indoor comfort and reduces leaf edge crisping without requiring a greenhouse. A pebble tray or grouping with other plants adds ambient moisture in dry winter homes.
Water when the top third of the mix feels dry - often every 7–10 days in active growth, less in cool months. Fertilizer can wait until the plant produces a new leaf larger than the propagation leaves; then a quarter-strength balanced liquid feed once monthly in spring and summer is sufficient. Repot only when roots circle the pot or emerge from drainage holes - usually several months after rooting, not immediately.
Quarantine new propagations from your main collection for two weeks if the parent ever had pests. Mealybugs and scale hide on stem joints and transfer silently on cuttings. Inspect leaf undersides weekly during the first month.
When vines reach 30–45 cm (12–18 inches), consider a moss pole or trellis if you want climbing habit rather than purely trailing stems. Scindapsus pictus attaches readily when humidity is moderate and stems are guided toward support.
Common Propagation Mistakes and Fixes
Even an easy propagator fails when basic rules stack wrong. Most Scindapsus pictus propagation problems trace to missing nodes, stagnant water, or potting too early - not mysterious bad luck.
Cutting without a node produces a leaf that never vines. Fix: verify node tissue on every segment before placing in medium; if you already rooted a leaf-only piece, compost it and recut from the parent.
Leaves submerged in water or soil rot and foul the medium within days. Fix: strip lower foliage until only the node contacts moisture; rinse jars and replace water immediately if debris accumulates.
Stagnant or cloudy water breeds bacteria that colonize stem tissue. Fix: change water every 3–7 days; if stem base turns mushy, trim to firm tissue and restart in fresh water with only the node submerged.
Potting with roots too short causes wilting and root tear. Fix: return water-rooted cuttings to the jar if roots are under 3 cm (1 inch) unless you can maintain high humidity while they extend; wait for branching side roots.
Propagating from a sick parent spreads pests and weakness. Fix: treat the donor, then take cuttings only from clean new growth; never propagate from yellow, pest-infested, or rot-adjacent tissue.
Overwatering after potting drowns fragile roots in anaerobic mix. Fix: let top mix dry between drinks; upsize pot only when roots fill the current one; ensure drainage holes are open.
Winter propagation without supplemental light or warmth stalls for weeks. Fix: add a grow light 30–45 cm (12–18 inches) above the jar and keep room temperature above 18°C (65°F), or wait until spring.
Expecting golden pothos speed leads to premature discarding of healthy cuttings. Fix: allow 3–6 weeks as normal for Scindapsus pictus; firm green stem and stable leaves mean the cutting is working even when roots are invisible.
Conclusion
Scindapsus pictus propagation rewards attention to anatomy over gadgetry. Stem cuttings with at least one node - taken from healthy active growth, rooted in clean water, damp sphagnum moss, or well-draining soil, and potted only when roots are several centimeters long with side branches - mirror how this Southeast Asian aroid restarts in nature. Spring and summer accelerate the timeline, but firm material and correct moisture matter more than the calendar.
If you remember only three rules, make them these: never propagate without a node, keep water fresh and nodes submerged while leaves stay dry, and wait for real root length before potting water-grown cuttings. Moss rooting trades a little setup effort for smoother soil transition; soil rooting skips the jar but hides progress and punishes overwatering. Choose the method that fits your patience and your setup - then let the silvery new vine tell you it worked when the first post-propagation leaf unfurls.
When to use this page vs other Scindapsus Pictus guides
- Scindapsus Pictus overview - Start here for whole-plant context before deep-diving this topic.
- Scindapsus Pictus problems hub - Jump to symptom-specific fix guides when this care topic does not resolve the issue.